
I earn a commission if you buy through links on this page, at no extra cost to you. As an Amazon Associate, I earn from qualifying purchases.
You saw a print online that looked injection-molded. Smooth walls, crisp edges, no visible layers. The comments said “0.2mm nozzle.” You looked at your own last print, counted the stair-steps on every curve, and started shopping.
Hold on. Most guides jump straight to “buy a 0.2mm nozzle,” and that advice quietly skips two facts. A nozzle swap alone often changes nothing until you calibrate. And it can double or triple your print times overnight.
Here’s what most guides won’t tell you: a stock 0.4mm nozzle, tuned properly, gets you most of the way to 0.2mm quality. This guide walks the exact order to do it, with real test data on where the gap closes and where it doesn’t.
Table of Contents
- The Honest Answer: What a 0.4mm Nozzle Can (and Can’t) Match
- Lower Your Layer Height First (The Single Biggest Lever)
- Shrink Line Width and Turn On Variable Walls
- Slow Down, Cool Down (Speed, Temp, Cooling)
- Calibrate, or None of This Sticks
- Your “Print Like 0.2mm” Cheat Sheet
- The Real Cost: Time (and When to Stop Tuning)
- When You Should Actually Buy a 0.2mm Nozzle
- FAQ
The Honest Answer: What a 0.4mm Nozzle Can (and Can’t) Match
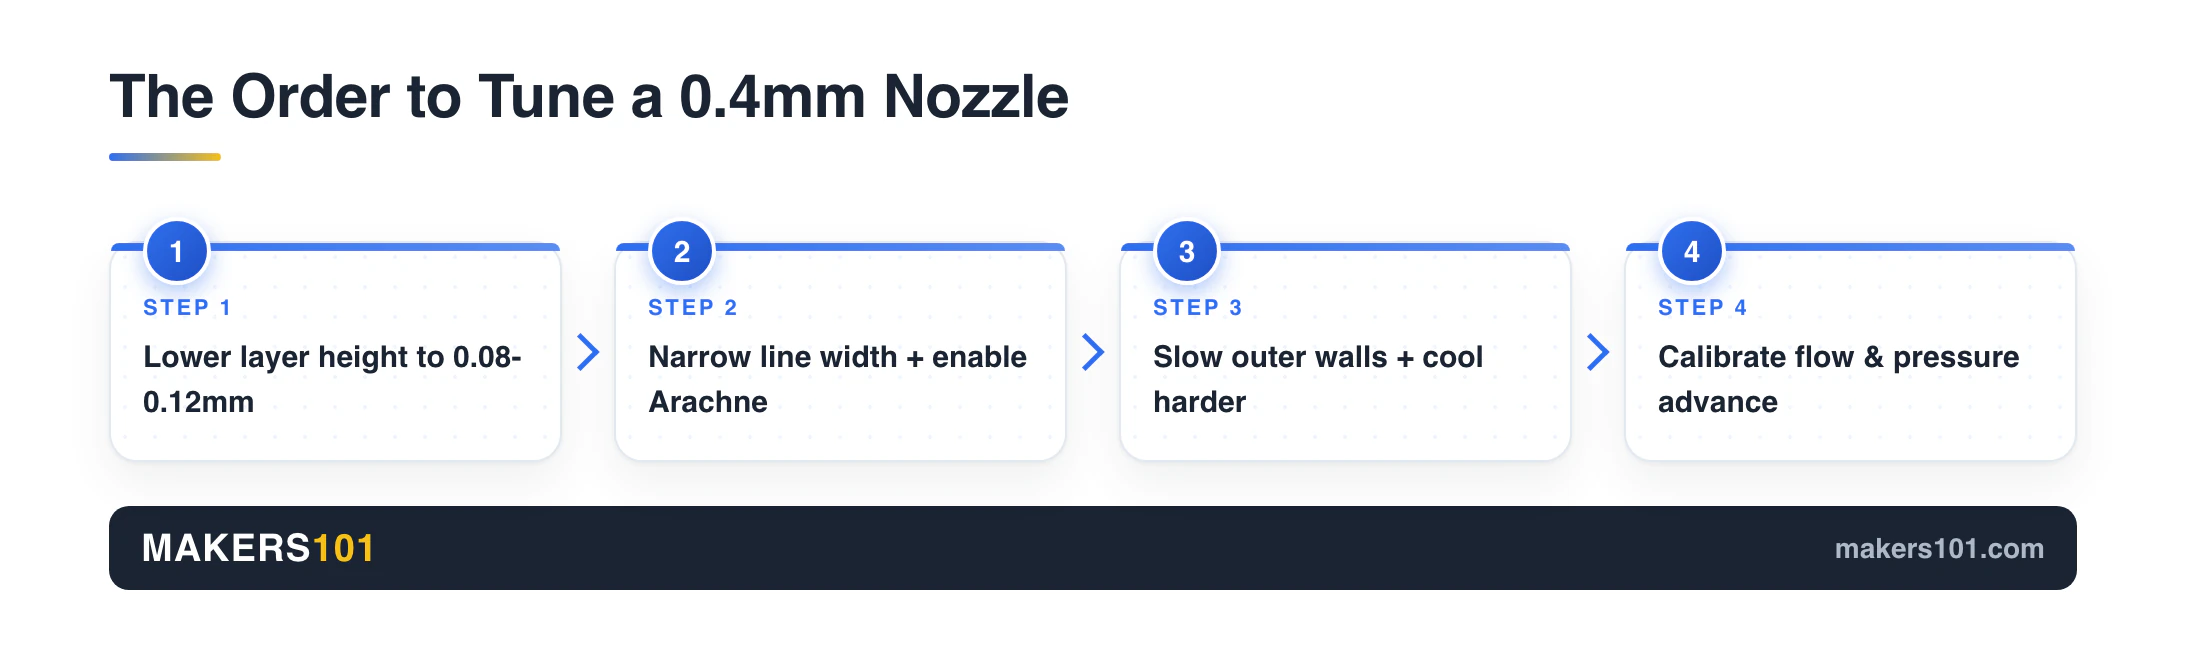
Start here so you spend your time on the right settings. A 0.4mm nozzle can match a 0.2mm nozzle on one kind of detail and never on the other.
There are two kinds of “detail” in an FDM print. Vertical detail is your layer lines: the stair-stepping you see on curves and slopes. Horizontal detail is feature width: how thin a wall, a letter, or a raised edge can be before your nozzle just smears over it.
Layer height controls vertical detail, and you have full control over it. That’s the gap you can close. Horizontal detail is limited by how wide a line your nozzle lays down. You can coax it a little under 0.4mm, but there’s a floor, and it sits nowhere near what a 0.2mm nozzle reaches.
The proof is brutal at the extreme. In one head-to-head test on a detailed bust, even a 0.2mm nozzle running a 0.08mm layer height could not print the model’s thin eyeglass arms. They snapped during support removal. If a 0.2mm nozzle can’t hold those features, no 0.4mm setting will either.
So set your expectations before you tune. You’ll close roughly 90% of the visible gap, mostly the layer lines and surface smoothness. The last slice, the genuinely tiny stuff, is where a 0.2mm nozzle still wins. For everything else on that final stretch, you sand and prime away the last layer lines instead of chasing them in the slicer. If you’re choosing between sanding, primer, resin, and solvents, start with this XTC-3D alternative breakdown. If you want to try epoxy instead, start with this beginner XTC-3D smoothing workflow before coating a real part.
Lower Your Layer Height First (The Single Biggest Lever)
If you change one setting, change this one. Layer height matters more for smoothness than every other setting combined. Cura won’t let you change it partway up a model, and the workarounds are worth knowing.
The 80% rule and how low you can go
The common rule of thumb: keep your layer height at or below roughly 80% of the nozzle’s width. For a 0.4mm nozzle, that puts your ceiling near 0.32mm and lets you go all the way down to about 0.05 to 0.08mm.
Stair-stepping is the giveaway. Every curved or sloped surface is built from stacked flat layers, so thicker layers leave taller steps. Thinner layers make those steps too small to see. That single change is what makes a print read as “0.2mm quality.”
The numbers that prove it
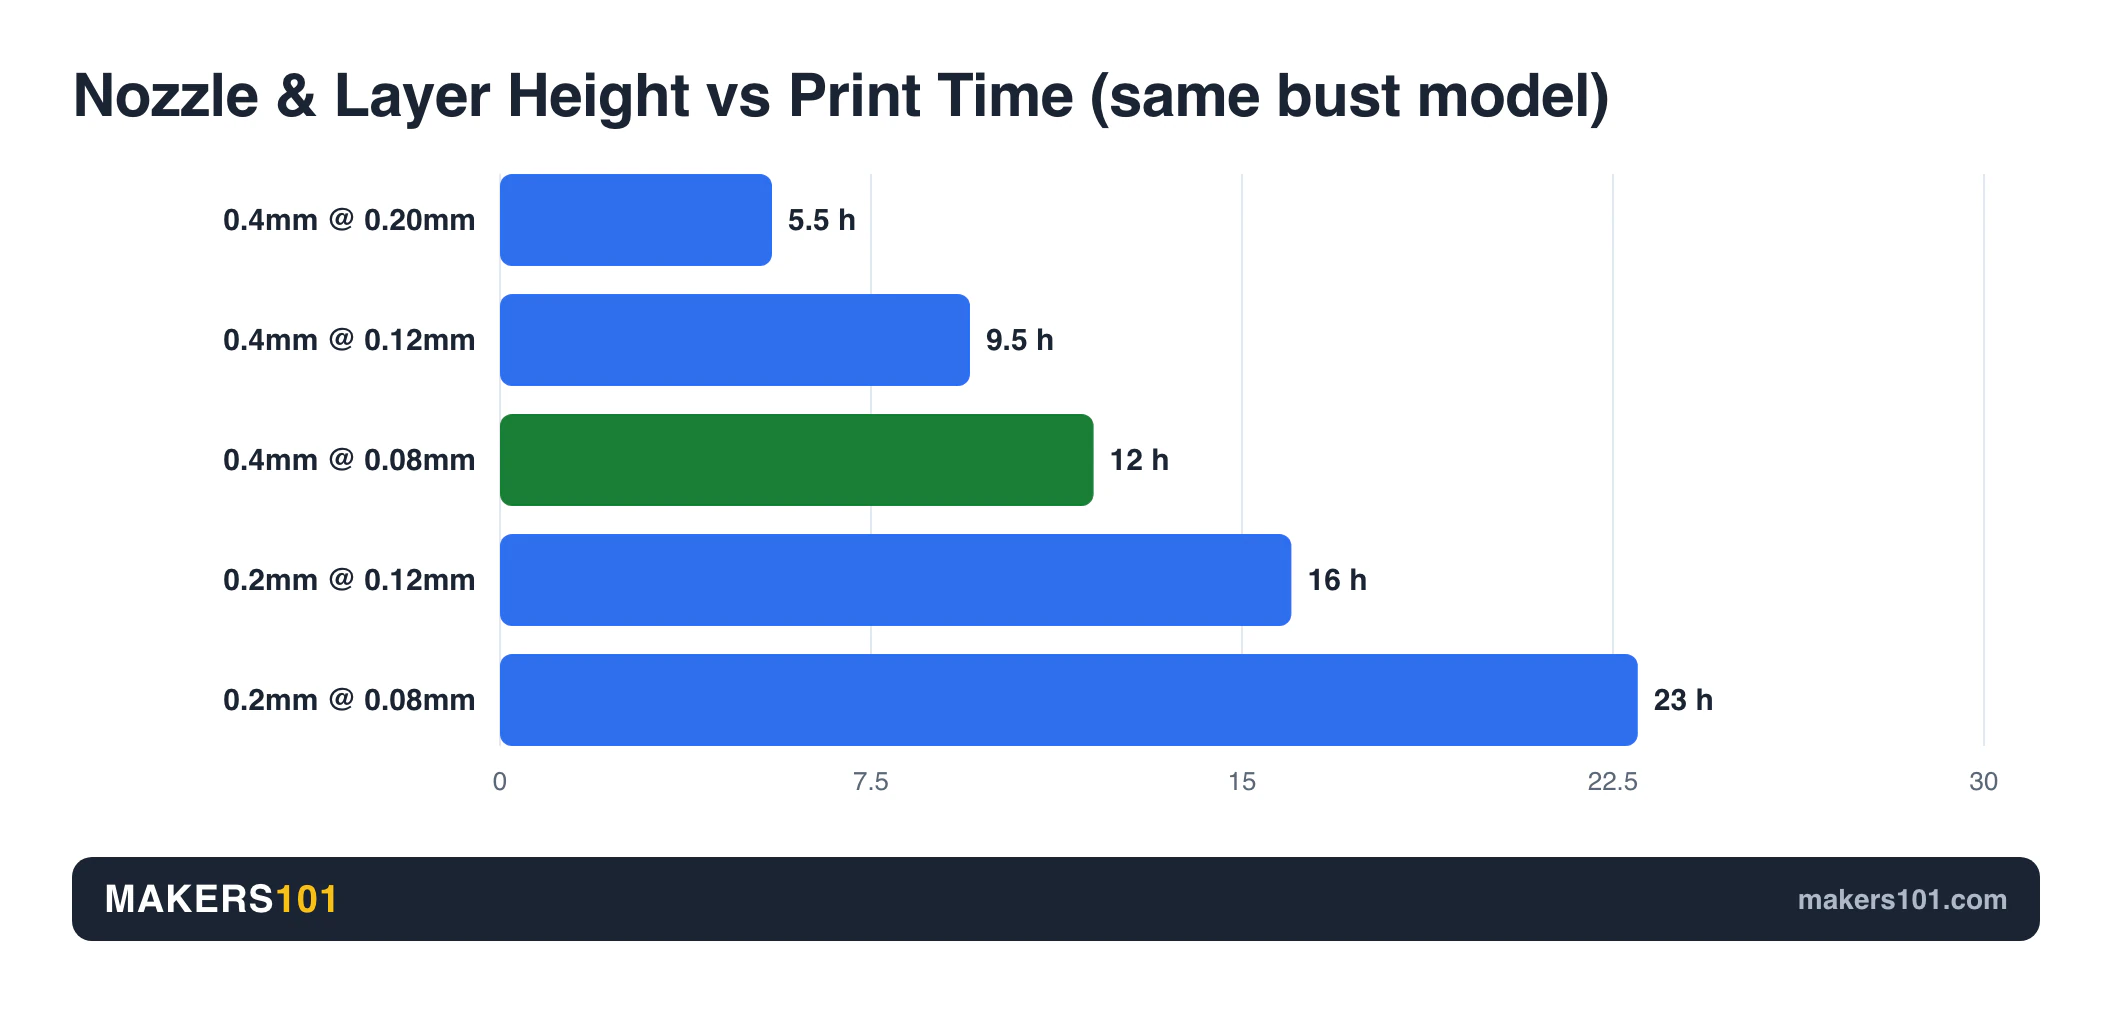
I lean on a test from YouTuber Uncle Jessy that printed the same detailed bust at several layer heights on a 0.4mm nozzle. At the standard 0.2mm layer height, it finished in about 5.5 hours with good shape but visibly rough top surfaces. Dropping to 0.12mm took it to roughly 9.5 hours and cleaned up the cloth and facial detail. At 0.08mm, around 12 hours, the tester called it the sweet spot: crisp hair, smooth skin, sharp folds.
A separate miniature test from The Custom Corner told the same story from the other direction. The same ogre model went from muddy, stair-stepped curves at a 0.2mm layer height to smooth organic surfaces at 0.08mm, on the same 0.4mm nozzle.
So the target is clear. 0.08mm is your “print like 0.2mm” layer height. 0.12mm is the sane compromise when you can’t spare the hours. If you want a starting point tailored to your printer and filament, run the numbers through a print settings calculator before your first attempt.
Shrink Line Width and Turn On Variable Walls
Layer height smooths the top and the slopes. Line width sharpens the sides. This is the setting most people never touch, and it’s where a lot of the “0.2mm look” actually hides.
Narrow the outer-wall line width
Your slicer defaults the line width to your nozzle size or a little above. You can go under it. In the miniature test above, dropping the outer-wall line width to about 0.35mm on a 0.4mm nozzle produced noticeably finer visible walls. The extruder can push a thinner line than the nozzle is wide, and on the outside surface that reads as more precision.
Variable line width (Arachne) captures thin features
Older slicers had a blind spot. Any feature between one and two line widths wide got skipped or printed as one rough blob. The Arachne wall generator fixed that by continuously varying the extrusion width as it prints, so thin walls, raised text, and fine edges come through cleanly.
It’s not exotic anymore. Arachne started in Cura and is now standard in PrusaSlicer and OrcaSlicer. In one comparison, a larger nozzle running Arachne printed raised fonts cleanly that classic slicing butchered. For your 0.4mm, it means the slicer finally renders the small features instead of rounding them off. Both of those are free, so if Cura is the part you are tired of, here are the free slicers worth switching to.
One honest caveat. Variable widths and low layer heights together can hurt overhangs. If your overhangs start sagging after you enable this, nudge the layer height back up a notch. You trade a little vertical crispness for cleaner underside angles.
Wall order and Precise Wall
Wall print order affects how consistent your surface looks. Printing the outer wall earlier in the sequence, or using OrcaSlicer’s inner-outer-inner order, evened out layer-line consistency across a range of printers and materials in one test. Precise Wall on its own gave only a small bump.
Here’s the nuance, because it bit a different tester. That same outer-first setting made a miniature look worse, not better, adding layer lines and stringing to a model that already printed well. So don’t blanket-enable it. Turn it on, print the same model, and compare. Wall order is a “test it on your part” setting, not a universal win.
Slow Down, Cool Down (Speed, Temp, Cooling)
Fine layers are fragile while they’re hot. If you print them fast and keep them molten, they slump and lose the detail you just dialed in. Pace and cooling lock it in.
Slow the outer wall
Speed only needs to drop where you can see it. Set the outer-wall speed to roughly 30 to 50mm/s and leave your infill and inner walls fast. In the miniature test, a 30mm/s outer wall gave clean, consistent visible surfaces without tanking the whole print time.
Temperature and cooling for small features
Small features cool slowly and blob easily. Two fixes work together. Drop your temperature a little, for example from 220°C to 205°C on PLA, to cut oozing and stringing on travel moves. Then cool aggressively: push the minimum fan to 90 to 100%, set a minimum layer time around 10 seconds, and a minimum print speed near 15mm/s so each thin layer has time to solidify before the next lands.
One rule you don’t break: keep the first-layer fan at zero. Aggressive cooling on layer one ruins bed adhesion, and a print that pops loose has no detail at all. Cooling numbers also shift with material, so match them to the right temperature for your filament rather than reusing your PLA profile on PETG.
Calibrate, or None of This Sticks
This is the step that separates a real result from a wasted afternoon. Settings only pay off on a calibrated machine.
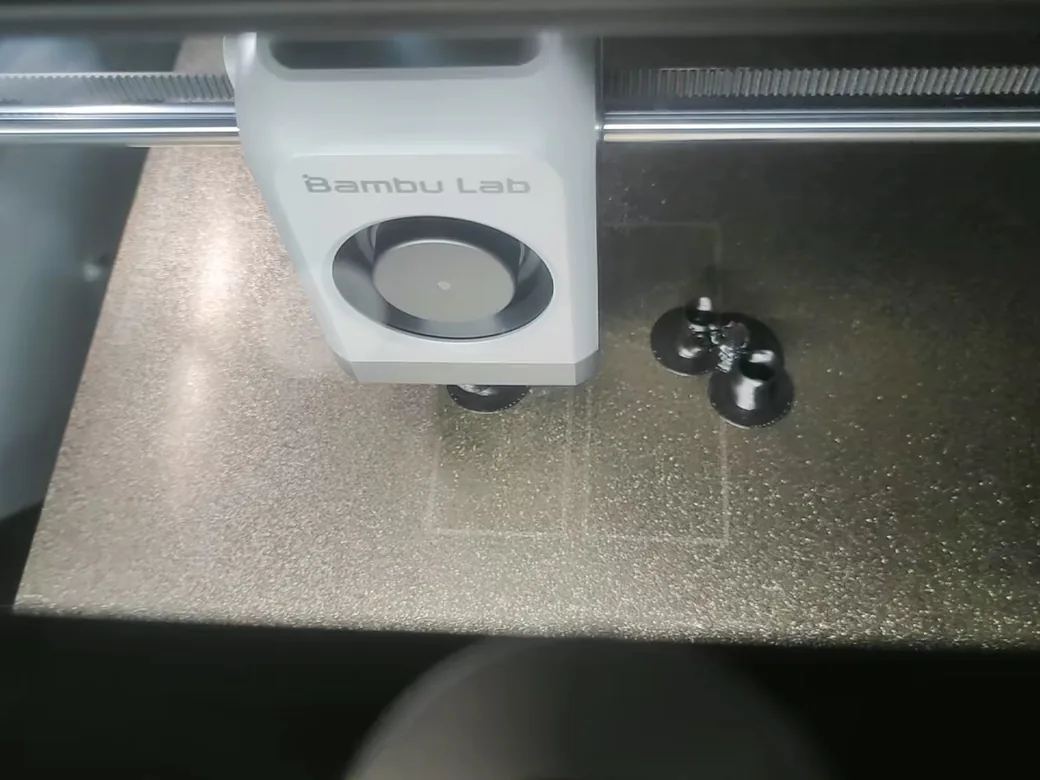
The clearest proof comes from the nozzle you’re trying to imitate. In a Bambu P1S test by The Nomadic Mechanic, a fresh 0.2mm nozzle went on with no calibration first. The result had overhangs and layer lines no better than the 0.4mm it replaced. Only after running the calibration tools did it turn out smooth, detailed pins. The expensive small nozzle did nothing until the machine was dialed in.
Your tuned 0.4mm is no different. Before you judge any of the settings above, run a flow-rate calibration and a pressure-advance test, sometimes called linear advance. Both live in the calibration tab in Bambu Studio and OrcaSlicer, and both take minutes. Skip them and you’ll blame the layer height for problems that were really over- or under-extrusion. If the settings panel is the part slowing you down, start with the slicer itself. I compared the best 3D printing slicers by printer type.
Your “Print Like 0.2mm” Cheat Sheet
Here’s the whole recipe in one place. Treat the values as starting points, and change one thing at a time so you can see what each does.
| Setting | Typical 0.4mm default | “Print like 0.2mm” value | Why it helps |
|---|---|---|---|
| Layer height | 0.20mm | 0.08 to 0.12mm | Biggest lever for smooth curves |
| Outer-wall line width | 0.42mm | ~0.35mm | Finer, sharper visible walls |
| Wall generator | Classic | Arachne / variable | Captures thin features and text |
| Outer-wall speed | 200mm/s+ | ~30 to 50mm/s | Cleaner outer surface |
| Temperature | Filament default | 10 to 15°C lower | Less ooze on small features |
| Cooling | Default | Min fan 90 to 100%, 10s min layer time | Crisp small layers |
| Wall order | Inner first | Test outer-first / inner-outer-inner | More consistent layer lines |
| Ironing | Off | On, top surfaces only | Glass-smooth flat tops |
| Calibration | Assumed fine | Flow + pressure advance | Makes every setting above real |
Ironing earns its own line. It re-runs the hot nozzle across finished top surfaces to melt down the ridges, and on flat upward faces it gets you closest to that molded look. It only touches top surfaces, but at Cura’s factory numbers that is not cheap. At the default 0.1 mm line spacing, a 100 x 100 mm top face works out to well over an hour of extra nozzle travel. Open the spacing up and run the pass faster and the same face drops to around 20 minutes, which is why the settings matter more than the checkbox. Here’s what each Cura ironing setting actually does and which one to move first.
The Real Cost: Time (and When to Stop Tuning)
Crisper prints are not free, and you should see the bill before you commit. The cost shows up entirely as hours.
That optimized miniature went from 1 hour 21 minutes at a standard layer height to 3 hours 56 minutes fully tuned. Roughly triple. The 0.12 to 0.13mm compromise landed in the middle at about 2.5 hours, clearly better than baseline without the full penalty.
Put that next to the nozzle you’re chasing. In the bust test, a 0.4mm at 0.08mm layer height took about 12 hours. The 0.2mm at 0.12mm took 16 for only a marginal gain, and pushing it to 0.08mm ballooned to 23 hours and introduced under-extrusion defects. Read that again. The small nozzle cost far more time and printed worse at the extreme.
There’s a trap on the way, too. One tester enabled every quality-sounding toggle at once, Arachne plus outer-first walls on a print that already looked great, and the result got worse: new layer lines, fresh stringing. More settings is not more quality. Change one thing, print, compare, keep or revert. That loop beats stacking ten “improvements” you can’t tell apart.
When You Should Actually Buy a 0.2mm Nozzle
Settings have a ceiling, and it’s worth knowing where hardware finally wins. Buy the 0.2mm nozzle when your work lives in horizontal detail your 0.4mm physically cannot resolve. Fine engraved text. Features under about half a millimeter. Tiny miniature faces and hands. Jewelry and small mechanical parts with crisp edges. That’s the real 0.2mm territory.
Go in with clear eyes, though, because a small nozzle is not free quality. It roughly doubles your print time or more. It clogs more easily, especially on filled or abrasive filaments. And as the P1S test showed, it needs its own calibration before it beats your 0.4mm at all.
So the value verdict is simple. For “I want smoother prints,” a tuned 0.4mm wins on time and hassle. For genuinely small, intricate work, the 0.2mm nozzle is the right tool and no setting substitutes for it. Keep both, and match the nozzle to the job.

FAQ
Can a 0.4mm nozzle print fine detail like a 0.2mm nozzle?
Partly. For vertical detail, meaning smooth curves and hidden layer lines, a tuned 0.4mm gets very close by using a 0.08 to 0.12mm layer height. For horizontal detail, meaning very thin walls, small text, and sub-0.5mm features, it cannot match a 0.2mm nozzle. The orifice width is a hard physical limit. Paint and filler primer close most of what’s left. We ranked the ones worth buying.
What is the smallest layer height for a 0.4mm nozzle?
In practice, roughly 0.05 to 0.08mm. A safe guideline is to stay under about 80% of your nozzle diameter, which caps a 0.4mm nozzle near 0.32mm at the top and leaves plenty of headroom to go finer.
Does a lower layer height actually improve detail?
Yes, on surfaces and curves. In one bust test, a 0.4mm nozzle produced rough top surfaces at the standard setting and crisp, clean detail once the layers dropped to 0.08mm. The trade-off is time: that print took roughly twice as long.
Why doesn’t my 0.2mm nozzle look better than my 0.4mm?
Almost always calibration. In a Bambu P1S test, a fresh 0.2mm nozzle printed no better than the 0.4mm until flow and other calibrations were run. A smaller nozzle only shines on a dialed-in machine, so calibrate flow rate and pressure advance before you judge it.
How much slower is printing at 0.08mm layer height?
Expect roughly two to three times the print time versus a standard 0.2mm layer height. In one miniature test the print went from about 1 hour 21 minutes to nearly 4 hours. A 0.12mm layer height is a good middle ground at close to double.
Should I buy a 0.2mm nozzle or just tune my 0.4mm?
Tune the 0.4mm first if your goal is smoother-looking prints. It’s cheaper, faster, and closes most of the visible gap. Buy the 0.2mm nozzle only when you need genuinely small features, fine text, or intricate miniatures that a 0.4mm cannot resolve at any setting.
CERTAIN CONTENT THAT APPEARS ON THIS SITE COMES FROM AMAZON. THIS CONTENT IS PROVIDED ‘AS IS’ AND IS SUBJECT TO CHANGE OR REMOVAL AT ANY TIME.
Price details
Product prices and availability are accurate as of the date/time indicated and are subject to change. Any price and availability information displayed on Amazon.com at the time of purchase will apply to the purchase of this product.