
I earn a commission if you buy through links on this page, at no extra cost to you. As an Amazon Associate, I earn from qualifying purchases.
3D printer nozzles are defined by two things. Their size sets the trade-off between detail and speed, and their material sets how long they last. The stock 0.4mm brass nozzle is a fine default, but a 0.6mm is faster with barely visible quality loss on modern slicers. The moment you print carbon fiber or other abrasives, switch to hardened steel. And most “dead” nozzles are just clogged.
If you have opened three browser tabs trying to tell a 0.4mm from a 0.6mm, or you are staring at a wall of options from brass to steel to ruby, you are not overthinking it. This part genuinely confuses most beginners.
Here is the trap almost everyone falls into: assuming a pricier, harder nozzle prints faster or better. It usually does neither. The whole thing comes down to two simple decisions, size and material, and once those click, the rest is easy. This guide walks you through both, plus when to change a nozzle, how to unclog one, and which ones are actually worth buying.
Table of Contents
- What a Nozzle Does — and Why the Right One Matters
- Nozzle Sizes: The Trade-Off Between Detail and Speed
- Is 0.4mm Still the Best Default? The Case for 0.6mm
- Nozzle Materials: Match the Nozzle to Your Filament
- When (and Why) to Replace Your Nozzle
- How to Unclog and Clean a Nozzle (Before You Replace It)
- How to Change a Nozzle (It Depends on Your Printer)
- Which Nozzles Are Worth Buying
- FAQ
What a Nozzle Does — and Why the Right One Matters
The nozzle is the last thing your filament touches before it becomes a print, and its bore size and material shape almost everything about the result. It melts plastic and lays it down, line by line, onto the bed. That makes it small but decisive.
Two properties do the heavy lifting. The bore diameter controls how much plastic comes out per pass, which drives detail and speed. The material controls how well the nozzle survives the filament you push through it. Get those two right for your workflow and most print-quality gremlins never show up.
Everything below is really just those two dials, explained.
Nozzle Sizes: The Trade-Off Between Detail and Speed
The bigger the bore, the more plastic per pass, so larger nozzles print faster while smaller ones print finer. That single sentence explains almost every size decision you will make.
The 0.4mm size became the default for a historical reason, not because it is perfect. It rode in on E3D’s V4 hotend years ago and simply stuck as the industry compromise between the older 0.5mm and finer 0.35mm nozzles. It is a safe middle, not a magic number.
The trade-off is easy to see in real prints. In one side-by-side test of the same Cali Dragon model, a 0.4mm nozzle finished in 40 minutes, a 0.2mm took over two hours for sharper detail, and a 0.6mm blasted through in 19 minutes with thicker but perfectly acceptable layers. A Prusa owner on Reddit clocked the same pattern on tiny figures: 36 minutes at 0.6mm, 42 at 0.4mm, and a punishing 1 hour 45 at 0.25mm.
Smaller is not automatically better, either. In that same dragon test, the 0.2mm nozzle rendered small text the 0.4mm couldn’t fill, yet it actually produced a worse overhang under the chin. Fine nozzles win on detail and lose on speed and some geometry. And on big models, scaling up hides the difference. A dragon printed 61% larger at 0.6mm finished in about the same time as the smaller 0.4mm version, a minute faster in fact, at similar visible quality.
The 3D Printer Nozzle Size Chart
Use this as your quick reference. Each row stands on its own.
| Nozzle size | Best for | Trade-off |
|---|---|---|
| 0.2mm | Miniatures, jewelry, small text, fine detail | Very slow; picky about clogs |
| 0.4mm | Everyday default; balanced detail and speed | Jack of all trades, master of none |
| 0.6mm | Larger models, functional parts, faster prints | Slightly softer fine detail |
| 0.8mm | Big, chunky, strong parts; fast drafts | Coarse detail; thick layers |
| 1.0mm+ | Vases, large props, speed-first prints | Detail is an afterthought |
Want to experiment across sizes without buying nozzles one at a time? A cheap mixed-size MK8 pack covers 0.2mm through 1.0mm, so you can test what actually suits your prints before committing. Creality’s upcoming K3 is built to mix 0.2 mm and 0.8 mm nozzles in one print. Here’s how it compares with the single-nozzle SparkX i8.
Nozzle Diameter Is Not Layer Height
Diameter and layer height are two different settings, and mixing them up causes real problems. Diameter is how wide the hole is. Layer height is how thick each printed layer is. As a rule of thumb, keep your layer height between roughly 0.25× and 0.75× the nozzle bore. So a 0.4mm nozzle is happy from about 0.1mm to 0.3mm layers. Push past that ceiling and layers won’t bond; drop below the floor and you invite clogs. Want finer layers for just the detailed half of a model? In Cura that takes a workaround.
Is 0.4mm Still the Best Default? The Case for 0.6mm
For most people printing today, a 0.6mm nozzle is the smarter default, and it is mostly thanks to slicer software catching up. The old knock on 0.6mm was blurry detail. Newer slicing engines erased most of that gap.
The change is an engine called Arachne, now built into PrusaSlicer and Cura. Instead of forcing every wall into fixed-width lines, Arachne varies the extrusion width continuously, anywhere from one to three times the nozzle diameter. The upshot: a 0.6mm nozzle can now print fine features, like raised text and thin walls, at least as cleanly as a 0.4mm used to.
The speed payoff is large. In one test, an organic model printed in 1 hour 49 minutes on a 0.6mm with Arachne versus 3 hours 17 minutes on a 0.4mm with classic slicing, at nearly identical quality. Real users report the same. One Bambu owner switched a big print from 0.4mm to 0.6mm and cut it from an estimated 12 hours to 7 hours 45, saving over four hours on a single job.
To be fair, 0.6mm has one honest weakness. At very thin layer heights, around 0.15mm, it handles steep overhangs slightly worse than a 0.4mm. The fix is simple: run a 0.6mm nozzle at 0.2mm layers or thicker, where it is happiest. For the vast majority of everyday prints, the speed is worth it.
Nozzle Materials: Match the Nozzle to Your Filament
Standard brass is all most people ever need, right up until they load an abrasive filament, and then it wears out shockingly fast. Material choice is really about one question: how rough is the plastic you print?
Plain PLA and PETG are gentle, and so is ABS. Brass handles them well and, as a bonus, conducts heat nicely. But abrasive filaments, carbon fiber blends and other rough stuff like glow-in-the-dark or metal-fills, are like sandpaper flowing through the bore. They can chew out a brass nozzle in a week or two of steady printing, which is exactly why our 3D printing filament guide flags carbon fiber as a nozzle killer. That is when you step up to hardened steel or harder. Brass has one other catch, though: it’s the wrong metal for anything that touches food.
The Nozzle Material Cheat Sheet
| Material | Best for | Durability / heat note |
|---|---|---|
| Brass | PLA, PETG, ABS, everyday printing | Cheap, great heat transfer; wears fast on abrasives |
| Stainless steel | Food-safe-ish prints, general use | Tougher than brass, slightly worse heat transfer |
| Hardened steel | Carbon fiber, glow-in-the-dark, abrasives | ~10× brass wear resistance; the practical upgrade |
| Ruby-tipped | Frequent abrasives, precision work | Extremely wear-resistant; premium price, niche |
| Tungsten carbide | Heavy abrasive use | Very hard; higher temperature tolerance |
| Diamond (e.g. DiamondBack) | Print farms, constant abrasives | Effectively a “forever” bore; $80–100 tier |
Which Material Do You Actually Need? (and the flow-rate myth)
Here is what most guides won’t tell you: a harder nozzle does not print faster. Hardness buys you lifespan, not speed. The flow-rate ceiling is set mostly by your hotend and bore size, not by whether the tip is brass or diamond. In fact, testers consistently find that going up a nozzle size does far more for flow than swapping to an exotic material.
So match material to filament, not to ambition. Print mostly PLA and PETG? Brass is genuinely fine. Dabbling in carbon fiber? Hardened steel is the sweet spot for cost and durability. Running a print farm or living in abrasives all day? A diamond nozzle stops brass from slowly widening its own bore, which is the sneaky way worn nozzles quietly ruin print quality over time. For someone who prints PLA once a week, that same $80–100 diamond nozzle is a hard sell. Be honest with yourself about what you actually print. If you are still narrowing down your filament, our 3DPKit Filament Picker can point you toward the right material and, by extension, the right nozzle.
If you print abrasives often but a diamond nozzle feels like overkill, a ruby-tipped nozzle is a solid middle ground.

When (and Why) to Replace Your Nozzle
A nozzle is a wear part, so plan to replace it when the print quality starts slipping and cleaning doesn’t bring it back. The warning signs are consistent: inconsistent extrusion, fuzzy detail that used to be crisp, under-extrusion you can’t tune away, or scratches and rounding you can see on the tip. A worn nozzle isn’t the only thing that starves extrusion. Grinding filament at the extruder does it too, and it needs a different fix.
Lifespan depends entirely on what you print. A brass nozzle running normal PLA or PETG often lasts three to six months of regular use. Feed it abrasives and that can drop to one or two months. Hardened steel and above stretch those numbers dramatically.
The reason a worn nozzle matters is subtle. As brass abrades, the bore slowly widens, so a “0.4mm” nozzle quietly becomes a 0.42, then a 0.45. Your slicer still thinks it’s 0.4mm, so calibration drifts and detail degrades without any obvious single failure. One more thing kills nozzles early: bad cleaning technique. Never take a blowtorch to a hardened steel nozzle. Overheating it changes the steel’s temper and strips out the wear resistance you paid for.
How to Unclog and Clean a Nozzle (Before You Replace It)
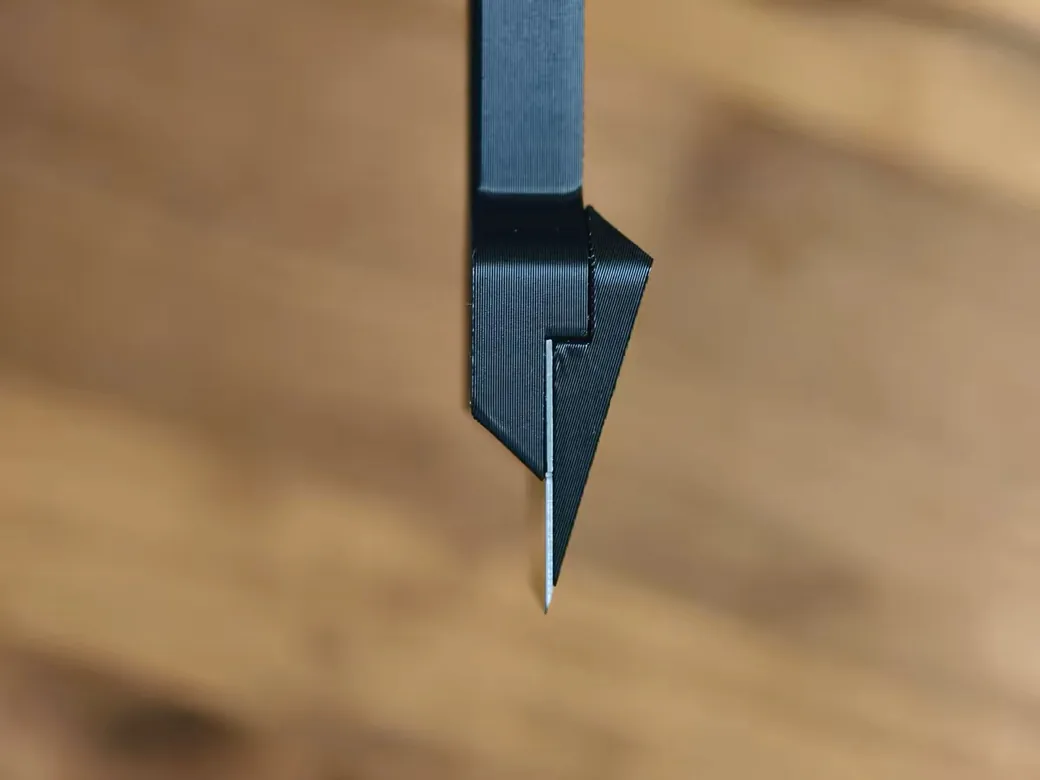
Most nozzles people throw away were never broken, just clogged, and a cold pull usually rescues them in minutes. Reach for cleaning before you reach for your wallet.
The cold pull (or atomic pull) is the go-to method for nozzles still on the printer, especially on lined hotends like an Ender 3 V2. Heat up, extrude a little to fill the nozzle, then let the temperature fall. For PLA, when it drops to around 90°C, pull the filament straight out with steady force. It should come out as a solid plug shaped like the inside of your nozzle, dragging the gunk with it. If it resists, nudge the temperature up a few degrees and try again. All-metal hotends are a little fussier and may need tweaking.
For a nozzle you have already removed, a soldering iron is safer than any open flame. At roughly 270°C it melts residue out without wrecking the tip’s tolerances, and, crucially, without ruining a hardened steel nozzle’s temper the way a torch would. Wipe the softened plastic away, brush stubborn spots with a brass brush, then run a cleaning needle through the tip.
Clogs hit hardest with abrasive and high-temperature filaments. Carbon-fiber blends are notorious: one user jammed two separate 0.4mm nozzles printing PETG-CF and PPA-CF and couldn’t clear either. If you print recycled or filled materials, expect more frequent clogs, the same way recycled feedstock can clog your printer when tolerances drift. Dialing in temperature and retraction helps a lot; our 3DPKit Settings Finder is a quick way to get sane starting values.
How to Change a Nozzle (It Depends on Your Printer)
Before you buy anything, know that swapping a nozzle is wildly easier on some printers than others, so check your model first. On an open-frame machine like a Bambu A1, it is close to tool-free. On an enclosed printer like the P1S, it is a genuine little procedure.
On the P1S, you power down and let it cool, pop the magnetic front cover, unplug the cable, and remove two screws with an H2 Allen key before pulling the whole hotend assembly down. To swap just the nozzle rather than the entire assembly, you go further: off come the fan, silicone sock, and clip, then the thermistor and ceramic heater. When you reassemble, apply thermal paste to the ceramic heater’s contact area and a dot in the thermistor hole, or your temperature readings and heat transfer will suffer.
Two habits save you grief. First, keep a spare hotend assembly ready so you can swap the whole unit and clean the old one later; it turns a fiddly job into a two-minute one. Second, clean any filament off the threads before you screw a nozzle in. Cross-threading a heat block with baked-on plastic is an expensive, avoidable mistake. And always, always let it cool first.
Bambu P1P and P1S owners can sidestep most of that teardown with a FlowTech hotend, which allows quick cold nozzle changes.

Which Nozzles Are Worth Buying
For nearly everyone, the entire nozzle shopping list is two items: a set of spare standard nozzles and a cheap cleaning kit. Start there, and only spend more when a specific filament forces your hand.
A multipack of hardened steel nozzles covers you for both everyday printing and the occasional abrasive spool, at a price that makes keeping spares painless. Pair it with a cleaning kit of fine needles and tweezers so a clog never ends a print session. Those two purchases handle 95% of situations. Both belong in the same drawer as the rest of your essential printer tools.


Beyond the basics, buy for your actual filament. Carbon-fiber dabblers want hardened steel. Heavy abrasive users can justify ruby. And if you run a print farm or print abrasives daily, a diamond nozzle’s one-time cost beats replacing brass on a schedule.
Want More Speed? Consider a High-Flow (CHT) Nozzle
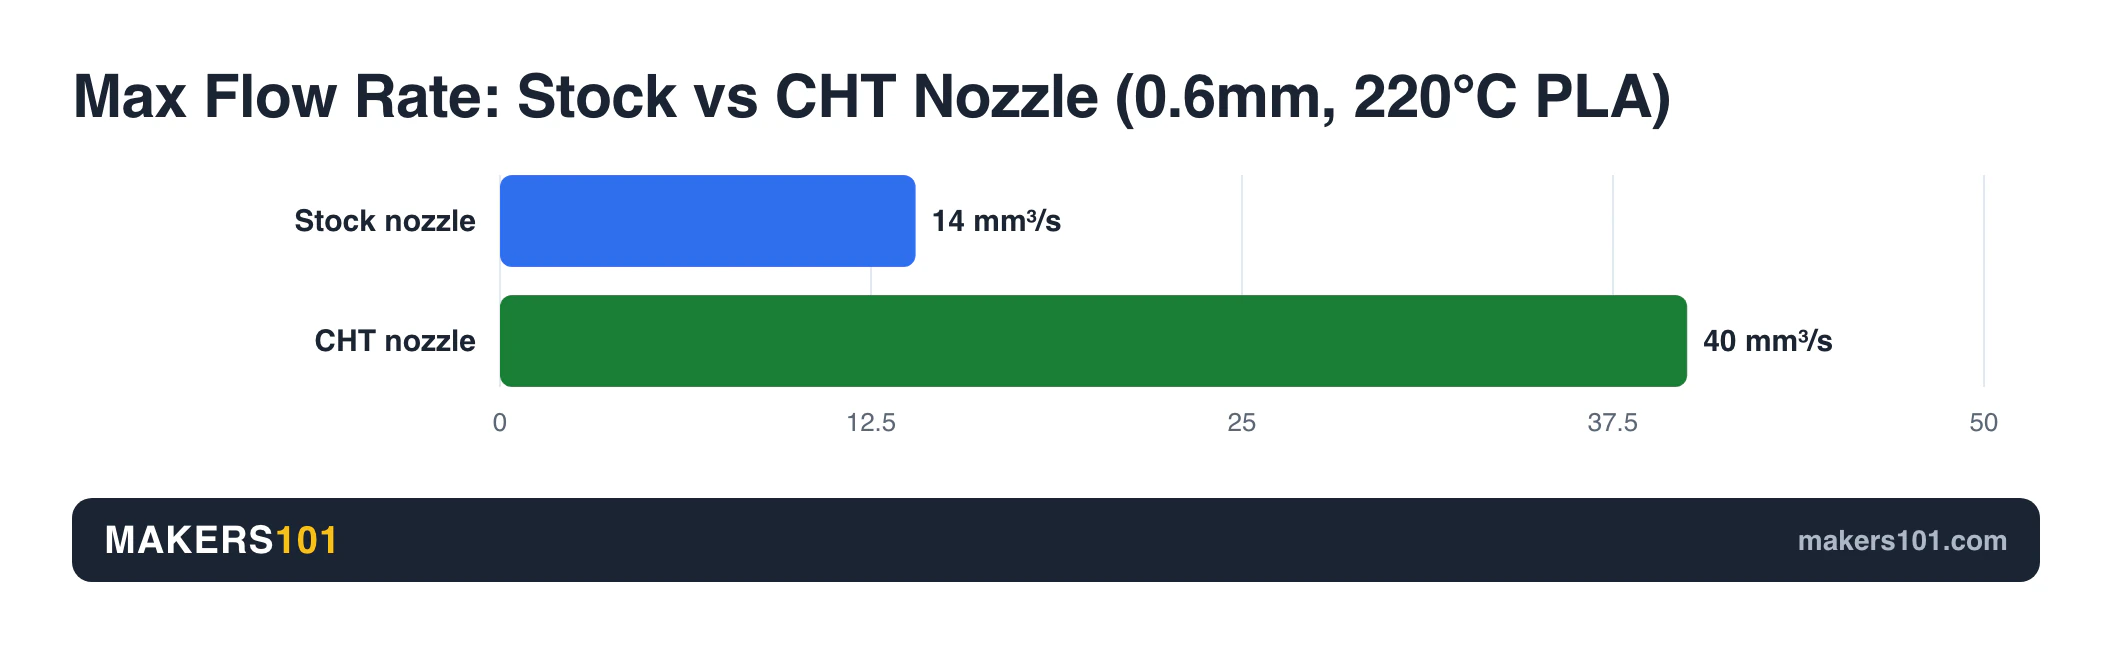
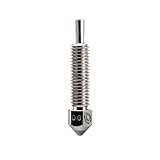
If your prints feel bottlenecked at high speed, a high-flow CHT-style nozzle can help more than any pricey filament. These nozzles split the melt into three internal channels that funnel back into one, which enlarges the melt zone and lets more plastic flow at the same temperature. In one flow-rate test, a Q1 Pro jumped from about 14 mm³/s on its stock nozzle to 40 mm³/s with a Triangle Lab CHT 0.6mm, using the same standard PLA at 220°C.
That is the cheaper path to speed. Instead of paying a premium for high-flow filament on every spool, you upgrade the nozzle once and every roll flows faster. The honest downside is minor: the CHT’s chunkier shape can make the printer’s nozzle-wipe routine noticeably louder. For most speed-hungry makers, that is an easy trade.
Micro Swiss’s FlowTech is a well-regarded CHT option if you want that flow jump on a common hotend.
FAQ
What nozzle size should I use for a 3D printer? Start with the 0.4mm your printer came with; it balances detail and speed for almost everything. Move to 0.6mm if you print larger or functional parts and want more speed. Drop to 0.2mm only when you need very fine detail, like miniatures or small text, and can accept much longer print times.
Can I use any nozzle with my 3D printer? Not always. Many printers use the common MK8-style thread, so generic nozzles fit fine, but some machines use proprietary designs, like Bambu Lab’s hotend nozzles or E3D’s Revo system. Check your printer’s nozzle type before buying, and match both the thread and the length to avoid leaks or a crash into the bed.
How long does a 3D printer nozzle last? On normal PLA or PETG, expect a brass nozzle to stay sharp for a few months of steady printing. Abrasive filaments like carbon fiber can wear one out in weeks instead. Harder nozzles, from hardened steel up to diamond, hold up far longer, which is exactly why abrasive printers upgrade.
What’s the difference between nozzle diameter and layer height? Diameter is the width of the nozzle’s hole; layer height is the thickness of each printed layer. They are independent settings. A good rule of thumb: your layers should land somewhere between a quarter and three-quarters of the bore, so a 0.4mm nozzle works well from about 0.1mm to 0.3mm layers.
Why does my nozzle keep clogging? Repeat clogs usually trace back to heat creep, damp or abrasive filament, printing too cold, or leftover residue from a previous material. Try a cold pull to clear it, dry your filament, and confirm your temperature and retraction settings. Abrasive and high-temperature filaments clog more often, so clean more frequently if you print them.
What nozzle should I use for carbon fiber or abrasive filament? Use a hardened steel nozzle at minimum. Carbon fiber, glow-in-the-dark and metal-filled filaments are abrasive and will grind a brass nozzle’s bore wider quickly. For heavy or constant abrasive printing, ruby-tipped or diamond nozzles resist wear far longer and hold their size, which keeps your print quality consistent over time.
Does nozzle size affect filament consumption? Not really. A model needs the same volume of plastic regardless of nozzle size, so a 0.6mm doesn’t “eat” more filament than a 0.4mm for the same object. What changes is how the plastic is laid down: bigger nozzles use thicker, wider lines, so they finish faster and can slightly overshoot on fine walls, while smaller nozzles trace more, thinner lines. Total grams used stays roughly the same.
CERTAIN CONTENT THAT APPEARS ON THIS SITE COMES FROM AMAZON. THIS CONTENT IS PROVIDED ‘AS IS’ AND IS SUBJECT TO CHANGE OR REMOVAL AT ANY TIME.
Price details
Product prices and availability are accurate as of the date/time indicated and are subject to change. Any price and availability information displayed on Amazon.com at the time of purchase will apply to the purchase of this product.