
I earn a commission if you buy through links on this page, at no extra cost to you. As an Amazon Associate, I earn from qualifying purchases.
Picking the right nozzle temp for PLA feels like it should be simple. You grab a number off Reddit, type it in, and never think about it again. That’s exactly how most people end up fighting their prints for months.
Here’s a story that plays out constantly. One maker printed PLA at 220°C for half a year because a forum post promised “better layer adhesion.” Every print came out okay, but always with stringy wisps and the occasional blob. Then they started a job at 200°C by accident, forgot to change it, and got the cleanest print of their life. No strings. No blobs. Better overhangs. They’d been running 20 degrees too hot the whole time.
This guide gives you the exact numbers to start with, the test data behind why they work, and a five-minute way to dial in the one temperature that’s right for your printer. Running at the cooler end has a bonus that has nothing to do with print quality. Particle emissions climb steeply with nozzle temperature, which we cover in PLA fumes and your air. No textbook required.
Table of Contents
- What’s the Best Nozzle Temp for PLA?
- Why 200-210°C Is the Sweet Spot (Not Hotter)
- Signs Your Nozzle Temp Is Off
- “Your 210°C Isn’t My 210°C”
- How to Find YOUR Perfect PLA Temp in Five Minutes
- Adjusting for PLA Variants, Brands, and Fast Printers
- Bed Temp and Cooling: The Settings That Ride Along
- Is PLA Heat-Resistant After Printing?
- FAQ
- The Bottom Line
What’s the Best Nozzle Temp for PLA?
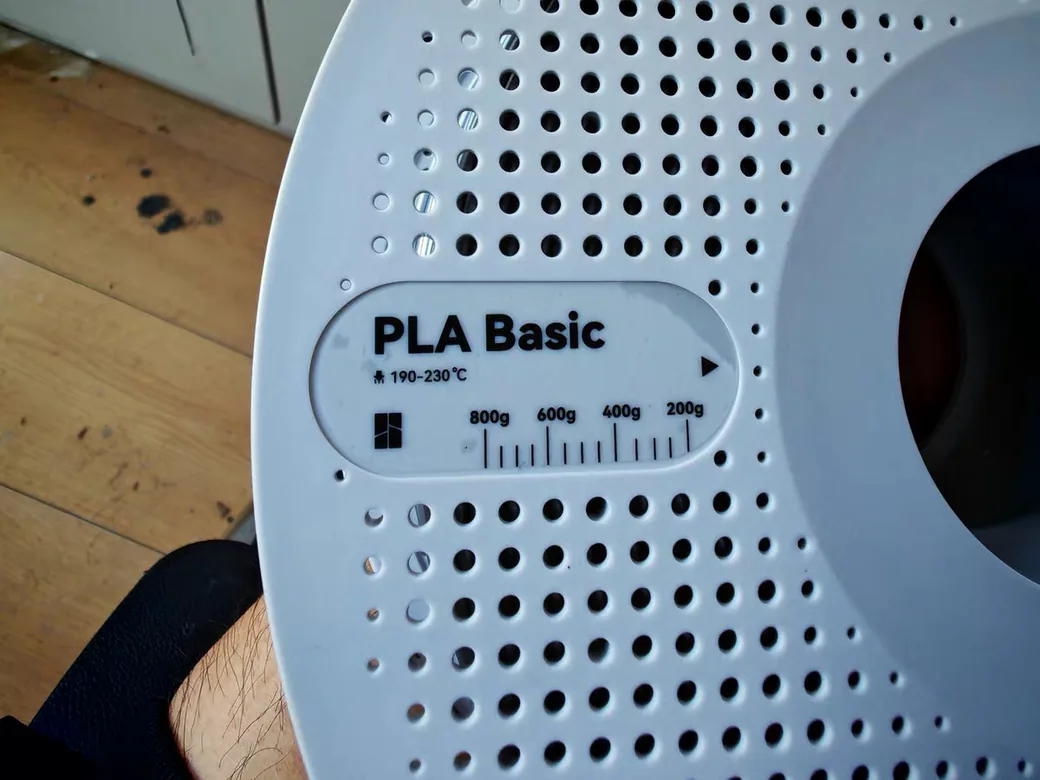
Start standard PLA at 205°C. Most standard PLA has a working window of 190-220°C, and the sweet spot for a clean, strong print sits around 200-210°C on a typical printer. Print one small test, look at the surface, then nudge in 5-degree steps. That’s the whole method in one sentence.
Here’s where each common flavor of PLA lands:
| Filament | Nozzle temp | First layer | Bed temp |
|---|---|---|---|
| Standard PLA | 190-220°C (start 205) | +5°C hotter | 50-60°C |
| PLA+ (tougher blends) | 205-225°C | +5°C hotter | 50-60°C |
| Silk PLA | 215-230°C | +5°C hotter | 50-60°C |
| Matte PLA | 190-215°C | +5°C hotter | 50-60°C |
| High-speed PLA | 210-230°C (rises with speed) | +5°C hotter | 55-60°C |
Treat these as starting points, not final answers. If you want a tool that suggests a full profile from your printer and filament, the print settings finder is a quick shortcut. But the numbers above will get you a good first print today.
Why 200-210°C Is the Sweet Spot (Not Hotter)
There’s a myth that printing hotter always fuses layers better and makes stronger parts. It doesn’t. Once you pass the sweet spot, extra heat starts to hurt. Printing at the top of the range does help one specific job. It’s sealing a print against water.
The clearest evidence comes from a controlled test by Thomas Sanladerer, who printed the same PLA parts across a wide range and then measured them. Strength held steady through the whole usable range and only dropped at the extremes. Around 215°C, the parts hit the best balance of strength and surface finish. You’d have to run absurdly hot, up past 270°C, before the plastic starts to degrade and weaken. Bend the numbers down too far, near 195°C, and you get a nice matte look but weaker, more brittle layers.
So the “hotter equals stronger” instinct is a dead end. Above the sweet spot you don’t gain strength. You just add stringing and a rougher surface, with fine detail starting to droop. Think of it like an oven. The right temperature bakes evenly, and cranking it higher only makes the result worse for no payoff.
Here’s the practical takeaway. Default profiles from filament makers are usually well tuned. Start near the middle, not the ceiling.
Signs Your Nozzle Temp Is Off
Your print will tell you when the temperature is wrong. You just need to read the symptoms. Too hot and too cold each leave a different fingerprint.
| What you see | Likely cause | Try this |
|---|---|---|
| Stringing, wisps, blobs | Too hot | Drop 5°C, dry filament |
| Glossy but rough or bumpy surface | Too hot | Drop 5°C |
| Fine details or overhangs drooping | Too hot | Drop 5°C, raise cooling |
| Weak layers that split apart | Too cold | Raise 5°C |
| Matte, rough, gritty walls | Too cold | Raise 5°C |
| Under-extrusion, gaps, clicking extruder | Too cold or clog | Raise 5°C, check for jam |
One warning before you start chasing temperature. Stringing is often a moisture problem, not a heat problem. Wet filament hisses, strings, and prints rough no matter what number you dial in. If your spool has been open for weeks, dry your filament first, then judge the temperature. Otherwise you’ll lower the heat trying to fix strings that were never about heat.
“Your 210°C Isn’t My 210°C”
Here’s the part almost no guide mentions, and it explains why forum advice contradicts itself so often. The number on your screen isn’t necessarily the number at your nozzle.
Cheaper thermistors and mainboards carry a tolerance of roughly ±10°C. So a printer set to 210°C might actually be melting plastic at 200°C, and another set to the same 210°C might be running at 220°C. Two people can follow the exact same “recommended” setting and get different results, because their hardware disagrees about what 210 even means. I’ve set two of my own machines to the same temperature and watched them behave like they were 10 degrees apart.
This also trips people up with measurement. A common move is to point an infrared thermometer at the nozzle to “check” it. That reading is unreliable on shiny metal, and it often shows a temperature far below the real one. One user measured 110°C on a nozzle set to 215°C and panicked, when the tool was simply wrong about bare metal.
The lesson is freeing, actually. Stop arguing about whether the internet’s number should be 200 or 210. Find the number that works on your printer, and ignore the rest.
How to Find YOUR Perfect PLA Temp in Five Minutes
The tool for this is a temperature tower. It prints one small model where each section is a different temperature, so you get a whole range tested in a single print. Temperature is also the setting you calibrate first, before speed or flow, because it affects everything downstream.
Here’s the workflow in a slicer like OrcaSlicer or Bambu Studio:
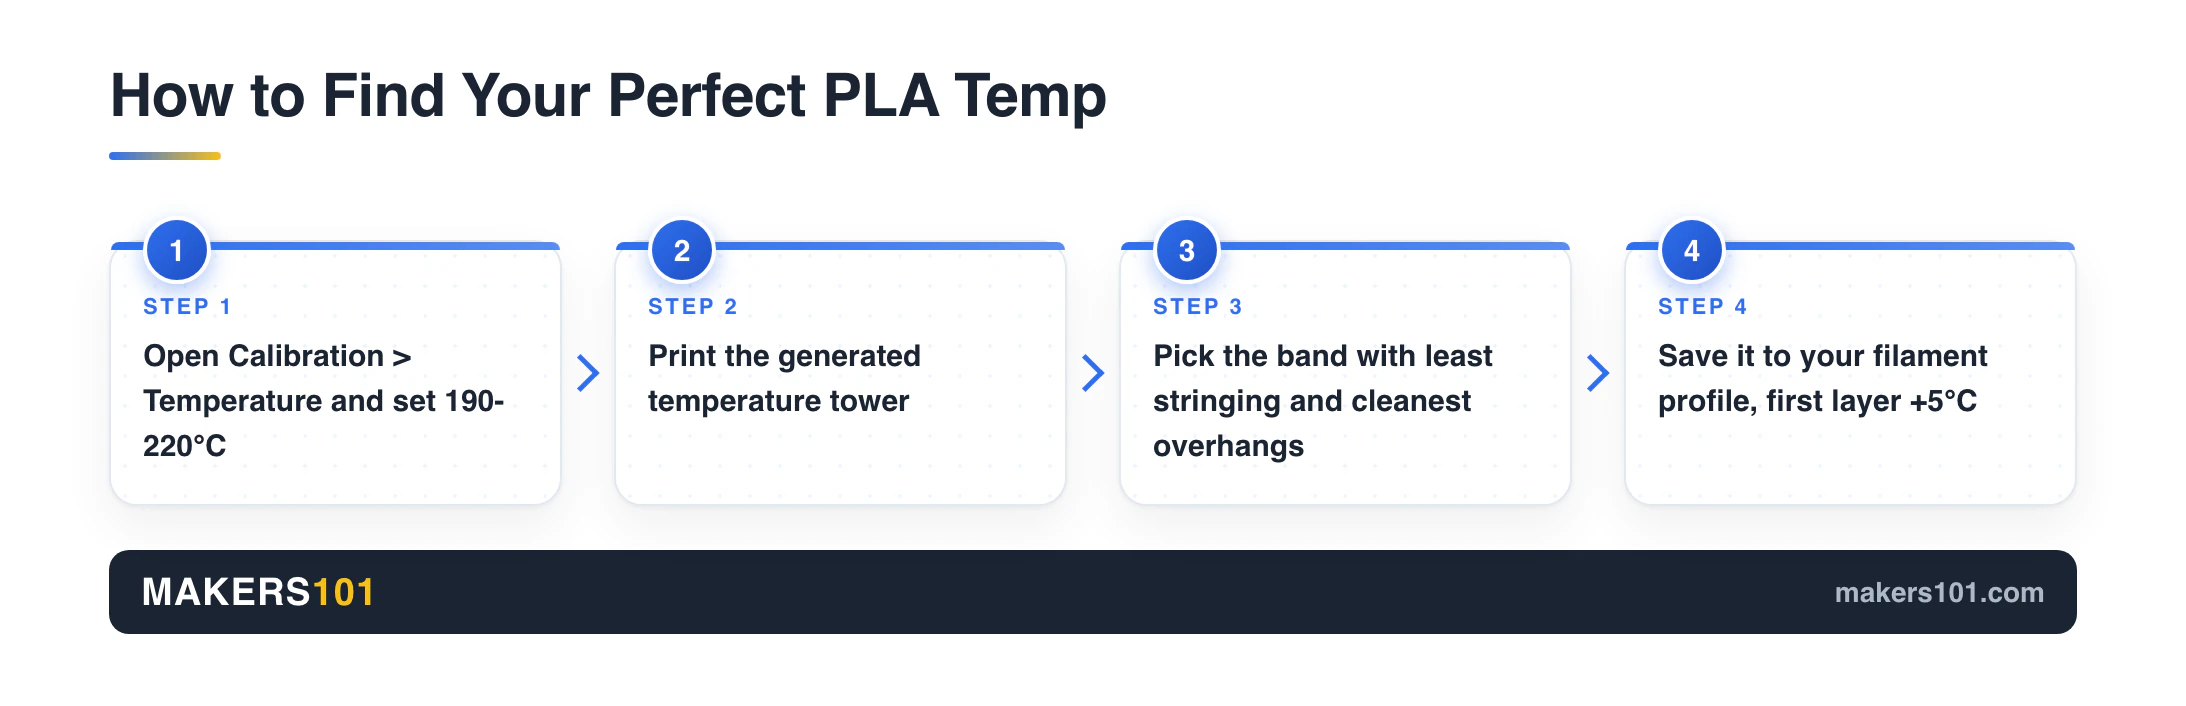
1. Open the calibration menu. In OrcaSlicer, go to Calibration, then Temperature. Pick your filament and set a start and end range, such as 190 to 220°C, and it steps down in 5-degree bands automatically. 2. Slice and print the generated model. It prints each temperature band automatically. You don’t build anything by hand. 3. Read the result. Look for the band with the least stringing and the cleanest overhangs. In one PLA test, 190 to 195°C left wispy strings and poor detail, while 215°C printed cleanest with sharp overhangs. You can also snap each section off to feel which layers bond strongest. 4. Save it to your filament profile. Set that temperature as your “other layers” value, and bump the first layer up by 5°C for better bed grip.
Using Bambu Studio and can’t find where to change temperature? It hides behind a small button next to the filament name, not in a separate menu. Click the filament, and the temperature fields appear. Bambu machines also print fast, so lean toward the higher end of the range rather than copying settings from a slower printer.
Do this once per filament and write the number down. That’s the difference between guessing and knowing.
When to run it again
You don’t need a fresh tower for every spool, but a few changes are worth five minutes:
- New brand or a very different color. Pigments and additives shift how the plastic flows, so a black and a white from the same brand can prefer numbers a few degrees apart.
- A new nozzle, especially a different size or a hardened one. Metal and bore diameter both change how heat reaches the melt.
- Prints that suddenly go wrong on settings that used to work. A tower quickly tells you whether temperature drifted or something else broke.
Calibrate temperature first, before you touch speed, flow, or retraction, because those settings all sit downstream of a good melt. Get the heat right and half the other problems never show up.
Adjusting for PLA Variants, Brands, and Fast Printers
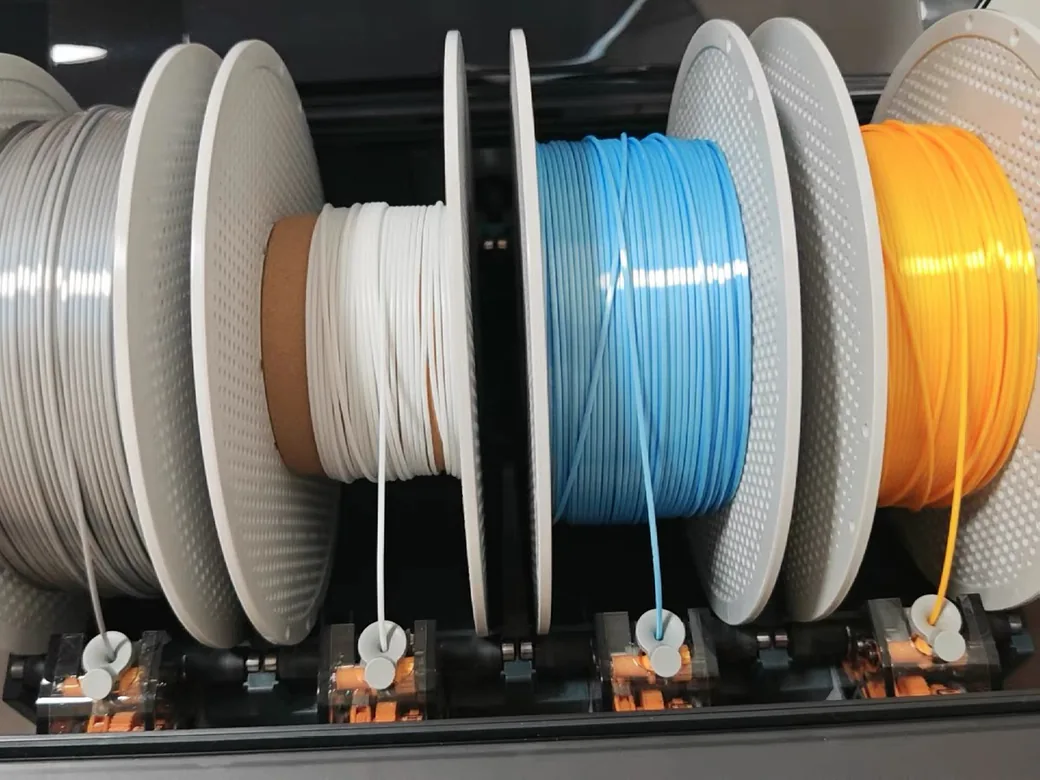
“PLA” isn’t one material anymore. The blends behave differently, and a few need a real change in approach. This is also where a consistent, well-made filament saves you more grief than chasing exact degrees, since cheap spools vary batch to batch.
PLA+
PLA+ adds toughness and usually wants a little more heat, often 205-225°C. Many spools default to 220°C. It’s more forgiving than standard PLA, so if a print looks fine at the higher end, leave it.
Silk PLA (the counterintuitive one)
Silk PLA is the exception to every rule above. It’s not real silk. It’s PLA blended with 10 to 20 percent polyester or elastomer additives that make it self-level into a glossy shine. Those additives need more heat to flow, so higher temperatures in the 215-230°C range actually reduce stringing and improve gloss, the opposite of standard PLA. Lean toward the top of that band for the glossiest result. Pair that with a slow speed near 30 mm/s so each layer has time to settle. The trade-off is that silk PLA is more brittle, so keep it for decorative pieces, not functional parts.
Matte and high-speed PLA
Matte PLA prints much like standard PLA, in the 190-215°C range. High-speed PLA is built to melt faster, so it climbs with your print speed. Below about 100 mm/s it’s happy in the low range, but push past that and it wants 210-230°C to keep up with the flow.
Brands and fast machines
Every brand, and even every color, can shift the ideal temperature slightly, which is exactly why the temperature tower earns its keep. PETG is worse on this front, and we walk through what changes when you move to PETG. When you want a spool that behaves predictably so your dialed-in numbers stick, these two are reliable starting points:


New to the whole material side of this? Our beginner’s guide to 3D printing filament covers how the common types differ before you tune any of them.
Bed Temp and Cooling: The Settings That Ride Along
Nozzle temperature doesn’t work alone. Two nearby settings decide whether that clean melt actually sticks and holds detail.
Bed temperature for PLA sits at 50-60°C. That’s warm enough to grip the first layer without softening the base of the print. Go much hotter and you risk “elephant foot,” where the bottom layers bulge out. If your first layer refuses to stick even at 60°C, the problem is usually leveling or a dirty surface, not temperature. Our guide on a first layer that won’t stick walks through the real causes.
Cooling fan is simple with PLA. Keep it off or low for the first one to two layers so they weld to the bed, then run it at 100 percent for the rest of the print. PLA loves cooling. Full fan gives you crisp overhangs and sharp detail once the base is down.
Is PLA Heat-Resistant After Printing?
This surprises new users, so it’s worth stating plainly. Your printing temperature has nothing to do with how much heat the finished part can survive. Standard PLA starts to soften at around 55°C. That’s why a PLA phone mount can droop on a hot car dashboard, or a part left near a heater slowly sags.
So a finished PLA part won’t survive a warm car in summer. It sits right past the softening point, and the plastic deforms under any load.
Need more heat resistance without switching materials? You can anneal the part. It isn’t free, though. The numbers on what annealing costs you in accuracy sit alongside the other options here. One simple method is to set your heated bed to 100°C, cover the print with a box to trap the heat, hold it for an hour, then let it cool slowly. In testing, that pushed PLA’s heat tolerance from about 55°C up toward 150°C. The catch is real, though. Annealing shrinks the part a few percent in X and Y, grows it in Z, and can warp solid pieces. It’s a genuine upgrade for heat resistance, not a free one. For the full method and other finishing options, see our guide to FDM post-processing.
FAQ
Is 220°C too hot for PLA?
For most standard PLA, 220°C is at the top of the range and often a touch hot, which shows up as stringing. It’s perfectly fine for PLA+ and many silk or high-speed blends. Watch for wisps: if you see them, drop to 210°C.
What nozzle temp should I use for PLA+?
PLA+ generally runs a little hotter than standard PLA, around 205-225°C, with 220°C a common default. The tougher blend handles the higher end well, so start there and drop only if you see stringing.
Does a 0.2mm nozzle change the temperature?
Slightly. A smaller nozzle pushes less plastic and loses heat faster at the tip, so nudging up 5-10°C helps keep flow steady. The bigger changes for a 0.2mm nozzle are slower speed and thinner layers, not a dramatic temperature shift.
Is 65°C too hot for PLA?
For a finished part, yes. PLA softens near 55°C, so that much heat causes sagging or warping under load. As a bed temperature it’s on the high side but usable, though it can cause elephant foot on the first layers.
What is the 45-degree rule, and does temperature matter?
The 45-degree rule says overhangs up to about 45 degrees usually print without support. Temperature does play in. Run too hot and the plastic stays soft too long, so those overhangs droop. Cooler prints with strong fan hold steep angles better.
What’s the best nozzle temp for PLA on a Bambu printer?
Bambu printers run quick, so aim high, roughly 210-220°C for standard PLA. The cleanest approach is to run a temperature tower in Bambu Studio and lock in the exact number for your filament rather than trusting the default.
The Bottom Line
Set standard PLA to 205°C, run one temperature tower, find the band with no strings and clean overhangs, and write that number in your filament profile. Bump the first layer 5°C, set the bed to 50-60°C, and full fan after layer two. Then stop second-guessing forum numbers, because your printer’s real temperature is its own. Dial it in once, and clean, strong PLA prints become the boring default they should be.
CERTAIN CONTENT THAT APPEARS ON THIS SITE COMES FROM AMAZON. THIS CONTENT IS PROVIDED ‘AS IS’ AND IS SUBJECT TO CHANGE OR REMOVAL AT ANY TIME.
Price details
Product prices and availability are accurate as of the date/time indicated and are subject to change. Any price and availability information displayed on Amazon.com at the time of purchase will apply to the purchase of this product.