
Heads up — some of the links below are affiliate links. If you buy through them, I earn a small commission (at no extra cost to you), which helps cover the gear I test. Thanks!
You’ve watched the videos. You’ve scrolled the mod lists. And now you have thirty browser tabs open, each promising the one upgrade that will fix everything.
Here’s the honest truth: most of them won’t. A handful will transform your printer. The rest are a slow way to spend money you could have put toward a better machine.
This guide sorts the difference. We’ll go through the 3D printer upgrades that genuinely earn their place, in the order you should actually do them, plus the popular ones that quietly waste your cash. No 25-item filler list. Just what moves the needle.
Last updated July 2026.
- The single highest-impact upgrade is firmware (Klipper) plus input shaping. It’s often free, and in one real test it made a stock printer print five times faster.
- Fix the weakest link first: your build plate, bed leveling, and extruder solve the most common headaches for the least money.
- Frame rigidity comes before speed parts. A wobbly frame makes expensive upgrades pointless.
- Some crowd favorites are a waste of money: bigger Y-axis motors, decorative fan shrouds, and PEI on a large warped bed.
- Own a modern enclosed printer like a Bambu? You upgrade differently. Software and printed parts beat swapping hardware.
Table of Contents
- Are 3D Printer Upgrades Worth It?
- How to Decide What to Upgrade First
- 3D Printer Upgrades at a Glance
- Klipper Firmware & Input Shaping: The Biggest Single Upgrade
- A PEI Spring Steel Build Plate
- Automatic Bed Leveling (CR Touch / BLTouch)
- A Better Extruder: Direct Drive or All-Metal
- An Upgraded Hot End & a Hardened Nozzle
- A Silent 32-Bit Mainboard
- An Enclosure (and Why Filtration Matters)
- The Cheap Wins: Cooling, Sensors, Tools & Free Printable Upgrades
- Got a Bambu or Other Modern Printer? Upgrade Differently
- 3D Printer Upgrades That Usually Aren’t Worth the Money
- A Quick Note on Safety
- Frequently Asked Questions
Are 3D Printer Upgrades Worth It?
Yes, for most budget and bed-slinger printers. Targeted upgrades fix a specific weakness for a fraction of what a new machine costs. But blindly buying parts for a worn-out printer can cost more than simply replacing it.
The proof is in what a small budget can do. In one head-to-head test, a creator upgraded a seven-year-old Ender 3 for about $100 and cut a Benchy print from 50 minutes to under 10. That’s a five-times speed gain on a machine most people would have thrown away. Most of that gain is acceleration, not top speed, and it’s worth checking what Orca does with your acceleration numbers before you spend anything.
So the answer isn’t “always upgrade.” It’s “upgrade the right thing.” A printer with sloppy plastic wheels on every axis is a poor candidate for expensive mechanical mods. You’d be better off buying a printer with linear rods and adding free firmware instead. We’ll get to that decision below.
Should you upgrade or buy new? Upgrade when your printer has a rigid frame and a specific, fixable problem. Buy new when you’re chasing features (auto-calibration, multi-color, a heated chamber) that would cost more to bolt on than they’re worth.
How to Decide What to Upgrade First
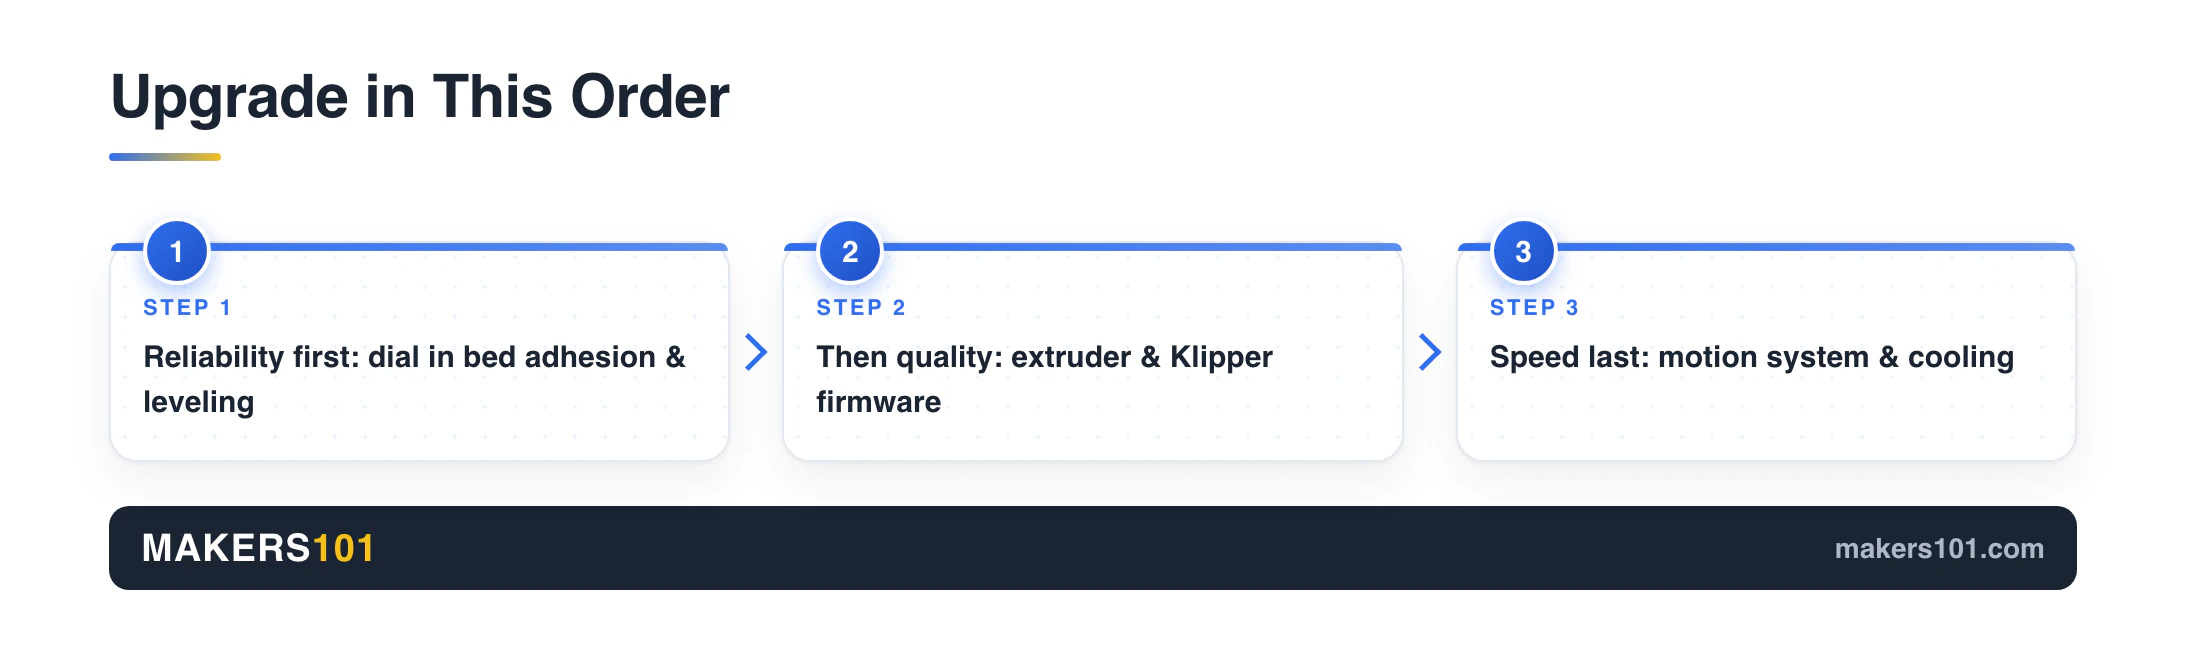
Fix the weakest link, in this order: reliability first, then quality, then speed. Solve adhesion and leveling before you ever touch motion-system parts. It sounds obvious, but it’s the step most people skip while chasing a faster hot end.
Run every upgrade through three quick questions:
- Does it fix a problem you actually have? If your first layers are fine, a new build plate isn’t your priority. Upgrading for the sake of upgrading is how you end up with a drawer of parts.
- Is your frame rigid enough to benefit? A stiff frame is the foundation. On a wobbly frame, high speeds produce disastrous ghosting no matter what you bolt on. Tighten and square the frame before anything else.
- Have you done the free software upgrade yet? More on this next, but firmware beats most hardware for print quality, and it usually costs nothing.
Then weigh cost against buying a newer printer. A single high-end toolhead can cost more than a modern machine that already does the job.
Want a shortcut? Dial in your slicer first. Most “quality” problems are settings, not hardware. Our print settings finder gives you a tuned starting point for your filament before you spend a cent.
3D Printer Upgrades at a Glance
Here’s the whole field, ranked by how much they actually improve your prints. Difficulty and price tier assume a typical budget bed-slinger.
| Upgrade | What it fixes | Difficulty | Price tier | Worth it? |
|---|---|---|---|---|
| Klipper firmware + input shaping | Speed, ringing, sharpness | Medium | Free–low | ★★★★★ |
| PEI spring steel plate | Adhesion, easy part removal | Easy | Low | ★★★★★ |
| Auto bed leveling | First-layer consistency | Medium | Low | ★★★★☆ |
| All-metal / direct-drive extruder | Reliability, flexibles, retraction | Medium | Low–mid | ★★★★☆ |
| All-metal / high-flow hot end | Higher temps, more speed | Medium | Low–mid | ★★★★☆ |
| Hardened nozzle | Abrasive filaments | Easy | Low | ★★★☆☆ |
| Silent 32-bit mainboard | Noise, drivers, reliability | Hard | Mid | ★★★☆☆ |
| Enclosure + filtration | ABS/ASA warping, fumes | Easy–medium | Low–mid | ★★★★☆ |
| Runout / motion sensor | Failed long prints | Easy | Low | ★★★☆☆ |
Prices shown in the product cards below refresh automatically, so you always see the current Amazon price.
Klipper Firmware & Input Shaping: The Biggest Single Upgrade
If you do only one upgrade, make it this. Klipper is a free firmware that adds input shaping and pressure advance, two features that sharpen your prints and unlock speed your printer already had. If you’re weighing this upgrade against Marlin, our Klipper vs Marlin comparison lays out the setup cost and trade-offs.
Here’s why it tops the list. In that same budget Ender 3 test, the creator used an accelerometer to tune input shaping and pushed the stock motion system to five times its original speed with only minor quality loss. No new motors. No reinforced frame. Just software cancelling out the vibrations that used to blur fast prints. His own take: if you can only do one or two upgrades, make them Klipper and input shaping.
Quality improves too, not just speed. On a rigid-frame printer, pressure advance makes lettering crisp instead of over-extruded and blobby. One tester found Klipper turned an ordinary budget machine into one that produced near-flawless prints, with the same mechanical parts it had before.
Nik’s take: This is the upgrade most people skip because it isn’t a shiny part in a box. Don’t. You can run Klipper on a Raspberry Pi for the cost of the board, or buy a plug-and-play pad if you’d rather skip the Linux setup. One caveat: your frame needs to be solid first. Klipper works magic on a stiff machine and does very little for a wobbly one.

- 【Higher Printing Speed & Keep the Quality】Creality sonic pad uses precision-oriented algorithms to command the motors for higher printing speed…
- 【Wide Compatibility】Sonic pad based on klipper firmware can connect to almost any ender 3D printer on the market via a USB cable. By updating the…
- 【Highly Integrated with Strong Computing Power】Beneath the large 7-inch touch control screen, the Klipper firmware runs in full swing on a…
- 【Intuitive Model Preview】Ender 3 v2 upgrades pad supports G-code model preview when slicing with the Creality Print, Ultimaker Cura, Pursa Slicer…
- 【Rich Expansion Interface】For this fdm ender 3d printers sonic pad, USB port x4, RJ45 port x1 and WiFi module x1 are included. Connect USB camera…
A PEI Spring Steel Build Plate
A flexible PEI spring steel plate is the most quality-of-life upgrade you can buy. Parts stick when hot, then pop free the moment you flex the cooled sheet. No scraping, no glue, no gouged beds.
PEI is tough. Its glass transition sits around 217°C, so it shrugs off nozzle crashes and the occasional steel-wool cleaning without permanent damage. As it cools, prints release themselves, one of the reasons it’s replaced glass on so many machines.
Smooth or textured? For PLA and TPU, both work about the same, so pick based on the finish you want on the bottom layer. For PETG, go textured and lower your bed temperature. PETG bonds so aggressively to smooth PEI that pulling a part while it’s still warm can rip a chunk out of the sheet.
Nik’s take: One honest limitation people forget: a PEI sheet conforms to whatever it’s stuck to. If your bed is warped, the flexible plate follows that warp; it won’t flatten it out the way a glass plate does. Fix bed flatness first, then enjoy the easy releases.

- WELL MADE PEI SHEET- Spring stainless steel, PEI powder sprayed on the surface, golden yellow on the back. Our PEI bed is flexible, removable, and pei…
- ALL NEW FUNCTIONALITY – The flexible surface of the ender 3 Pro PEI bed can easily be cut to any dimension making it perfect for all build sizes and…
- EASY MODEL REMOVAL-The PEI spring steel 235×235 is easy to adhere to the printing surface, easy to remove the prints and flex slightly to pop your…
- HIGH RESSISTANCE-Our Ender 3 PEI build plate is used in a 3D printing application, PEI is excellent because it can withstand the numerous heat cycles…
- WIDE APPLICATION – The PEI sheet 235×235 is perfect for ELEGOO Neptune 3 Pro/Neptune 4/Anycubic Kobra/Ender 3/ Ender 3 Pro/ Ender 3S/ Ender 3v2/ CR…
Automatic Bed Leveling (CR Touch / BLTouch)
An auto-leveling probe ends the ritual of paper-under-the-nozzle before every print. The sensor maps your bed and the firmware compensates for the high and low spots, so your first layer lands right across the whole surface.
Ask any group of owners for their best upgrade and a leveling sensor comes up every time. It pairs perfectly with a PEI plate: the probe handles the tramming math, the plate handles the release. Together they eliminate the two most common reasons a print fails in the first five minutes.
It’s a mid-difficulty install. You’ll mount a bracket, plug into your board, and flash a firmware update or edit a config line. If your printer already runs a 32-bit board, it’s straightforward.
Nik’s take: A probe earns its keep on a bed that isn’t perfectly flat. It maps the low spots so your nozzle tracks them, which is why a probe plus a fresh spring steel sheet is the combo that finally kills first-layer failures.

- Creality cr touch automatic leveling kit comes with 3 mounting brackets, making it compatible with various types of 3D printers, such as Ender…
- Download the CR Touch program from the Creative official website and copy it to the TF/SD card. Insert it directly into the card slot of the 3D…
- CR Touch is a Creality research institute self-developed 3D printer platform leveling solution based on hundreds of millions of user data used by the…
- CR Touch performs multi-point detaction on the printing platform and records the heigh of each detaction point. The system builds a virtual plane…
- Creality CR Touch auto leveling kit Compatible with PEI / sticker / glass / metal platform.
A Better Extruder: Direct Drive or All-Metal
Swapping the flimsy stock extruder for an all-metal, dual-gear unit is a cheap fix for a surprising number of problems. It grips filament harder, skips less, and handles flexibles that a plastic-armed extruder chews up.
On an Ender 3, a metal dual-gear extruder arm is one of the cheapest upgrades on this whole list, and it’s a quick swap with basic tools. A budget pick like the Redrex dual-gear arm gets the job done. Going a step further to a full direct-drive setup shortens the distance between motor and nozzle, which cuts retraction problems and makes TPU and other soft filaments far more reliable.
Quality improves too. In one comparison, a direct-drive extruder produced crisper lettering than a Bowden setup even before any pressure-advance tuning was applied. The old worry about the extra weight slowing you down mostly doesn’t apply on a bed-slinger, where print speed on that axis is limited by the moving bed anyway.
Nik’s take: Bowden still has its place on lightweight high-speed CoreXY toolheads, so don’t rip yours out on principle. But for a typical budget bed-slinger fighting stringing and soft-filament jams, this is a clear win.
No products found.
An Upgraded Hot End & a Hardened Nozzle
An all-metal hot end raises your temperature ceiling and, if it’s a high-flow design, lets you print faster without under-extruding. The stock PTFE-lined hot ends on budget printers soften and off-gas above roughly 240°C, which quietly caps what materials you can run.
Modern high-flow hot ends push far beyond that. One upgrade in that budget build used a ceramic-heated unit rated to 300°C drawing 115 watts, versus the stock 40-watt heater, enough thermal headroom to melt plastic as fast as a fast toolhead can move. Quick-swap designs add real convenience: when changing a nozzle is easy, you’ll actually switch to a 0.6mm for speed or back to 0.4mm for detail instead of avoiding it.
Pair it with a hardened steel nozzle if you print anything abrasive. Carbon-fiber, glow-in-the-dark, and wood-filled filaments grind a soft brass nozzle wider within a spool or two. Hardened steel lasts, and a multi-pack costs a few dollars.
Nik’s take: Read the safety note near the end before you install a high-wattage hot end. A 115-watt heater plus a heated bed can push a stock power supply to its limit. It’s a real upgrade, just one to do with your eyes open.

- The Hardened steel nozzles,each of which is molded by five axle CNC.Strict quality control enables it to possess Higher temperature,Higher Wear…
- If you 3D print with carbon fibre, filled PLA, or glow-in-the-dark filament,special filaments then this is the nozzle you need! Carbon filled…
- The Heatbreak material is upgraded from the original TC4 titanium alloy to GRADE5.High quality raw material.High precision production to provide…
- Heatsink and Heater Block Is high quality fine processing aluminum .It is not low quality or cheap aluminum.Coupled with high-precision CNC machining…
- Fits: CR-10 / CR-10S / CR-10-S4/CR-10-S5 / CR-10 MINI / Ender 3 /Ender 3 V2/ Ender 3 Pro/ Ender 3 Max /Ender-5/Ender 5 plus/CR-20 /CR-20 Pro/TronXY…

- [Parts Included] – Coming with 8 pieces of black different size MK8 nozzles, the size is 0.2mm/0.4mm/0.6mm/0.8mm/1.0mm, sufficient quantity and size…
- [Super Durable] – MK8 extruder nozzles are made by paramount hardened steel, with longer lasting time than the normal brass nozzle. The hardness is…
- [Super High Temperature Resistance] – The max temp of this hardened tool steel nozzle could reach at 450c, suitable for 3D printing at high…
- [High Precision More Than Your Imagination] – Keep stable temperature during printing, let the filament out evenly, create more perfect printer item…
- [Applicability & Compatibility] – Our hardened steel nozzles are compatible with almost all FDM printer, also fits for MK8 heating block. The hardened…
A Silent 32-Bit Mainboard
A modern 32-bit mainboard with integrated stepper drivers does three things at once: it silences your printer, improves reliability, and unlocks features like sensorless homing. If your machine still sounds like a swarm of angry bees, this is the fix.
The popular choice for Ender-class printers, the BTT SKR Mini E3 V3, ships with pre-soldered TMC2209 silent drivers and runs both Marlin and Klipper, so it doubles as your gateway to the firmware upgrade above. It’s the quiet-and-capable base a lot of upgrade paths are built on.
One honest warning: it’s the mod most likely to leave you with a non-printing machine for an evening. Firmware compatibility is the real risk. In that same test, the losing competitor never finished because he couldn’t get firmware working across three different boards. Read the flashing guide for your exact board before you start.
Nik’s take: This is an intermediate upgrade, not a beginner’s first move. If wiring and flashing firmware make you nervous, do the build plate, leveling, and extruder first and come back to this once you’re comfortable.

- Main Control Chip: BIGTREETECH SKR Mini E3 V3.0 32 bit control board adoptes the G0 series MCU-STM32G0B1RET6 or STM32G0B0RET6 ARM Coretex. integrated…
- Multiple Compatibile: BIGTREETECH SKR MINI E3 V3.0 control board integrated ultra silent TMC2209 uart stepper driver, designed for Ender 3, plug and…
- Heat Sink Design Upgrade: BIGTREETECH SKR MINI E3 V3.0 motherboard new upgraded to integrated large stepping motor driver aluminum heat sink…
- Multiple Functions: BTT SKR MINI E3 V3.0 silent board Supports BLTouch, MicroProbe, Eddy v1.0, RGB lights, filament detection, automatic shutdown…
- Fan Upgraded: There are 3 CNC fan interfaces in total on SKR MINI E3 V3.0 control board for you to connect more fans for better heat dissipation of…
An Enclosure (and Why Filtration Matters)
An enclosure traps heat and blocks drafts, which is exactly what ABS and ASA need to stop warping and cracking. It also contains the fumes those materials give off, a health point that gets glossed over far too often.
The heat side is simple: a stable, warm chamber keeps big prints from lifting at the corners. The air side matters more than people admit. Open-source carbon filters like the Nevermore recirculate chamber air to strip out VOCs while keeping that heat inside, so you get cleaner air without cooling the box down. If you print styrene-based plastics indoors, ventilation isn’t optional.
A soft fabric enclosure is the cheapest way in and installs in minutes. If you’re serious about ABS, ASA, or nylon, look at enclosed high-temperature printers built for the job from the start. Sometimes buying the right machine beats boxing in the wrong one.
Nik’s take: Do not improvise a heated chamber with a mains-powered heater. It’s genuinely dangerous, and I explain why in the safety note below.

- Creality 3d printer enclosure 100% official and original packaging of the products! compitable with 99% FDM 3d printers such as Ender 3 V3 KE…
- 3d printer cover Size:28.35×23.62×18.9inch (480*600*720mm). Creality 3d printer enclosure maintains a constant temperature printing environment…
- Creality 3d printer enclosure ensure absolute safety! Creality 3d printer enclosure is made of flame-retardant aluminum foil cloth, which is high…
- 3d printer cover is easy to install, detachable, folded for storage, and easy to use. Creality 3d printer enclosure support frame uses glass fiber…
- We are the official Creality 3D store! We provide professional after-sales support, and more than 20 engineers provide 24/7 customer service with…

The Cheap Wins: Cooling, Sensors, Tools & Free Printable Upgrades
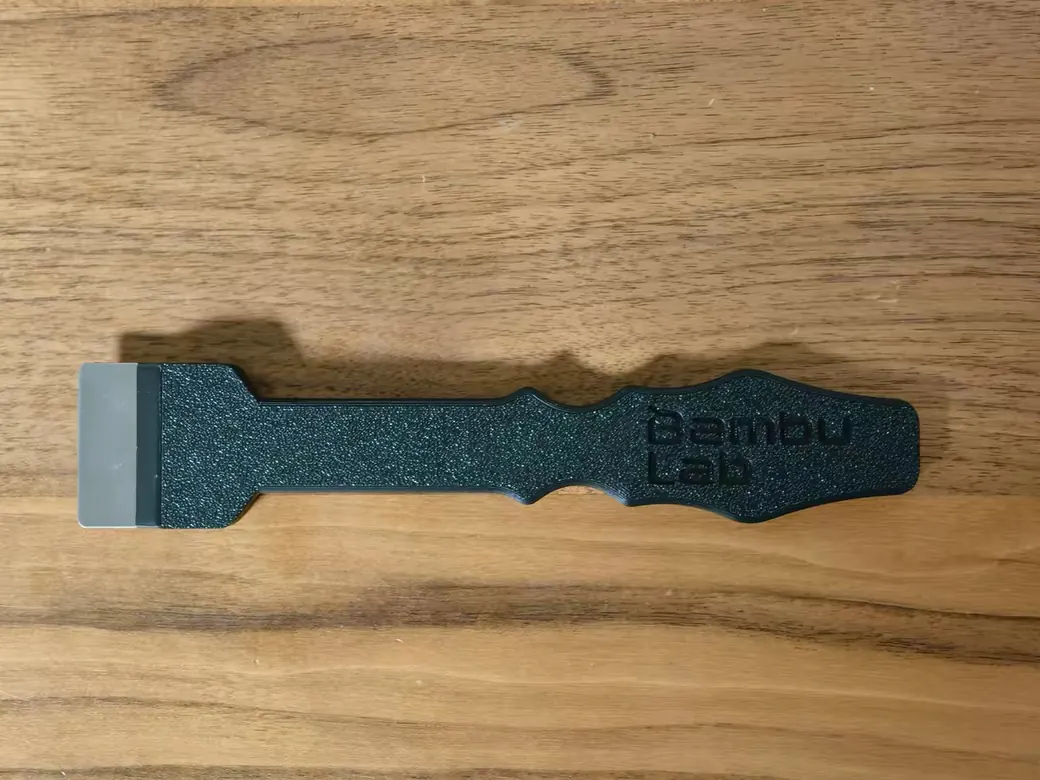
Some of the best upgrades barely cost anything. Before you buy a single expensive part, clear these off the list. The return per dollar is unbeatable.
- Better part cooling. A stronger fan and an efficient duct sharpen overhangs and fine detail, especially on PLA. It’s one of the cheapest quality bumps available.
- A filament runout or motion sensor. A runout sensor pauses when filament ends; a motion sensor goes further and catches jams and grinding mid-print. A sensor only tells you it happened. We go through why your extruder grinds filament and how to trace it back to the cause. For long overnight prints, it’s cheap insurance against a wasted spool.
- Silicone bed spacers. They replace mushy stock springs so your bed holds its level far longer. A perennial “why didn’t I do this sooner” upgrade.
- Good tools. A sharp scraper, a nozzle-cleaning kit, and a set of calipers save more failed prints than most hardware. See our essential 3D printing tools for the short list that actually earns bench space.
- Free printable upgrades. Your printer can improve itself. Filament guides, tool holders, cable clips, and fixes like a PTFE-tube bracket cost nothing but a bit of filament and solve real annoyances.
Nik’s take: If your budget is tight, spend it here first. These small wins fix more day-to-day frustration than a single flashy part ever will.

- GREAT VALUE: sharp quality tweezers and 10pcs of 0.40mm nozzle cleaning needles packed in one safe container!
- Anti-Static, Non-Magnetic CURVED PRECISION TWEEZERS; 3D printing tweezers great for nozzle maintenance and cleaning excess support material
- 10 pcs of 0.40mm diameter FLEXIBLE stainless steel needles; Ideal for gentle maintenance of your nozzles and hard to reach places like the feed gears
- HANDY, SAFE and STYLISH container; All of the items come in a neat plastic tube with a screw lid to keep them safely together
- Long-lasting kit for SEVERAL PURPOSES; Remove excess plastic and clear jams with high precision, also great for general maintenance of the heatsink…
Got a Bambu or Other Modern Printer? Upgrade Differently
If you own an enclosed modern machine like a Bambu, throw out the old Ender-era playbook. You don’t need a new extruder or motion system. Those are already good. Your best upgrades are software, convenience, and printed parts.
Start with your slicer. Switching from the stock app to Orca Slicer unlocks a full calibration menu, including pressure advance tuning, while still handling wireless control and your AMS. It’s a free upgrade that improves every print. From there, cheap printed fixes solve the common annoyances. A PTFE-tube bracket stops the “can’t pull filament” error, and printed disconnect tools make tube swaps painless.
Hardware upgrades exist too, but choose carefully. A third-party textured build plate can let the heated bed run about 25°C cooler for the same adhesion, which adds up on energy if you print constantly. A quick-swap hot end lowers the friction of changing nozzle sizes. Just skip the purely cosmetic parts, the decorative fan ducts that look great and change nothing.
Nik’s take: The mental shift is the whole point. On these machines, “upgrading” mostly means better software and smarter accessories, not tearing hardware apart. If you also run multi-color, the biggest quality gains usually come from drier, better filament, not more parts. Curious about a specific machine? We did the same worth-it-or-skip breakdown for the Kobra S1 Max.
3D Printer Upgrades That Usually Aren’t Worth the Money
Not every popular upgrade earns its cost, and a few can even make prints worse. Save this money and put it toward the five-star items above.
- A bigger Y-axis motor. On a bed-slinger, a larger Y motor isn’t needed even for a heavy bed, and cranking up acceleration to use it can degrade quality on thin parts. It doesn’t improve longevity either.
- PEI on a big, warped bed. Without a probe, a flexible sheet can end up less flat than glass on a large surface, hurting your first layer. Fix flatness or add auto-leveling first.
- Cosmetic fan shrouds. A pretty printed duct that doesn’t improve airflow is decoration, not an upgrade. Buy or print cooling parts for measured performance, not looks.
- Heavy mechanical mods on a plastic-wheel printer. If your machine rolls on plastic wheels instead of rails, expensive toolheads usually aren’t cost-effective. You’ll often spend more than a newer linear-rail printer costs, and that printer plus free Klipper will beat your modded one.
Don’t upgrade if your printer is old, worn, and would need three of these to keep up. At that point a new machine is the smarter buy.
A Quick Note on Safety
Before any high-power or electrical upgrade, do the math on your power supply. This is the part the mod lists skip, and it’s the one that starts fires.
Here’s a real example. In that $100 build, the heated bed drew 220 watts and the upgraded hot end another 115, about 335 watts total against a 350-watt supply. That’s almost no headroom. Stack power-hungry parts without checking your supply’s rating and you’re courting an overheating connector or worse.
Chamber heaters deserve their own warning. DIY mains-powered heaters pull serious current straight from the wall and carry a genuine risk of electrocution and fire. The Voron team bans the topic from its channels for exactly that reason. If you want a heated chamber, buy a printer built with one; don’t wire one yourself unless you truly know what you’re doing.
And when you flash new firmware, follow the guide for your specific board. Firmware mistakes brick machines, and a bricked board turns a fun evening into a frustrating one.
Frequently Asked Questions
Can 3D printers be upgraded? Yes. Most printers, especially budget and open-frame models, are designed to be modified. You can upgrade the extruder, hot end, build plate, mainboard, firmware, and more. Fully enclosed machines like Bambu printers are upgraded mainly through software and accessories rather than swapped hardware.
What is the best first upgrade for an Ender 3? Start with the free one: flash better firmware and, if your frame is solid, add Klipper with input shaping. For a physical part, a PEI spring steel build plate and an auto-leveling probe fix the most common first-layer failures for very little money.
Are 3D printer upgrades worth it? For most budget printers, yes. Targeted upgrades fix real weaknesses far cheaper than a new machine. The exception is a worn-out printer that would need several upgrades to keep up. In that case, replacing it is the better value.
What upgrades make a 3D printer faster? Firmware is the big one: Klipper with input shaping can multiply your usable speed on the same hardware. Back it up with a high-flow hot end so the printer can melt plastic fast enough to match, and strong part cooling to keep quality high at speed.
Should I upgrade my 3D printer or buy a new one? Modding pays off on a solid frame with one clear problem to solve. Lean toward a new machine when you’re chasing features that cost a lot to bolt on, like auto-calibration, multi-color, or a proper heated chamber, or when worn plastic wheels are holding back every other upgrade you’d make.