
Heads up — some of the links below are affiliate links. If you buy through them, I earn a small commission (at no extra cost to you), which helps cover the gear I test. Thanks!
- Ender 3 acceleration settings in Orca live in two places, and the Printer settings win. Type 3000 into the Speed page and Orca still clamps it to whatever Motion ability allows. On a stock Ender 3, Ender 3 Pro, S1, or V2, that ceiling is 500 mm/s². Raise the machine limit first, then the per-feature value, or nothing changes.
- On the three oldest models (original, Pro, S1), Orca ships all five acceleration fields set to 0, which tells the slicer to leave your firmware alone.
- The stock Ender 3 V2 profile ships travel acceleration at 700, above its own 500 travel ceiling. That mismatch is why you see warnings.
- On Marlin machines, every slice rewrites `M201`, `M204` and `M205` at the top of your G-code, so values you saved with `M500` do not survive. Klipper profiles skip that block entirely.
- Starting points by model: original / Pro / V2 / S1 around 500, V3 SE 2500, V3 KE and V3 leave it to Klipper.
You changed the acceleration number in OrcaSlicer, sliced again, and the print looks exactly the same. Or the printer refused the file outright. Either way you are now three forum threads deep, and every answer contradicts the last one.
Most of the advice you find is written for speed in mm/s. Acceleration has its own ceiling, and on an Ender 3 that ceiling is lower than almost anyone tells you.
Below are the real numbers Orca ships for each Ender 3, where the invisible limit lives, and what to change first so your edits reach the printer.
Table of Contents
- Acceleration Decides Your Print Time More Than Speed Does
- Orca Has Two Acceleration Layers, and the Top One Wins
- What OrcaSlicer Actually Ships for Each Ender 3
- What Each Acceleration Field in Orca Controls
- Run M503 Before You Type a Single Number
- Acceleration Settings That Work, by Ender 3 Model
- Jerk and Junction Deviation: The Other Half of Corner Quality
- If You Run Klipper (Sonic Pad, V3 KE, or a Pi)
- Tune Your Own Number in One Evening
- Mistakes That Cost People a Weekend
- FAQ
Acceleration Decides Your Print Time More Than Speed Does
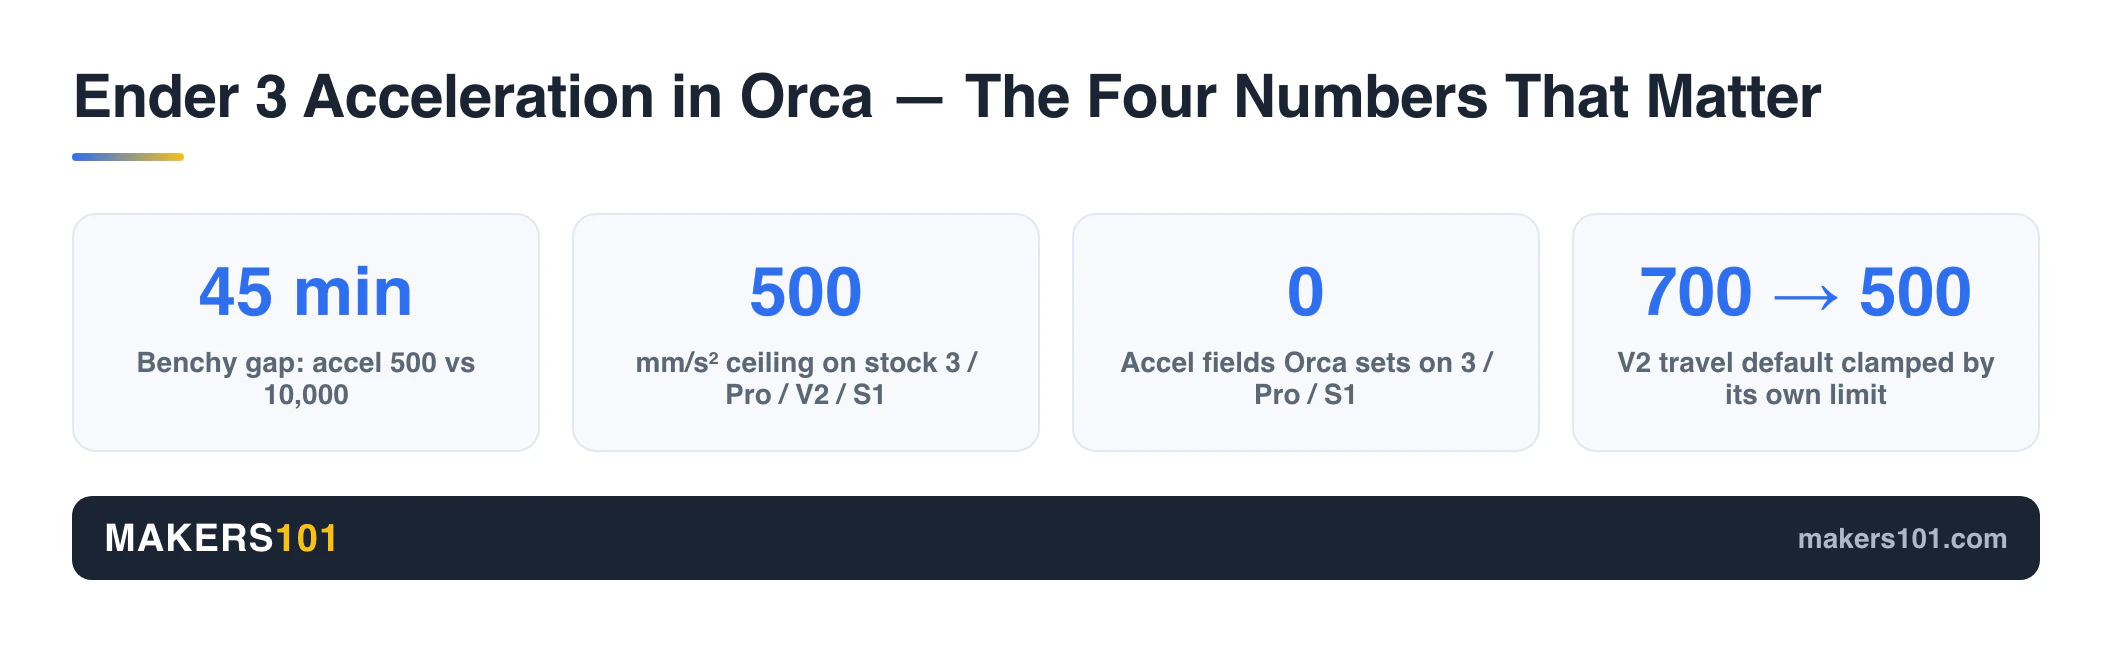
Two Benchys sliced at the same 200 mm/s feedrate, one at acceleration 500 and one at 10,000, finished 45 minutes apart in Teaching Tech’s comparison. Your acceleration value controls how hard the toolhead ramps up to the speed you set, and on small parts it decides almost everything.
The speed number was identical in both files.
A Benchy is mostly short moves, so the toolhead never gets there. It spends its life speeding up and slowing down, which makes the ramp rate the real clock. Think of city driving. The speed limit sign is not what makes you late, the stop lights are.
Your Ender 3 has two reasons its ramp rate stays low. The bed is the Y axis, so every Y move shoves a heated aluminum plate and your part back and forth. A CoreXY or delta moves a fraction of that mass. Marlin also runs its motion planning on the printer’s own mainboard, and that board’s processing power sets a hard ceiling on how much math it can do per second.
Both are physical limits. No slicer setting removes them, which is why copying acceleration numbers from a Bambu owner ends badly. If you are still deciding which slicer suits your machine, our best slicer for 3D printing guide covers that choice separately.
Orca Has Two Acceleration Layers, and the Top One Wins
Orca stores acceleration in two different places, and they do not negotiate. The Printer settings layer caps the Print settings layer, every time.
Where each layer lives
The per-feature values sit in Print settings → Speed → Acceleration. Switch the mode selector to Advanced or the whole section stays hidden, which is the first thing that catches new Orca users.
The ceiling sits somewhere else entirely: Printer settings → Motion ability. That page holds a maximum acceleration for every axis, plus separate ceilings for extruding, travel and retracting moves.
The clamp rule
Orca’s own documentation states it plainly: “Orca will limit the acceleration to not exceed the acceleration set in the Printer’s Motion Ability settings.”
So a 3000 in the outer wall box on a stock Ender 3 profile becomes 500 on the way out. The box still shows 3000. Your G-code does not.
The documentation adds a second rule that matters just as much. The slicer only overrides your firmware “when normal printing acceleration value is different than 0.” A zero means hands off, and your printer runs whatever its own firmware decided.
What Orca writes into your G-code
Open any sliced file from Orca and read the first twenty lines. Sliced with the stock Ender 3 profile, you get this:
“` M201 X500 Y500 Z100 E5000 M204 P500 R1000 T1500 M205 X8.00 Y8.00 Z0.40 E5.00 “`
Those come straight from Motion ability. `M201` sets the per-axis maximum. `M204` sets three figures at once: printing, retraction, travel. `M205` sets the jerk limits, or `M205 J` when junction deviation is active.
Two conditions control whether that block appears at all. Your G-code flavor has to be a Marlin or RepRap variant, and Emit limits to G-code in Machine limits has to be on, which it is by default. Set the flavor to Klipper and Orca skips the whole block, which is why V3 and KE owners never see it.
That block explains a frustration that shows up constantly in the Ender 3 subreddits. You tuned acceleration over serial, saved it with `M500`, and it worked beautifully. The next sliced print ignored all of it. The saved values are still in EEPROM, and the top of every sliced file overwrites them before layer one.
Why you see “exceeds the printer’s maximum acceleration”
That warning means your per-feature value is above the Motion ability ceiling for that move type. Orca is telling you the clamp is about to happen.
For some setups it gets worse than a warning. An Ender 3 S1 owner on Reddit tried to push acceleration past 500 through Orca while running a Sonic Pad. The pad rejected every value above 500 and killed the print before the first layer went down.
What OrcaSlicer Actually Ships for Each Ender 3
Orca’s factory numbers differ enormously between Ender 3 generations, and they are not documented anywhere in the app. Everything below comes from the profile files in Orca’s own repository, so you can check any cell yourself.
Two of these columns come from Printer settings and two come from Print settings, which is the split the whole article is about.
| Ender 3 model | Machine max X/Y | Machine travel ceiling | Factory print accel | Factory travel |
|---|---|---|---|---|
| Ender-3 / Pro | 500 / 500 | 1500 | 0 (firmware decides) | 0 |
| Ender-3 S1 | 500 / 500 | 1500 | 0 (firmware decides) | 0 |
| Ender-3 V2 | 500 / 500 | 500 | 500 | 700 |
| Ender-3 V3 SE | 2500 / 2500 | 2500 | 2500 | 2500 |
| Ender-3 V3 KE | 8000 / 8000 | 8000 | 5000 | 5000 |
| Ender-3 V3 | 20000 / 5000 | 20000 | 12000 | 12000 |
Three rows deserve a closer look.
Three models ship with nothing set at all. On the original, the Pro, and the S1, all five acceleration fields sit at zero. Your edits do nothing until you replace those zeros, because zero keeps the slicer silent and hands the job to your firmware. Nothing is broken. That’s the profile working as designed. Outer wall is the one exception: no Ender 3 profile sets it, so it falls through to Orca’s own default of 500.
The V2 is the odd one, and the reason is a missing line. Every other old Ender 3 profile overrides the travel ceiling up to 1500. The V2 profile never does, so it falls back to the 500 in Orca’s shared Creality base while its print profile still asks for 700.
The shipped default sits 200 above the shipped limit. That mismatch is what V2 owners are looking at when they ask about the “solid 700” in their travel box, and it is what produced the OrcaSlicer bug report filed against Ender 3 V2 travel acceleration. That report was closed back in February 2025. The mismatch is still in the profile Orca ships today.
The V3 shows why bed slingers cap out early. Its X limit is 20,000 and its Y limit is 5,000, a quarter of that. X moves the toolhead. Y moves the bed.
Check any number yourself
- Machine limits: `resources/profiles/Creality/machine/` in the OrcaSlicer repository. The V2 file defines only junction deviation and inherits the rest from `fdm_creality_common`.
- Factory print values: `resources/profiles/Creality/process/`, files named `0.20mm Standard @Creality Ender3V2.json` and similar.
- The shared base every Creality profile inherits sets 500 for printing and 700 for travel, which is exactly what the V2 keeps.
What Each Acceleration Field in Orca Controls
Orca splits acceleration by feature so you can slow down the parts you see and leave the rest fast. Each box below sits under Print settings → Speed in Advanced mode.
| Field | What it controls |
|---|---|
| Normal printing | The fallback. Anything you leave blank runs at this value |
| Outer wall | The surface you look at. Lower this first when quality slips |
| Inner wall, Internal solid infill | Hidden geometry, so it can run higher |
| Sparse infill | Hidden too, and usually where your print time goes |
| Top surface | The finish on flat upper faces |
| Bridge | Unsupported spans |
| Initial layer, Initial layer travel | Adhesion at the start |
| Travel | Non-printing moves, where ghosting on the next perimeter often begins |
Four boxes accept percentages, and the parent they measure against is not the same for all of them. Bridge reads off outer wall. Both infill types read off Normal printing. Initial layer travel reads off Travel. When a profile leaves them unset, Orca falls back to 500 for Normal printing and 500 for outer wall.
Accelerate to decelerate is the setting people ask about most, and it only does something on Klipper. Orca’s own tooltip says so outright: the value adjusts Klipper’s `max_accel_to_decel`, which caps the ramp on moves too short to reach full speed anyway. Orca enables it by default at 50%. On a Marlin-flavor Ender 3 it changes nothing. Curiously, Orca’s factory profile for the V3 KE switches it off, while Creality’s forum staff recommend 50% for that same machine.
Run M503 Before You Type a Single Number
Send `M503` to your printer before touching anything in Orca. It prints your firmware’s current motion values. Those are the only numbers that describe your actual machine.
You can send it from Orca’s device console, from Pronterface, or from the terminal in OctoPrint or Fluidd. Look for the three lines that matter:
- `M201` gives per-axis maximum acceleration
- `M204` gives your printing acceleration, with separate figures for retraction and travel
- `M205` gives jerk, or junction deviation as `J` on newer builds
For reference, Marlin’s officially maintained example configurations for these machines set printing acceleration to 500 across the board, with per-axis maximums of 500 everywhere except the S1, which gets 1000.
Those files describe what Marlin publishes for each board. Creality flashes its own binaries at the factory, and the gap can be large. One Ender 3 owner checked his machine, found maximum acceleration sitting at 5000 on both axes, and asked the subreddit whether that was still normal. Nobody gave him a firm answer, which is the point. Your factory value is whatever Creality flashed, and 5000 is far above what an Ender 3 frame uses cleanly.
So read your own output, and remember `M500` won’t protect it on a Marlin profile.
Acceleration Settings That Work, by Ender 3 Model
Set the Motion ability ceiling first, then the per-feature values underneath it. Reversing that order is the single most common reason nothing changes.
The ceiling lives in Printer settings → Machine limits → Motion ability, and four boxes there matter. Maximum acceleration X and Y set the hard cap. Maximum acceleration for extruding governs printing moves, and Maximum acceleration for travel governs the rest. Raise the X and Y caps together with extruding, or your printing moves stay clamped no matter what the axis limits say.
Stock Ender 3, Ender 3 Pro, and V2
Start at 500 for Normal printing and keep outer wall at or below it. These frames are the ones a Klipper forum regular had in mind when he wrote that it is “unlikely that a standard i3 can meaningfully handle much above 3k in terms of acceleration.”
If you want more, raise Motion ability to around 1000 first and move in steps. Watch the corners before you watch the clock. One widely shared baseline pairs acceleration near 700 with jerk at 7, though the source never states which firmware or model it came from.
For the V2 specifically, that stock 700 travel value is worth correcting. Either lower it to 500 to match the machine limit, or raise the travel ceiling in Motion ability so the number you see is the number you get.
Ender 3 S1
The S1 is a two-layer mismatch of a different kind. Orca caps it at 500, while Marlin’s example configuration for the S1 board allows 1000 per axis. Confirm your own ceiling with `M503`, then raise Orca’s Motion ability to match it before you touch the Speed page.
Ender 3 V3 Family (SE, V3, KE)
This generation starts far higher, though not uniformly. Orca’s V3 SE profile is set to Marlin flavor, while the V3 and the KE are set to Klipper.
The SE ships with sensible per-feature staging already in place: 2500 for Normal printing, top surface and travel, 2000 for inner walls, and 1000 for outer walls. Orca has already dropped your visible surface to 40% of the default. Leave that outer wall value alone unless you have a specific reason, and note the first layer sits at 500.
For the KE, Creality’s own forum staff recommend 500 mm/s printing at 8000 mm/s², with the first layer at 200 mm/s and 800 mm/s². They also flag a flow ceiling: above roughly 300 mm/s, Hyper-PLA needs a limit near 32 mm³/s, so acceleration stops being the constraint and the hot end takes over.
Independent testing on the V3 landed lower than Orca’s factory numbers. The 3D Printer Bee’s profile build used 5000 for general moves, 2500 for walls, and 1500 for special surfaces, with the first layer dropped to 10-20 mm/s for adhesion. That channel also noted the V3 runs Klipper internally while recommending you keep the G-code flavor set to Marlin in your slicer. Orca’s own V3 profile disagrees and ships as Klipper. Test both if you are building a profile from scratch.

Want a starting point for the rest of your profile at the same time? The Print Settings Finder covers the rest of a profile: temperature, speed, retraction.
Jerk and Junction Deviation: The Other Half of Corner Quality
Acceleration controls the ramp. Jerk controls how fast the toolhead may change direction without ramping at all, which is the minimum speed it carries through a corner.
Marlin uses one of two models, and only one can be active. Classic jerk gives you `M205 X Y Z E` values. Junction deviation replaces those with a single `J` figure in millimeters. Marlin’s example configurations put the original Ender 3 on junction deviation at 0.08 with classic jerk switched off, while the Pro, V2, and S1 ship with classic jerk enabled and junction deviation values of 0.08 and 0.013 sitting unused in the file.
Check which one your firmware reports before you edit either.
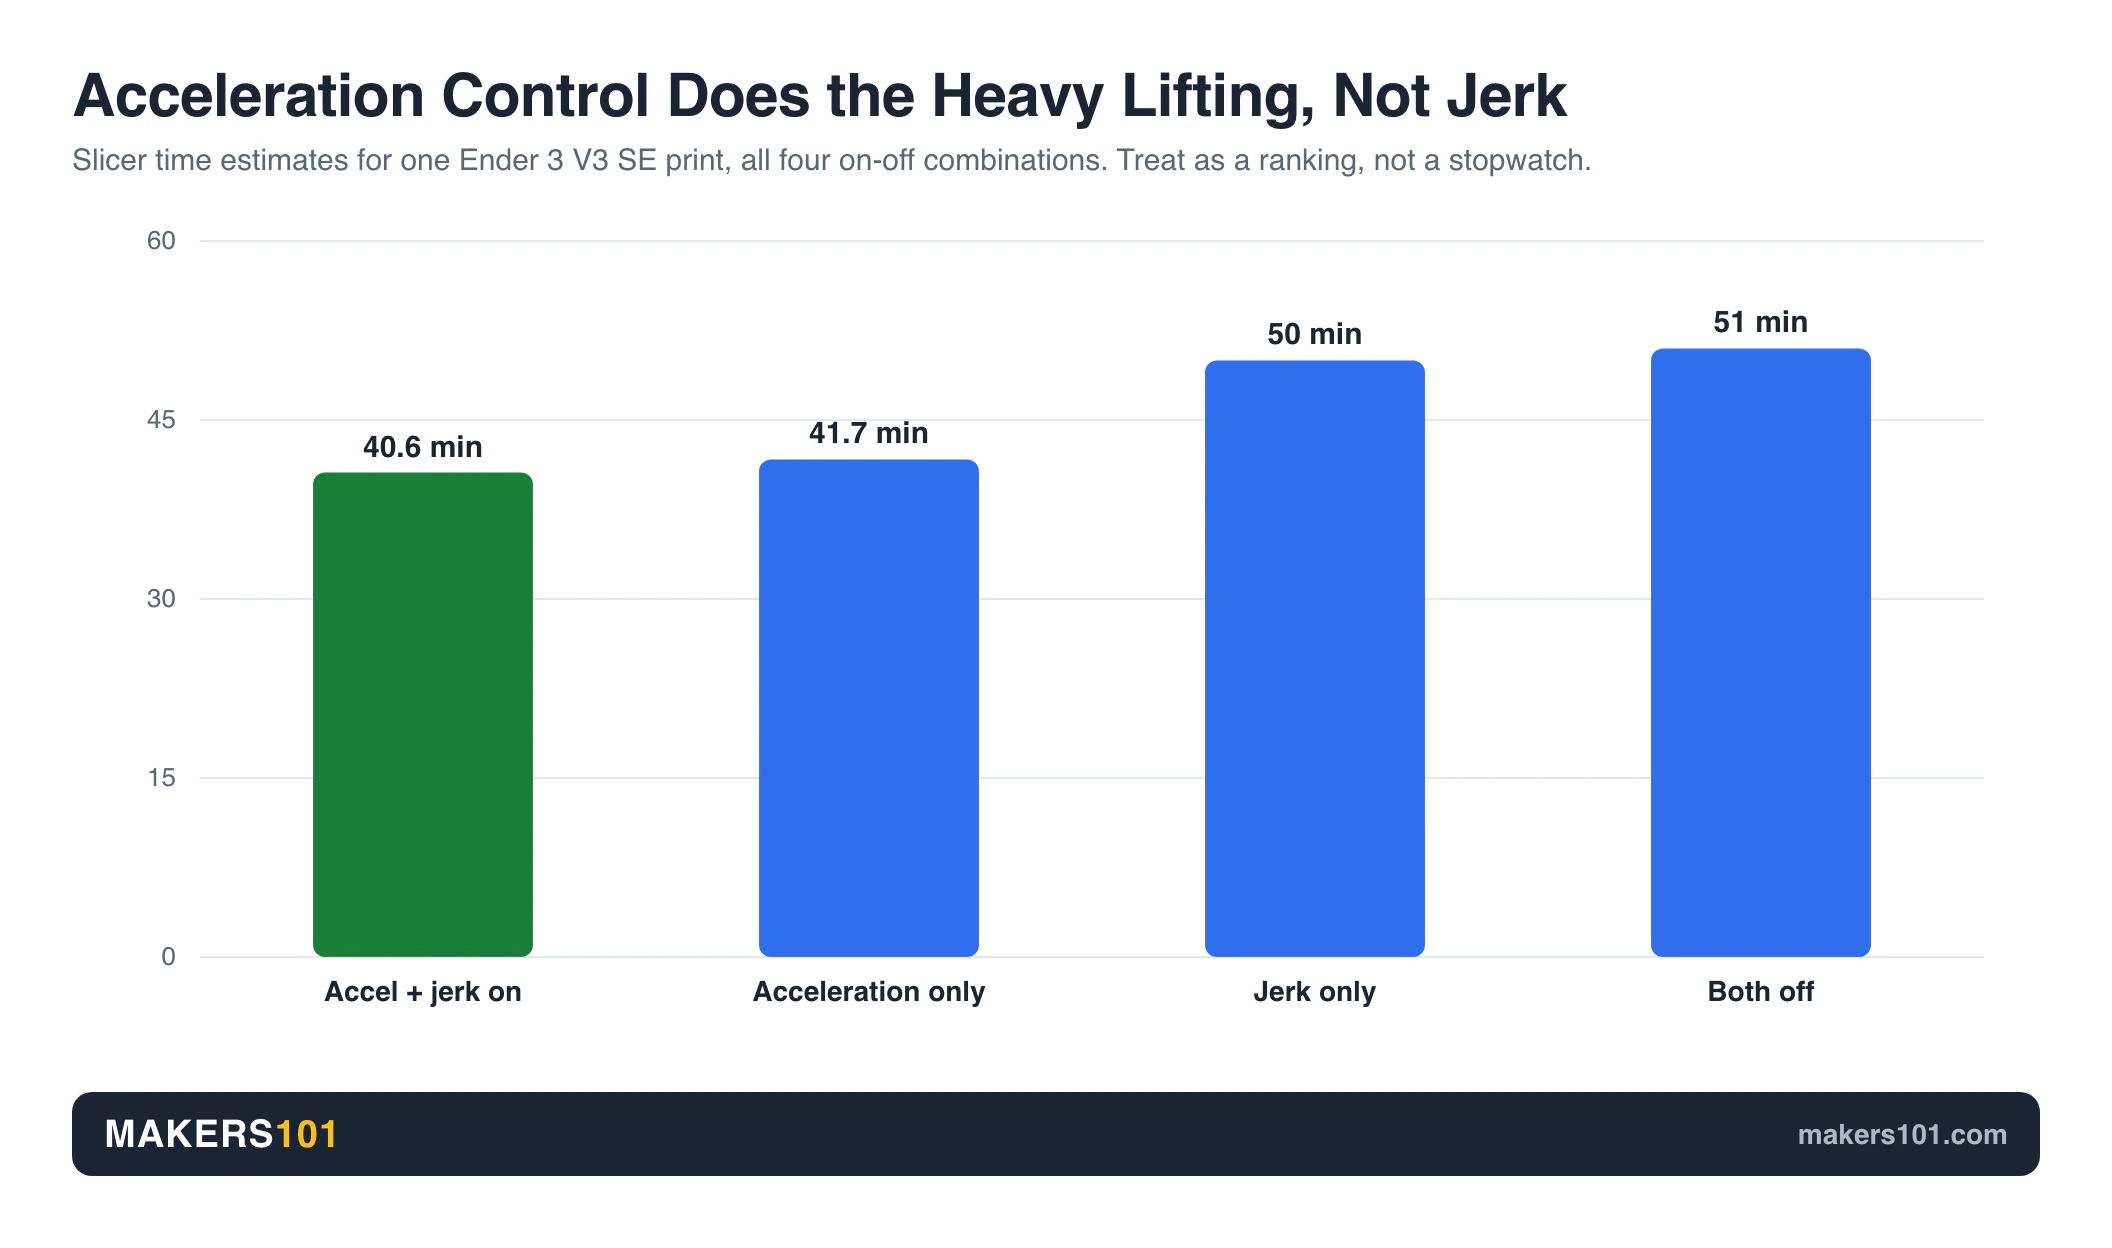
The practical question owners actually ask is whether to enable jerk control at all. One Ender 3 V3 SE owner compared all four on-off combinations and posted the slicer’s time estimates: 40m37s with both enabled, 41m42s with acceleration only, 49m58s with jerk only, and 51m02s with both off. Those numbers are slicer estimates, so treat them as a ranking. The ranking is clear enough. Acceleration control is doing the heavy lifting, and turning it off costs you about ten minutes on a forty-minute print.
If You Run Klipper (Sonic Pad, V3 KE, or a Pi)
With Klipper, your `printer.cfg` holds the real ceiling and Orca’s Motion ability values only matter as far as that config allows. Set your limits in Klipper, keep Orca’s machine limits at or below them, and use the Speed page for per-feature tuning.
`SET_VELOCITY_LIMIT` overrides acceleration and velocity at runtime, so you can test a value without reslicing. That editing loop is the real advantage here.
Two expectations need resetting before you buy a Pi.
Installing Klipper does not make prints faster on its own. One Ender 3 V2 owner who documented his own upgrade called that belief a common misconception: the gains arrive only after you run input shaping, and automatic calibration needs an accelerometer you buy separately.
The gains are also smaller than the marketing. One channel ran four cheap bed slingers on a common baseline profile and measured 30% to 50% shorter print times, up to roughly double at best. The 5-6x figure vendors advertise refers to acceleration, and acceleration is only part of the clock. Our Klipper vs Marlin comparison covers the rest of that decision.
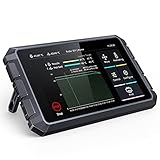
- 【Speed Up Printing While Keep the Quality】Creality sonic pad uses precision-oriented algorithms to command the motors for higher printing speed…
- 【Highly Integrated with Strong Computing Power】Beneath the large 7-inch touch control screen, the Klipper firmware runs in full swing on a…
- 【Wide Compatibility】Sonic pad based on klipper firmware can connect to almost any ender 3D printer on the market via a USB cable. By updating the…
- 【Intuitive Model Preview】Creality 3d printer smart pad supports G-code model preview when slicing with the Creality Print, Ultimaker Cura, Pursa…
- 【Rich Expansion Interface】For this fdm ender 3d printers touchscreen, USB port x4, RJ45 port x1 and WiFi module x1 are included. Connect USB…
Tune Your Own Number in One Evening
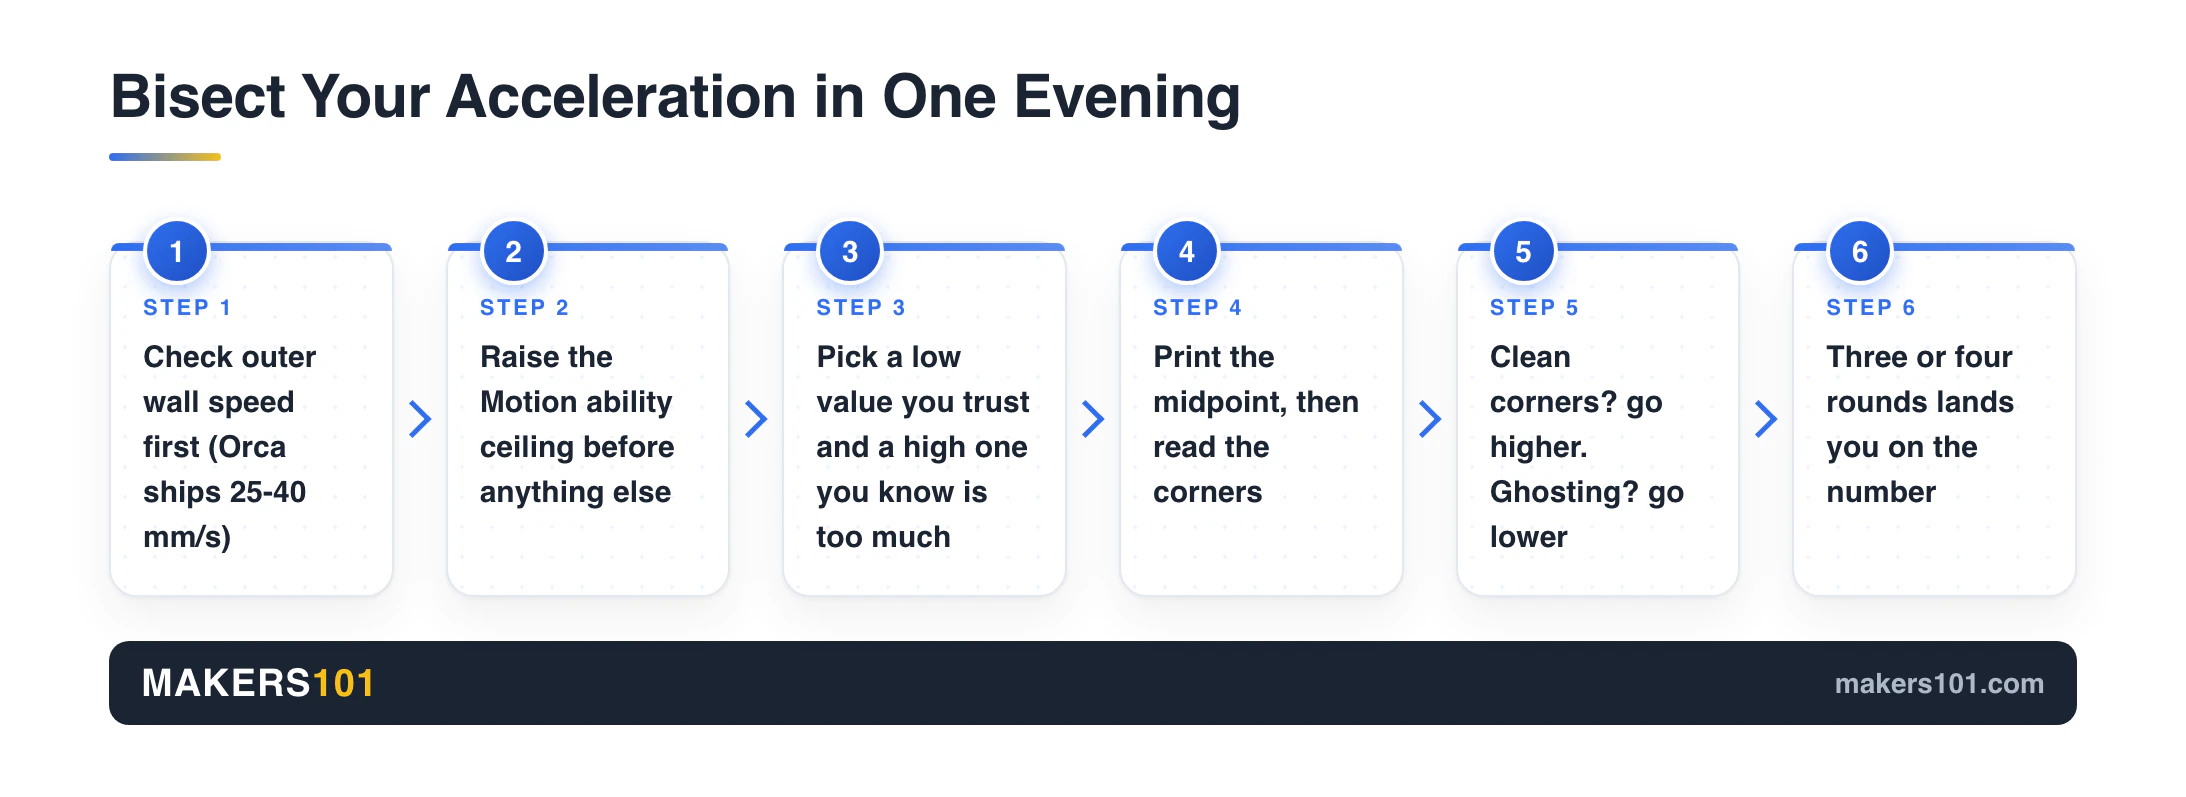
Pick a low value you know is safe and a high value you know is too much. Print the midpoint. If corners look clean, move up to the midpoint of the upper half. If you see ghosting, move down. Three or four rounds gets you close, and it beats nudging by 100 at a time.
One symptom deserves its own note, because it sends people back to Cura. Corners and overhangs that looked fine in another slicer and fall apart in Orca are usually a speed problem wearing an acceleration costume. Orca’s factory Ender 3 profiles run the outer wall at 25 to 40 mm/s, and if your old profile printed slower there, matching that speed matters more than any acceleration value. Check outer wall speed and overhang speed before you touch the acceleration boxes. Going back to Cura is not the only option either. Here is how the other free slicers compare.
Print something with sharp corners and a tall flat wall. Ghosting shows up as a faint echo of each corner repeated across the surface after it. When you see it, lower speed and acceleration together, since dropping only one often leaves the ringing in place.
Orca’s print time breakdown tells you where to aim. It splits the estimate by move type, so you can see which category owns your clock and raise that one alone.
Two sanity checks. Your first layer belongs at 10-20 mm/s whatever the rest of the profile does, and a calibration cube reads dimensional accuracy, so it’ll pass a print that’s still ringing.
Mistakes That Cost People a Weekend
Five errors account for most of the acceleration threads on the Ender 3 subreddits, and four of them waste a full weekend before anyone notices.
Copying numbers from a CoreXY owner. A Bambu or Voron moves a fraction of the mass your Y axis does. The number that works there will ring on your frame.
Editing per-feature values while Motion ability stays untouched. The clamp applies silently. Check the ceiling first.
Chasing acceleration when the hot end is already maxed. Volumetric flow is a hard wall. One measured example topped out near 20 mm³/s, roughly 70 mm/s with a 0.6 mm nozzle at 0.4 mm layers. Past that, the extruder cannot keep up.
Blaming acceleration for Z wobble. Wavy vertical banding at a regular pitch is usually a bent lead screw or a loose eccentric nut. No acceleration value fixes hardware.
Forgetting cooling when the speed goes up. Faster moves give the part fan less time per layer, and overhangs are the first thing to suffer.
FAQ
What should normal printing acceleration be?
On a stock Ender 3, Pro, V2 or S1, start at 500. The V3 SE runs comfortably at 2500, and the Klipper-based V3 and V3 KE start at 5000 and above. Your ceiling in Printer settings has to be at least as high as the value you enter.
What is the best acceleration speed for 3D printing?
There is no single number, because your machine’s moving mass and firmware set the limit. Bed slingers like the Ender 3 generally work best between 500 and 3000 mm/s². CoreXY machines with input shaping run several times higher.
What is Accel to Decel Orca slicer?
It limits how hard a short move may accelerate when the printer already knows it must brake again, which reduces vibration on dense geometry. Orca’s tooltip ties the setting directly to Klipper’s `max_accel_to_decel`, so it does nothing on a Marlin-flavor Ender 3. The default is on at 50%, except on the V3 KE where it arrives disabled.
What travel acceleration should I use on an Ender 3 V2?
Use 500 to match the V2’s machine ceiling, or raise that ceiling if you want the 700 Orca ships. Left mismatched, the clamp means you were only ever getting 500.
Why does OrcaSlicer say my acceleration exceeds the printer’s maximum?
Your per-feature value is higher than the matching limit in Motion ability, so Orca clamps it and warns you. On some setups, notably a Sonic Pad, the printer rejects the file outright.
Should I set acceleration in Orca or leave it to Klipper?
Set your true limits in `printer.cfg` and keep Orca’s Motion ability at or below them. Use the per-feature boxes for tuning, and `SET_VELOCITY_LIMIT` for quick experiments without reslicing.
Is a 5000 mm/s² max acceleration normal on an Ender 3?
It gets reported often enough that it is clearly not a fault, and it is far higher than the frame can use well. For comparison, Marlin’s published example configurations set 500 per axis for every model except the S1, which gets 1000. Run `M503`, see what yours reports, and treat that number as a ceiling to tune down from.
What should flow be on Ender 3?
Once acceleration is sorted, volumetric flow becomes what caps your top speed. Around 20 mm³/s is typical for a stock hot end, and Creality flags roughly 32 mm³/s for Hyper-PLA on the V3 KE above 300 mm/s. Run Orca’s flow rate calibration to find your own number.
How to make a 3D print stronger in Orca slicer?
Strength comes from three things: wall count, infill density, nozzle temperature. Acceleration barely touches it. What acceleration changes is surface finish and print time, so tune it for looks and speed.
How to make Ender 3 more precise?
Lower outer wall speed and outer wall acceleration first. Then level the bed and check for slop in the eccentric nuts and belts. Problems that survive both steps are usually mechanical.