
Last updated August 26, 2026. Every version number and release date below was read from each project’s own public repository on that date.
Search for a Cura free alternative and every list hands you the same ten names, with Cura sitting at number one. That is not an answer to the question you asked. You already have Cura. You are here because something in it wore you down: a slice that crawls, a setting you cannot find, a pause you had to script by hand.
Which slicer you should move to depends entirely on which of those it was. So this guide sorts by the reason you’re leaving. If you want the wider ranking that includes paid tools, that is what our best slicer for 3D printing guide covers.
What follows is only for people already running Cura who want out. It also names two free slicers that still appear on recommendation lists years after their last stable release, which you can verify yourself in about ninety seconds.
Table of Contents
- Cura Is Still Free, and It Is Still Being Updated
- Why People Actually Leave Cura
- OrcaSlicer: The Cura Free Alternative Most People Should Try First
- PrusaSlicer: Best If You Want the Interface to Explain Itself
- Bambu Studio: Best If You Own a Bambu Lab Printer
- ideaMaker: A Closed-Source Name Still Worth Knowing
- Creality Print, Elegoo Slicer, and the Rest of the Brand Slicers
- Kiri:Moto and Browser Slicers: For When You Cannot Install Anything
- Free Slicers Still on Every List That You Should Skip
- What Switching Actually Costs You
- When You Should Stay With Cura
- Frequently Asked Questions
Cura Is Still Free, and It Is Still Being Updated
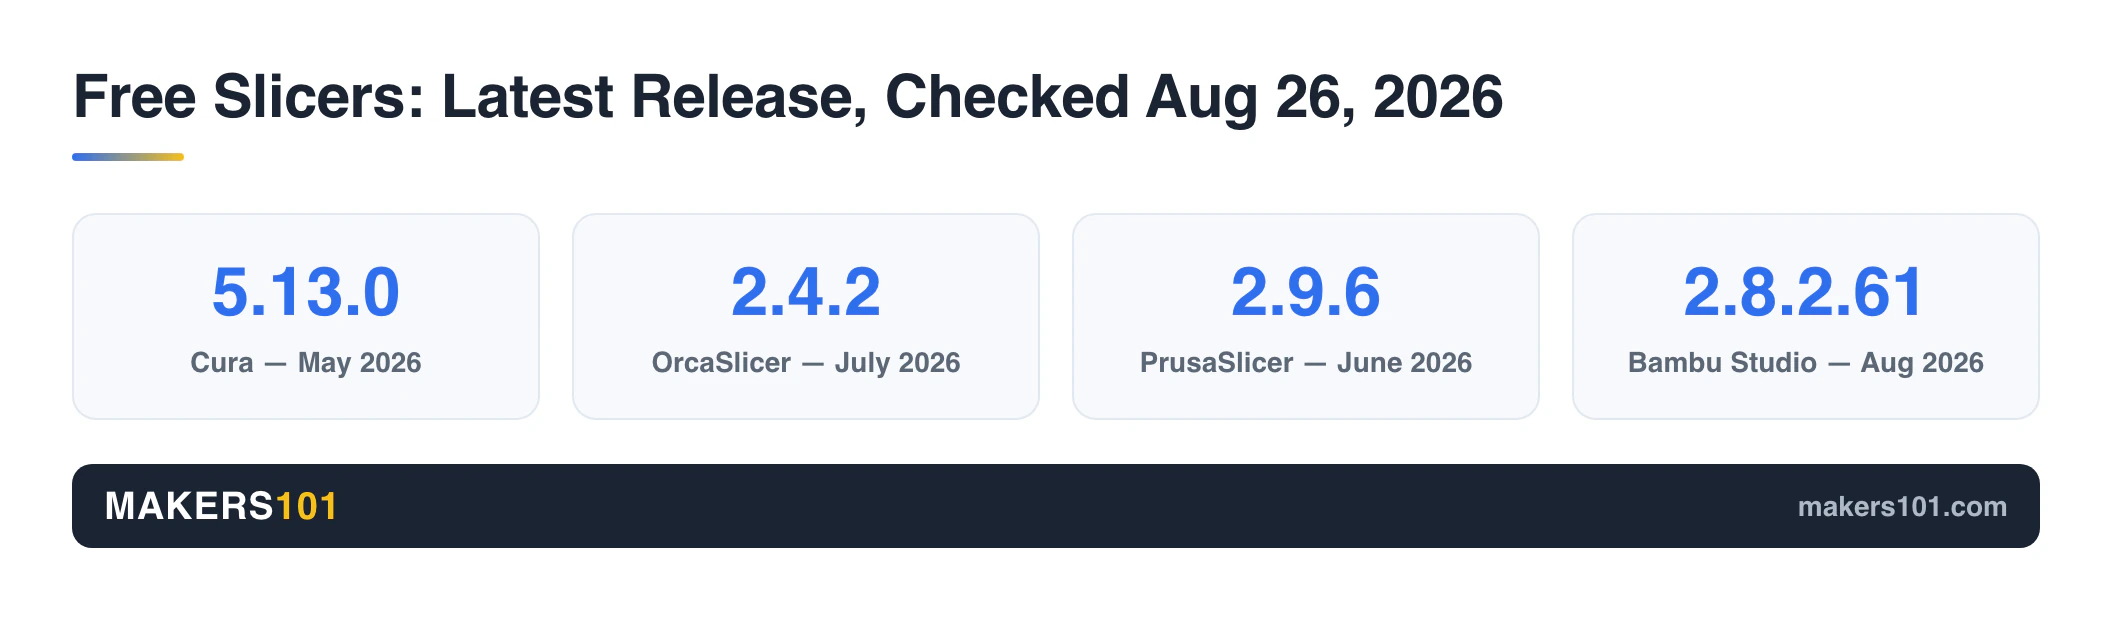
Yes, Cura is free. UltiMaker ships it open source with no paid tier, no seat limit, and no watermark on your G-code. Version 5.13.0 landed on May 28, 2026, and the project’s public repository was still receiving commits on August 25, 2026. Nothing about the software is winding down.
That matters, because the loudest reason people give for leaving is a rumour. Cura is not being paywalled and the project is not abandoned.
What Cura is, by UltiMaker’s own count, is a program with more than 400 adjustable settings. That single number explains both halves of the experience. It’s why Cura can do almost anything you ask. It’s also why finding the one thing you need can eat twenty minutes. One thing you’ll never find in there: a way to change layer height at a given Z.
Why People Actually Leave Cura
OrcaSlicer is the answer in more rows of this table than anything else, which is why it gets the longest section in this guide. Find your reason in the left column.
| Why you’re leaving Cura | Switch to | What you actually gain |
|---|---|---|
| Slicing crawls on your computer | OrcaSlicer | Usable speed on modest hardware, plus a print-time breakdown by feature |
| Settings come with no explanation | PrusaSlicer | Plain-text descriptions inside the settings panel, no plugin needed |
| You own a Bambu Lab printer | Bambu Studio | Tuning built for your exact machine, and it flags trouble mid-print |
| You run several brands of printer | OrcaSlicer | One profile system covering most machines on the market |
| Your printer runs Klipper | OrcaSlicer | Mainsail and Fluidd open inside the slicer window |
| You cannot install software | Kiri:Moto | A full slice in a browser tab, on hardware Cura will not run on |
| You want a profile library and a Simplify3D-style interface | ideaMaker | A community profile library, and a layout former Simplify3D users already know |
| You want something that feels like Cura | Keep Cura, add a second slicer | Nothing else copies Cura’s layout, so run both |
Not sure which row is yours? The Print Settings Finder will get you to a working baseline on your current slicer first, which is worth ruling out before you migrate anything.
What You Actually Gain, Feature by Feature
| Feature | Cura | OrcaSlicer | PrusaSlicer |
|---|---|---|---|
| Built-in calibration wizards (flow, pressure advance) | No | Yes | No |
| Tree or organic supports | Yes | Yes | Yes |
| Fuzzy skin painted on chosen areas | No | Whole object only | Yes |
| Colour change or pause at a layer | Post-processing script | Layer-bar control | Plus button on the layer bar |
One row deserves attention. Cura does tree supports perfectly well, so cross “better supports” off your list of reasons to migrate.
The Specific Things That Push People Out
The 450 °C ceiling. A high-temperature print shop reported back in 2022 that Cura would not slice above 450 °C without hand-editing a core JSON file. Almost nothing you print will reach that, so it bites only at the far end of engineering polymers. Check it against your own Cura version before you switch on that basis.
The 2.85 mm default. Add a custom printer in Cura and check filament diameter before you touch anything else. The field has defaulted to 2.85 mm, which is the UltiMaker standard and wrong for nearly every consumer machine on the market. Almost all of them take 1.75 mm.
Pausing at a layer. In Bambu Studio you right-click the layer bar and insert a pause. In PrusaSlicer you click the plus button on the layer bar, which drops in an M600. In Cura you go to Extensions, then Post Processing, then add a script, and the slicer never shows you where the pause landed. That script also counts layers from zero, so entering 70 stops the printer after layer 69. That off-by-one has ruined a lot of colour changes.
Cutting a model in half. One Cura user of a year switched over a single job: a long, thin part that needed splitting to fit the bed. Cura’s plugin kept standing the part upright to cut it. He installed Orca, found the cut tool, and wrote “What… Why is this so easy.”
Old or non-Windows hardware. A maker with a decade of slicer history left Cura for one reason, and it was not features. Cura would not perform on his M1 Mac.
OrcaSlicer: The Cura Free Alternative Most People Should Try First
OrcaSlicer is the default answer for anyone leaving Cura without a Bambu-specific reason to stay put. It’s free and open source, it carries profiles for most machines on the market, and it ships the calibration tooling Cura has never included. Current release is v2.4.2, from July 2026, and the project is actively maintained.
Where It Came From, and Why That Matters on Day One
The lineage runs Slic3r to PrusaSlicer to Bambu Studio to Orca, each one forked from the last, with open-source licensing forcing the code back into the open. Orca is maintained by SoftFever, a community developer working outside any hardware company.
The practical consequence is a vocabulary change. Orca inherited Prusa’s settings language, so what you knew as Wall Line Count is now Perimeters. Expect an afternoon of hunting for familiar settings under unfamiliar names. That is the real migration cost, and it’s smaller than it sounds.
What Cura Simply Does Not Have
Calibration lives in the tools menu: flow rate, pressure advance, retraction, run as guided tests that write results straight into your profile. Cura has no equivalent built in.
Orca also exposes settings other slicers bury. One builder making 150-gram combat robots switched specifically because he needed to turn off “ensure vertical shell thickness,” which Bambu Studio doesn’t let you disable and Orca lets you set to none. At that weight class, the material that setting adds is the difference between making the class and not.
The same openness runs downstream. Controls that Bambu Studio keeps sealed are editable in Orca, which is built from that same code.
For anyone running Klipper, Orca embeds a browser panel, so OctoPrint, Mainsail, and Fluidd open inside the slicer. One window slices and runs the machine. Orca also breaks its time estimate down by feature, which is how you find out which setting is actually costing you the hours.
One Creality K1 owner ran the same machine on Creality Print and then on Orca, and reported less ringing and fewer surface artefacts from Orca before running a single calibration test. Running Orca’s flow and pressure advance calibrations improved it again. Both runs used each slicer’s own defaults and were judged by eye, so read it as a default-profile comparison.
Orca’s repository carries 15,490 stars against Cura’s 7,020. Read that as a measure of developer attention. Cura is distributed mainly through UltiMaker’s own website, so GitHub undercounts its install base badly.
What You Give Up
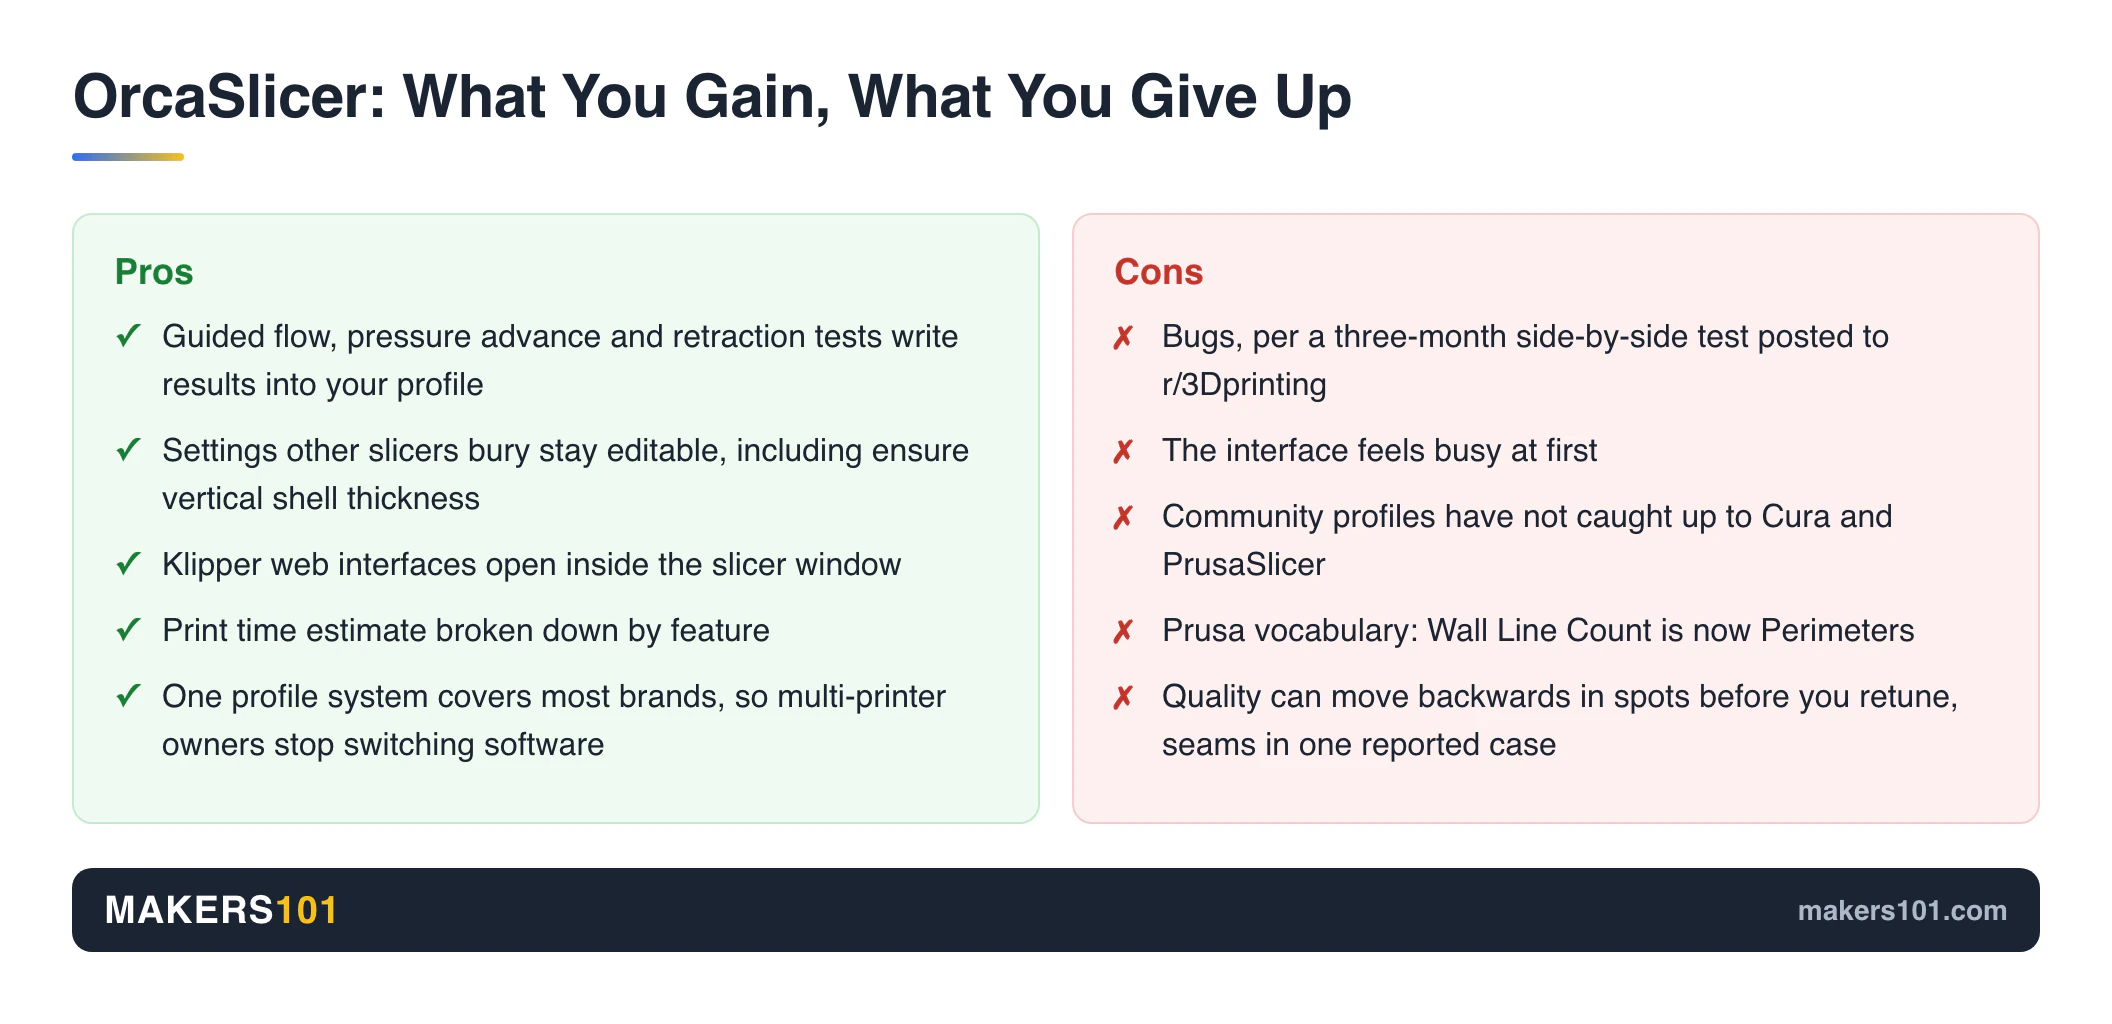
A three-month side-by-side test posted to r/3Dprinting was blunt about the trade: Orca has bugs, the interface feels busy at first, and community profiles have not caught up to what exists for Cura and PrusaSlicer.
Print quality can also move backwards in specific ways. An Ender 3 owner who moved from ideaMaker to Orca got better first-layer corners and cleaner extrusion, then found his seams were worse than before. He believed settings could recover it. He had not proven that yet.
He also clocked the same part at 2 hours 32 minutes in ideaMaker and 2 hours 14 minutes in Orca. Those two runs were never set up as a controlled comparison, so the 18 minutes could just as easily be a speed setting. Treat it as unproven until you time your own part. If you want to see how much of a speed claim survives contact with your actual hardware, our breakdown of acceleration settings in OrcaSlicer shows how many of those numbers your firmware quietly overrides.
PrusaSlicer: Best If You Want the Interface to Explain Itself
PrusaSlicer is the answer to one specific Cura complaint: you can see a setting but not what it does. Prusa writes plain-language descriptions into the settings panel itself. In Cura, that explanation arrives only after you install the Settings Guide plugin from the Marketplace. Current release is 2.9.6, from June 2026.
The difference shows up in cooling. PrusaSlicer lets you set fan speed in 25% increments, and it prints a plain-text explanation of how those cooling settings will affect the print. Orca and Bambu Studio give you a single overhang threshold and leave you to work out the rest.
Fuzzy skin is where PrusaSlicer stands alone. It’s the only one of the three that lets you paint the effect onto chosen areas of a model. Orca and Bambu apply it to whole outlines or whole walls, and getting anything selective out of them means building modifier volumes.
PrusaSlicer also carries three reference coordinate systems (world, object, and part) against Bambu Studio’s two and Orca’s single world reference. If you position assemblies or multi-part models precisely, that is the row that will matter to you.
Nobody wins everywhere. Mouse ears, the small discs that hold down sharp corners, are a one-click paint tool in Orca and Bambu Studio. In PrusaSlicer you add the part manually, set its height to your first layer height, and place it yourself.
There is also a real dissenting view. One five-slicer ranking put PrusaSlicer dead last, and the reason was not capability. It was that PrusaSlicer exposes so many settings that a beginner has more room to get something wrong. That is worth weighing if you are leaving Cura because it overwhelmed you.
Bambu Studio: Best If You Own a Bambu Lab Printer
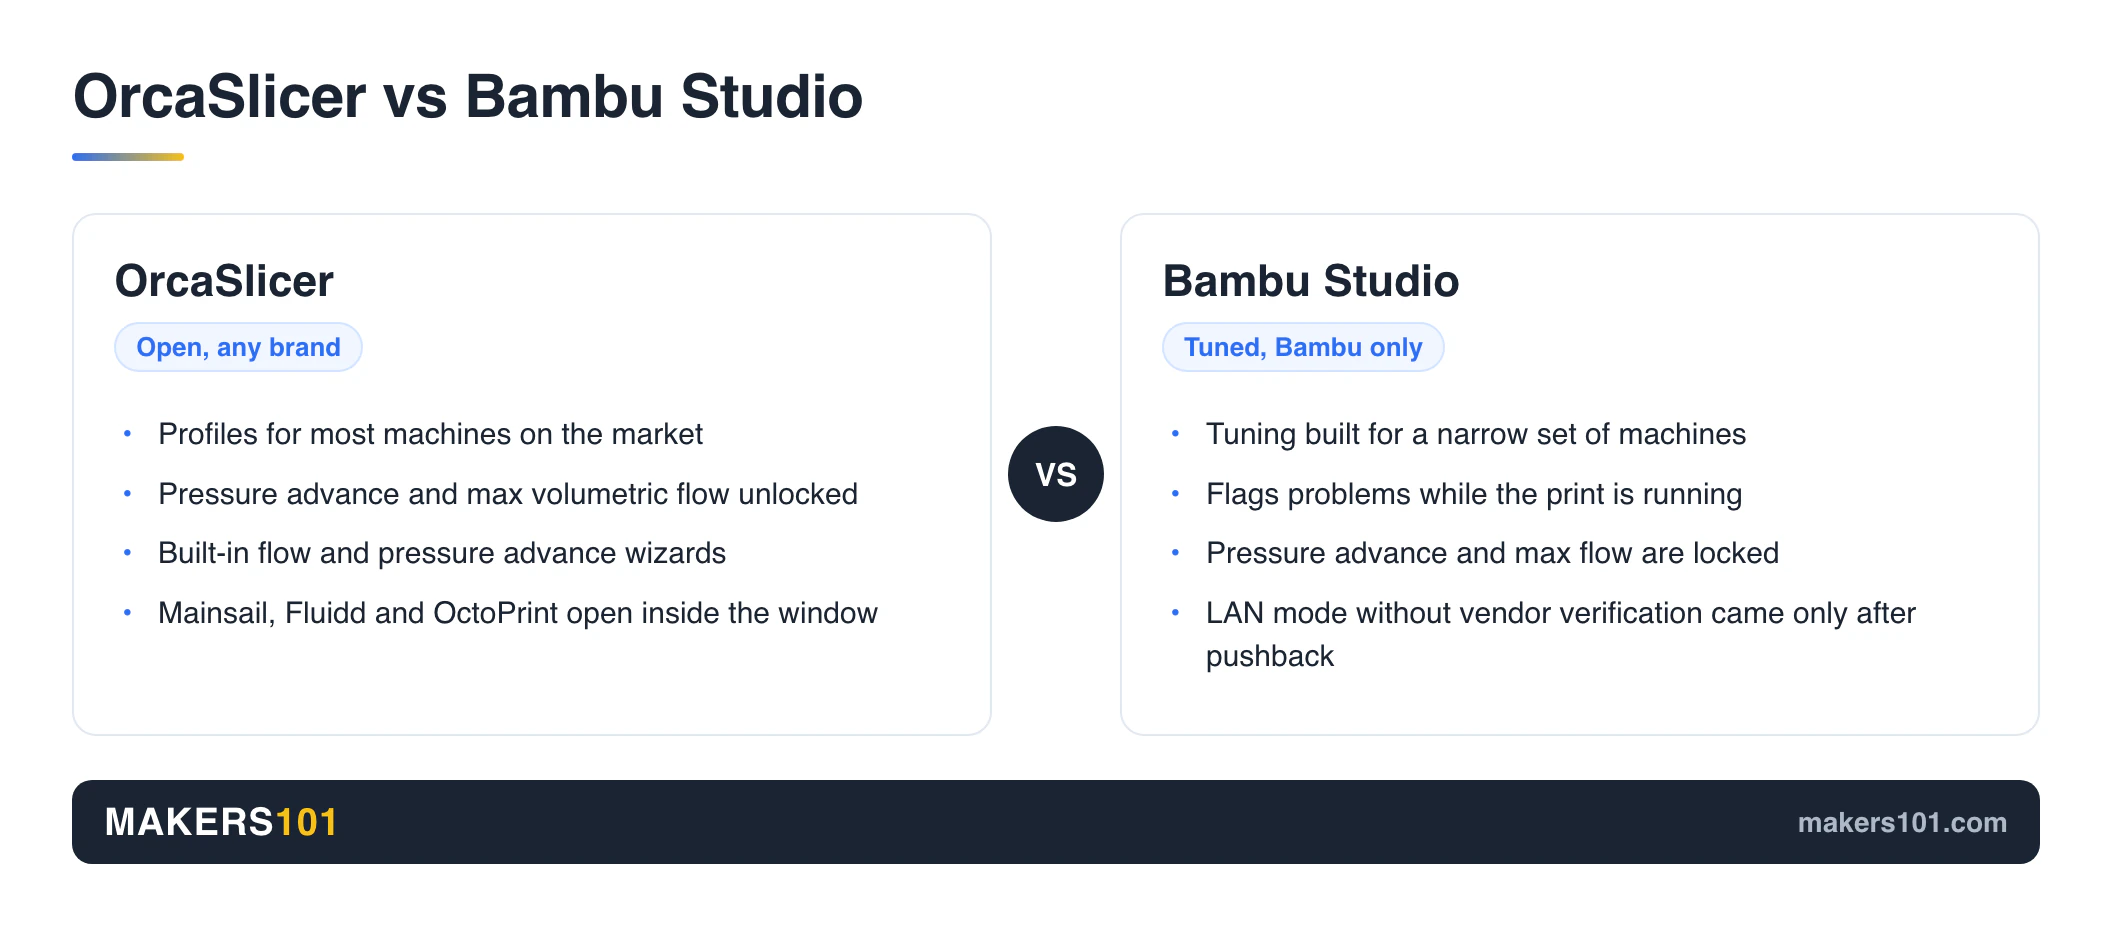
The cleanest description of the Orca and Bambu Studio choice is that Orca is Android and Bambu Studio is iOS. Bambu Studio is tuned to a narrow set of machines and gives you a smoother ride on them. Orca takes everyone’s hardware and hands you the controls. Current release is 2.8.2.61, from August 2026.
The closed side buys you something. In one side-by-side account, Bambu Studio flagged problems during a print and produced steadier results on Bambu hardware than the open fork did. That comes from one reviewer’s experience. Nobody measured it.
The price is control. Bambu Studio locks pressure advance and maximum volumetric flow. Orca, built from that same codebase, unlocks both.
Bambu also drew criticism when it planned to extend its security verification to LAN mode, and it committed to a LAN variant without that requirement only after community pushback. If keeping your printer reachable without vendor infrastructure matters to you, that history is part of the decision.
If you stay on Bambu Studio, learn what its defaults are actually doing. Our breakdown of what Bambu Studio’s cooling numbers actually do covers the ones that most often get left at defaults.
ideaMaker: A Closed-Source Name Still Worth Knowing
ideaMaker is free to use and closed source, which sets it apart from the open-source options in this guide. Raise3D builds it, and its pull is a large community profile library plus an interface that reads like Simplify3D, which matters if that is what you trained on.
It shows up in exactly the situation this guide is about. One maker whose Cura install had been throwing constant problems found ideaMaker on his own, discovered his Anycubic Kobra Plus was not in the machine list, built the profile himself, and called it “really simple.” Another maker found it the better fit for his belt printer, a SainSmart Infi-20.
Closed source is the trade. You get no forks, no community-patched builds, and no guarantee the roadmap follows you.
Creality Print, Elegoo Slicer, and the Rest of the Brand Slicers
Your printer’s own slicer is free and already installed, which is why so many people never look further. It’s usually enough to get a printer running and rarely enough to keep up with it.
That ceiling is why multi-printer owners leave first. The K1 owner described earlier ended up driving both a Bambu X1C and his Creality K1 from one copy of Orca, which no vendor tool will ever let him do. Vendor slicers also ship coarser default profiles and thinner calibration tooling, since tuning for one product line is the whole job.
Brand slicers do have real strengths worth naming. Creality Print’s auto-orient can optimise for minimum support volume or for shortest print time, and its tree supports peel off cleanly.
The trade is at the top end. A locked-down vendor slicer will not let you optimise for speed or for an unusual material, and that ceiling is the whole design. Industrial slicers like Markforged’s take this furthest: extremely reliable, and you cannot change anything.
So the honest split is by ownership.
One printer, one brand, still learning? The bundled slicer is fine and the alerts and defaults are working in your favour. Several printers from several brands? You will get tired of switching software before you get tired of any one of them.
Kiri:Moto and Browser Slicers: For When You Cannot Install Anything
Browser slicers exist for a constraint that has nothing to do with preference. School-issued Chromebooks block Linux applications outright, which rules out every desktop slicer on this page. Kiri:Moto runs entirely in a browser tab and covers common machines including the Ender 3.
The hardware floor is genuinely low. One maker ran a complete workflow on a Chromebook that had already passed its end-of-support date, slicing in Cloud 3D Print and printing a calibration cube successfully. Another built a stained-glass hanger on a $70 Chromebook using TinkerCAD and Kiri:Moto, running 0.2 mm layers, four shells, 15% infill, 210 °C nozzle and 65 °C bed at 50 mm/s. He called the result usable and said outright that it was not the best quality he had seen.
Know the ceiling before you commit. Browser slicers expose basic settings like layer height and infill, their machine libraries are incomplete, and some printers need manual configuration. You are trading control for access, and it’s a good trade only when access is the actual problem.
Free Slicers Still on Every List That You Should Skip
Two names that appear on major “best free slicer” roundups have not shipped a release in years.
| Slicer | Last release | Date | Still recommended by |
|---|---|---|---|
| SuperSlicer | 2.5.59.13 | July 1, 2024 | manufactur3dmag |
| Slic3r | 1.3.0 | May 10, 2018 | manufactur3dmag, Xometry |
SuperSlicer is a PrusaSlicer fork built for people who wanted even more settings exposed. It has always trailed upstream on new features, and it is now more than two years behind on releases as well. Its repository still saw commits in May 2026, so the code has not been abandoned. What stopped is the packaged version you would actually download.
Slic3r is the ancestor of the entire PrusaSlicer, Bambu Studio, and Orca family. Its ideas are everywhere. Its last release predates every printer most readers own, and its repository was last touched in June 2024.
Xometry’s ten-item ranking has a second problem. It includes OctoPrint, which is a print host, and Tinkerine Suite, while omitting both OrcaSlicer and Bambu Studio entirely.
Simplify3D is missing from this guide for a simpler reason: it is paid, so it fails the free test before anything else is considered. It also spent years without meaningful updates after 2018, which is a large part of why the community moved on.
One last trap. Searching for slicer alternatives will surface download.slicer.org, and 3D Slicer is medical imaging software with no connection to 3D printing. Google mixes the two on this exact query.
What Switching Actually Costs You
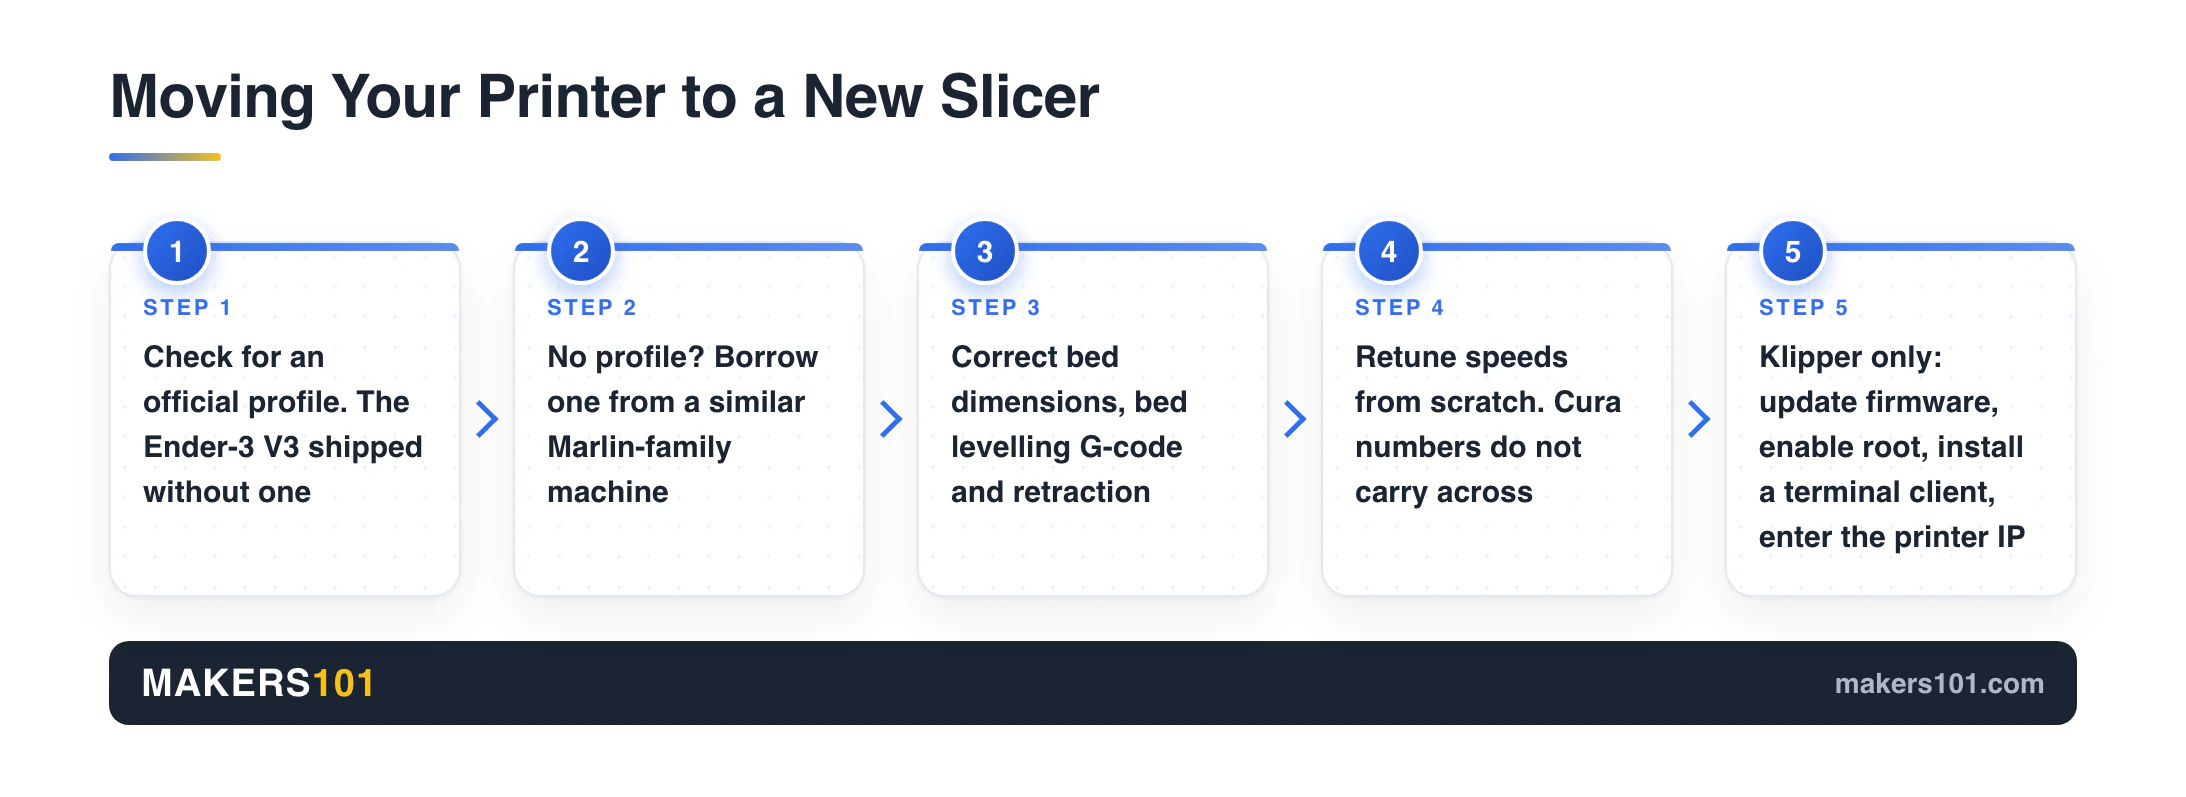
Switching costs you five things, and only the Klipper setup takes more than an afternoon.
A ready-made profile is not guaranteed. The Ender-3 V3 shipped without an official profile in Cura, OrcaSlicer, or PrusaSlicer. Owners built their own. Popularity doesn’t guarantee support.
The build itself is usually small. One Ender 3 owner moving to Orca adjusted only a few settings, naming nozzle diameter, retraction, and temperature. Orca handed him a generic profile and that was enough to make it printable.
You can borrow a profile. Most consumer printers run G-code with Marlin-family firmware, so a profile from a similar machine is a legitimate starting point. Change the bed dimensions, adjust the bed levelling G-code, and correct retraction for your extruder type.
Speeds do not carry across. Numbers you tuned in Cura are not portable. One tested set for a machine rated at 600 mm/s came out at 250 mm/s general, 150 mm/s for outer walls, and 10 to 20 mm/s for the first layer, with acceleration at 5000, 2500, and 1500 mm/s² respectively, and PLA retraction at 0.5 to 0.7 mm at 40 mm/s. Use those as a starting point and expect to test.
Klipper machines are real work. Connecting a Klipper printer like the K1 to Orca means updating firmware, enabling root access, installing a terminal client, and entering the printer’s IP. Whether your machine runs Klipper or Marlin changes how much of an afternoon this is.
When You Should Stay With Cura
The best slicer is the one you know well. That is not a consolation prize. A shop that ran Simplify3D for years said exactly this, and their reasoning holds: fluency with a tool beats a feature list you have not learned yet.
Cura also hides complexity better than the alternatives. PrusaSlicer has simple, advanced, and expert modes of its own, but one maker who ran both judged Cura’s control over what stays hidden to be the finer of the two. If Cura overwhelmed you, flipping it to beginner mode may be the whole fix, and it costs you nothing to try before migrating.
Cura’s per-model settings are underused too. Combine a support blocker with per-model settings and you can change infill, or almost any other setting, in one region of a single model. That is how you get a solid base and a hollow top on the same part without cutting it.
Adaptive layers are worth a test before you migrate. One chess piece dropped from 4 hours and 532 layers to 3 hours 32 minutes and 482 layers with the feature on. Going finer backfired: dropping topography size from 0.2 to 0.1 pushed it back up to 524 layers and 3 hours 49 minutes. The feature has sat under Experimental since around 2017.
Whatever you install, keep Cura on the machine. A second slicer is a diagnostic tool. One maker had a model fail the same way repeatedly in PrusaSlicer, skipping a layer, and only saw the cause after importing it into ideaMaker.
If I were moving off Cura today, I would install Orca, keep Cura for a month, and let the jobs decide. Either way you will want to dial in your print settings again in the new tool, because almost none of them transfer.
Frequently Asked Questions
Is Cura still free?
Yes. UltiMaker publishes Cura under an open-source licence, and every feature is available without payment. Version 5.13.0 was released on May 28, 2026, and the public repository was receiving commits on August 25, 2026. Whatever pushes you to look elsewhere, price won’t be it.
Is there a better slicer than Cura?
There is a better slicer for specific problems. OrcaSlicer adds calibration wizards and multi-brand printer support Cura lacks. PrusaSlicer explains its settings in the interface. Every Cura free alternative in this guide costs nothing, so the only real price is relearning where the settings live.
Is Cura or Creality slicer better?
For a single Creality printer, Creality Print is simpler and its auto-orient and tree supports work well. Cura gives you far more control. One K1 owner reported less ringing from OrcaSlicer than from Creality Print on the same machine. He never tested Cura, so read that as a Creality Print comparison only.
Is Cura or Elegoo slicer better?
Elegoo’s slicer, like most brand slicers, is tuned for Elegoo hardware and easier to start with. Cura supports far more printers and far more settings. If you own only Elegoo machines and you are new, stay with the bundled tool. If you own several brands, one slicer covering all of them saves more time than either choice.
Do I need to redo all my settings if I switch from Cura?
Mostly yes for speeds and accelerations, mostly no for the basics. One Ender 3 owner got printable results from OrcaSlicer after changing just a handful of values, among them nozzle size, retraction, and temperature. Speed values do not transfer meaningfully between slicers, so plan to re-test those.
Is there a free 3D slicer that runs in the browser?
Yes. Kiri:Moto runs inside your browser with nothing installed locally, and its machine list covers the Ender 3 along with other common printers. Expect basic settings only, an incomplete machine library, and manual configuration for anything unusual.
What is the best free slicing software for an Ender 3?
Cura and OrcaSlicer both work well. Orca gives you built-in calibration, which matters more on an older Ender 3 than on a modern machine. One owner reported better first-layer corners after switching, along with worse seams, so test a part you care about before committing.
What is the best free program for 3D printing?
That depends on which half of the job you mean. For turning a model into G-code, OrcaSlicer covers the widest range of printers at no cost. For designing the model in the first place, you need CAD such as TinkerCAD, FreeCAD, or Blender. Slicers cannot create geometry and CAD tools cannot drive your printer, so most people end up running one of each. On the CAD side, ChatGPT can now drive Fusion 360 for boxy parts. We walk through that setup here.
Can I use Cura or these alternatives for resin printing?
No. Cura, OrcaSlicer, PrusaSlicer, and Bambu Studio all slice for FDM printers. Resin printing uses a separate category of software such as Lychee Slicer or CHITUBOX, built around exposure times and photopolymer supports.