If you’re staring at a slicer screen packed with temperatures and percentages, you’re in good company. The first settings page can feel harder than the printer itself. Some slicers explain each box right there in the panel. That is one reason people move off Cura.
The uncomfortable truth is that a random “best settings” table often creates more problems than it solves. Your printer, nozzle, filament, build plate, and model all change the answer.
This 3D printer settings guide gives you a reliable starting point for FDM printing, then shows you how to tune one setting at a time. Resin printers use a different system, so I’ll keep that distinction clear.
The source tests cited here point to the same workflow. Maker’s Muse changed one calibration variable at a time, while David’s IT Garage used temperature towers and repeated Benchy tests for specific materials. That approach is more reliable than collecting numbers from unrelated machines.
- Start with the correct printer and matching filament profile.
- For a standard FDM nozzle, a 0.20 mm layer height is a sensible general starting point.
- Tune bed contact and heat before chasing speed or retraction.
- Change one variable, print a small test, and record the result.
- Treat every number as a starting point tied to a material and printer.
Table of Contents
Quick Start: The 2-Minute FDM Settings Checklist
For a first PLA print, select the exact printer and nozzle profile, choose the filament manufacturer’s PLA profile, and leave most defaults unchanged. Slice a small calibration model, preview it, and print that before committing to a six-hour project.
Confirm these items first:
1. The printer model matches the profile. 2. The nozzle diameter matches the installed nozzle. 3. The filament type matches the spool. 4. The build plate selected in the slicer matches the one on the printer. 5. The first layer is wide and slow enough for reliable adhesion. 6. Supports are enabled only where the model needs them.
For a typical PLA profile, use that conservative layer-height starting point. Use the profile’s temperature and speed values. Start around 2 or 3 walls and 10-20% infill for a normal decorative or light-duty part. Treat those numbers as a baseline to test, not a promise of strength.
Don’t change ten settings after one failed print. That makes the result impossible to interpret.
What You’ll Need Before Tuning Any Setting
You can solve most beginner settings problems with a few simple tools: the printer manual, the filament label, your slicer’s preview window, and a small calibration model. Calipers and a feeler gauge help when you’re checking dimensions or first-layer spacing. If the computer you’re on won’t let you install anything, there are free slicers that need no install.
| Item | Why it matters | When to use it | Beginner note |
|---|---|---|---|
| Filament label | Gives a temperature range | Every print | Treat it as a starting range |
| Calibration model | Makes changes comparable | After each major change | Use the same model each time |
| Calipers | Measures printed dimensions | Accuracy problems | Measure more than one axis |
| Feeler gauge | Checks nozzle spacing | Manual leveling | Follow the printer’s procedure |
| Slicer preview | Shows speed, walls, and supports | Before printing | Inspect thin areas and bridges |
Keep a small note with the filament brand and the settings you changed. Record the result beside them. Your best profile is the one you can reproduce later.
For a broader beginner tool list, see our guide to essential 3D printing tools. The 3DPKit filament picker can also help you match material characteristics to a project before you start changing slicer values.
3D Printer Settings That Control Print Quality
Temperature controls how the material flows and bonds. Layer height controls detail and print time. Speed controls throughput and risk. Walls and infill affect strength, while retraction and cooling address travel moves and cooling-sensitive geometry.
Nozzle and Bed Temperature
Nozzle temperature affects melting and layer bonding. Bed temperature affects first-layer adhesion and warping. Use the temperature range printed on the spool or supplied by the filament manufacturer, then refine it with a temperature tower.
If the nozzle is too cool, extrusion can look thin or inconsistent. Layers may split easily. If it is too hot, you may see excess ooze, blobs, soft details, or heavy stringing.
The same material name doesn’t guarantee the same result. PLA blends and PETG formulations vary. A temperature tower is a simple way to compare several values on one print. Choose the section with the best balance of clean surfaces, strong layers, and acceptable overhangs.
Our PLA nozzle temperature guide covers the same decision in more detail.
First-Layer Height, Z Offset, and Bed Adhesion
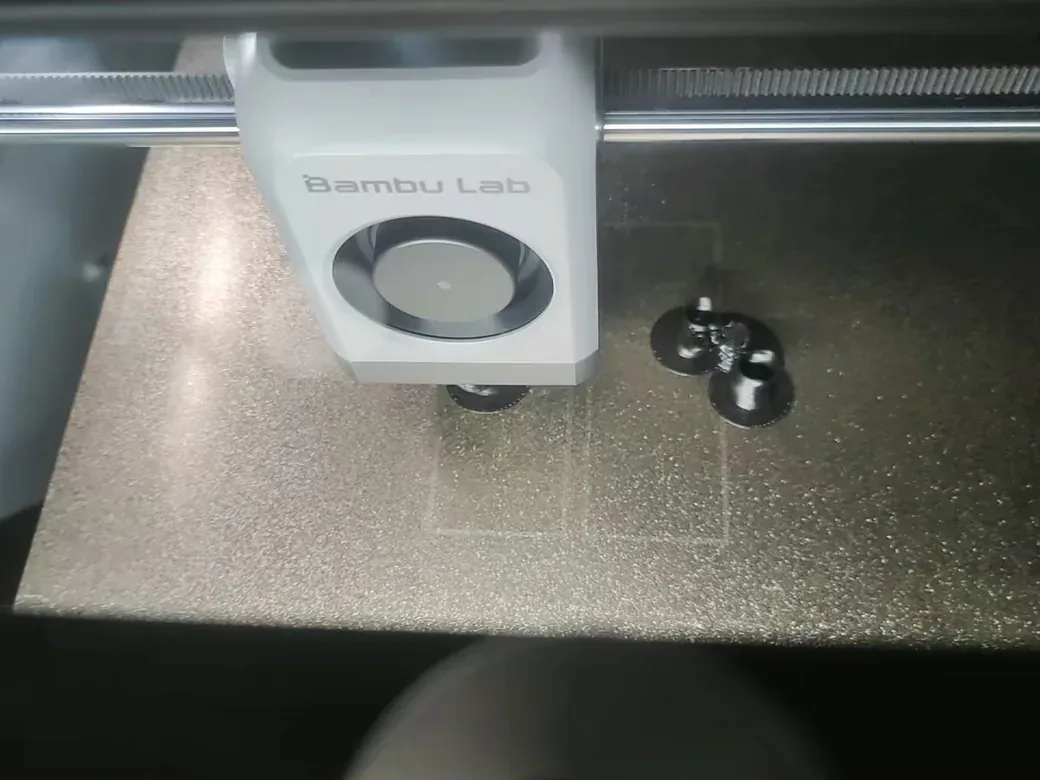
The first layer is the foundation of the print. If the nozzle sits too far from the bed, the lines look round and separated. They are easy to pull loose. If it is too close, the plastic spreads into ridges and may create elephant foot.
A clean build surface and the printer’s normal heating routine come first. Then follow the machine’s homing and Z-offset instructions. Manual leveling and automatic bed leveling are related, but they aren’t identical procedures.
A small first-layer test is more useful than guessing from the final model. Look for continuous lines with light contact between them. If the first layer is inconsistent across the bed, check leveling and bed warp before changing flow.
If your print keeps sliding loose, see why a 3D print won’t stick to the bed.
Layer Height and Nozzle Diameter
Layer height is the height of each deposited layer. Lower values produce smoother curves and finer detail, but they add layers and increase print time. Higher values print faster, but curved surfaces show more visible stepping. A few slicers let you mix two layer heights up one model. Cura is not one of them.
For a standard nozzle, a moderate layer height is a useful starting point. Try 0.12 or 0.16 mm for a display piece with visible curves. For a faster prototype, try 0.24 or 0.28 mm when the profile supports it.
Nozzle diameter changes the useful range. A 0.2 mm nozzle can resolve smaller details but usually takes longer. A 0.6 or 0.8 mm nozzle can deposit more material and shorten large prints, with a trade-off in fine detail.
Print Speed and Feature Speed
Print speed isn’t one number. First-layer and wall speeds affect surfaces. Infill and travel speeds affect the model interior. Bridge and overhang speeds affect unsupported areas.
The printer profile gives you the baseline. Reduce first-layer speed when adhesion is marginal. Reduce outer-wall speed when surfaces show ringing or inconsistent finish. Reduce small-feature speed when tips become soft or misshapen.
The slicer’s speed preview can show where the printer slows down or accelerates. That is more useful than changing the global speed blindly. A high advertised maximum speed doesn’t mean every model should be printed at that value.
Walls, Top and Bottom Layers, and Infill
Walls usually improve functional strength more efficiently than blindly increasing infill. A part with thin walls can still break even when its interior is densely filled.
Use these as broad starting categories:
- Decorative objects: 2 walls, 10-15% infill, and enough top layers to close the surface.
- Everyday functional parts: 3 walls, 15-25% infill, and thicker top and bottom coverage.
- Parts carrying repeated loads: start with more walls and test the orientation before increasing infill.
Infill pattern matters after the basic structure is sound. A simple grid or similar pattern is easy to inspect. Gyroid and other patterns can be useful, but the pattern will not fix a poorly bonded wall or a weak orientation. Top layer count also decides whether ironing can do anything for you. Close the surface first, then go tune the Cura ironing settings.
Retraction and Travel
Retraction pulls filament back during a non-printing move. It reduces the pressure at the nozzle and can limit stringing between separate parts.
Tune retraction with a small stringing test. Direct-drive and Bowden extruders usually need different distances because the filament path behaves differently. Flexible filament needs its own approach as well.
Too little retraction can leave webs. Too much can cause grinding or clogs. It can also leave sections of missing extrusion. Wet filament can create popping and stringing, so don’t assume retraction is the only cause.
Cooling, Bridges, and Overhangs
Cooling helps PLA form sharper details and cleaner bridges. Excessive cooling can weaken layer bonding in materials such as PETG or ABS. The correct fan setting is a material trade-off.
Overhangs may improve when you slow the relevant feature, increase cooling where appropriate, or change the model orientation. Some slicers can slow down overhangs automatically. Watch the surface for a visible line where the speed changes.
Keep first-layer cooling separate from later-layer cooling. Many materials need a different fan strategy after the first layer has bonded.
Supports and Orientation
Supports are scaffolding for geometry that would otherwise print in midair. Before adding them, rotate the model so the critical surface needs less support. This can improve finish, shorten the print, and make removal easier.
Use the slicer preview to inspect support contact points and overhangs. Add supports only where the preview shows unsupported islands or steep geometry. A support setting cannot repair a poor orientation choice.
Material-Specific Starting Points
PLA is usually the easiest material for a first settings experiment. PETG needs more attention to moisture and cooling. TPU needs dry filament and slower movement. ABS and ASA add enclosure concerns.
| Material | First concern | Useful test | Main warning |
|---|---|---|---|
| PLA | Temperature and cooling | Temperature tower | Too much heat creates ooze |
| PETG | Moisture and layer bonding | Temperature tower | Fan settings affect strength |
| TPU | Moisture and movement | Small Benchy or stringing test | Rigid-filament retraction may fail |
| ABS/ASA | Ambient temperature | Small enclosed test print | Warping and fumes need planning |
PLA
Use the printer’s PLA profile as your baseline. If the surface is stringy, run a temperature tower before increasing retraction. If the print is weak, review heat and cooling first. Change only one variable per test.
The PLA temperature guide is a useful reference when your spool range and profile do not seem to agree.
PETG
PETG absorbs moisture more readily than PLA. Wet PETG may pop at the nozzle, string heavily, or produce a rough surface. Store it sealed with desiccant and dry it when the symptoms suggest moisture.
In David’s IT Garage PETG test, a temperature tower was used to find a cleaner temperature for that filament. The test also reduced fan output after seeing layer separation. The exact values belonged to that source setup. Use the method, then tune your own PETG profile. Higher fan output may improve overhangs while weakening layer bonding.
Read why PETG print temperature varies so much before copying a number from another spool.
TPU
TPU is flexible, moisture-sensitive, and less forgiving of aggressive speed. Dry the filament, start slowly, and use a small test model before a large flexible part.
In David’s IT Garage test of Overture 95A TPU on a Creality K1C and Bambu X1 Carbon, repeated Benchy models were used to tune slow movement, moisture control, and retraction. Those values belonged to that setup. Don’t copy them into every direct-drive profile.
ABS and ASA
ABS and ASA usually need more environmental control than PLA or PETG. An enclosure, warm surroundings, suitable bed temperature, and ventilation can matter more than a small slicer adjustment. Follow the material manufacturer’s safety and temperature guidance.
A Calibration Order That Prevents Random Tuning
Tune in dependency order: mechanical condition and first layer come first. Then check heat, flow, retraction, cooling, and speed. Add dimensional compensation last. This order prevents a slicer value from hiding a hardware problem.
1. Inspect the nozzle, bed, belts, lead screws, and filament path. 2. Get a consistent first layer. 3. Run a temperature tower. 4. Check extrusion or flow calibration. 5. Run a small retraction test. 6. Tune cooling, then test bridges and overhangs. 7. Tune speed for the feature that shows the defect. 8. Use horizontal expansion only for a defined fit problem.
The key habit is simple: change one variable and record the result. Maker’s Muse used a Clearance Castle to expose first-layer, retraction, cooling, and dimensional problems in sequence. A calibration cube can also help you measure dimensional accuracy. Our guide explains how to read a 3D printer calibration cube.
Flow rate and horizontal expansion are late-stage tools. Use them after checking mechanics and extrusion. Also confirm bed contact and heat. Otherwise, you may compensate for the wrong problem.
Troubleshooting by Symptom
Match the defect to the smallest likely cause. Don’t change temperature and speed alongside retraction or flow.
| Symptom | Check first | Controlled next change |
|---|---|---|
| First layer will not stick | Surface, Z offset, bed temperature | Clean, then adjust offset per manual |
| Stringing | Moisture, temperature, retraction | Temperature tower, then retraction test |
| Weak layers | Temperature, cooling, speed | Adjust one within the material range |
| Rough overhangs | Cooling, speed, orientation | Slow overhangs or improve cooling |
| Blobs and ooze | Temperature, retraction, wet filament | Lower temperature within range or dry filament |
| Dimensional error | Mechanics, flow, elephant foot | Calibrate before horizontal expansion |
If a defect repeats in a regular pattern, inspect the machine. Loose parts, a bent lead screw, poor belt tension, or temperature control problems can look like slicer errors.
Common Beginner Mistakes
The most expensive mistake is copying values from a different printer, nozzle, or filament. The number may look precise while describing a completely different setup.
Other common mistakes include:
- Treating slicer defaults as wrong before printing a baseline.
- Using maximum speed because the printer advertises it.
- Increasing infill when more walls would solve the strength problem.
- Adding supports without first considering orientation.
- Ignoring wet filament.
- Changing many variables at once.
- Changing flow or horizontal expansion before checking mechanics.
You do not need a perfect profile on the first day. You need a repeatable baseline.
FAQ
What are the best settings for a 3D printer?
The best starting settings are the printer’s tested profile plus the filament manufacturer’s range. Print a small calibration model, then tune the setting connected to the defect you can see. There isn’t a universal preset for every printer and filament.
What settings should I change first on a 3D printer?
Begin with the first layer, bed condition, and material temperature. Then adjust layer height for the finish you want. Tune speed, retraction, or cooling only when a specific defect points there.
What temperature should PLA print at?
Use the range printed on the PLA spool as your starting point. A temperature tower can show which value gives the best balance of flow and bonding, with less stringing and clean detail.
Why is my 3D printer stringing?
Wet filament, excessive nozzle temperature, and retraction or travel settings are common causes. Check moisture and temperature first, then run a retraction test. Raising retraction indefinitely can create clogs without solving the underlying issue.
Are these settings for resin printers too?
No. Resin printers use exposure time, bottom exposure, lift distance, and lift speed controls. Those settings belong to a resin-specific workflow and shouldn’t be mixed into an FDM profile.
A Repeatable Next Step
Save your baseline profile. Change one setting. Print a small test. Record what changed.
That simple loop will teach you more than a giant settings table. When moisture is the problem, read our guide to drying and storing filament. When detail or throughput is the problem, compare your 3D printer nozzle size options before changing every slicer value.