
Heads up — some of the links below are affiliate links. If you buy through them, I earn a small commission (at no extra cost to you), which helps cover the gear I test. Thanks!
- Wet filament, not your printer, causes most stringing, weak layers, and rough surfaces.
- Aim for around 10% relative humidity in storage. Drier isn’t always better.
- Dry filament three ways: a dedicated dryer (easiest), a food dehydrator (cheapest), or your oven (last resort).
- Drying is a temporary fix. Sealed storage with desiccant is what keeps filament good long term.
- A cheap hygrometer and a tub of rechargeable silica beads solve 90% of moisture problems.
Here’s the short version on how to dry and store filament. Filament soaks up water from the air. When that wet plastic hits a hot nozzle, the trapped water flashes to steam and wrecks your print. Dry it to drive the water out, then store it sealed so it stays dry. That’s the whole game. Dry storage is just one item on our 3D printer accessories checklist.
If you are already fighting clog symptoms, how to clean a 3D printer nozzle is the faster next step.
Your first failed print probably looked like the printer’s fault. The layers split. The surface went rough and hairy. Strings webbed across every gap.
Here’s the thing: nine times out of ten, the printer is fine. The filament got damp.
And the usual advice (“just dry it as much as you can”) is only half right. You can actually over-dry some plastics and make them brittle. This guide shows you how to tell when filament is wet, how to dry it properly by material, and how to store it so you rarely have to dry it again. No chemistry degree required.
Why Wet Filament Wrecks Your Prints
Moisture is the hidden cause behind most beginner print failures. Filament is hygroscopic, which is a fancy way of saying it acts like a sponge. Left in open air, it slowly pulls water vapor out of the room and holds it inside the plastic.
That water stays harmless until it reaches the hot end. At print temperatures north of 200°C, trapped water instantly boils into steam. The steam bursts out of the nozzle and disrupts the smooth flow of plastic. Worse, that same heat-plus-water reaction can chemically break the polymer chains, a process called hydrolysis, which permanently weakens the material.
Think of it like dropping water into a hot frying pan. It pops, spits, and makes a mess. Now imagine that happening inside your nozzle, layer after layer.
How to Tell If Your Filament Is Wet
You usually don’t need a meter to catch wet filament. Your eyes and ears will tell you. Watch and listen for these signs:
- Popping or crackling sounds at the nozzle while printing. That’s water boiling.
- Stringing and oozing across open gaps, even with good retraction settings.
- A rough, fuzzy, or bumpy surface instead of clean, glossy layers.
- Weak layer adhesion, where parts snap apart along the layer lines.
- Brittle raw filament that cracks when you bend it off the spool.
One or two of these can have other causes. Three or more at once points straight at moisture.
Which Filaments Absorb Moisture Fastest
Not all plastics drink water at the same rate. Knowing your material tells you how careful you need to be. From thirstiest to most forgiving:
- Very high: Nylon (PA), Polycarbonate (PC), PVA, and most TPU. These can go bad in hours of open air.
- Medium: PETG, ABS, and ASA. A day or two of humid air starts to show.
- Low: PLA and Polypropylene (PP). Forgiving, but still not immune over weeks.
If you print a lot of Nylon or TPU, moisture control isn’t optional. If you mostly print PLA, you’ve more breathing room. For a deeper look at how the main filament types behave, see our 3D printing filament guide.
The Myth of “Bone Dry”: You Can Over-Dry Filament
Here’s what most guides won’t tell you: more drying isn’t always better. Your goal is the right moisture level, not zero moisture.
Filament is made with a small amount of moisture built in. That helps keep it flexible. Push some materials past fully dry with too much heat or too many drying cycles, and they turn brittle. Over-dried filament can snap like dry spaghetti and print worse, not better.
Most makers settle on a target near 10% humidity for their stored spools. That’s dry enough to print clean. It won’t bake the life out of your plastic the way aggressive drying can.
This is where a cheap tool earns its keep. A small digital hygrometer, the kind sold for terrariums and cigar boxes, lets you actually see the humidity inside your storage box. One creator I follow measured his shed at 78% humidity. Far too high. He dropped a hygrometer right next to the spool so he could watch the number, not guess. You should do the same.
A quick honesty note: the strongest “over-drying is bad” claims come from filament makers, and the published research is thin. Treat it as a reason to avoid extreme, repeated high-heat drying, not a reason to skip drying. For everyday printing, damp is a far bigger enemy than slightly-too-dry.
How to Dry Filament: 3 Methods That Actually Work
Three methods reliably dry filament: a dedicated dryer, a food dehydrator, or your oven. A dryer is the easiest and safest. The other two save money if you already own the gear. Here’s how to use each one well, ranked from best to last resort.
Method 1: A Dedicated Filament Dryer
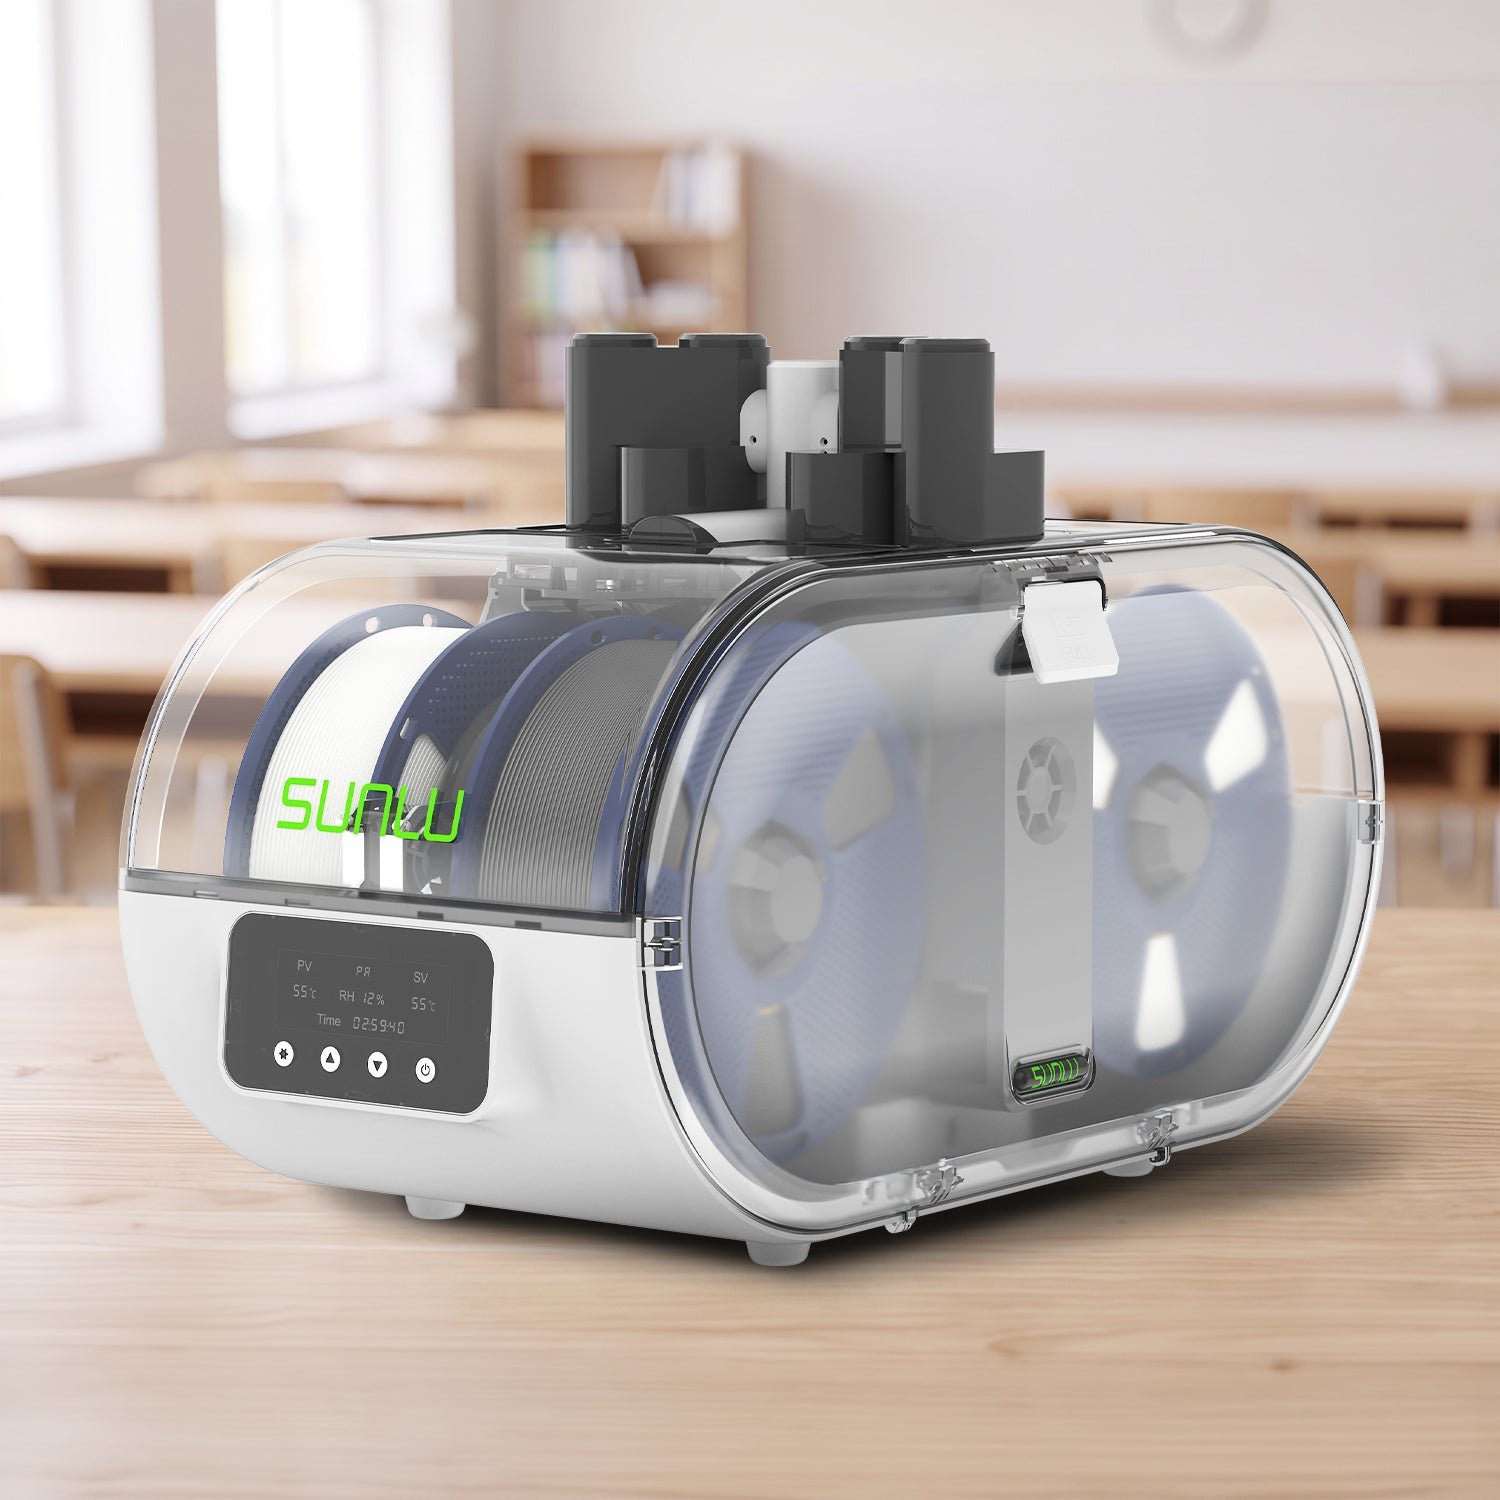
Best for most people, especially if you print often or use thirsty materials. A filament dryer is a heated box with a fan that circulates warm, dry air around the spool. You drop the spool in, set the temperature and time, and walk away. Many models have a feed port, so you can print straight from the dryer while it keeps the filament warm and dry. Four-spool boxes take that further and dry a whole color set in one go. Here’s how one of them holds up.
When you shop for one, three things matter. First, temperature range: budget units cap around 55-60°C, which covers PLA and PETG, but Nylon and PC need a dryer that climbs higher. Second, real airflow from a fan, not just a warm plate, since moving air dries far more evenly. Third, a feed port and a built-in hygrometer if you want to print through it. We ranked six that nail those three things in our best filament dryers guide.
Using it is simple. Set the temperature for your material, run it for the time in the chart below, then either print through the port or move the spool straight into sealed storage. The only real downside is cost. But it removes the guesswork and the risk of cooking a spool, and for Nylon, PETG, or TPU it pays for itself fast. Worth knowing with PETG: drying fixes stringing that people spend days chasing with temperature instead. We pull those two apart here.

- 【Upgraded PTC Solution】Creality Space PI SE heats up quickly and has a built-in fan that circulates the hot air through 360° inside the chamber…
- 【Improved Print Quality】3D printing filaments are hygroscopic, moisture can cause printing failure. After using filament dryer box, it can…
- 【Easy to Use】Creality filament storage box requires no assembly and can be used right out of the dry box. Display screen and knob make it easy to…
- 【Personalized Drying Time/Temperature Setting】You can set different drying temperatures and time to dry the filaments fully according to different…
- 【Wide Compatibility】Creality filament dryer compatible with most 1KG spool 3D Printer filament. It can perfectly fit filament diameters of…
Method 2: A Food Dehydrator
The best budget way to rescue a damp spool, and a favorite for makers who already own one. A dehydrator stacks trays over a heating element and a fan, pushing gentle, even heat upward. That slow, low airflow is exactly what filament wants.
Two things make or break it. You need an adjustable thermostat, not a fixed fruit-drying setting, because the cheap fixed units often run too hot or too cool to trust. And you need to pull out the middle trays so a full spool actually fits, lying flat or standing on edge.
To use it, set the dial to your material temperature, then leave it running for the hours your material needs, flipping or rotating the spool once halfway through. Leave the lid slightly vented so the moisture you pull out can escape instead of recirculating. One limit to know: most dehydrators top out near 70°C. That handles PLA, PETG, TPU, and ABS well, but it falls short for Nylon and PC, which need more heat than these units can deliver.
Method 3: Your Oven (Last Resort)
Use this only when you have nothing else, and only for forgiving materials like PLA and PETG. A kitchen oven works in theory, but it’s the riskiest option by far. Most home ovens swing wildly around their set temperature. A dial that reads 70°C can spike past 90°C and slump your spool into a warped, sticky mess.
Warning first: never blast filament at high heat to save time. If you must use the oven, set it to the lowest temperature it allows, place an oven thermometer inside to read the real heat, and put a single spool on the middle rack. Crack the door open so trapped moisture vents out, and check on it every 15 to 20 minutes.
Some materials simply don’t belong in an oven. Skip TPU, which deforms easily, and skip Nylon and PC, which demand temperatures that put both your spool and your oven at risk. And if your oven can’t hold a steady low temperature, walk away from this method entirely. A spool fused to a baking tray isn’t worth the few dollars you saved.
Drying Temperature and Time Chart
Temperature matters more than anything. Too low does nothing. Too high deforms the spool. Use these as starting points, then confirm against your filament maker’s spec sheet.
| Material | Moisture Risk | Dryer Temp | Drying Time |
|---|---|---|---|
| PLA | Low to Medium | 45°C | 4-6 hrs |
| PETG | Medium | 65°C | 6-8 hrs |
| TPU | Medium to High | 50°C | 4-6 hrs |
| ABS / ASA | Medium | 70°C | 4-6 hrs |
| Nylon (PA) | Very High | 80-95°C | 8-12+ hrs |
| PC | Very High | 100-120°C | 8-12+ hrs |
Polycarbonate runs hottest, and many consumer dryers top out below its ideal range. If your dryer can’t reach that range, a longer run at its maximum helps, but PC genuinely needs the heat. Brands vary, so treat every row as a starting point. Not sure where your exact brand falls? You can look up your filament in our filament drying guide tool for material-specific settings.
How to Store Filament So It Stays Dry

Here’s the part beginners skip, and it’s the most important. Drying is only a temporary fix. The moment a dry spool hits open air, it starts soaking up water again. Some thirsty plastics rehydrate in just a few hours.
Repeated high-heat drying also slowly degrades the plastic. So the real goal isn’t to dry filament over and over. It’s to dry it once, then store it so well that you rarely need to dry it again. As one maker put it, the dream is to dry a spool, seal it, and leave it alone for the life of the filament.
Sealed Container plus Desiccant
This is the baseline every maker should own. You need two things: an airtight container and a desiccant to mop up any trapped moisture.
A large airtight food bin works. So does a gallon zip-top bag for spools you use less often. Drop in a desiccant pack, seal it tight, and you’re most of the way there. Save the little silica packet that comes inside new filament bags. It’s free and it works.
Desiccant 101: Silica Gel, Activated Alumina, and Recharging
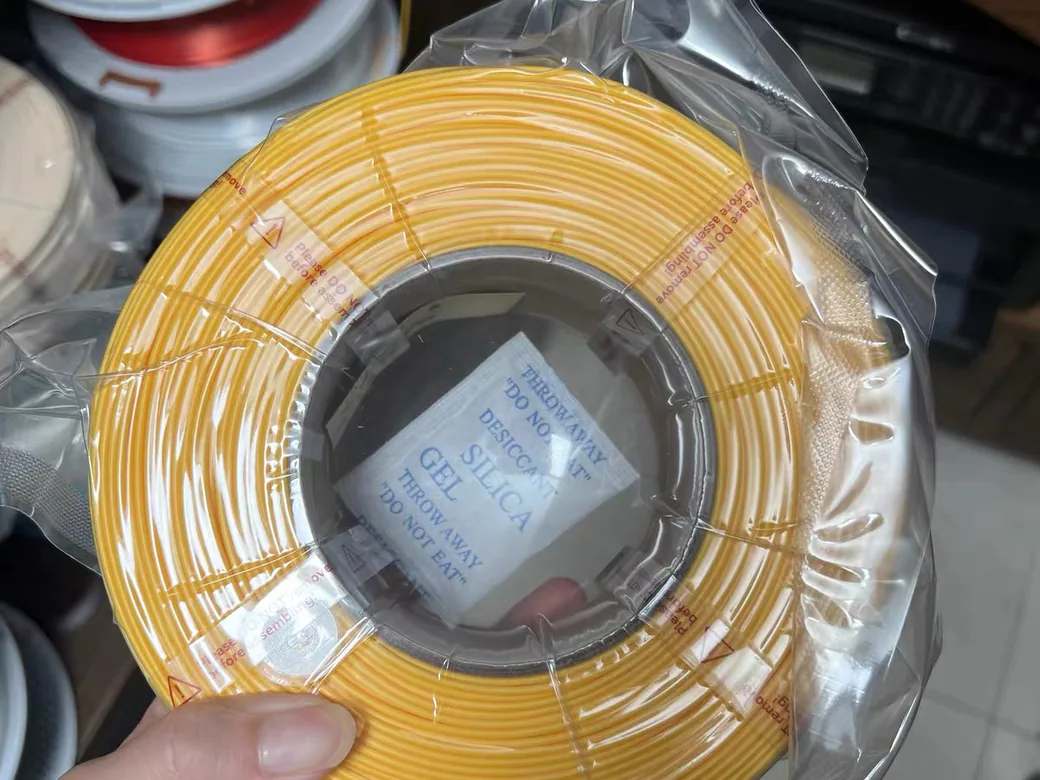
Desiccant is the cheap hero of filament storage. The most common type is color-changing silica gel. It starts orange or yellow when dry and turns green or blue once it has soaked up moisture. When the color flips, it’s full and needs recharging.
The best part: you can reuse it forever. Recharge silica gel by microwaving it on the defrost setting for about 10 minutes, or by baking it in an oven around 100°C until the color returns. Buy beads in a tub, not just packets, so you always have a fresh batch ready.
Want to go a step further? Some experienced makers prefer activated alumina over silica gel, finding it holds filament drier in their sealed boxes. It’s an upgrade worth knowing about once you’ve the basics down, though plain silica gel is more than enough for most beginners.
Vacuum Bags and Dry Boxes
For long-term storage, vacuum-seal bags take it up a level. Sucking the air out means there is almost no moisture left to attack the spool, and your desiccant lasts far longer. They’re cheap and stack neatly. Once the problem shifts from damp to “where does all this go”, we ranked six storage setups by cost and capacity.
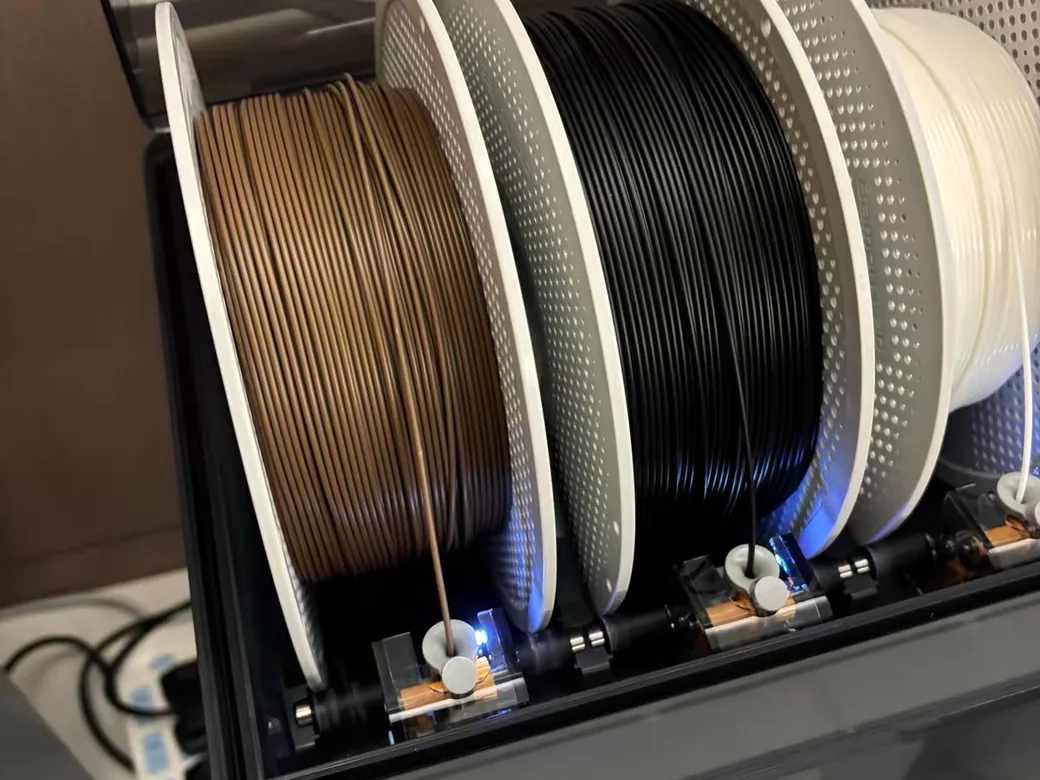
A dry box is the convenient middle ground. These are sealed containers, often with a built-in hygrometer and a desiccant holder, that keep spools ready to grab. A well-sealed box can hold around 10% humidity for months. If you run a Bambu Lab AMS or similar system, it doubles as dry storage that feeds the printer directly.
Should You Build a DIY Dry Box?
3D printable dry boxes are everywhere online, and they tempt every maker eventually. They can work beautifully. Just go in with clear eyes on the cost.
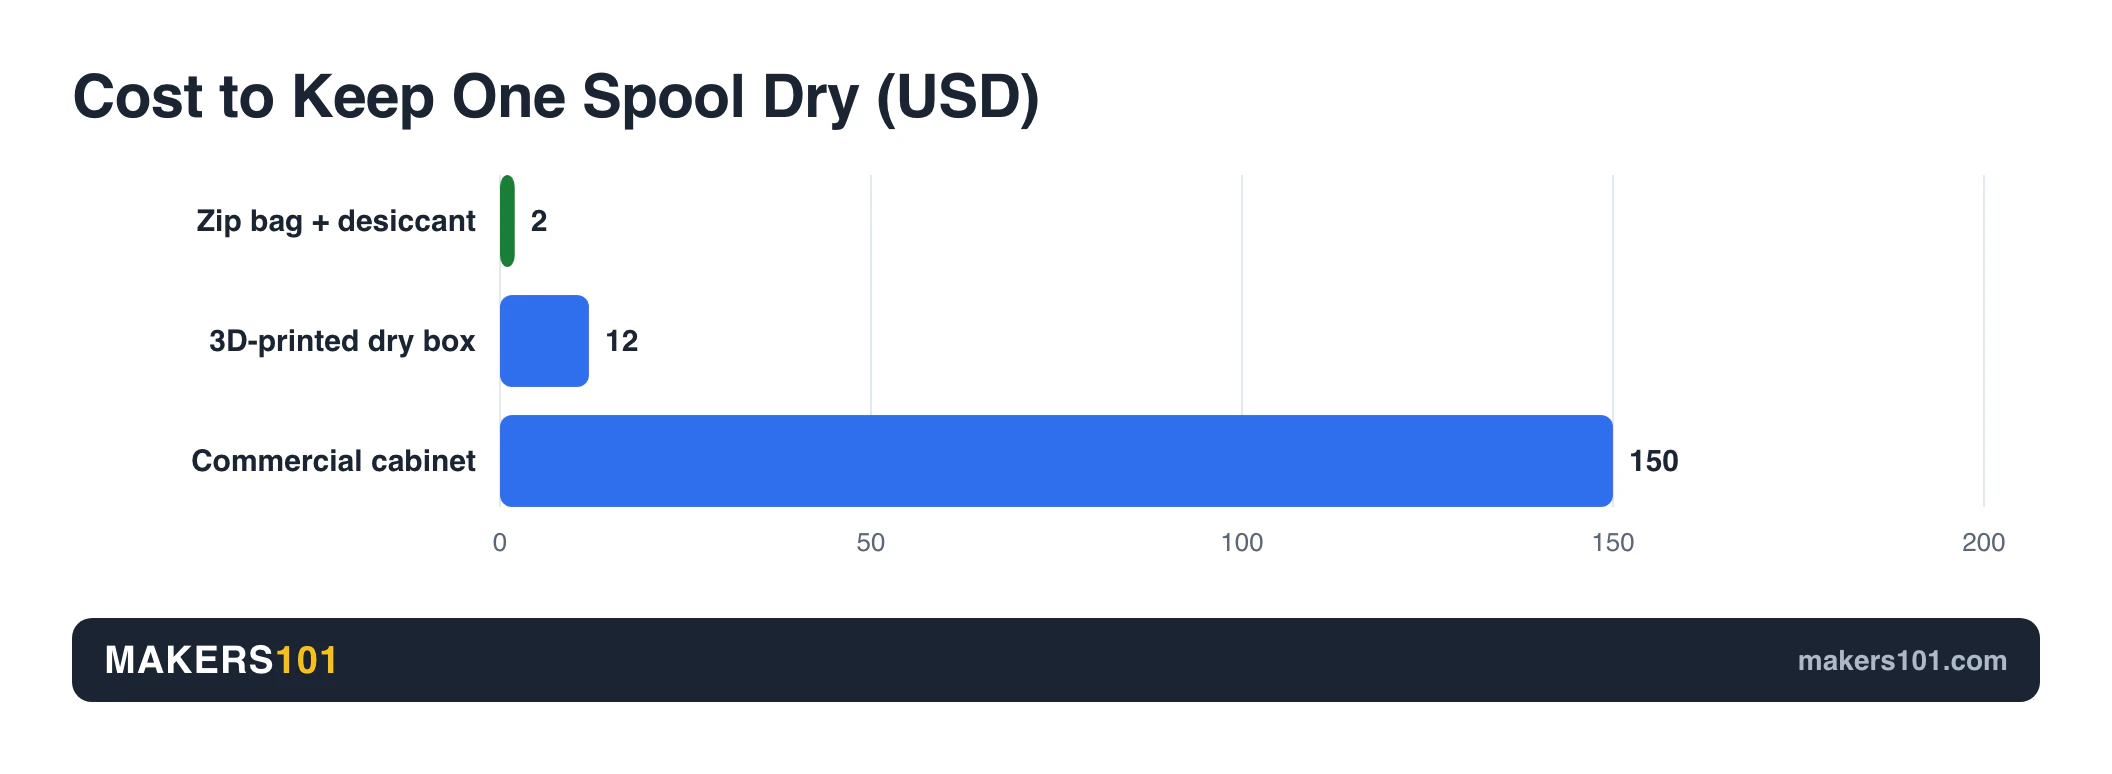
The trade-off is filament and time. At the cheap end, a zip-top bag with a desiccant pack costs only a dollar or two per spool. One popular printable design uses around 760g of filament per box, which lands near $10 to $15 in plastic each. A larger printed dry cabinet runs roughly $85 per module in filament and hardware, versus commercial cabinets that start around $600 for four spools, or about $150 per spool. One ambitious build of 80 matching boxes cost about $500 and weighed 43kg total. Beautiful, but a serious project.
The honest takeaway: no box keeps filament dry forever. It only slows down moisture and traps it. Whatever you build or buy, keep a hygrometer inside and recharge that desiccant on schedule. The container is half the system. The desiccant is the other half.
How to Keep Filament Dry While You Print
Long prints are where damp filament does the most damage. A 12-hour print gives moisture 12 hours to creep back in. The fix is to feed from a dry source the whole time. Damp filament feeds badly too. Badly-fed filament is one of the ways you end up with the gear grinding a flat spot into it.
The simplest setup is to print directly out of a sealed dry box. Run a short length of PTFE tube from the box to the printer so the filament never sits exposed. For thirsty materials like Nylon, a heated dryer that feeds while it runs keeps the spool dry mid-print.
A small habit helps too: mount a hygrometer where you can see it during printing. Watching the number is how you catch a creeping humidity problem before it ruins hour eleven.
What You’ll Need: A Beginner Starter Checklist
You can start cheap and add as you go. Here’s the kit that covers nearly every moisture problem:
| Item | What It Does | Priority |
|---|---|---|
| Airtight containers or bags | Block humidity from reaching spools | Essential |
| Rechargeable silica gel beads | Absorb trapped moisture, reusable | Essential |
| Digital hygrometer | Show real humidity inside storage | Essential |
| Filament dryer | Drive moisture out of damp spools | High value |
| Vacuum storage bags | Long-term sealing for spare spools | Optional |
If you buy one upgrade beyond the basics, make it a filament dryer. It turns “this spool is ruined” into “give it a few hours.”


New to filament in general? Our beginner’s guide to filament basics covers everything before this point.
Common Beginner Mistakes (and How to Avoid Them)
Most moisture trouble comes from a handful of repeat mistakes. I made several of these myself when I started. Avoid them and you skip a lot of failed prints.
- Drying at too high a temperature. Crank the heat and you deform the spool or melt PLA into a block. Stick to the chart.
- Forgetting to store after drying. A freshly dried spool left on the bench is wet again by morning. Drying without storage is wasted effort.
- Assuming new filament is always dry. Sealed bags usually arrive dry, but not always. If a new spool prints poorly, dry it before blaming the printer.
- Ignoring your thirstiest materials. PLA forgives a lot. Nylon and TPU don’t. Match your effort to the material.
- Skipping the hygrometer. Without a number, you’re guessing. A $10 meter ends the guessing.
- Over-drying out of panic. More heat and more cycles aren’t better. Dry to the spec, then stop.
Frequently Asked Questions
How do I store PLA filament when I’m not using it?
Seal it in an airtight container or zip-top bag with a silica gel desiccant pack. PLA is forgiving, so you don’t need a fancy setup. Just keep it out of open, humid air and check the desiccant color now and then.
Can I keep filament dry without a dryer?
Yes. Sealed storage with fresh desiccant prevents most moisture problems in the first place. To remove moisture from an already-damp spool without a dryer, use a food dehydrator with an adjustable thermostat, or your oven on its lowest setting with a thermometer inside to watch the real temperature.
Do I need to dry brand-new filament from a sealed bag?
Usually no. Most new spools arrive dry enough to print straight away, sealed with a desiccant pack. But sealing isn’t perfect, and a spool can sit in a warehouse for months. If a fresh spool shows wet-filament signs like popping or stringing, dry it before you troubleshoot anything else.
After drying, can I just leave filament in the dryer as storage?
You can, and many people do. A filament dryer that holds a low, steady temperature makes a fine storage spot. Just know it uses power continuously. For spools you’re not actively printing, a sealed box with desiccant is cheaper and works just as well.
Do I need to protect finished 3D prints from humidity?
For most objects, no. The damage from moisture happens at the hot nozzle, where water flashes to steam. A finished, cooled print is stable. It won’t suffer the same hydrolysis, so you can use and display it normally without special storage.
How long does filament last in storage?
Stored properly (sealed, with active desiccant, around 10% humidity), good filament lasts for years. Left in open air, thirsty materials like Nylon can absorb enough moisture to print poorly within a day. Storage conditions matter far more than the age printed on the box.