
I earn a commission if you buy through links on this page, at no extra cost to you. As an Amazon Associate, I earn from qualifying purchases.
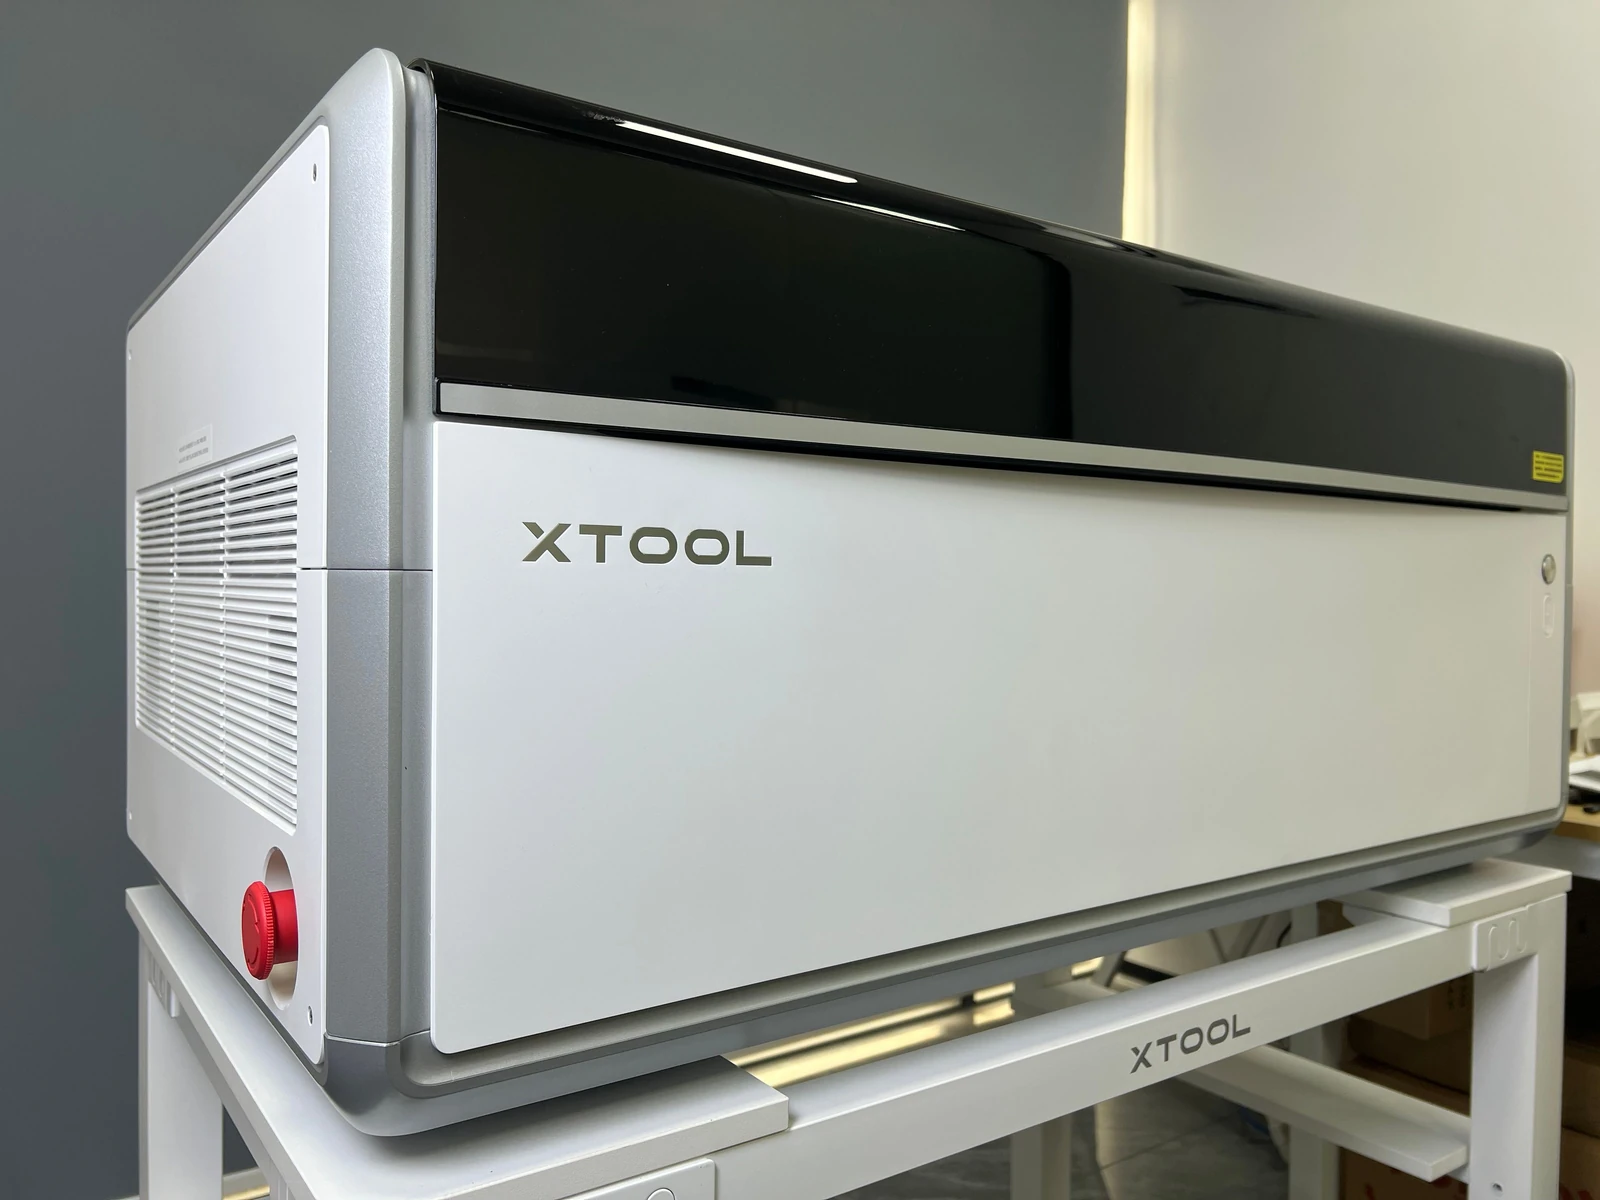
The xTool X1 is a laser processing platform that can grow with a small workshop. Start with 55W CO₂ cutting, then add the 20W diode galvo to engrave and cut in one job without moving the workpiece.
My verdict
9.5/10I’d strongly recommend the X1 to small shops and makers who regularly take custom orders.
My score reflects roughly six weeks with the 55W CO₂ and 20W diode galvo setup, including projects with the optional 60W MOPA.
On the large bed, autofocus and camera positioning helped me set up a batch. The fast galvo engraved it and the CO₂ cut it in the same job, saving me setup and repositioning time when I had several pieces to make.
The trade-offs I felt day to day were the bench space it takes up and the cleanup it needs. For the mix of cutting, engraving and short runs I do, I’d gladly make room for it.
With the diode galvo installed, you can add one external laser source at a time: 60W MOPA, 30W fiber, or 5W UV.
xTool supplied my review machine and accessories. How we test
What I liked
- Engraving and cutting in one job made my workflow simpler
- Large work area for batch projects
- Automatic focusing and camera positioning
- Optional sources give me room to take on new work
What to consider
- Heavy and bulky, with extra space needed behind it
- Initial installation and calibration take time
- No removable waste tray

- Up to 6,000 mm/s galvo
- 24.2 × 12.6 in galvo area
- Class 1 with enclosure closed
- 3 positioning cameras
Materials and specs
- Up to 6,000 mm/s galvo
- 24.2 × 12.6 in galvo area
- Class 1 with enclosure closed
- 3 positioning cameras
How I Tested the xTool X1
When the pre-release unit arrived in late September, I’d been using lasers for a little over a year, including the Creality Falcon A1 Pro and a Carverall 20W machine. The X1 was my first time combining multiple laser sources in one system.
All tests used xTool Studio, mainly with recommended presets. I also used parameter grids for the basswood photo tests.
For wood and acrylic, I used the CO₂ laser and diode galvo. The optional 60W MOPA came into play for the metal cards and color sample.
My alignment observations come from looking at the finished pieces. In the buying section, I draw on xTool’s published specifications to explain the optional configurations and accessories.
xTool X1 Specifications and Measured Dimensions
| Spec | xTool X1 |
|---|---|
| Laser sources | 55W CO₂ (all versions) + 20W Diode Galvo Module (CO₂ + Diode Galvo version) |
| Optional modules | 60W MOPA, 30W Fiber, 5W UV (all need the Diode Galvo Module) |
| Flat galvo processing area | 615 × 320 mm (24.2 × 12.6 in) |
| Combination mode with CO₂ | 527 × 297 mm (20.7 × 11.7 in), per xTool’s processing area guide |
| Rated galvo speed | Up to 6,000 mm/s |
| Motion system | Hybrid Motion (gantry X-Y plus two galvo mirrors) |
| Measured footprint | 100 × 58 × 43.5 cm with feet (my measurement) |
| Height with lid open | 85 cm (measured) |
| Space around my setup | About 15 cm behind and 20 cm on each side; observed placement, not a manufacturer clearance specification |
| Handling | Two of us lifted it onto the stand |
| Bed | AutoLift motorized bed, honeycomb panel optional |
| Cameras | ACS overview, close-up, and ranging cameras |
| Software | xTool Studio, with Atomm design tools |
xTool X1 Prices, Bundles and Upgrade Costs
I checked xTool’s US prices on November 9, 2026. The linked price is the sale price for that exact configuration, with xTool’s listed regular price in parentheses. Prices are in USD before taxes and shipping.
| Laser configuration | Standalone | Versatile Bundle | All-in-One Bundle |
|---|---|---|---|
| 55W CO₂ | $3,399 ($3,699) | $4,499 ($4,799) | $5,399 ($5,699) |
| 55W CO₂ + 20W Diode Galvo | $3,999 ($4,299) | $5,099 ($5,399) | $5,999 ($6,299) |
| CO₂ + Diode Galvo + 30W Fiber | $5,799 ($6,099) | $6,899 ($7,199) | $7,799 ($8,099) |
| CO₂ + Diode Galvo + 5W UV | $6,499 ($6,999) | $7,599 ($8,099) | $8,499 ($8,999) |
| CO₂ + Diode Galvo + 60W MOPA | $6,679 ($7,179) | $7,779 ($8,279) | $8,679 ($9,179) |
The product cards show the CO₂ + Diode Galvo Standalone price. I tested that base with the optional 60W MOPA. The stand, conveyor and fire safety box I received are separate from the Standalone package.
What Each Bundle Adds
| Bundle | What it adds | Over Standalone | Accessories bought separately |
|---|---|---|---|
| Standalone | Machine and selected laser sources | — | — |
| Versatile | MagSwap RA3 rotary, X1 Intelligent Conveyor Feeder and X1 Mobile Work Stand | +$1,100 | $1,139 |
| All-in-One | Everything in Versatile, plus the SafetyPro AP2 air purifier | +$2,000 | $2,138 |
At these prices, I’d save $39 on the Versatile accessories or $138 on the All-in-One accessories by buying them in the bundle. I’d choose a bundle if I already planned to use those accessories. My X1 pricing guide has more detail on the individual accessories.
What the Modules Cost if You Buy Them Later
| Add-on | US sale price | Listed regular price | Requires |
|---|---|---|---|
| 20W Diode Galvo Module | $809 | $899 | X1 base |
| 30W Fiber Galvo Source | $1,799 | $1,999 | 20W Diode Galvo Module |
| 5W UV Galvo Source | $2,699 | $2,999 | 20W Diode Galvo Module |
| 60W MOPA Galvo Source | $2,879 | $3,199 | 20W Diode Galvo Module |
At these prices I’d buy the diode galvo with the X1 if I already knew I wanted it. It adds $600 at checkout versus $809 later. Buying UV or MOPA with the machine saves $199 versus adding either at its current sale price. The 30W fiber costs about the same either way.
Unboxing the xTool X1: Included Accessories
My review kit arrived in several cartons. The large machine carton held the X1, the 20W Diode Galvo module and the smaller accessories packed inside the machine.
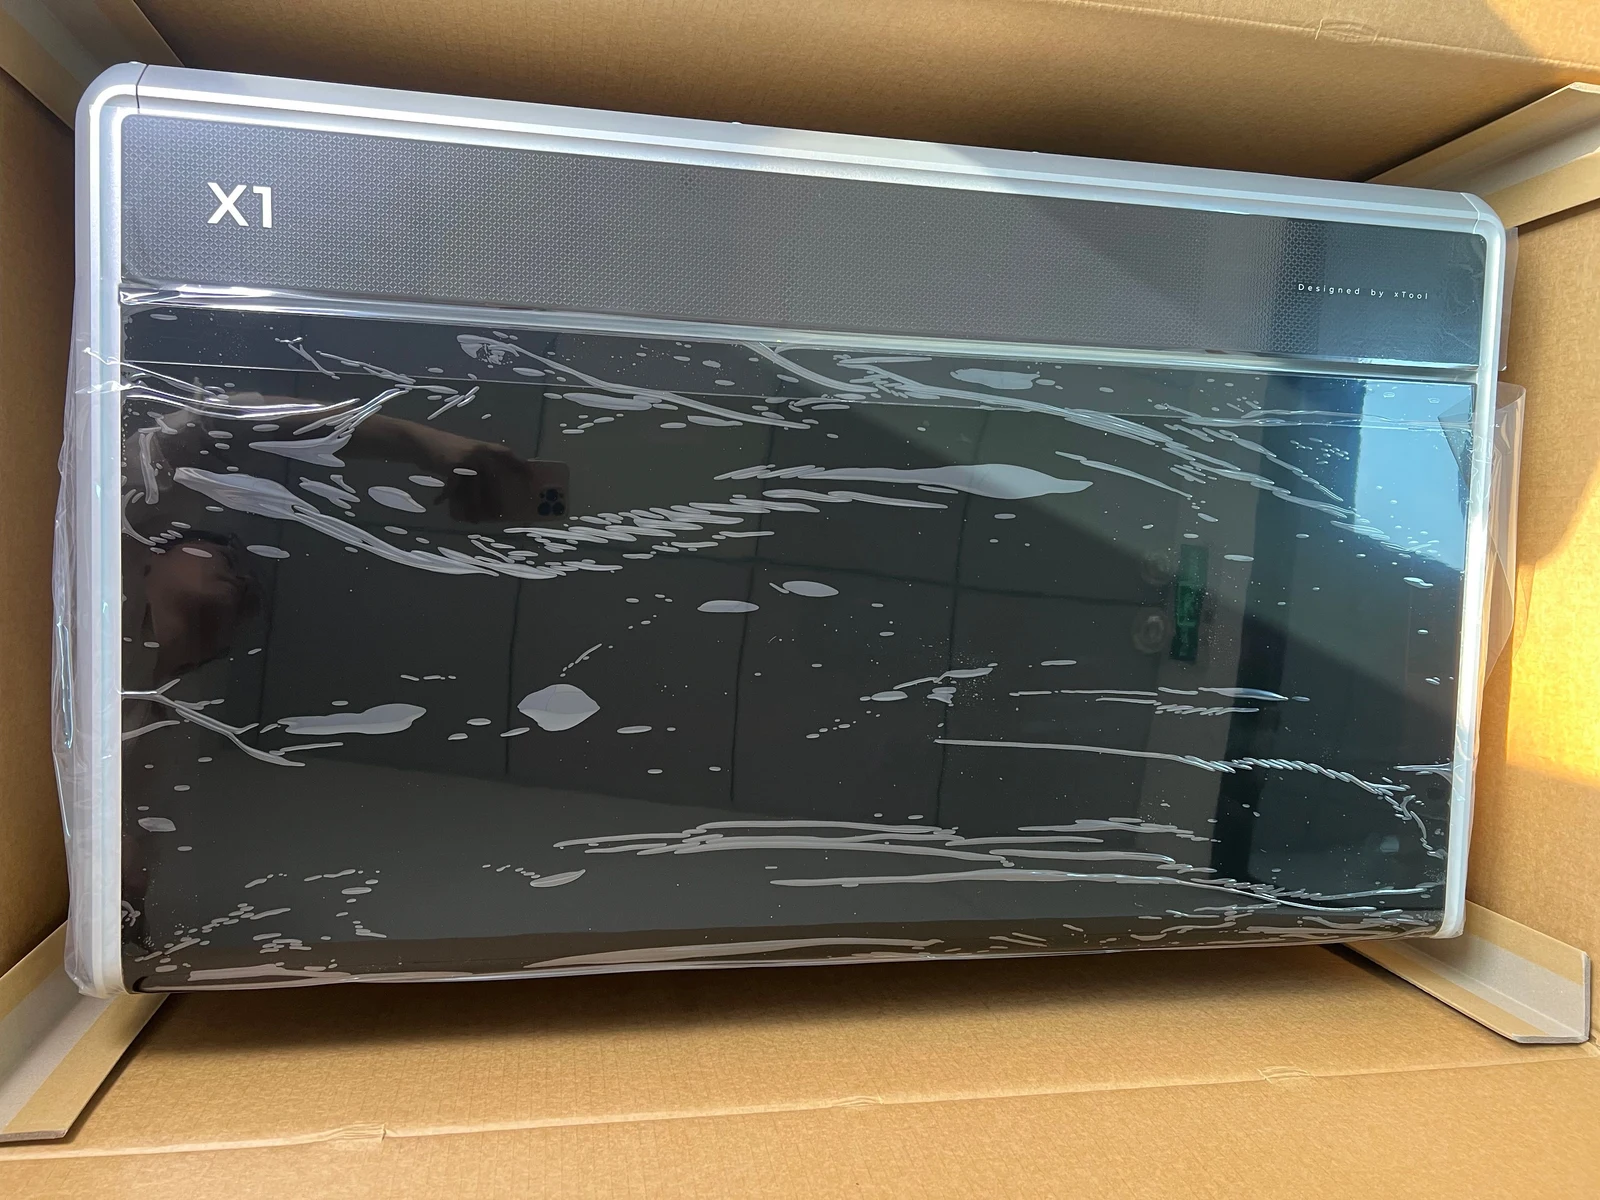
The X1 in its main carton with the protective film still in place.
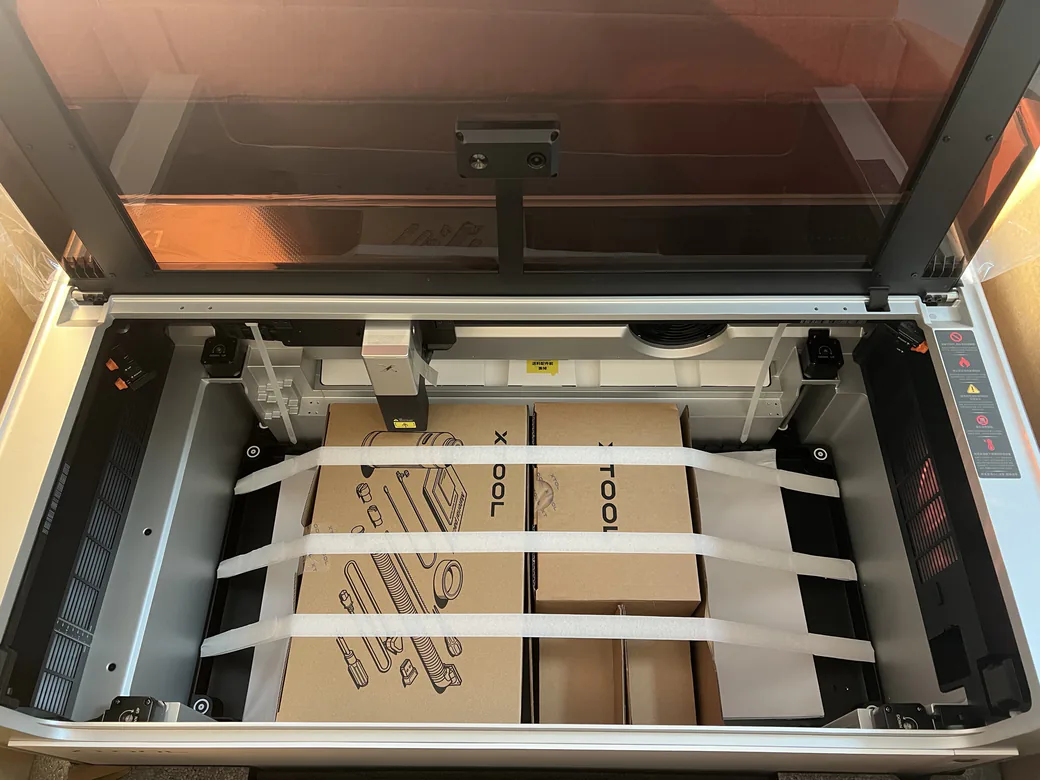
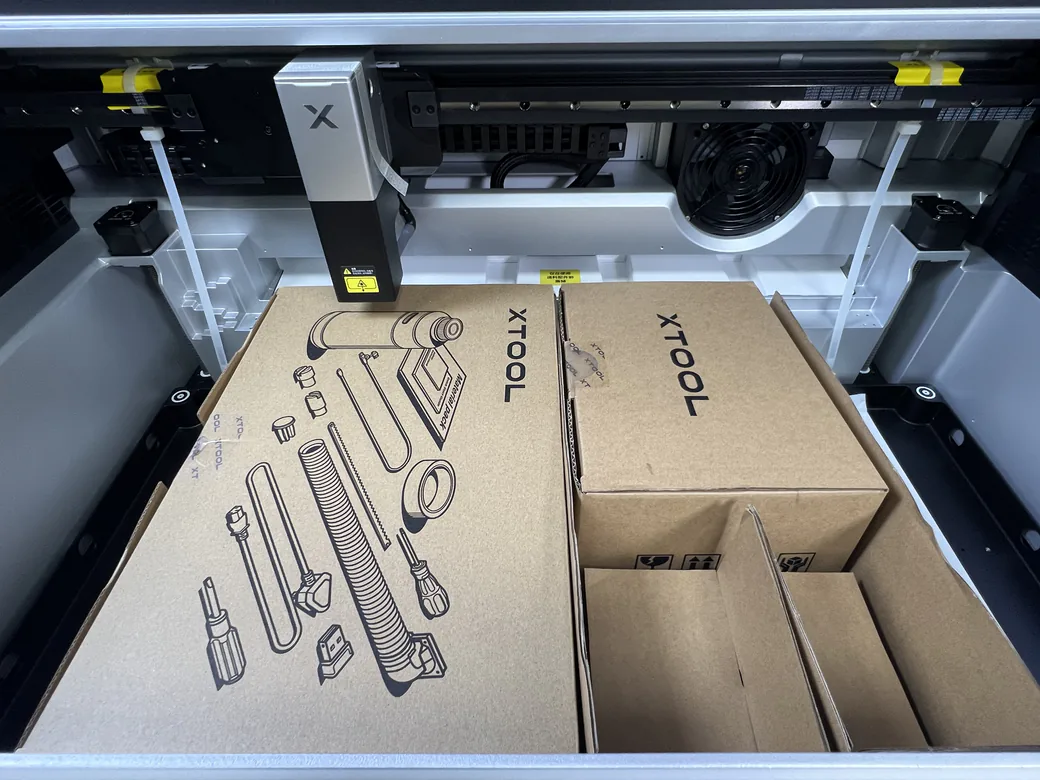
The main carton contained the machine and the 20W module. Smaller accessory cartons were secured inside the enclosure.
The mobile work stand, honeycomb panel, Automatic Conveyor Feeder, fire safety box and 60W MOPA module arrived as separate packages. The stand’s wheels made a practical difference once I needed to reach the back of the machine.
An exhaust hose came with the machine, along with the cables, tools and small mounting parts shown here. I already owned safety glasses and bought the xTool basswood and acrylic separately for testing, then added third-party wood samples.
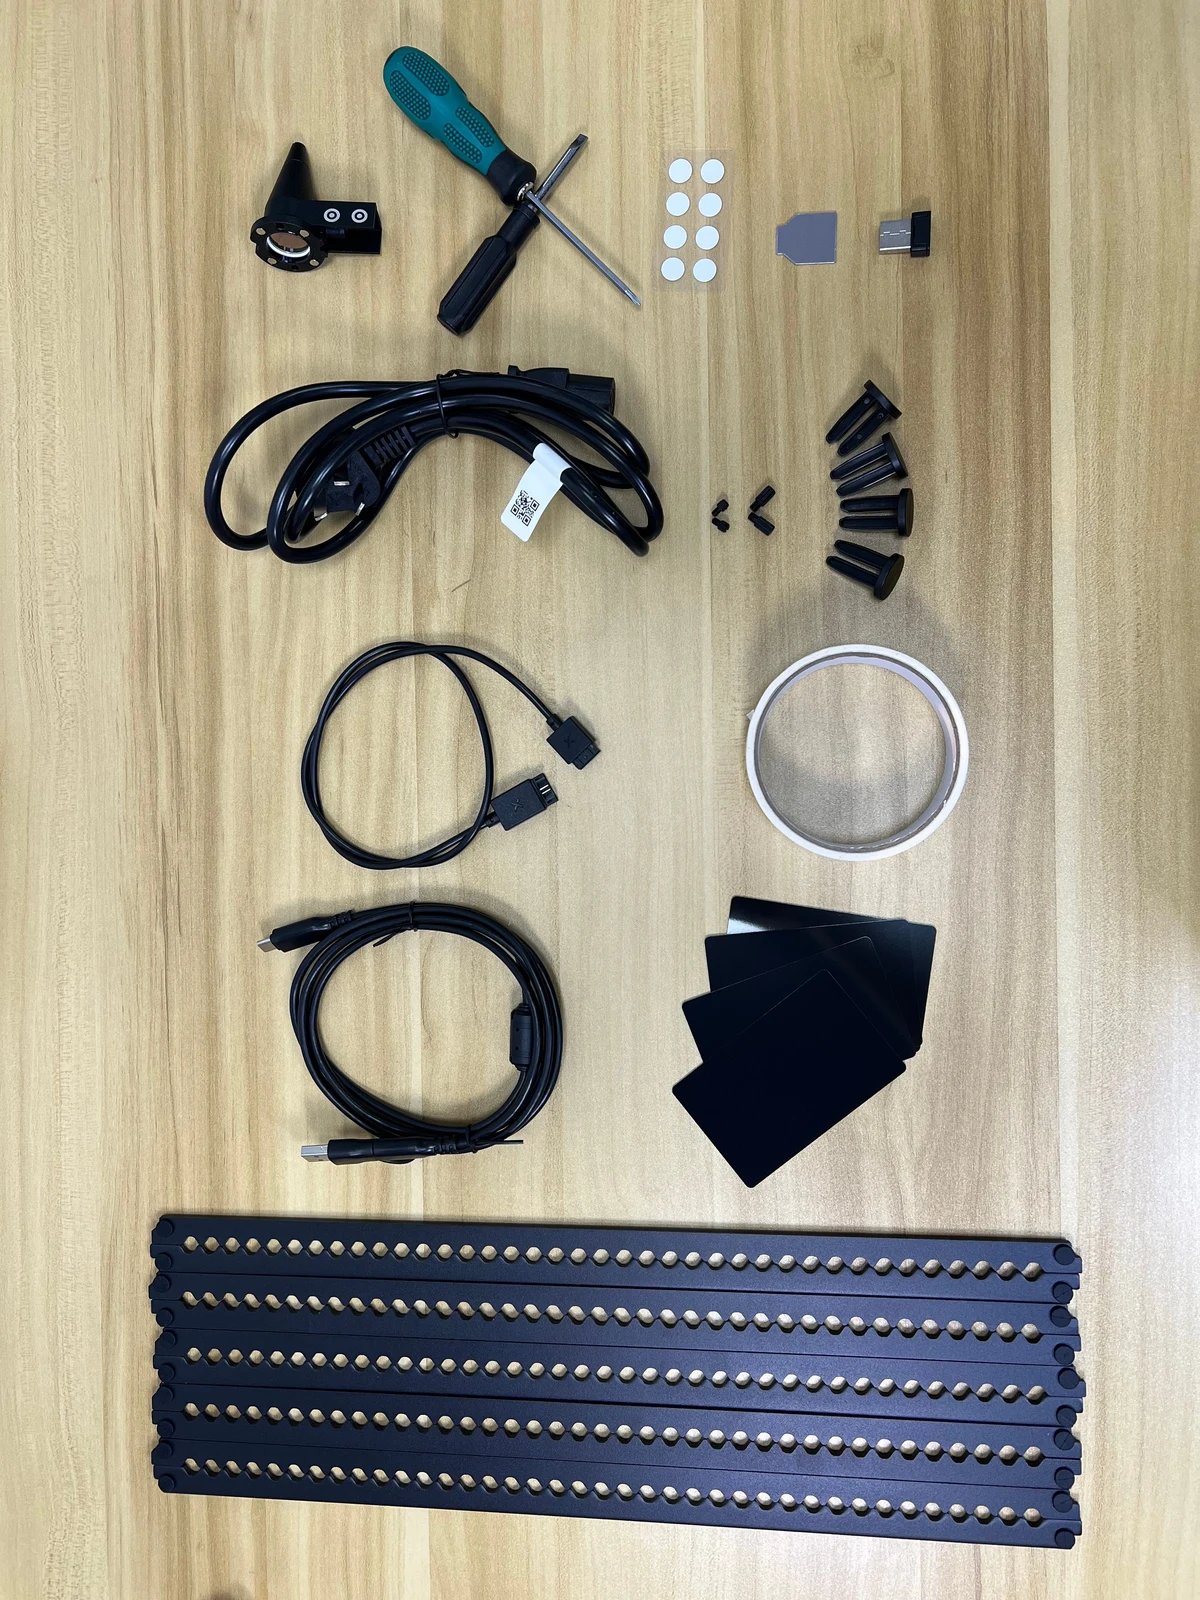
The supplied cables, tools and small fittings laid out before assembly. Check the configuration listing for the contents of a retail bundle.
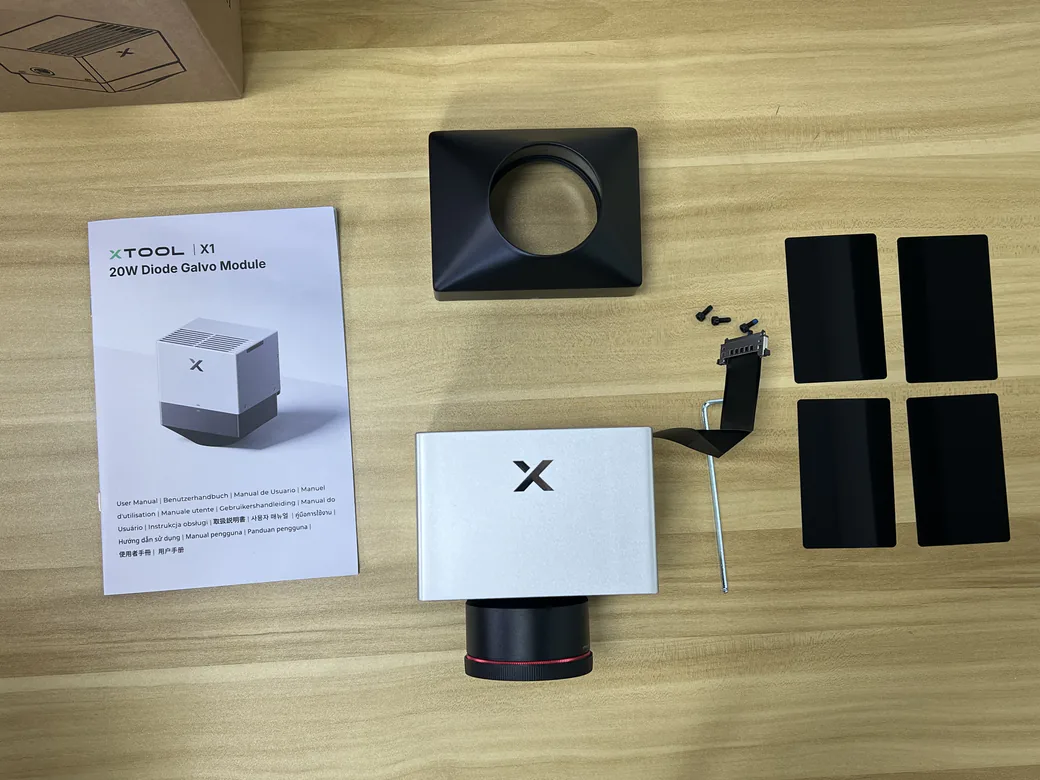
My 20W diode galvo kit laid out before installation, with the module, manual, hardware and sample cards.
Two of us lifted the machine onto the stand, consistent with the handling guidance on the carton. Choose a place with room behind the machine before lifting it into position.
Design and Build Quality
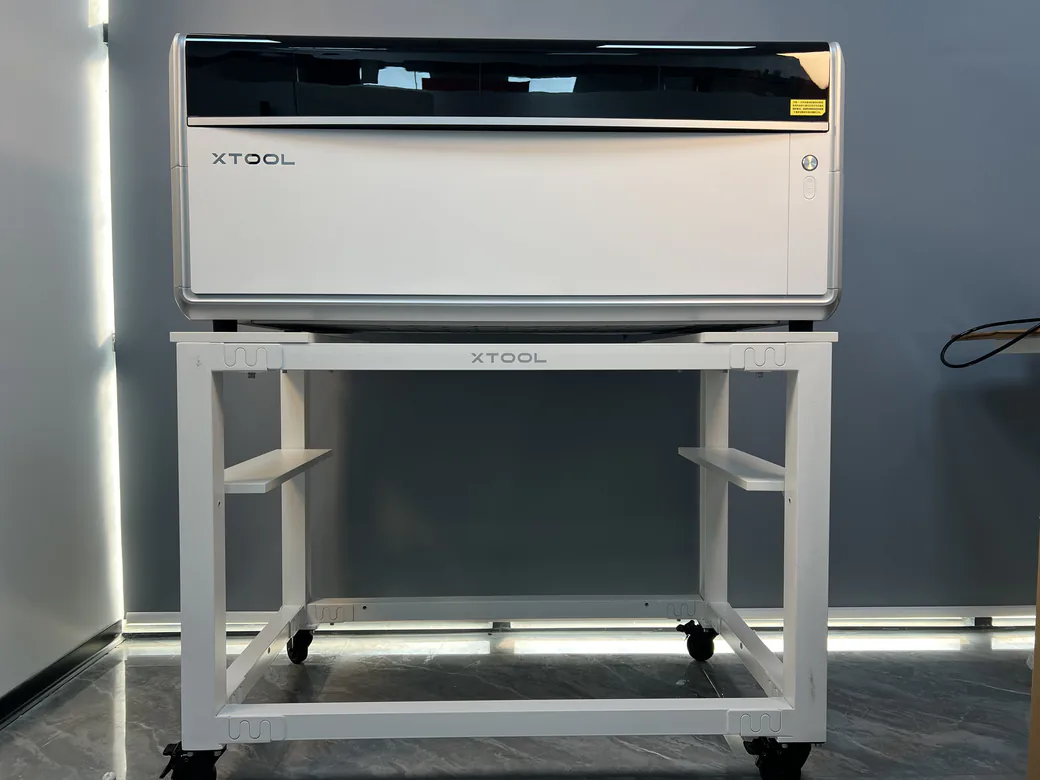
The X1 has white panels, gray trim and a dark transparent lid. The raised xTool logo is the most prominent feature on the front, and the broad bed felt solid when I loaded materials.
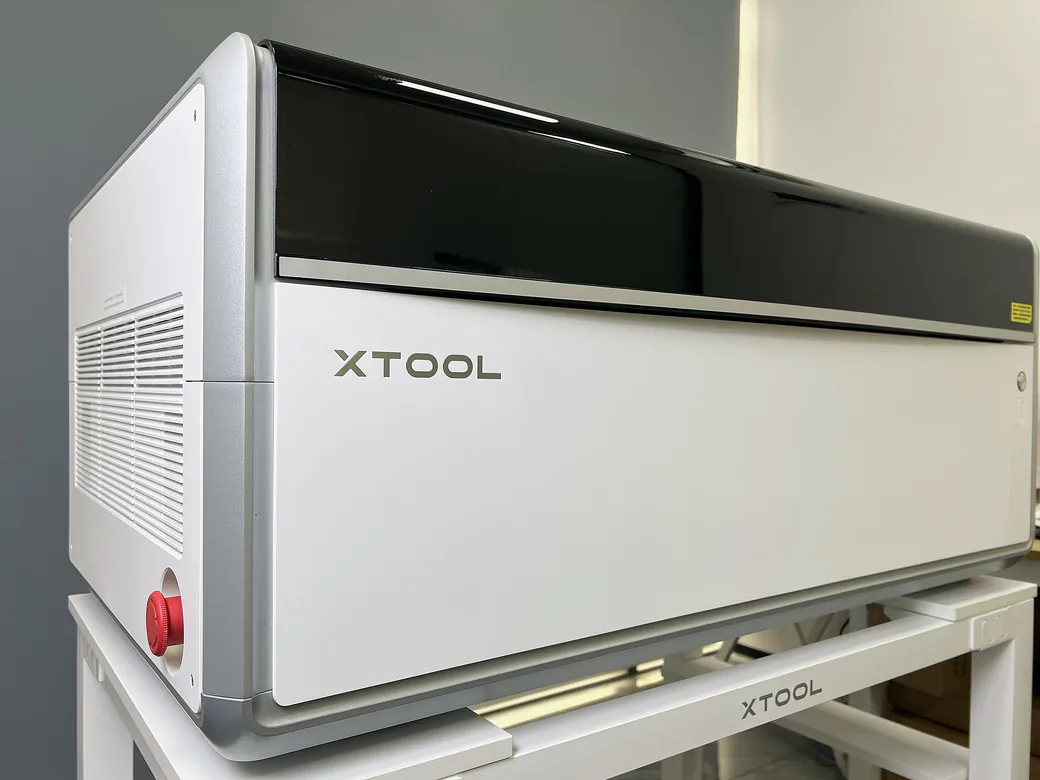
My review unit on the mobile work stand.
Front and Sides
The front control area includes a ring indicator, a Start/Stop button and controls for raising and lowering the base. Both side panels have air intakes. The red emergency stop sits on the side near the front, where it is easy to reach.
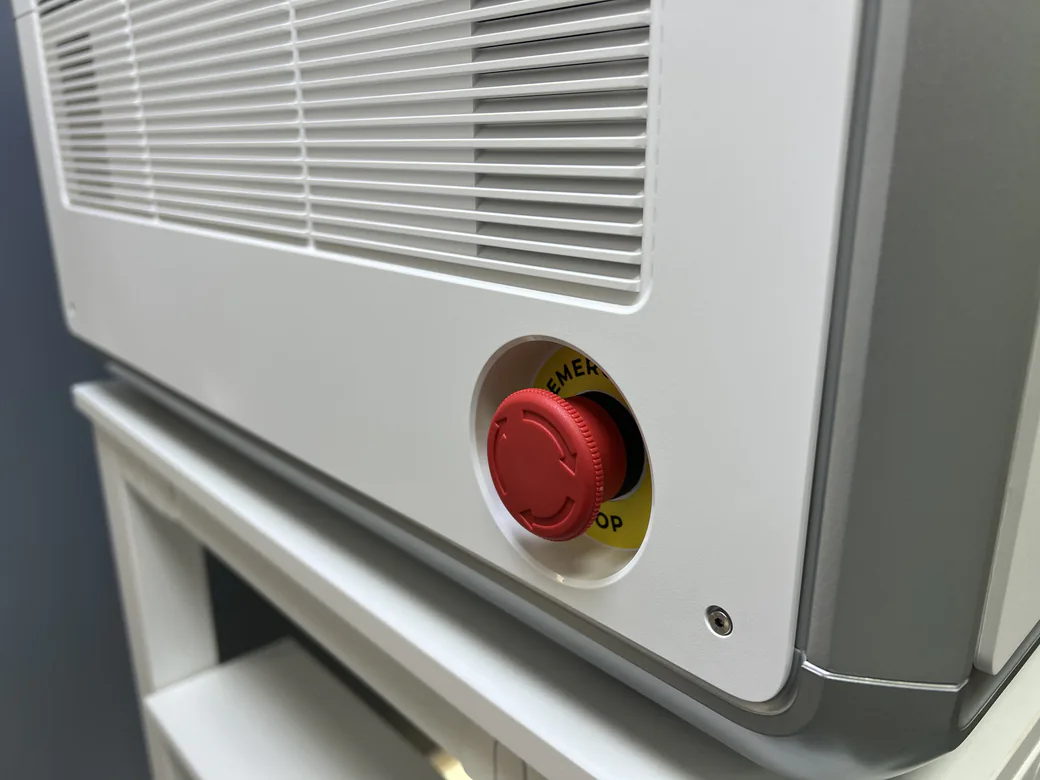
The side intake grille and red emergency stop button on my review unit.
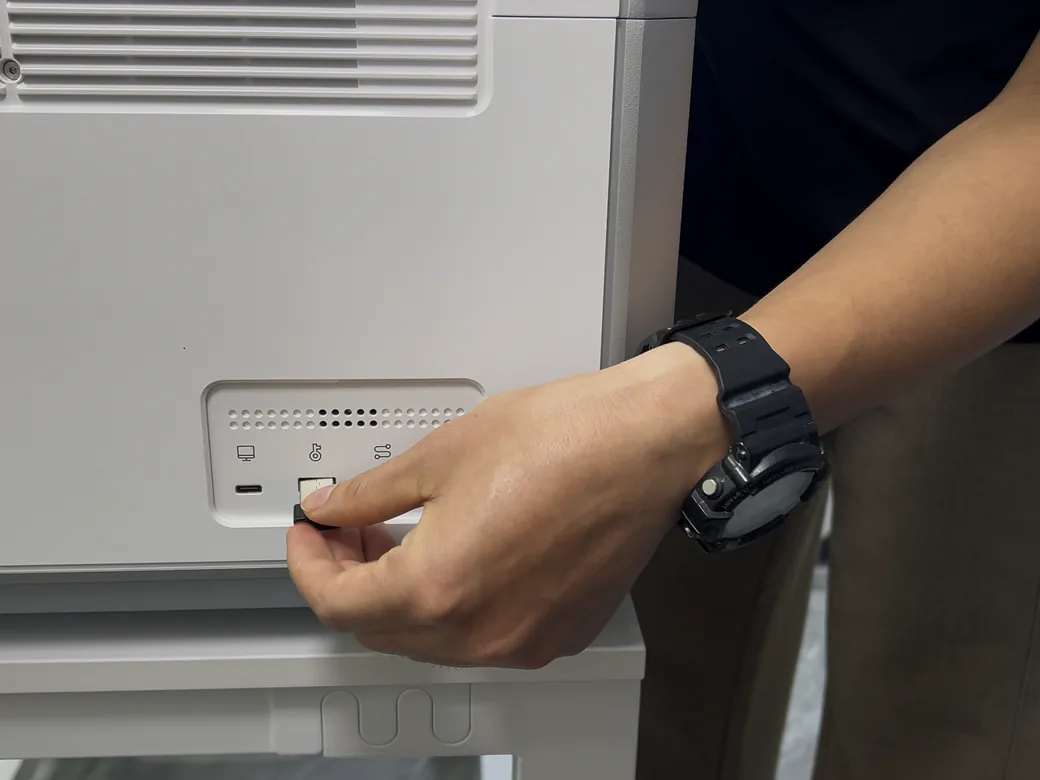
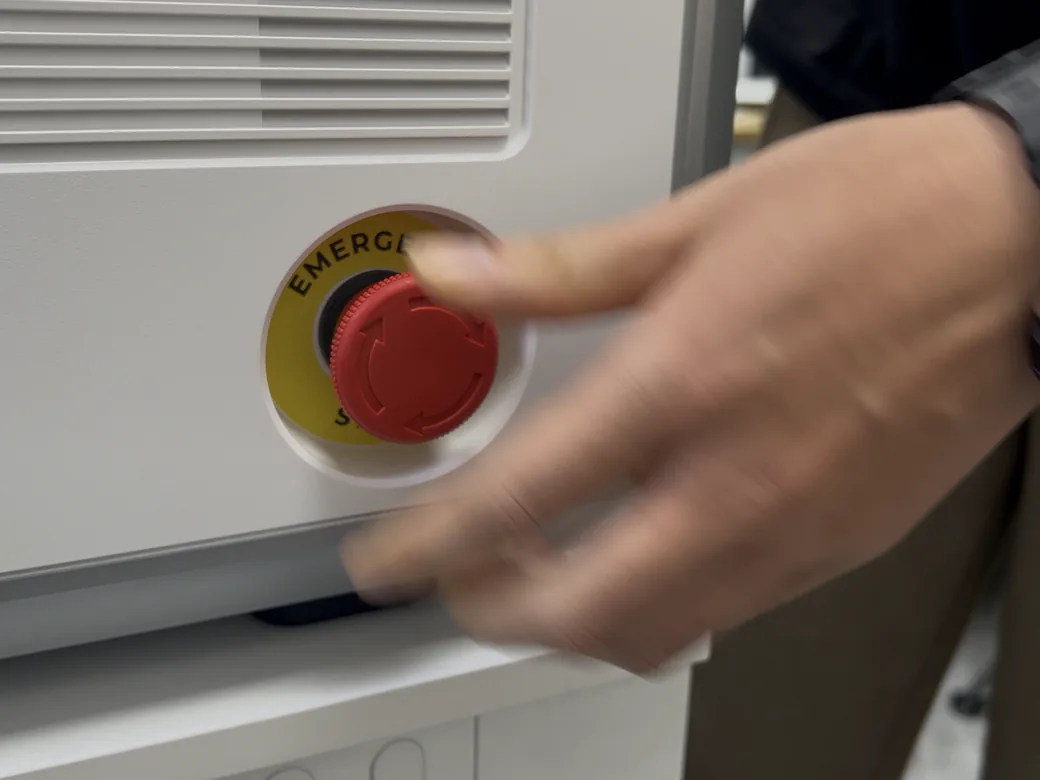
The safety lock on one side of the xTool X1, followed by the red emergency stop on the other side.
Rear Connections and Cooling
The rear is where the external MOPA module mounts and where you connect the exhaust duct. The coolant fill cap and water-level window are also at the back, along with the power switch, power connections and USB port. Keep this area accessible for filling the tank and servicing the duct.
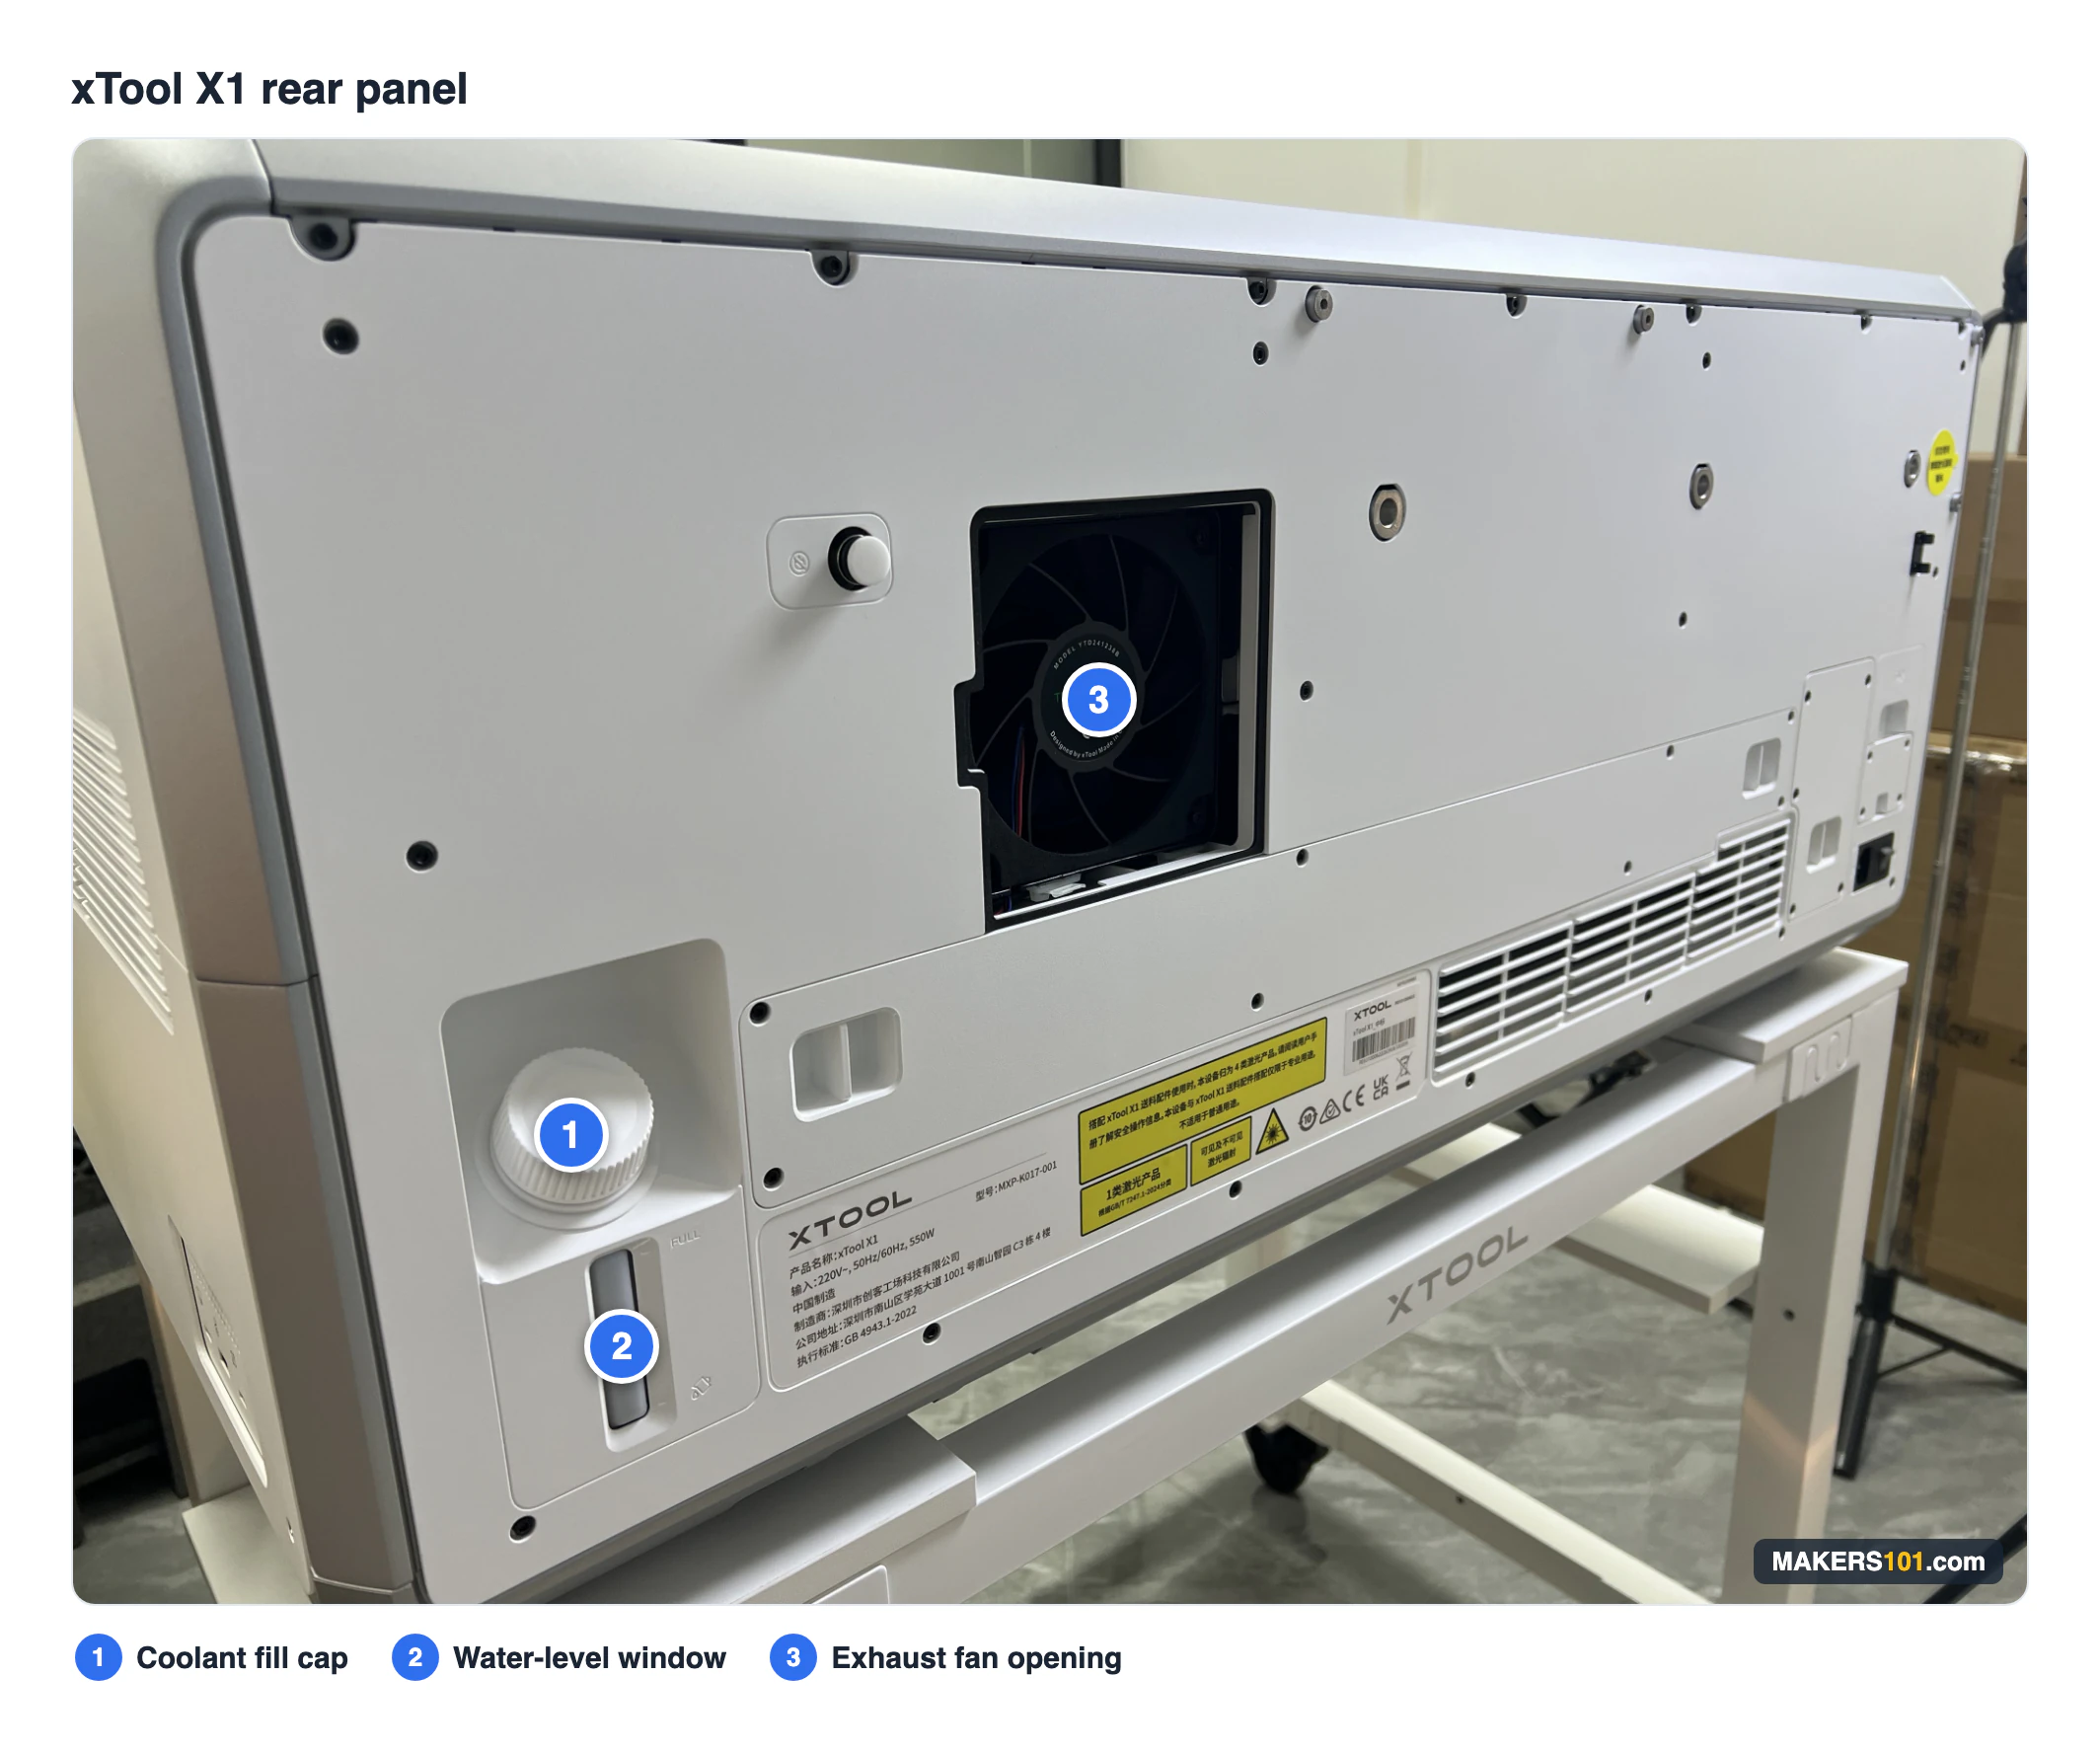
Rear panel before the exhaust duct and MOPA module were fitted. The numbers identify the coolant fill cap, water-level window and exhaust fan opening.
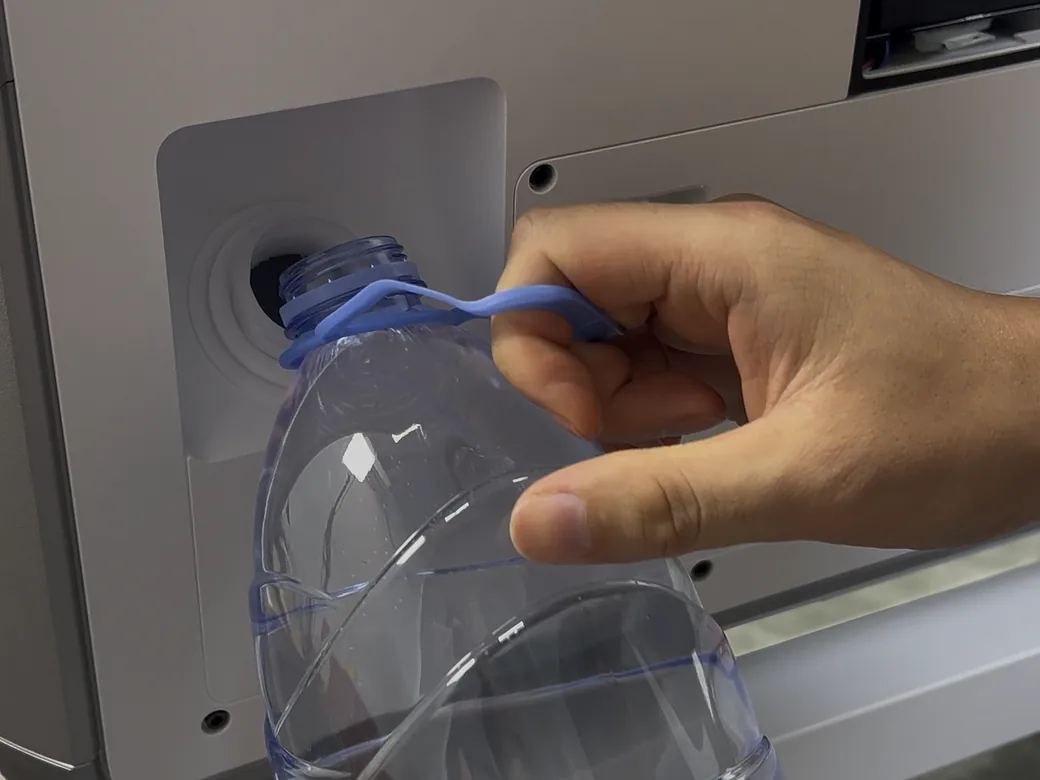
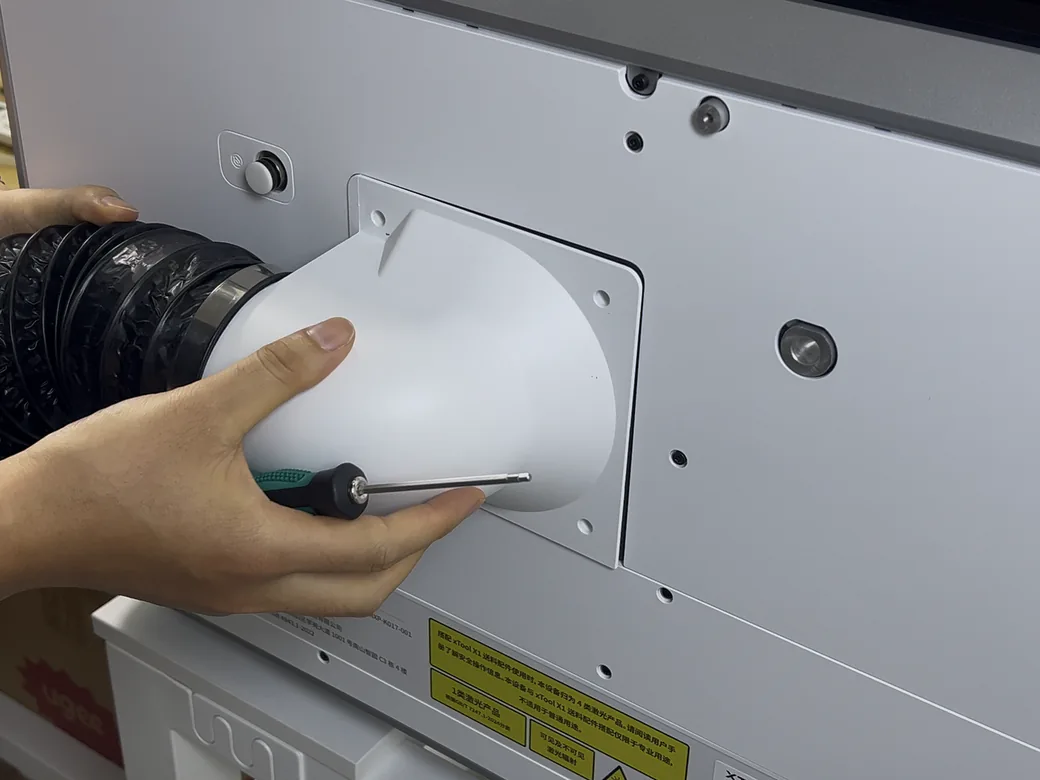
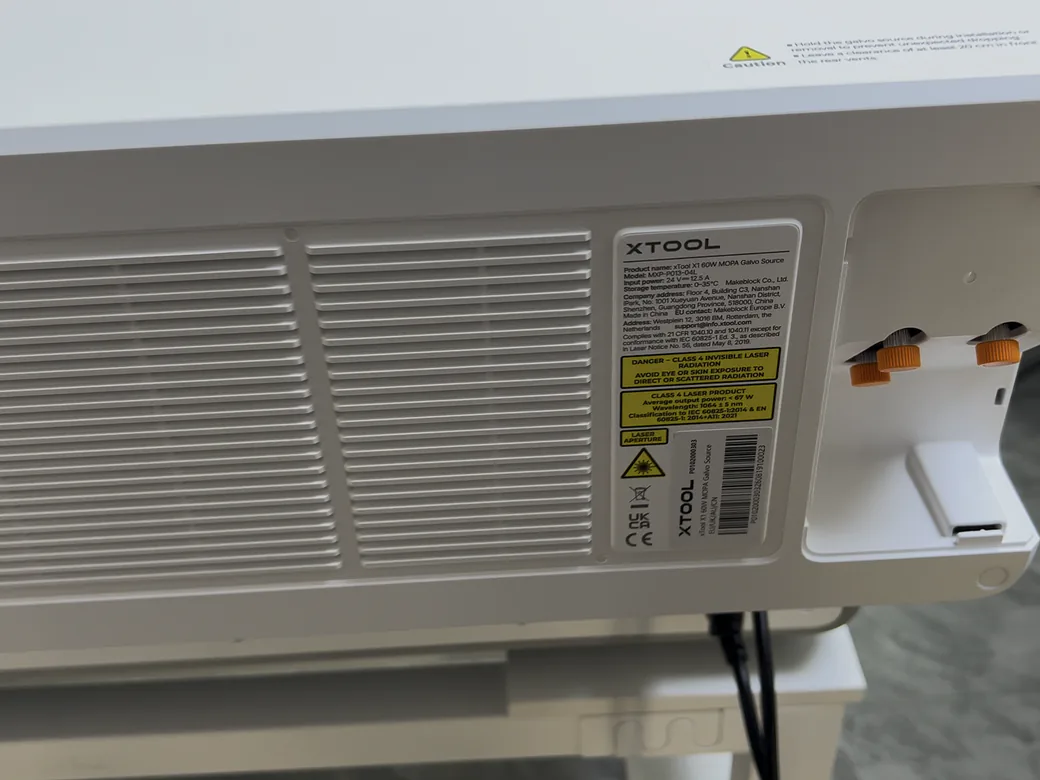
Rear access during setup. These stills show the coolant fill, exhaust duct installation and external laser source.
Temperatures where I live stay above 0°C year-round, so I filled the reservoir with purified water without adding antifreeze.
The main unit measured about 100 × 58 × 43.5 cm with its feet. I allowed about 15 cm behind to fit the roughly 14.5 cm-deep MOPA module and about 20 cm on each side around the air intakes. Check the space needed for your exhaust hose and for reaching the fill cap with the module installed.
Top, Lid and Underside
The tinted top lid gives a view into the chamber. Its highest point reached about 85 cm above the surface supporting the machine when open. That measurement is useful if you plan to put the X1 under shelves.
There’s another air intake underneath the machine. Inside the enclosure, the motorized base supports the work, and the separate honeycomb panel gives cut pieces and debris somewhere to drop. The stand’s casters made it easier for me to move the whole setup for rear access.
Motorized Bed and Working Area
When I first lifted the lid, I saw the bare machine bed with two Calibration Sheets laid on the bottom. Those sheets are for test marks and alignment during setup.
The AutoLift bed moves vertically to make room for different objects. I tried a cutting board, a wooden box and a hardcover book with autofocus enabled, and all three fitted.
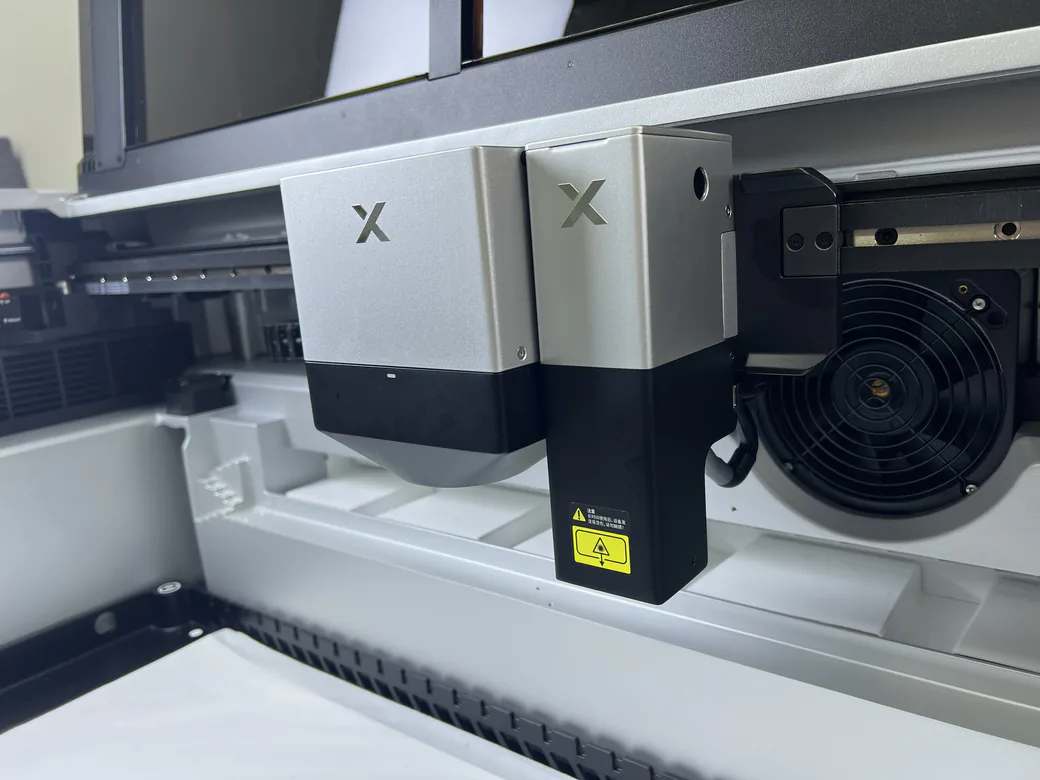
Three-Camera Positioning System
The ACS camera system combines an overview camera, a close-up camera, and a ranging camera.
- Overview: shows the work area for arranging the design.
- Close-up: provides a more detailed view for placement.
- Ranging: supports distance measurement for automatic setup.
Together, the cameras support the measurement and placement workflow described in the everyday-use section below. That automatic preparation was one of the features I appreciated most over six weeks of projects.
xTool X1 Setup and Installation
Assembly and Module Installation: About 90 Minutes
The 55W CO₂ system was already installed. To get it ready, I followed the manual to remove the shipping restraints, set up the exhaust, fill the coolant reservoir and seat the magnetic air nozzle. Then I installed the 20W diode galvo inside the enclosure and the 60W MOPA backpack at the rear. The setup took me about 90 minutes.
The magnetic air nozzle took me two tries to seat. The xTool X1 user guide shows the hardware setup for each configuration.
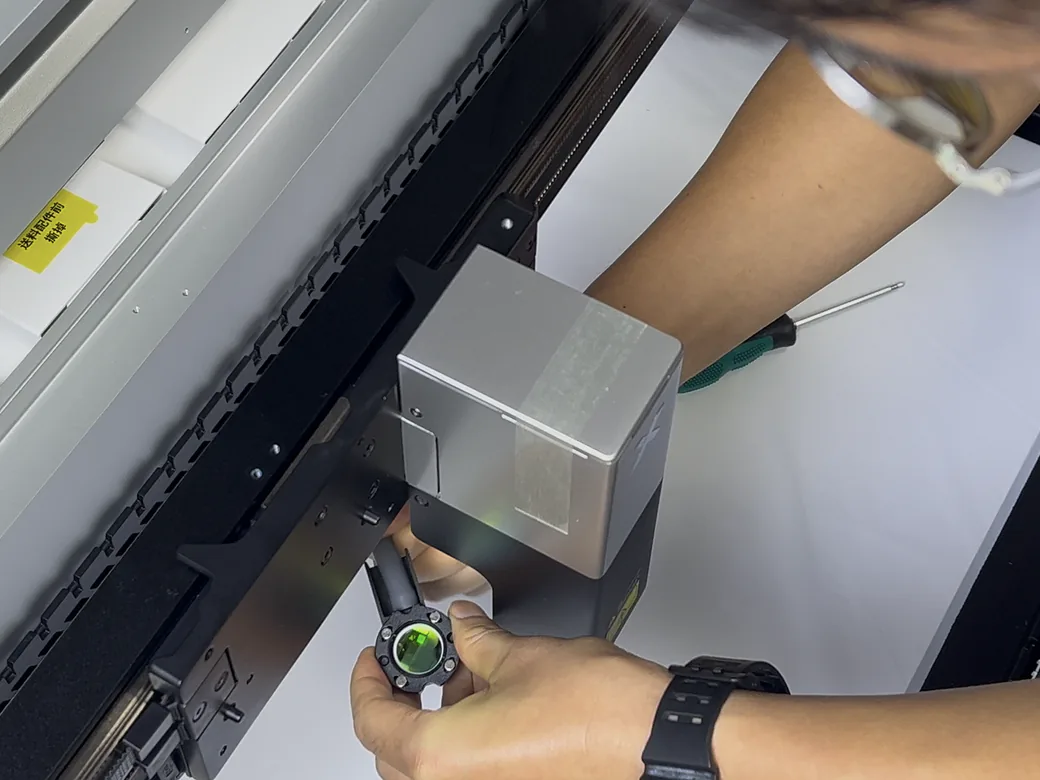
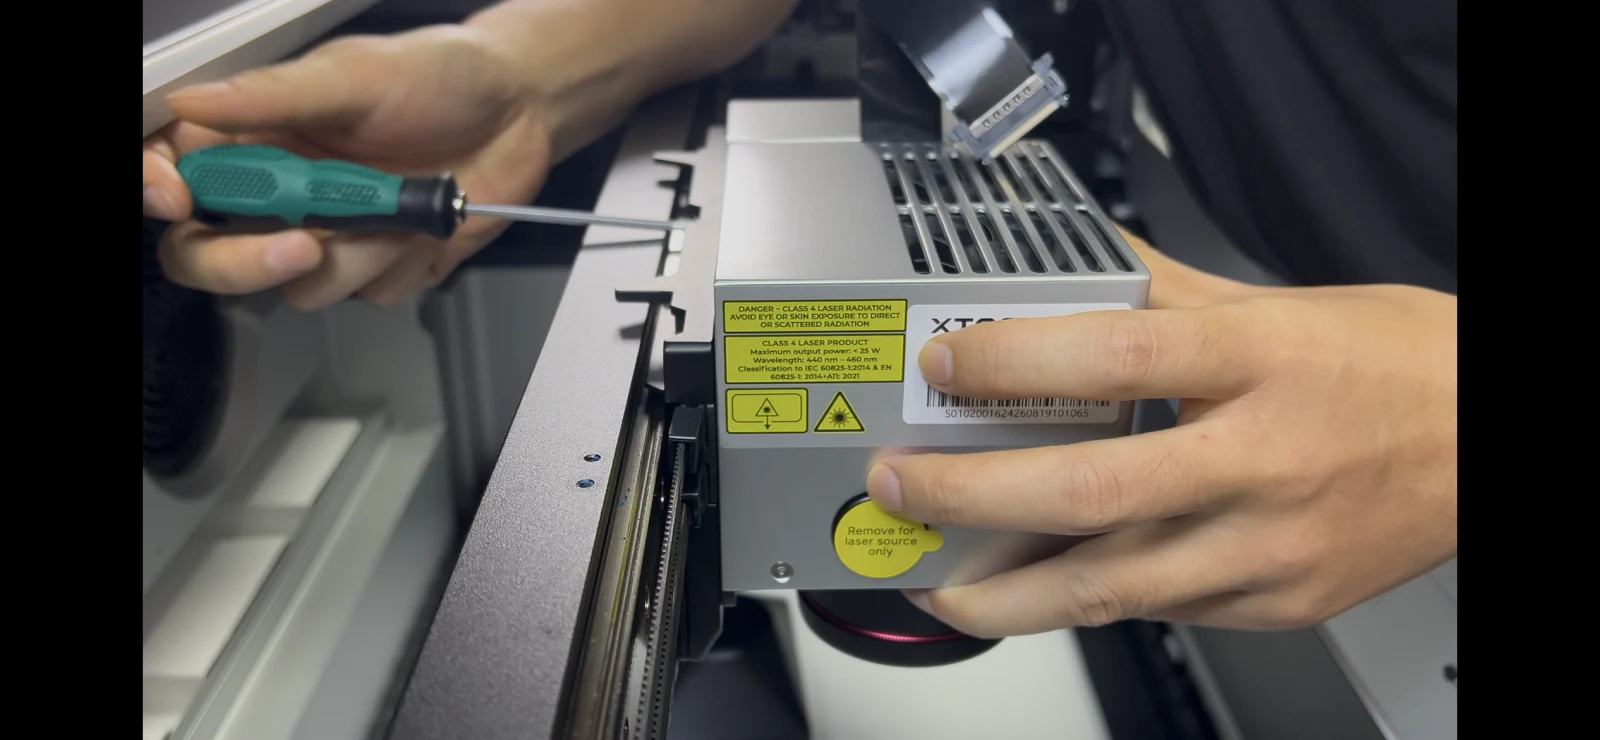
At the gantry during setup, including a close-up of the mounting screw I fitted on the 20W diode galvo.
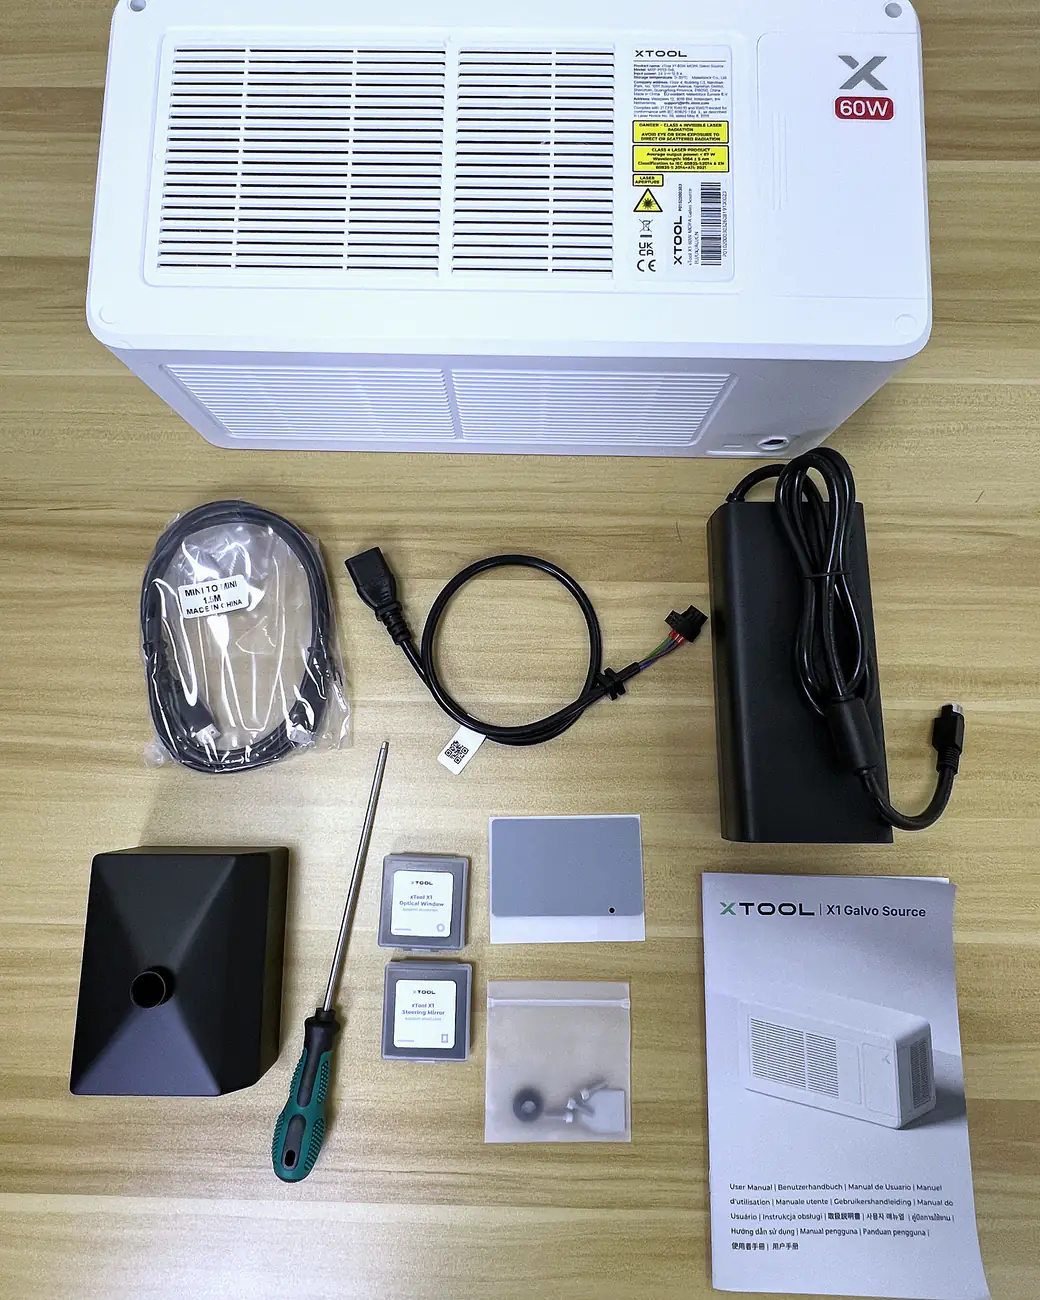
The 60W MOPA kit I installed at the rear after fitting the diode galvo.
For a beginner, I would allow an unhurried first session. The work was manageable, but it was more than taking the machine out of the box and pressing Start.
Initial Calibration in xTool Studio
The chamber lights came on immediately, and I heard a beep after about five seconds. Once I added the machine in xTool Studio, the guided calibration moved the head through several positions and took photographs along the way.
My unit passed the initial calibration without retries or manual adjustment. That stage accounted for most of the time between power-on and the first finished project. The steps depend on which sources are installed, as shown in xTool’s initial calibration guide.
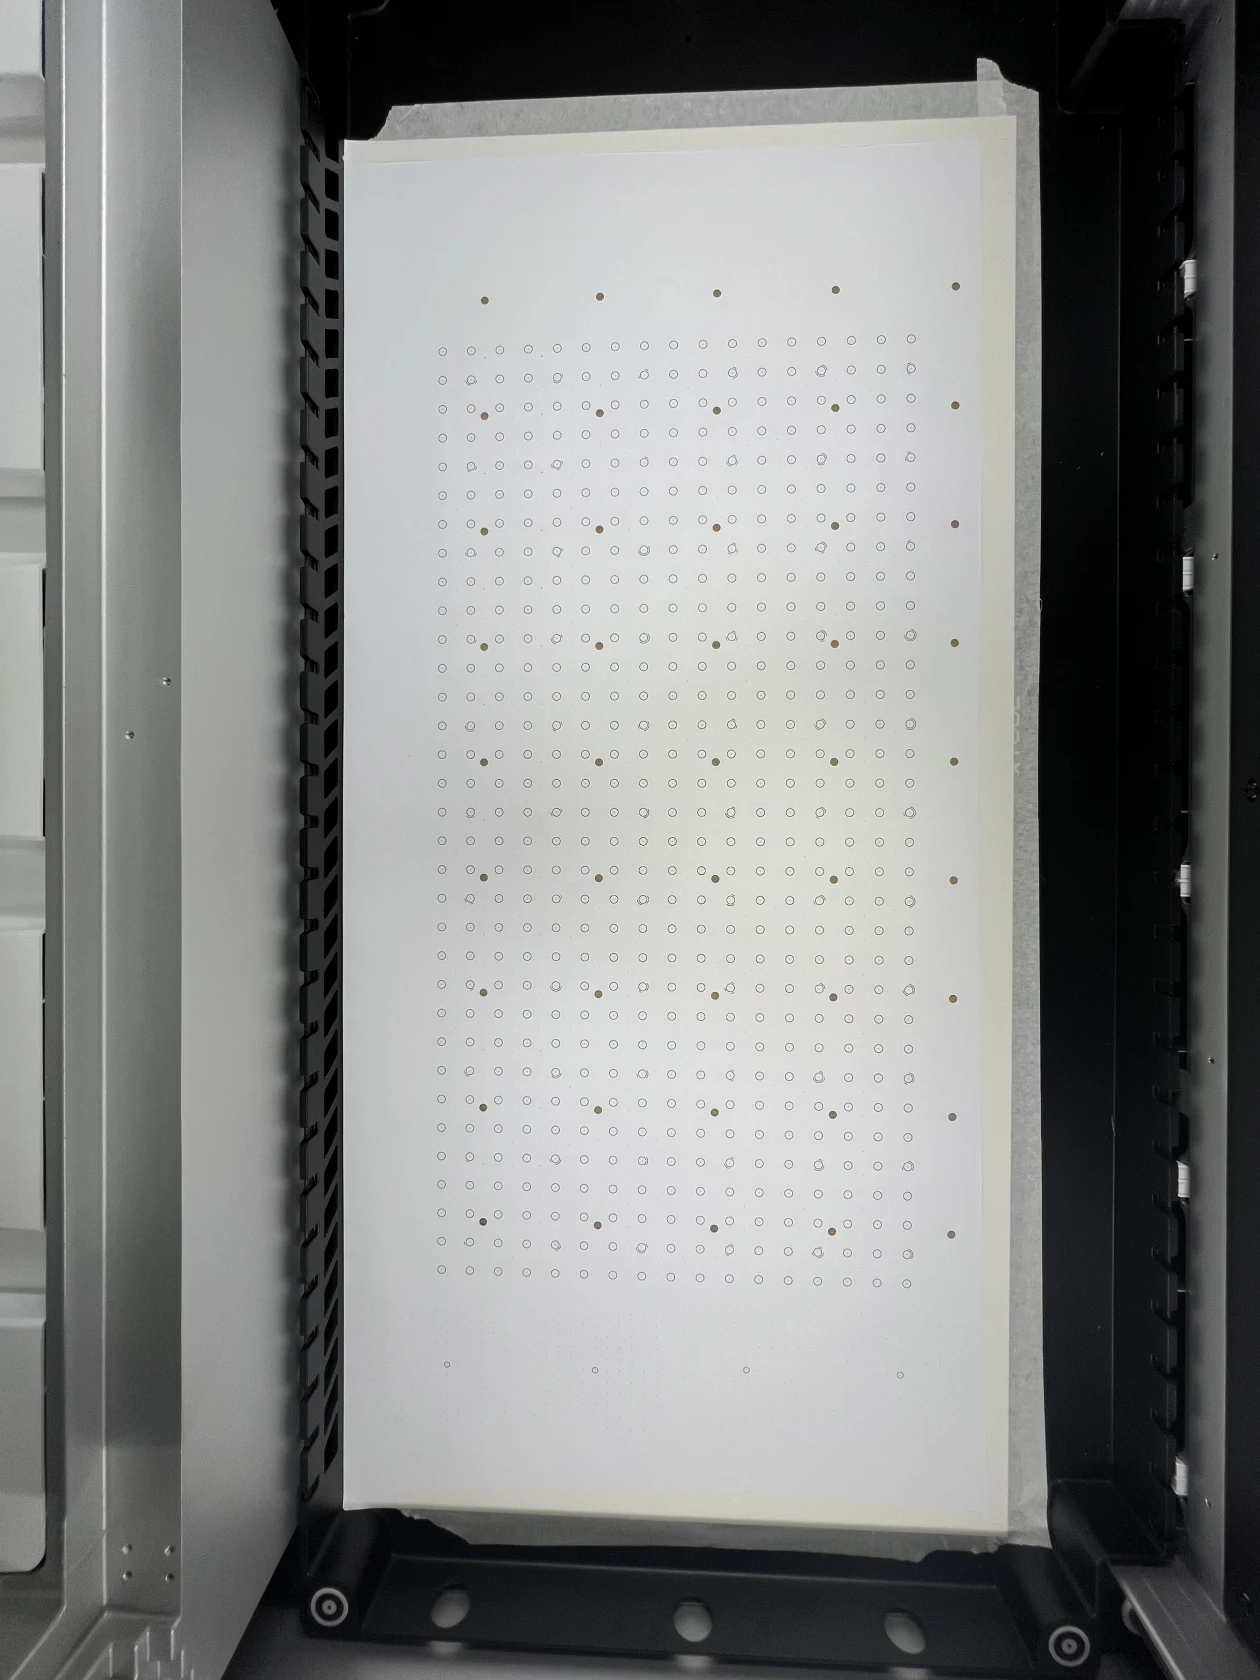
The marks on my calibration sheet after the first power-on calibration. The photo shows how the sheet sits across the work area.
First Project: Engraving and Cutting a Basswood Box
For Studio’s guided box project, I loaded the supplied 3 mm basswood sheet. The 20W diode engraved the pattern, and the 55W CO₂ cut out the pieces. The job ran in about a minute, and the engraving lined up with the cuts by eye.
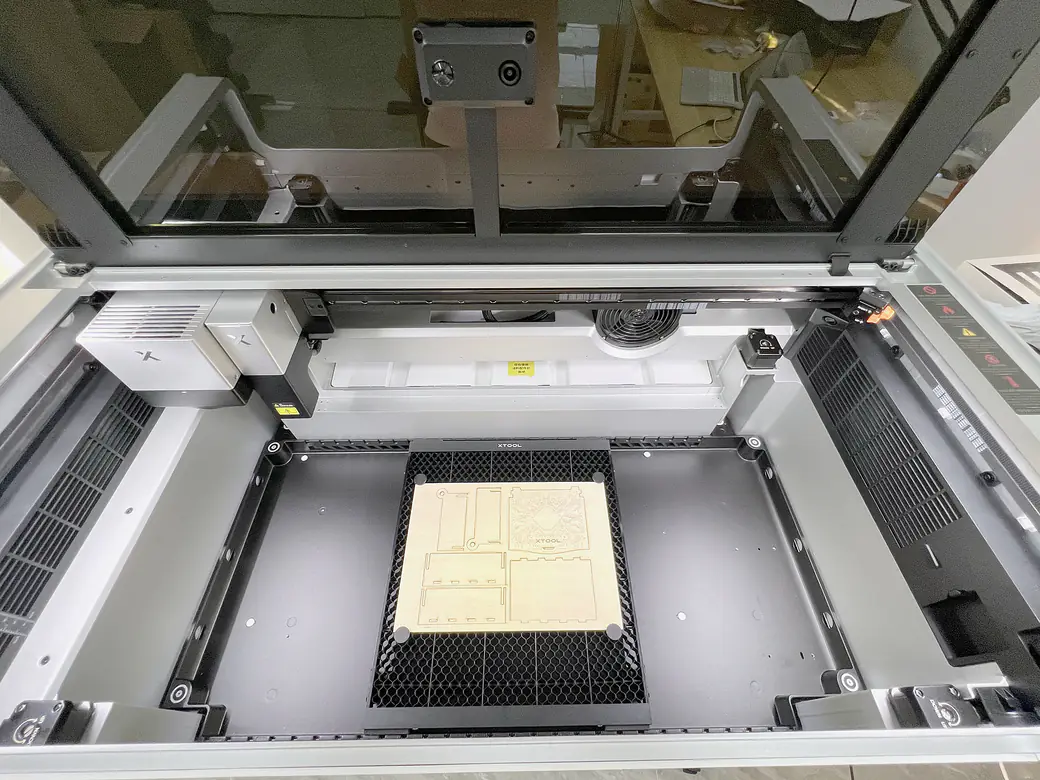
I took this photo after loading the basswood for the guided box project.
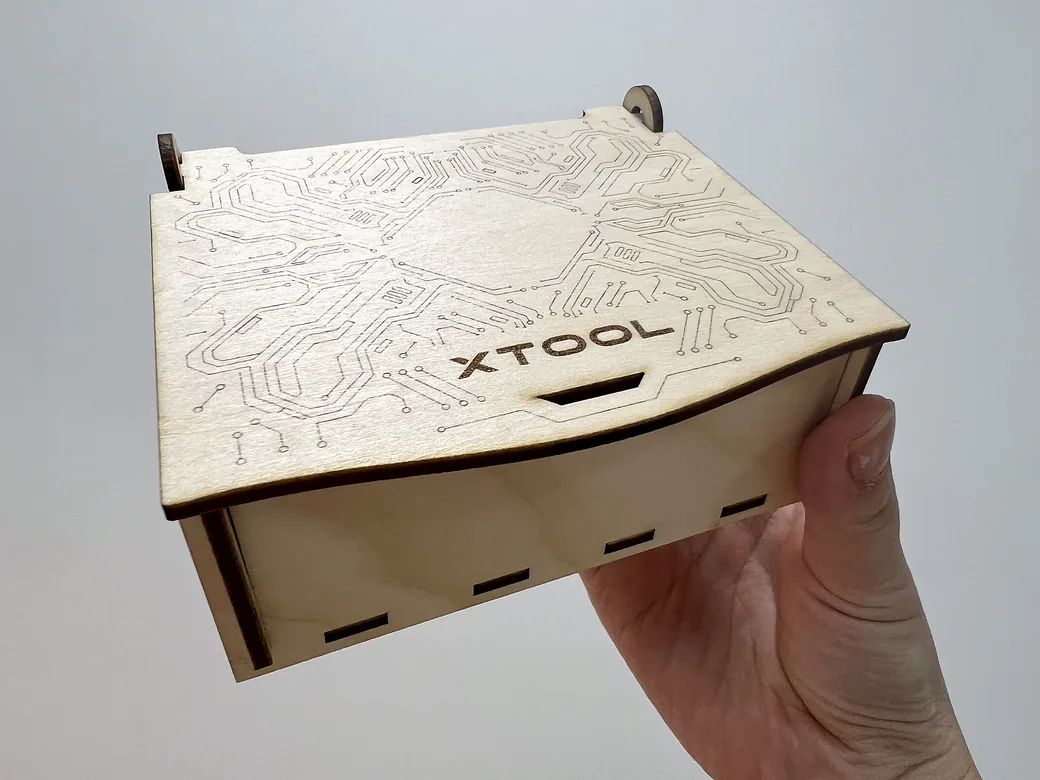
The assembled first-project box after the guided engraving-and-cutting job.
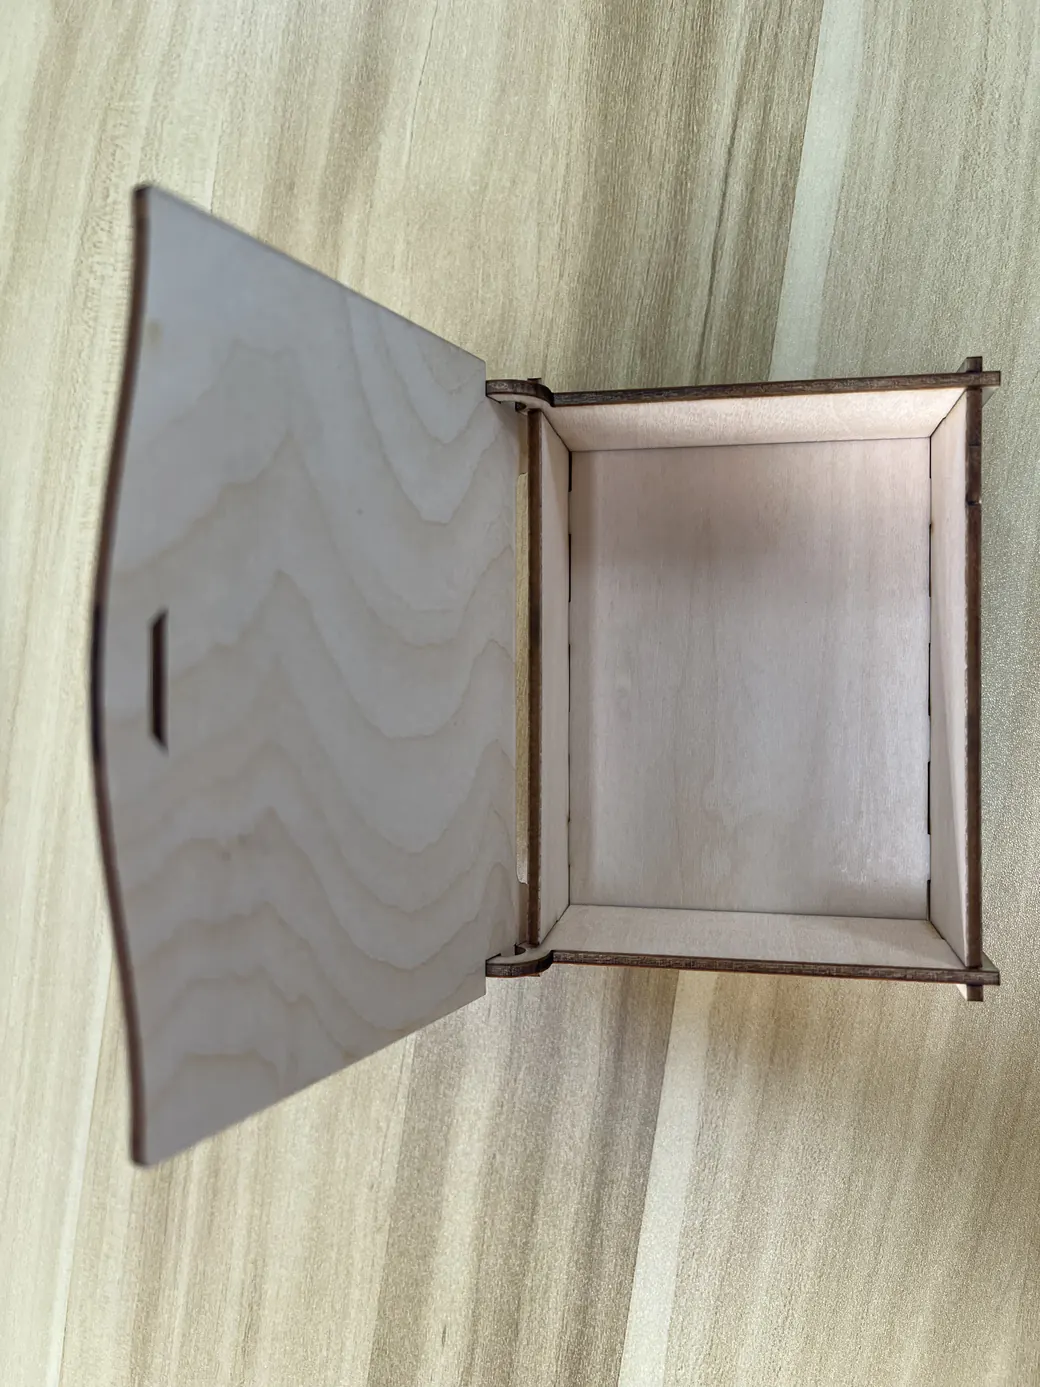
From power-on to a finished box, I spent about 30 minutes, in addition to assembly.
Selecting a Laser in Studio and Changing the Rear Module
With the diode and MOPA already installed, I could change a design layer from one to the other in Studio with one selection. I used the same field lens for that switch.
Physically changing the rear module is a separate operation. The X1 takes one external source at a time. When replacing or reinstalling a galvo source, xTool’s calibration instructions call for vibration calibration, backpack optical-path alignment, focus calibration and flying-galvo calibration, followed by a test job.
My MOPA module went on during the initial setup. For a shop that regularly swaps between MOPA and UV, I’d allow time for calibration and a test piece after each hardware change.
Combined Cutting and Engraving: Hands-On Projects
Diode vs CO₂ Engraving: Black Acrylic Pendant
For the pendant comparison, I made the same design twice in xTool’s 3 mm black acrylic. The 55W CO₂ laser cut both outlines. For the engraving, I used the 20W diode on the first run and CO₂ on the second. The AI-assisted design took about a minute to produce.
For the cut, the gantry moves the CO₂ head in X and Y to trace the outline. The diode’s galvo uses two fast-moving mirrors to steer its beam across a small area. The X1 coordinates that local scanning with gantry movement to reach more of the bed. Studio lets me assign the engraving and cut to separate layers in one job while the acrylic stays in place. xTool’s Hybrid Motion overview
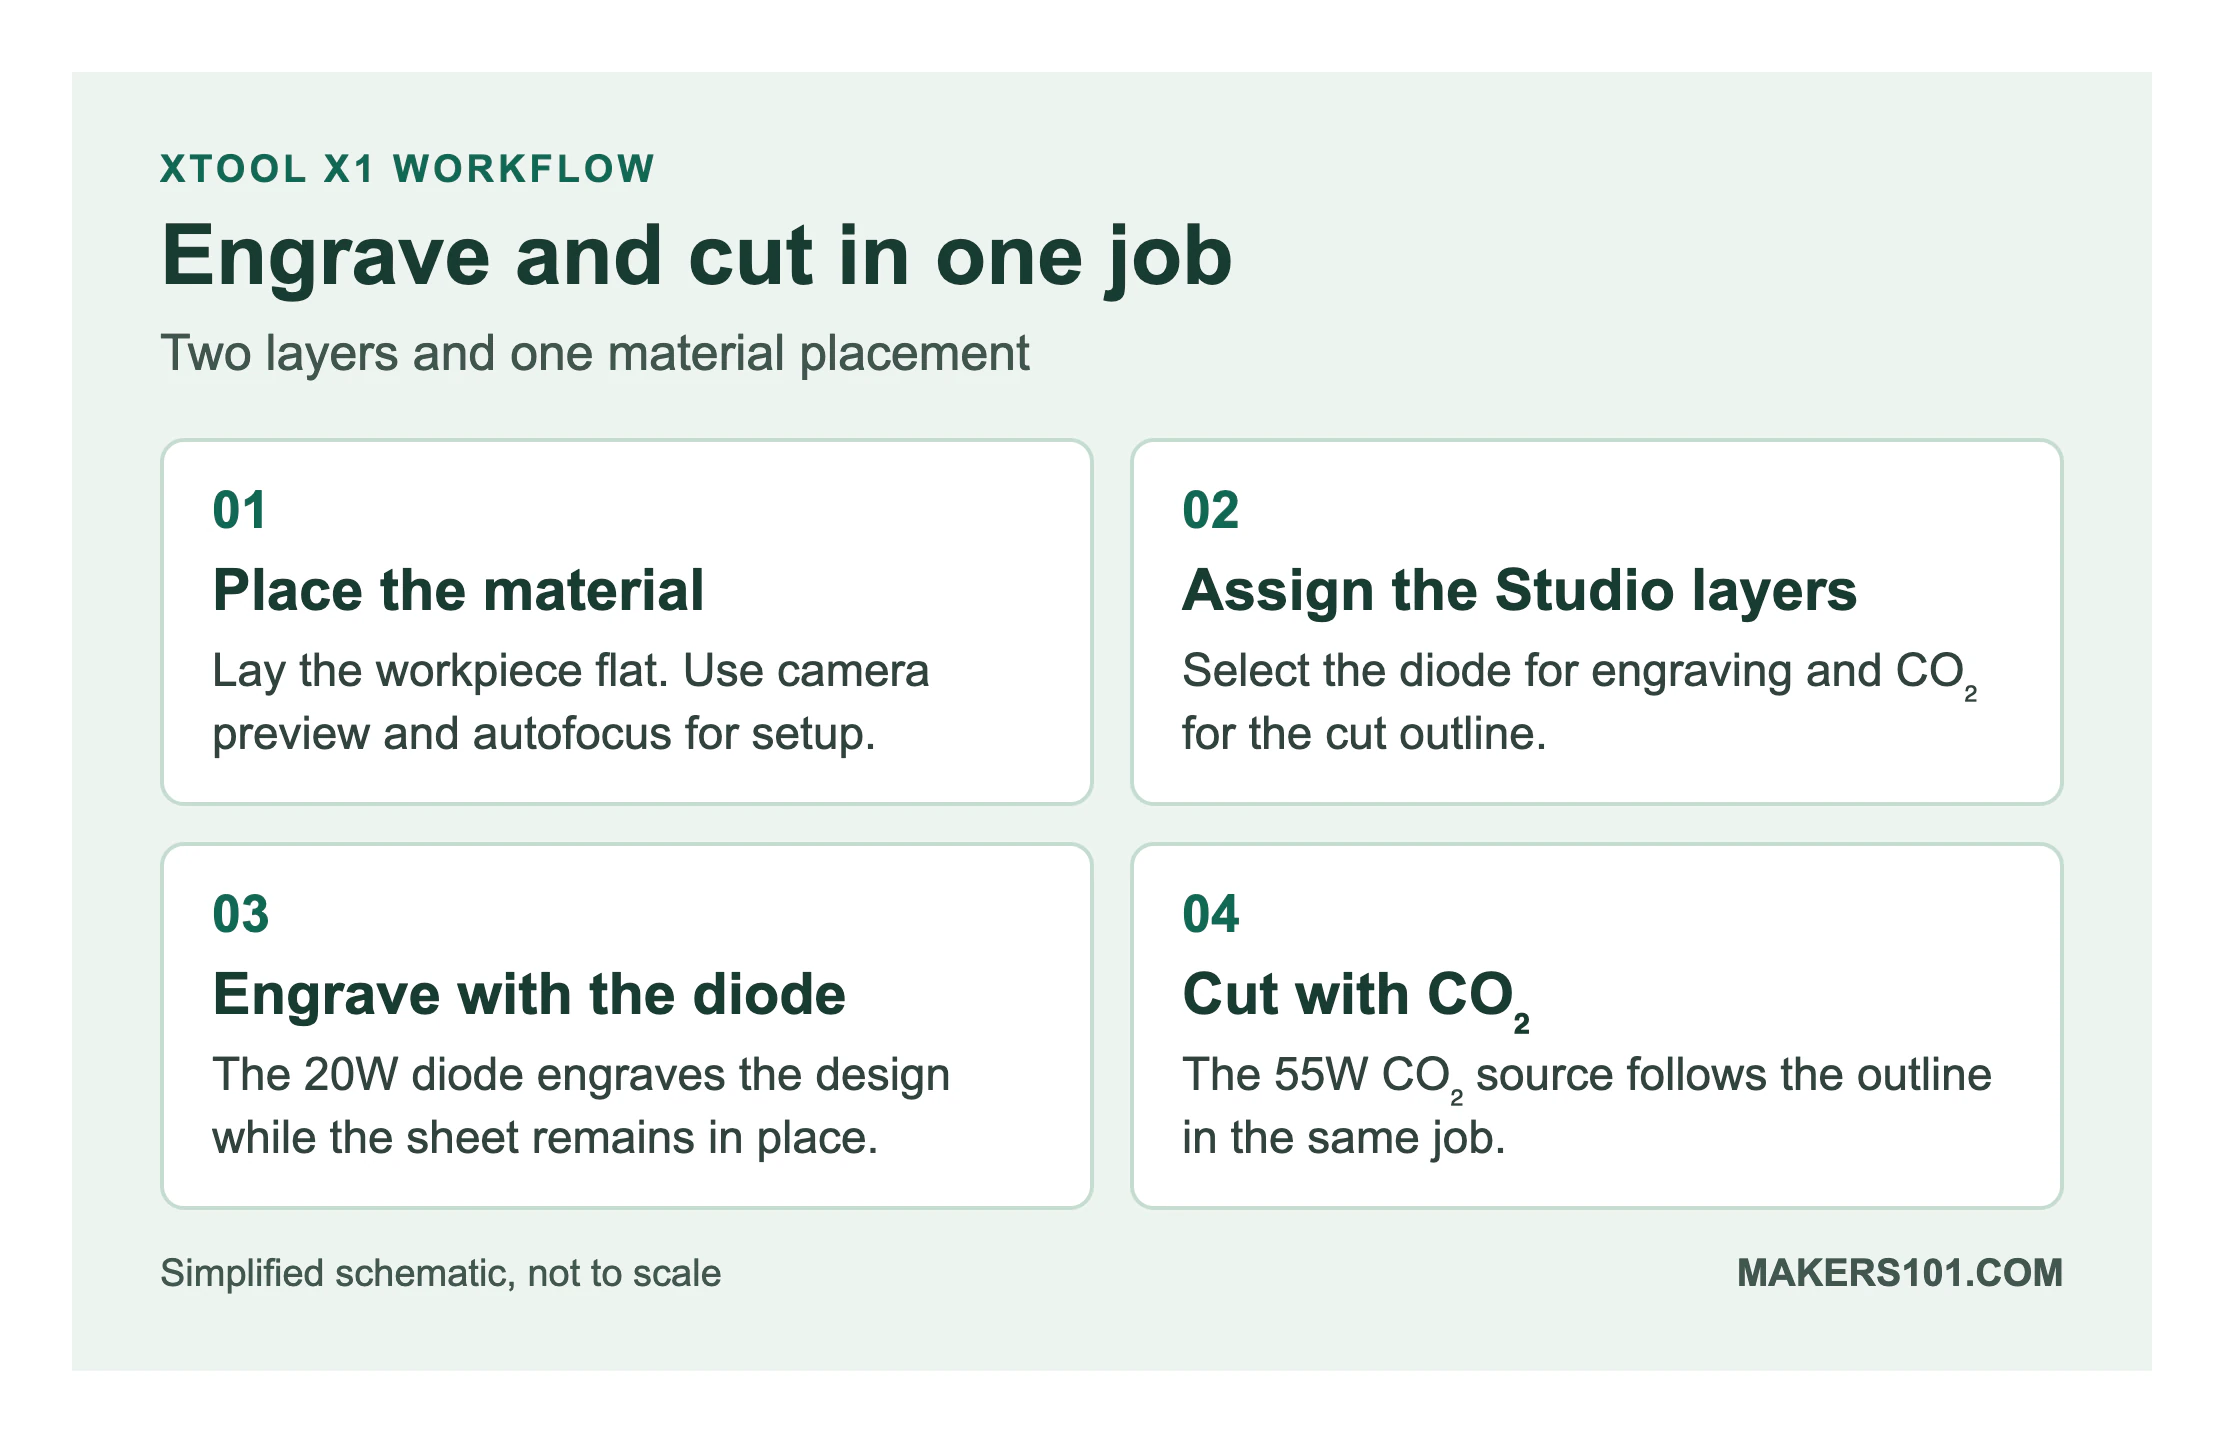
The schematic groups the job into two stages. In the actual Studio project, engraving was split into separate Score and Engrave layers, with a third layer for Cut.
- Load and position the acrylic. I selected 3 mm black acrylic in Studio and used the camera preview to position the artwork. With auto mode on, closing the lid triggered a photograph and height measurement.
- Assign the two sources. I used the 20W diode for the Score and Engrave layers and 55W CO₂ for Cut.
- Engrave first, then cut. I put the engraving before the outline cut so the pendant stayed attached to the sheet while the design was engraved. The two operations ran in one job, and I saw no visible offset on the finished piece.
When I engraved with the 20W diode and cut with CO₂, the tick marks and small dots came out crisp, and the cut edge was smooth. With CO₂ handling both operations, the engraving looked brighter, but some dots were less round and the small letters had rougher edges. I’d use the two-source setup for small black acrylic pieces like this pendant, where I care more about clean detail than a brighter mark.
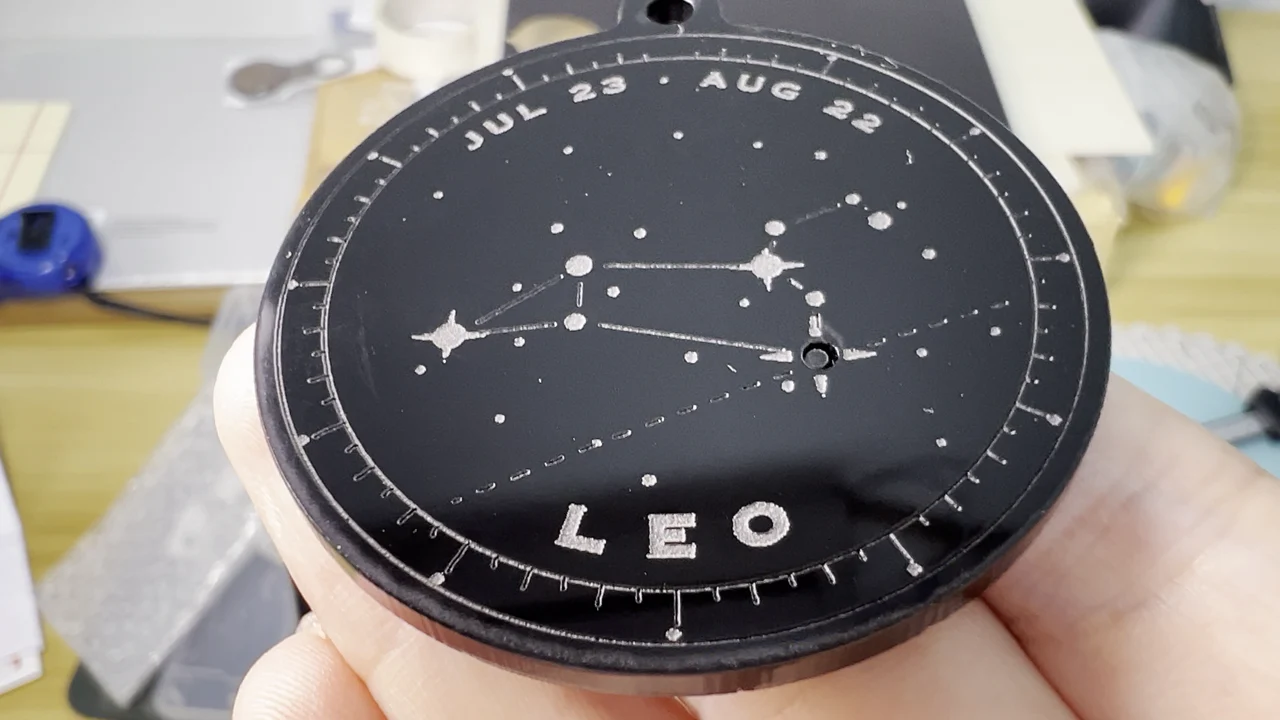
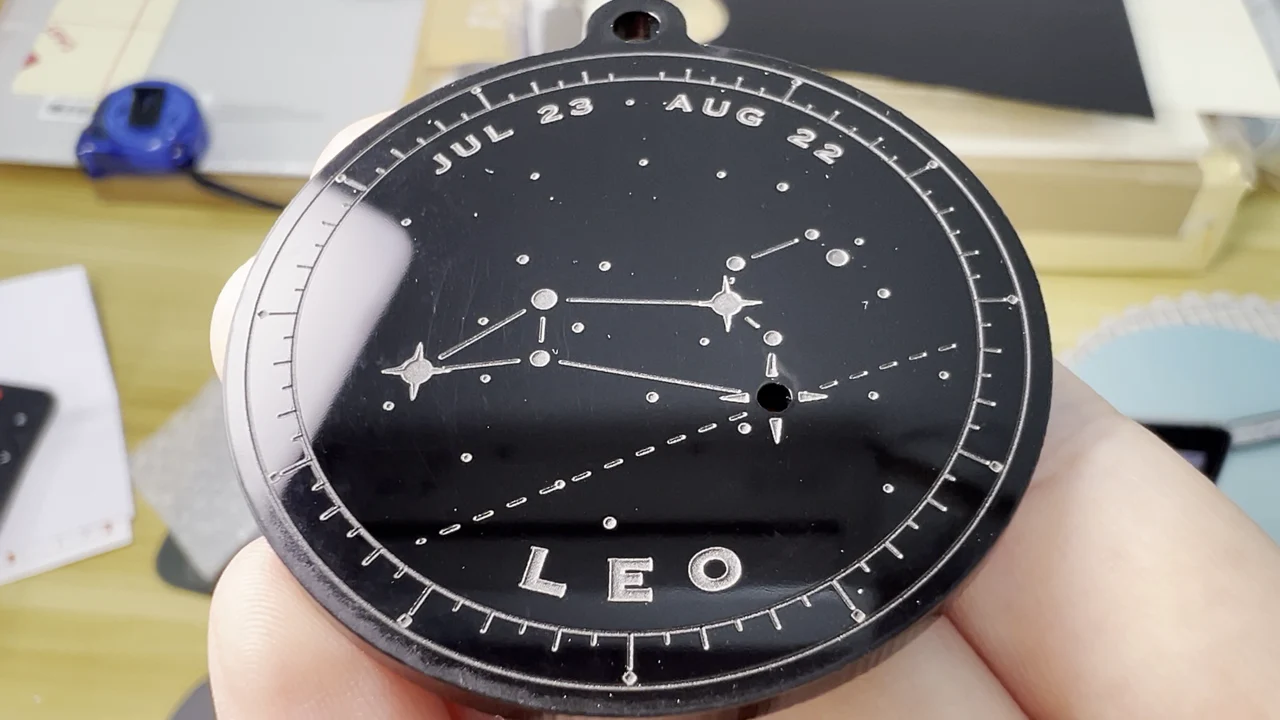
I made both pendants from 3 mm black acrylic and cut both with 55W CO₂. These frames are from separate workshop clips, so reflections differ. Compare the small dots, the tick marks around the rim and the edges of the letters.
| Studio setting | Source | Power | Speed | Other settings I used |
|---|---|---|---|---|
| Engrave (fill) | 20W diode | 60% | 600 mm/s | Density 140, feathering 2 |
| Score (line) | 20W diode | 60% | 140 mm/s | Linked processing, minimum output 20 |
| Cut | 55W CO₂ | 100% | 20 mm/s | One pass, full air assist |
My notes also include a stitched-processing line setting of 80% at 300 mm/s. With the engraving settings I used for each setup, the complete job took 44 seconds with diode engraving and CO₂ cutting, and about 6 minutes with CO₂ alone. The two-source workflow finished this pendant about five minutes sooner.
Halloween Sign: Engrave, Then Cut
The Halloween sign came first. I engraved the lettering and cut the outline in one job, then saved the rest of the basswood sheet for the dog designs.
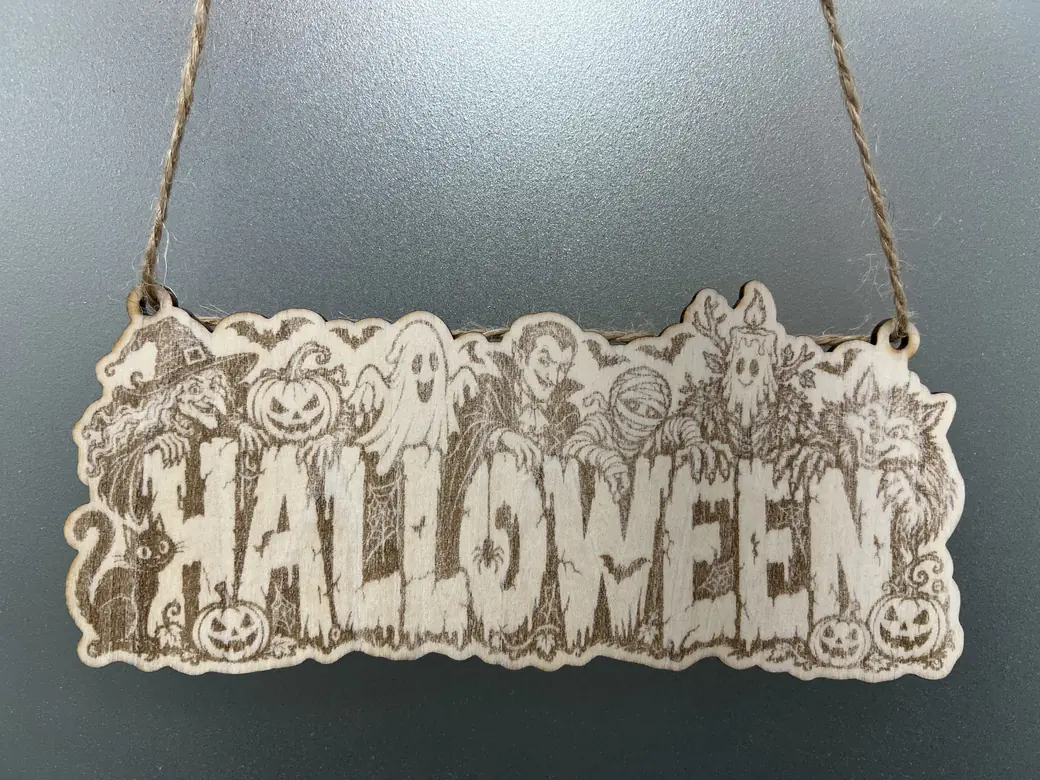
Batch Engraving and Cutting: 25 Basswood Pieces
The remaining space on the 300 × 300 × 3 mm basswood sheet fit 25 dog-face pieces. Arranging the designs took me about two minutes.
The X1 engraved and cut all 25 basswood pieces in one run that took 33 minutes 39 seconds.
I checked every piece and saw no visible offset between the engraving and the cut outline.
When I scale up a job like this, I plan the layout around the processing mode. xTool lists 527 × 297 mm in Combination mode with CO₂.
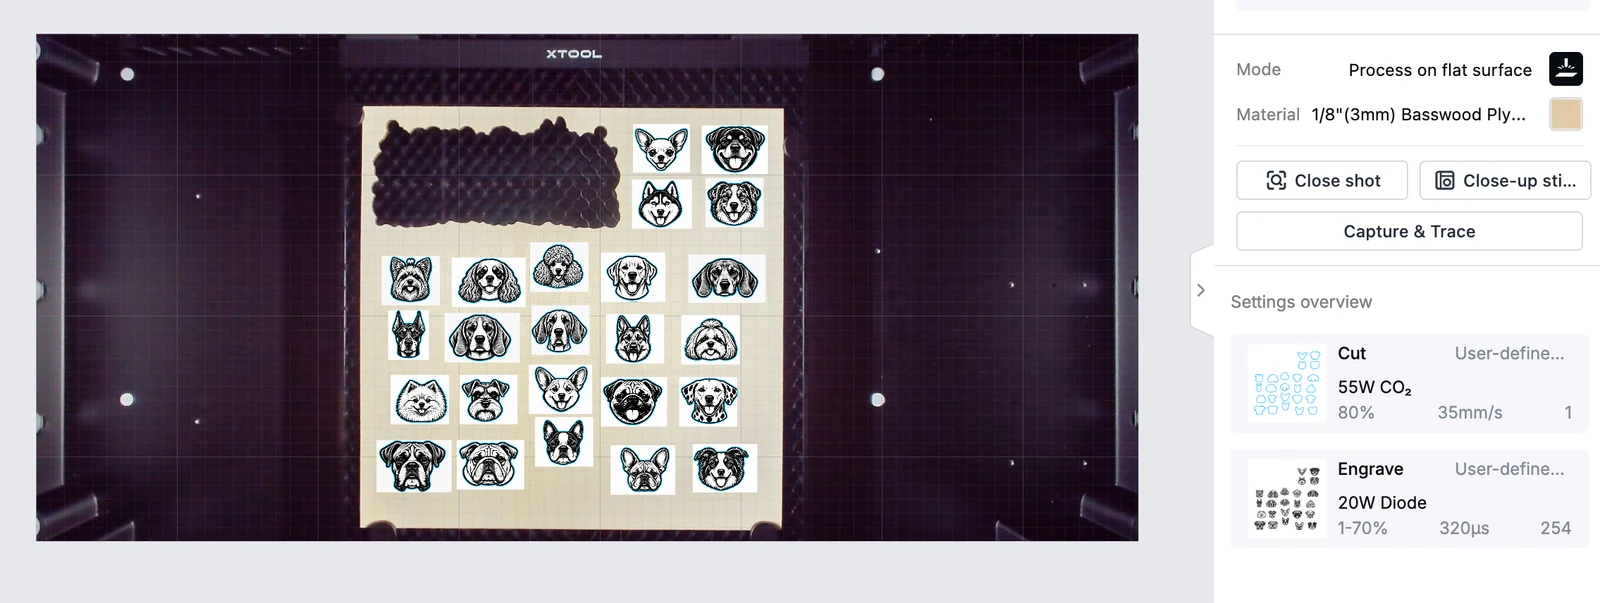
Studio layout for the 25-piece batch, with engraving and cutting assigned to separate layers.
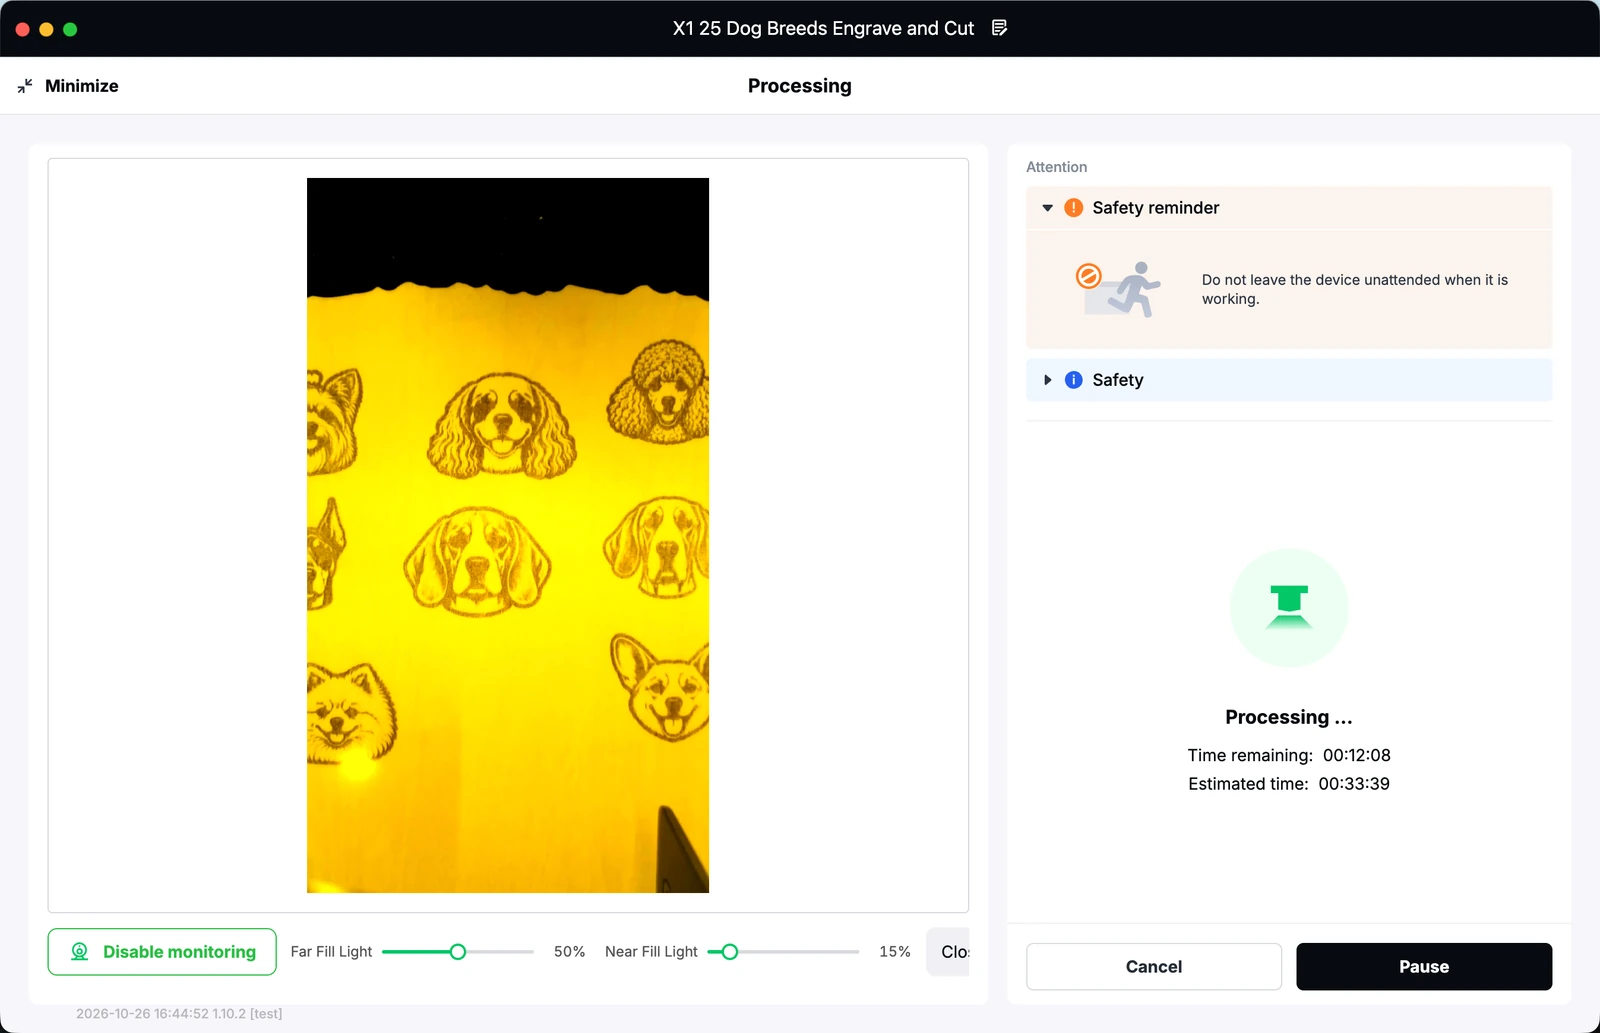
The batch during engraving, as seen through Studio’s camera view.
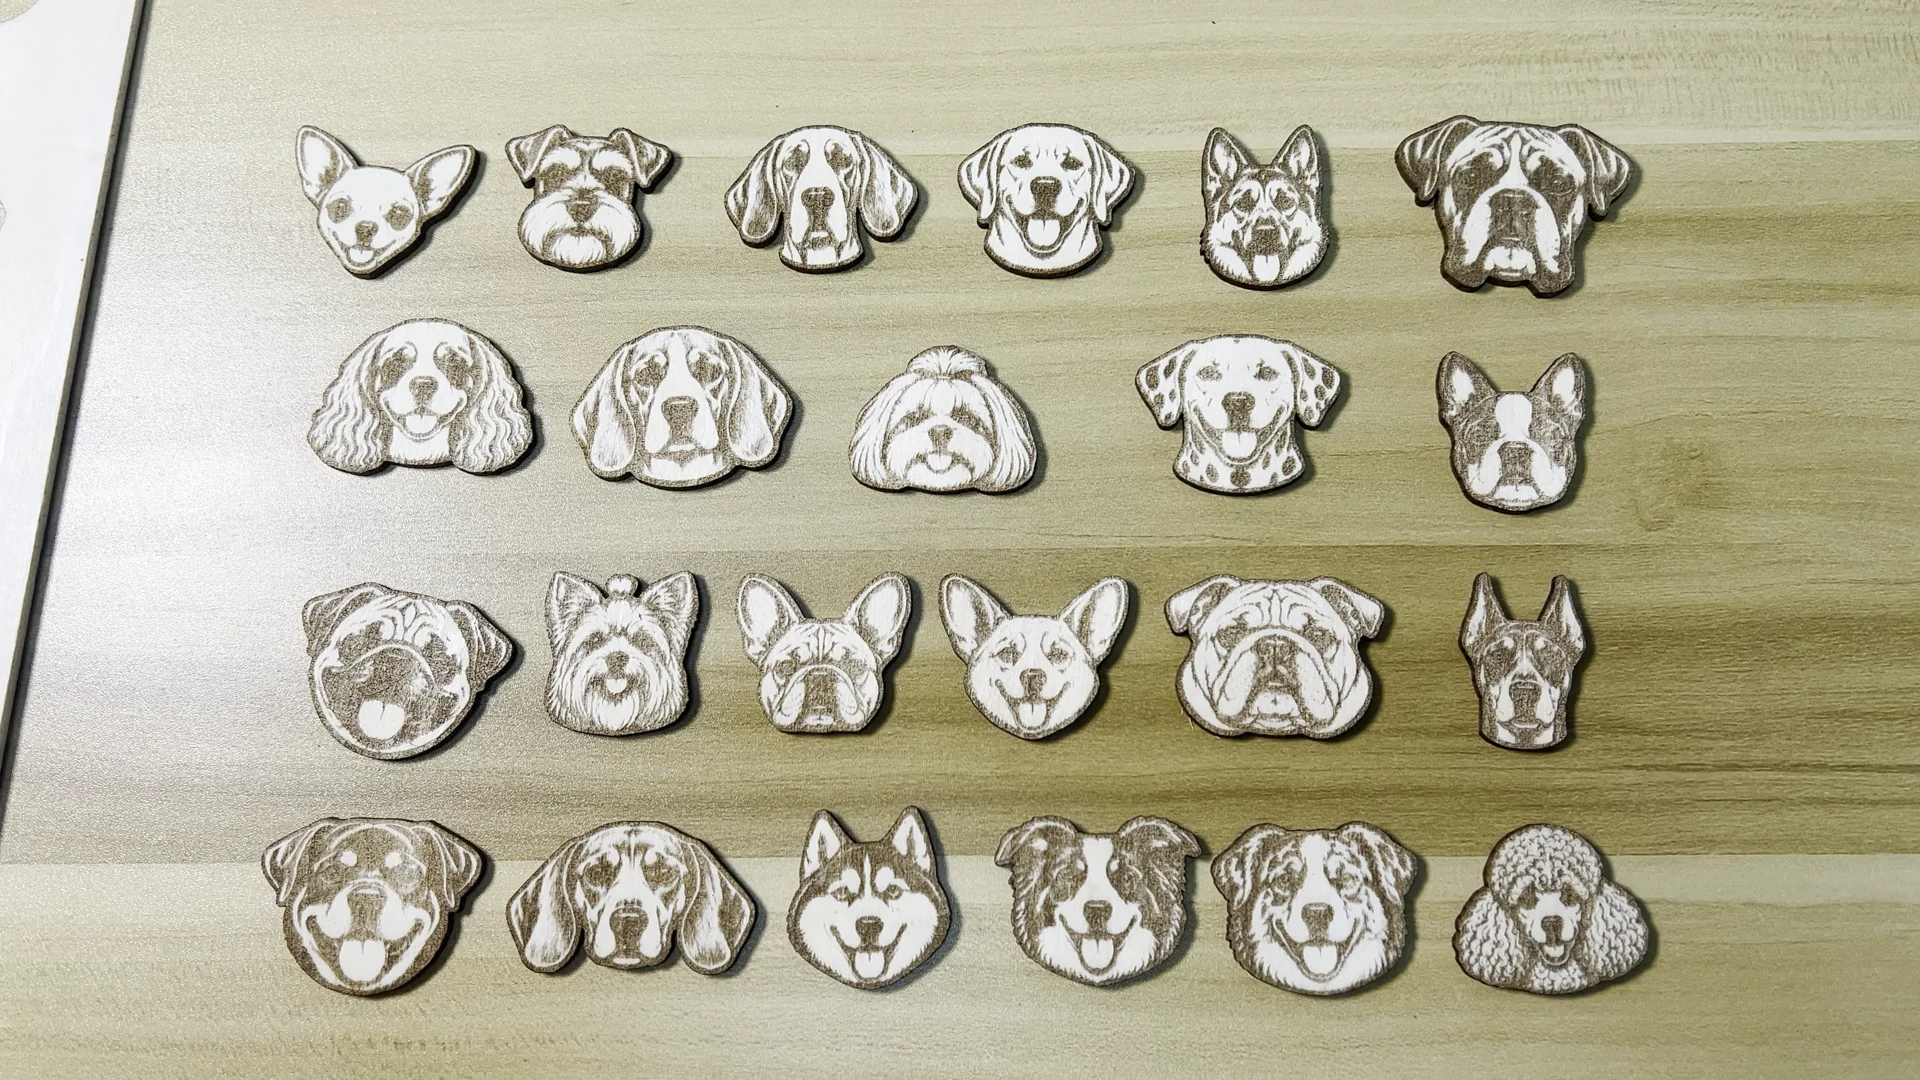
The finished dog designs from my basswood batch. I pulled this frame from my workshop video.
Photo Keepsake Box: From Design to Finished Project
Atomm’s Box Generator produced the exploded layout, and I dropped a photo onto the lid panel. Design took about 5 minutes.
To keep the pieces from shifting, I set the engraving to run before the outline cut. The project used one 300 × 300 × 3 mm xTool basswood sheet. My notes list 10 minutes for the job. It worked on the first try, and the photo sat square on the lid.
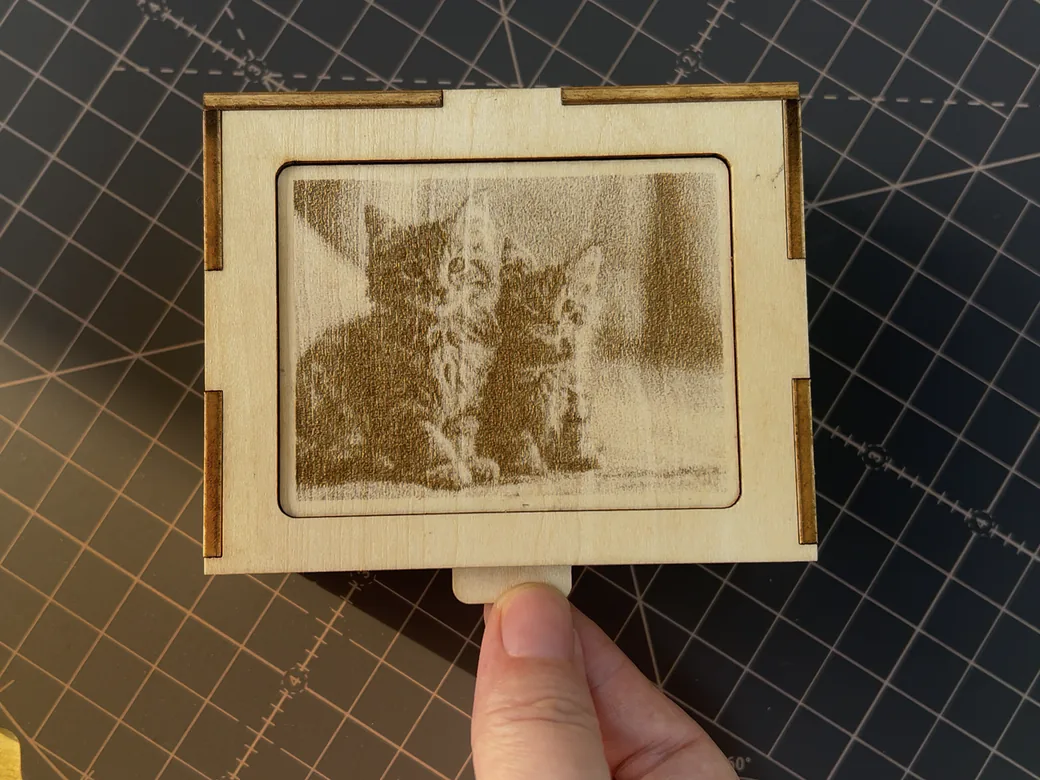
The photo I engraved on the keepsake-box lid.
55W CO₂ Cutting Tests: Basswood and Acrylic
For every sample below, I used Studio’s recommended 55W CO₂ preset. The thicker basswood came from a third-party supplier, and the thicknesses in the table come from the material labels.
| Material | Nominal thickness | Observed result |
|---|---|---|
| Basswood | 3 mm | Cut through successfully |
| Basswood | 5 mm | Cut through; no obvious heavy charring |
| Third-party basswood | 8 mm | Cut through; clean edge |
| Third-party basswood | 10 mm | Cut through; clean edge |
| Third-party basswood | 12 mm | Cut through; clean edge |
| Third-party basswood | 15 mm | Cut through in one pass with the default 55W CO₂ preset; light finger pressure released the piece |
| Black acrylic | 3 mm | Cut through; smooth edge |
| White acrylic | 3 mm | Cut through; smooth edge |
These results left me confident using the CO₂ source for the wood and acrylic projects I tried. Using third-party boards did not require me to develop a separate cutting recipe for these samples.
The 15 mm board was my thickest sample. I used Studio’s default 55W CO₂ preset and cut through in one pass. The piece needed a light push with my fingers to pop free, and I could see darkening along the cut edge.
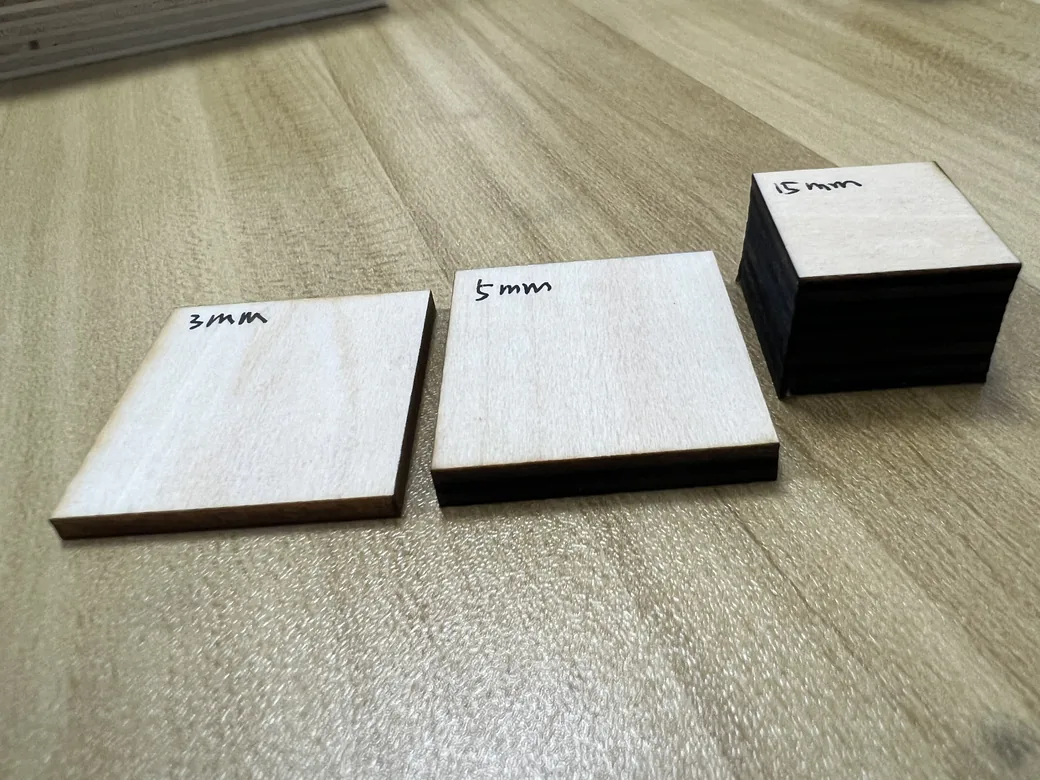
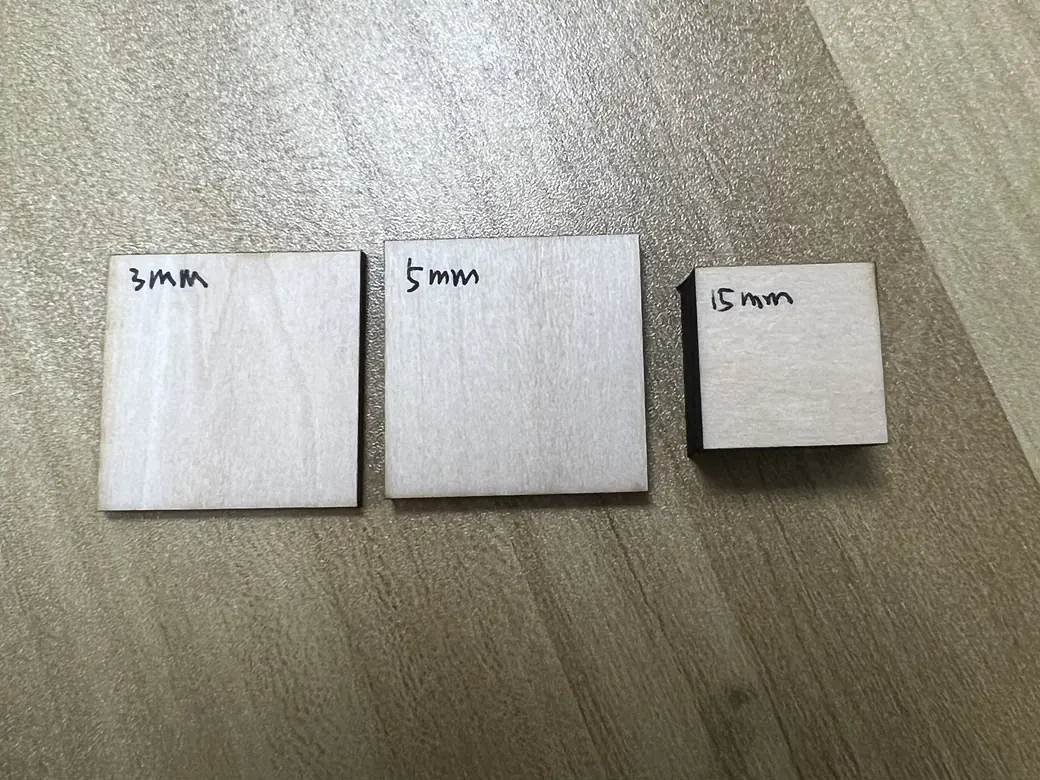
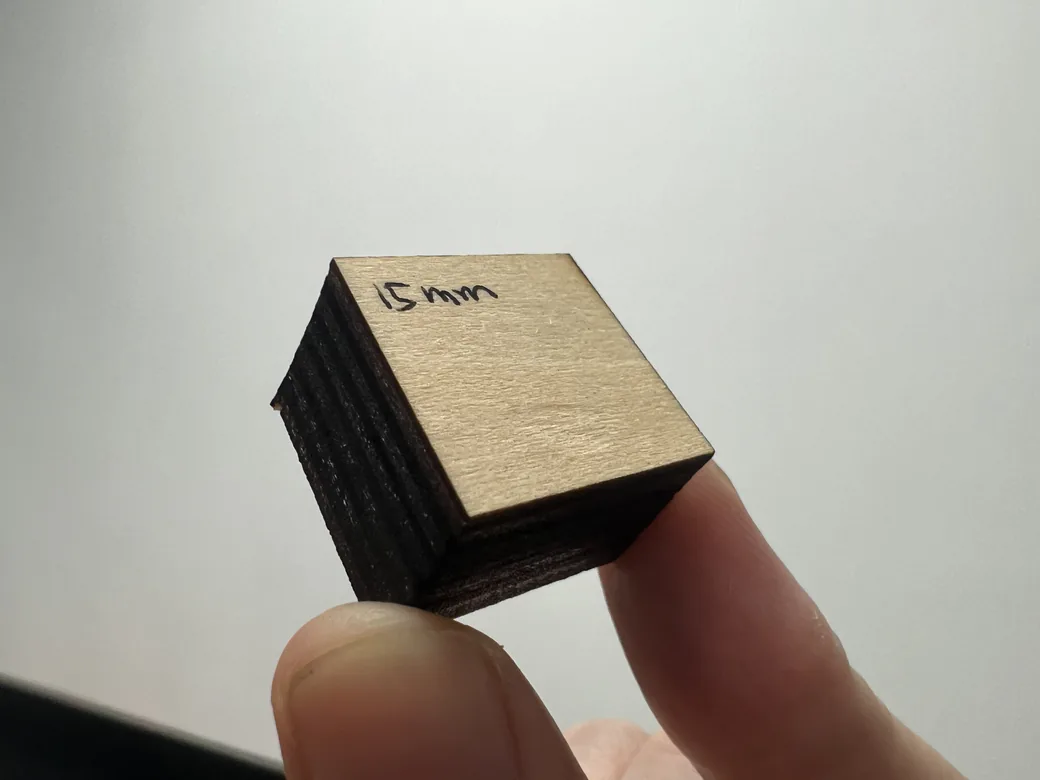
The labels identify the nominal thicknesses. The angled and close-up views show how the edges looked after cutting.
- Up to 6,000 mm/s galvo
- 24.2 × 12.6 in galvo area
- Class 1 with enclosure closed
- 3 positioning cameras
20W Diode Engraving Tests: Photos, Fine Detail and Coasters
Photo Engraving on Basswood: 20W Diode vs 55W CO₂
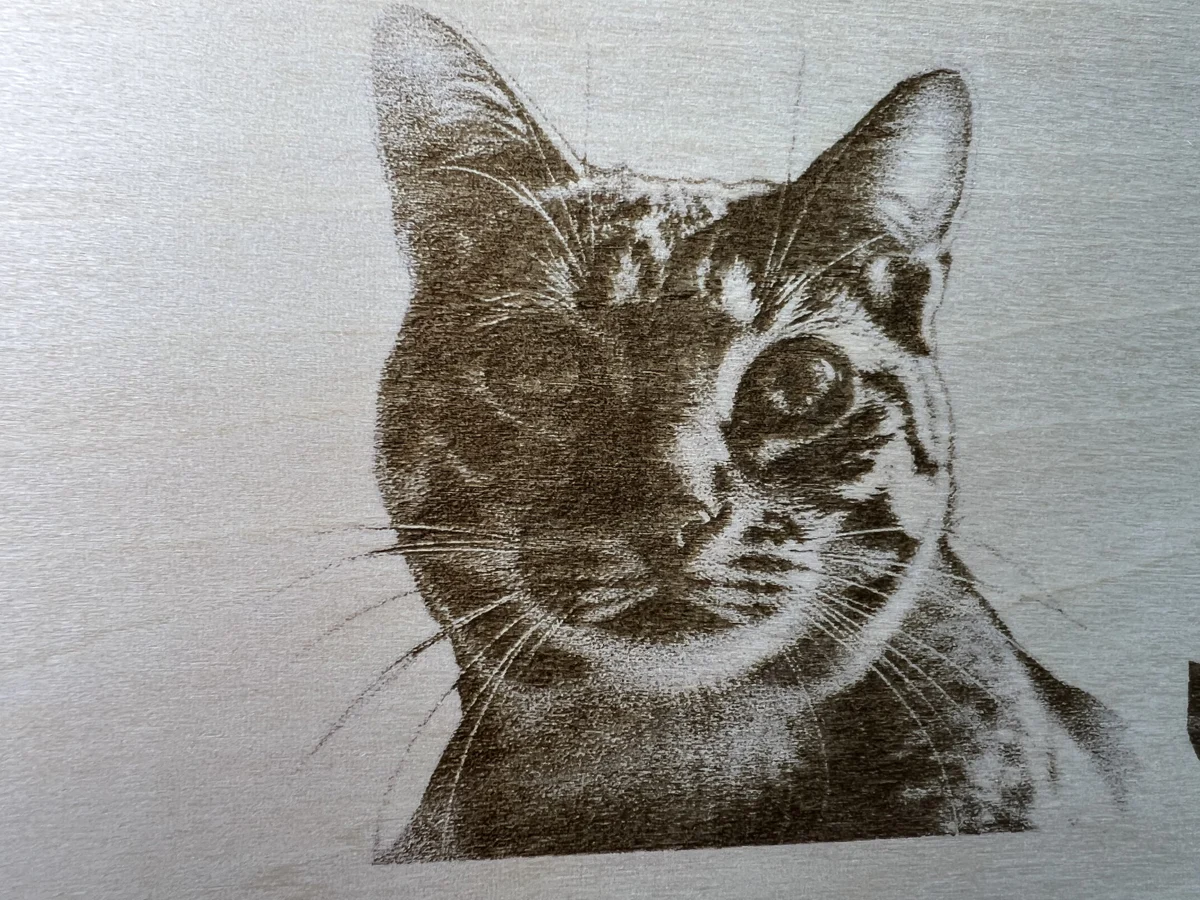
On the same 3 mm basswood board, I engraved the same cat image with the 20W diode and the 55W CO₂, using each laser’s default photo preset in Studio. Both runs worked on the first try.
The diode gave me a darker image with stronger contrast around the face and eyes, though some shadows merged. The CO₂ result was paler, but some individual whiskers and fine fur lines were easier to see.
A separate 11-step gray strip gave me roughly 4–5 distinguishable steps with the diode and 2–3 with CO₂. In the small 3 × 3 grids, changing CO₂ power and density had little effect on the gray strip. The diode produced a darker mark with longer dot durations, and lowering DPI helped separate tones. Settings of 500–700 µs at 150 DPI looked promising in those small tests.
For a finished photo engraving, I’d test the preset on a scrap of the intended board. In this comparison, I’d start with the diode for stronger contrast and try CO₂ if fine whiskers and fur lines mattered more.
Engraving an AI-Generated Kitten Image
Galvo Detail Test: Center vs Corner
For a quick check across the bed, I engraved the same test card at the center and the top-left corner of the work area, using the same 20W diode settings on 3 mm basswood. The 1 mm text was readable in both spots, and the 0.8 mm text was only partly legible. I saw no obvious loss of detail at the corner or visible stitching seam.
Cork Coaster Engraving: Results and Cleanup
The cork coasters were about 102 mm in diameter, and Studio’s recommended settings worked on the first attempt. I saw no scorching along the outer edge.
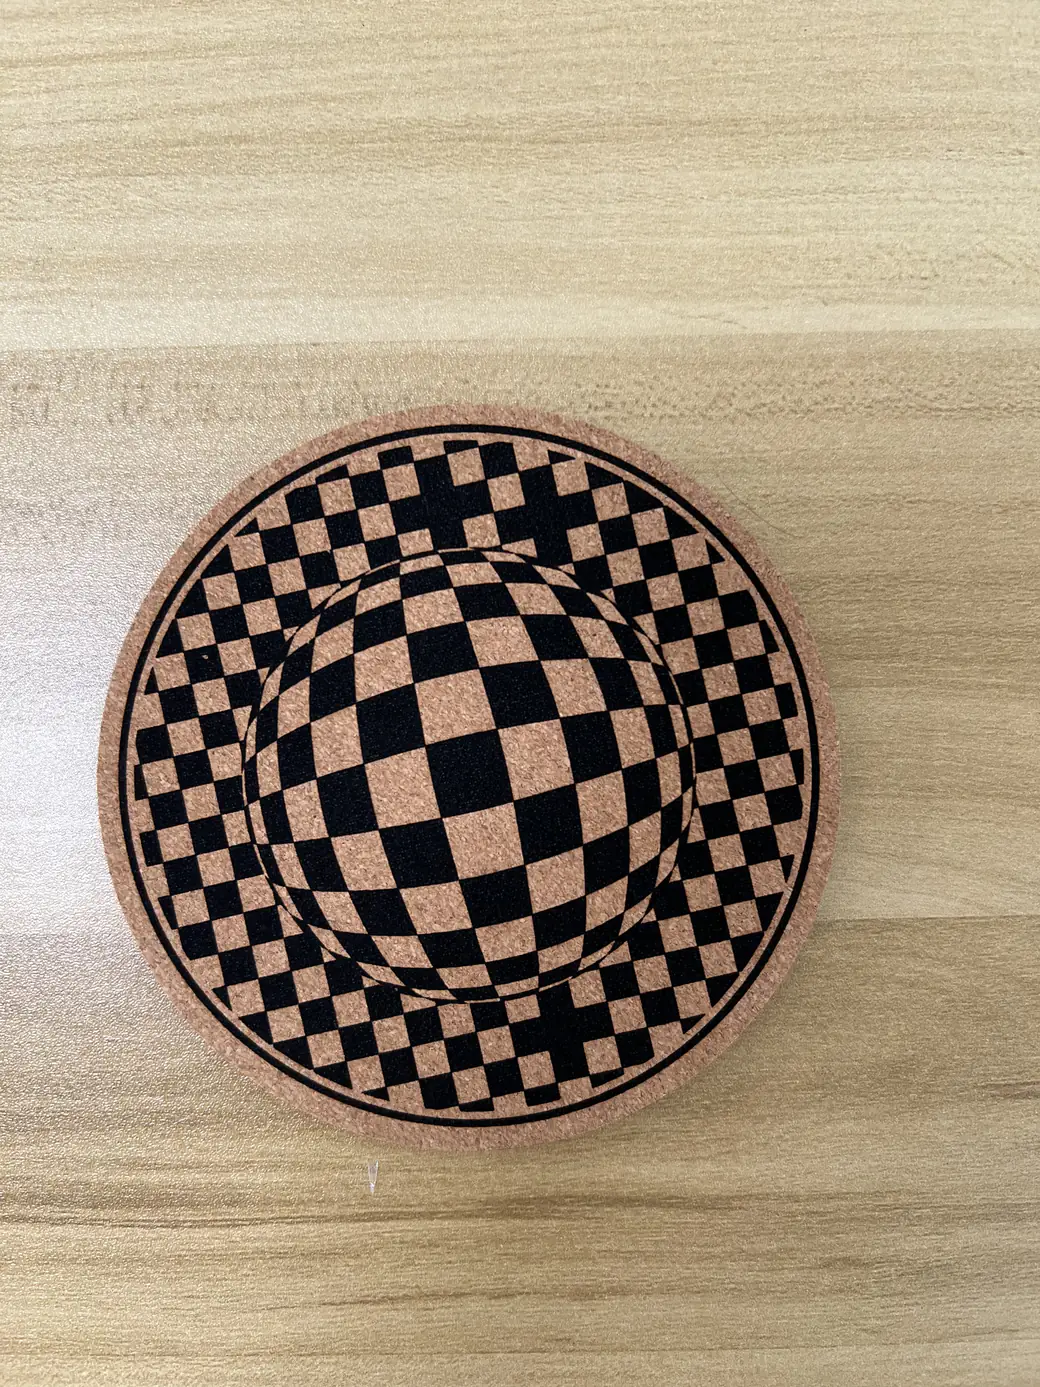
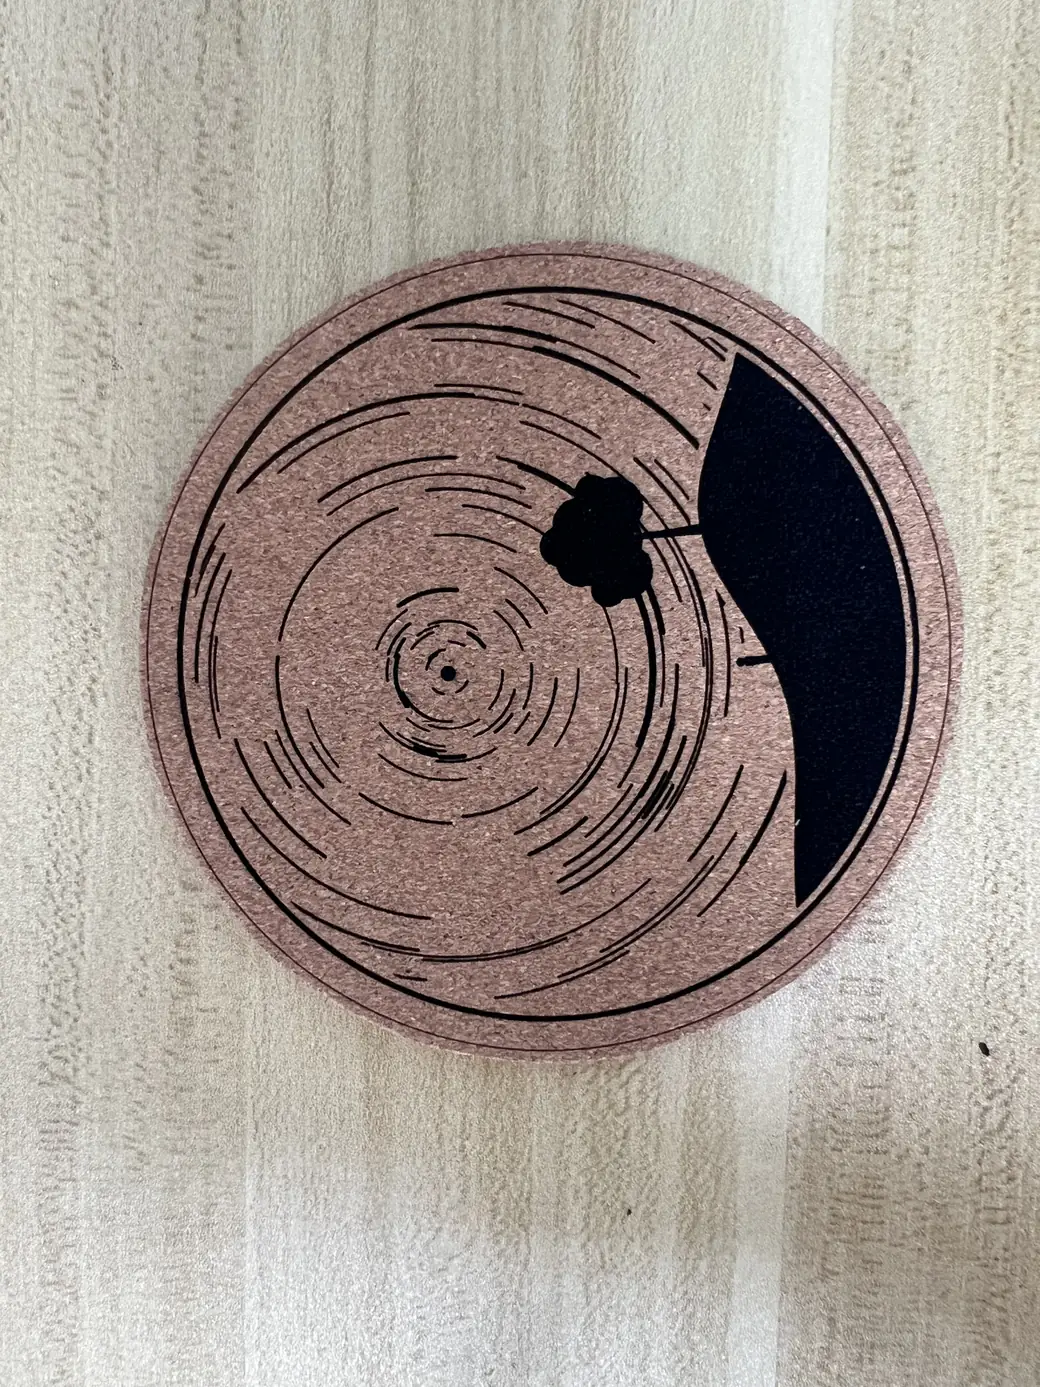
There was a slight smoke smell, and the dark carbonized fill rubbed off on my fingers after engraving. For gifts or small-shop orders, I would include cleanup in the finishing workflow rather than treating the engraved coaster as ready to hand over.
Line engraving used 35% power at 120 mm/s; fill engraving used 35% at 550 mm/s, both for one pass.
Slate Coaster Engraving
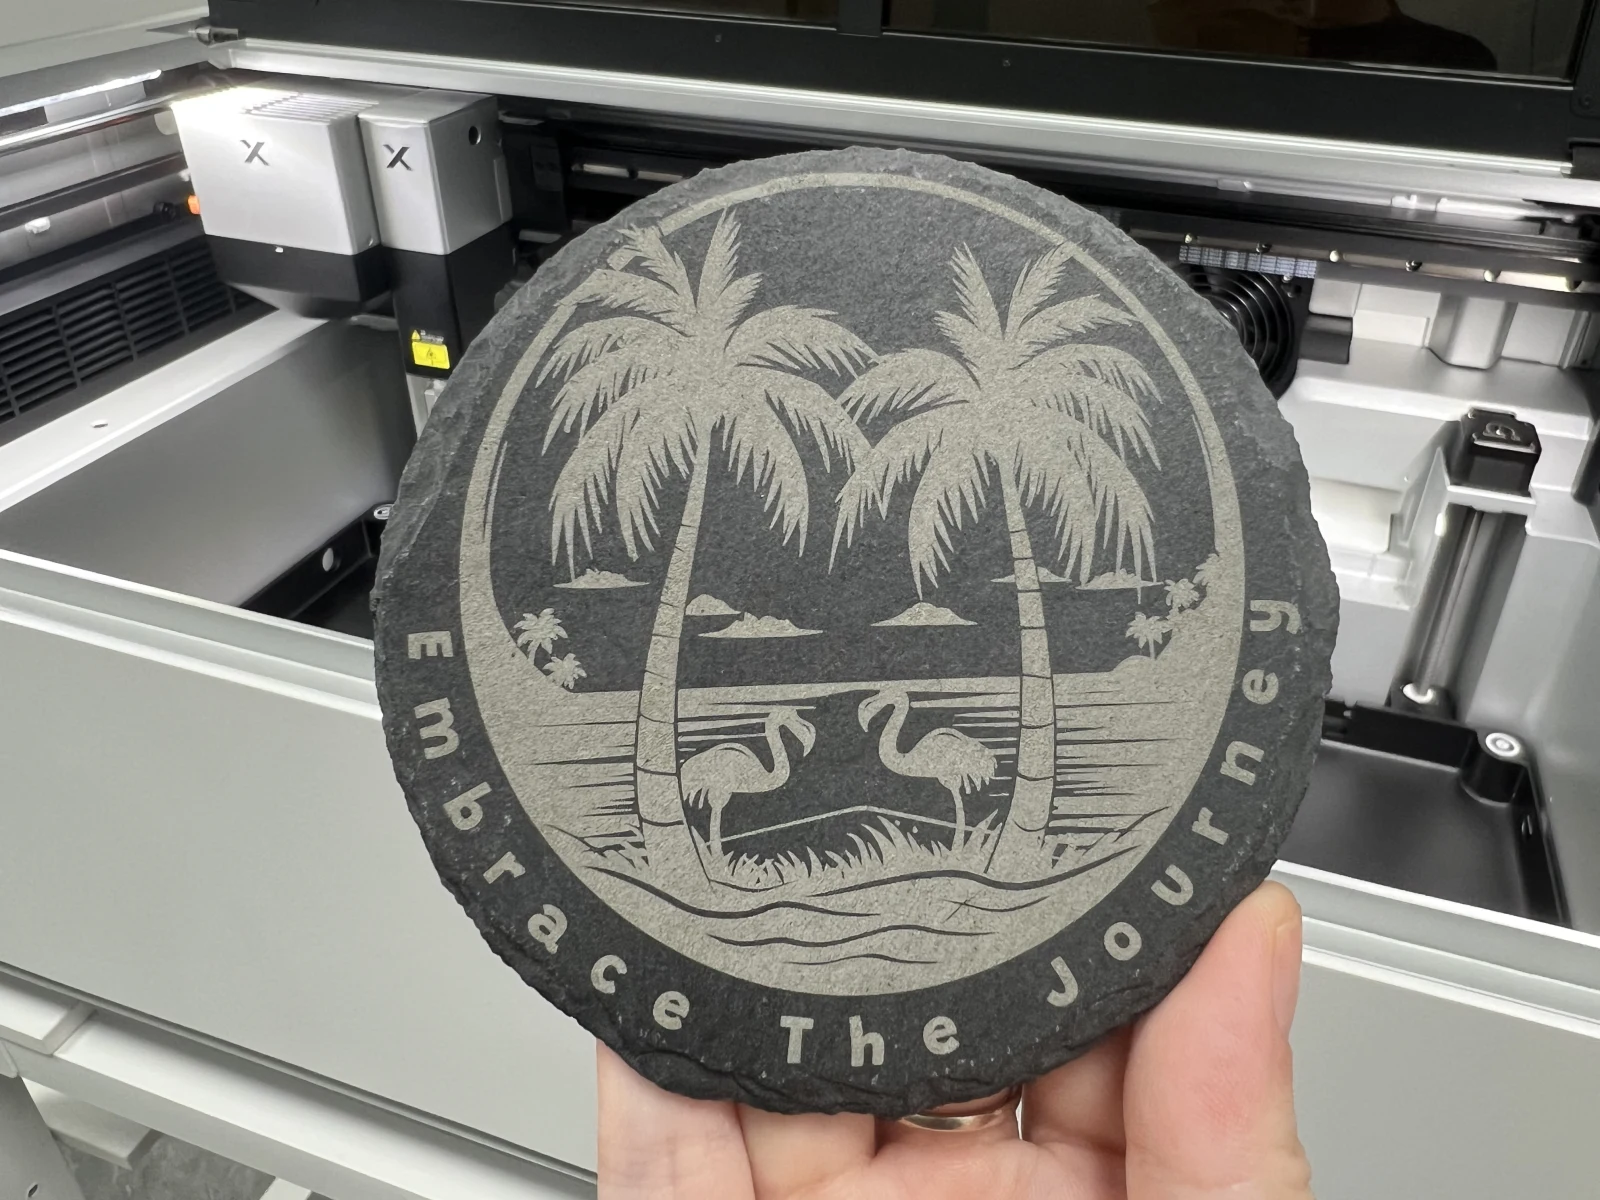
On a round slate coaster, the 20W diode gave me light palm trees and lettering that stood out against the dark stone.
60W MOPA Tests: Metal Cards, Color and Photo Engraving Paper
The clearest benefit in my tests was improved small lettering on anodized aluminum cards. I also tried a metal color test and engraved landscape artwork on black photo engraving paper.
Anodized Aluminum Cards: 60W MOPA vs 20W Diode
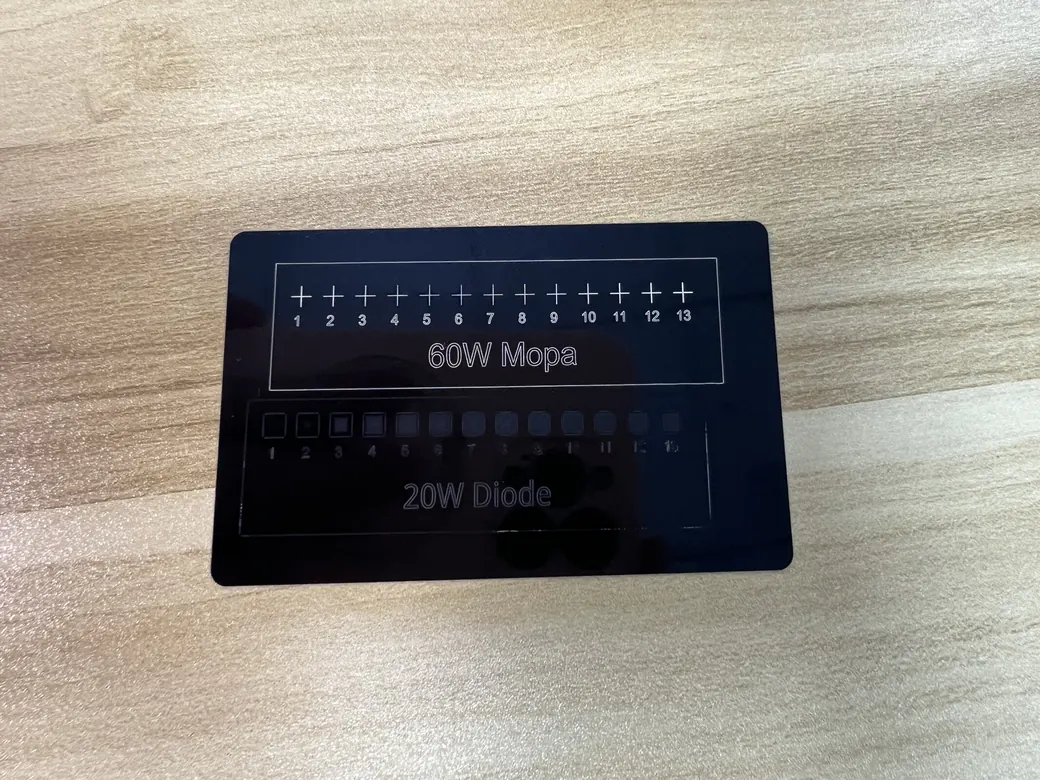
The cards were black anodized aluminum, approximately 84 × 52 mm and 0.2 mm thick. The 60W MOPA worked on the first attempt with Studio’s recommended settings. I also completed a 20W diode comparison using the test-card design.
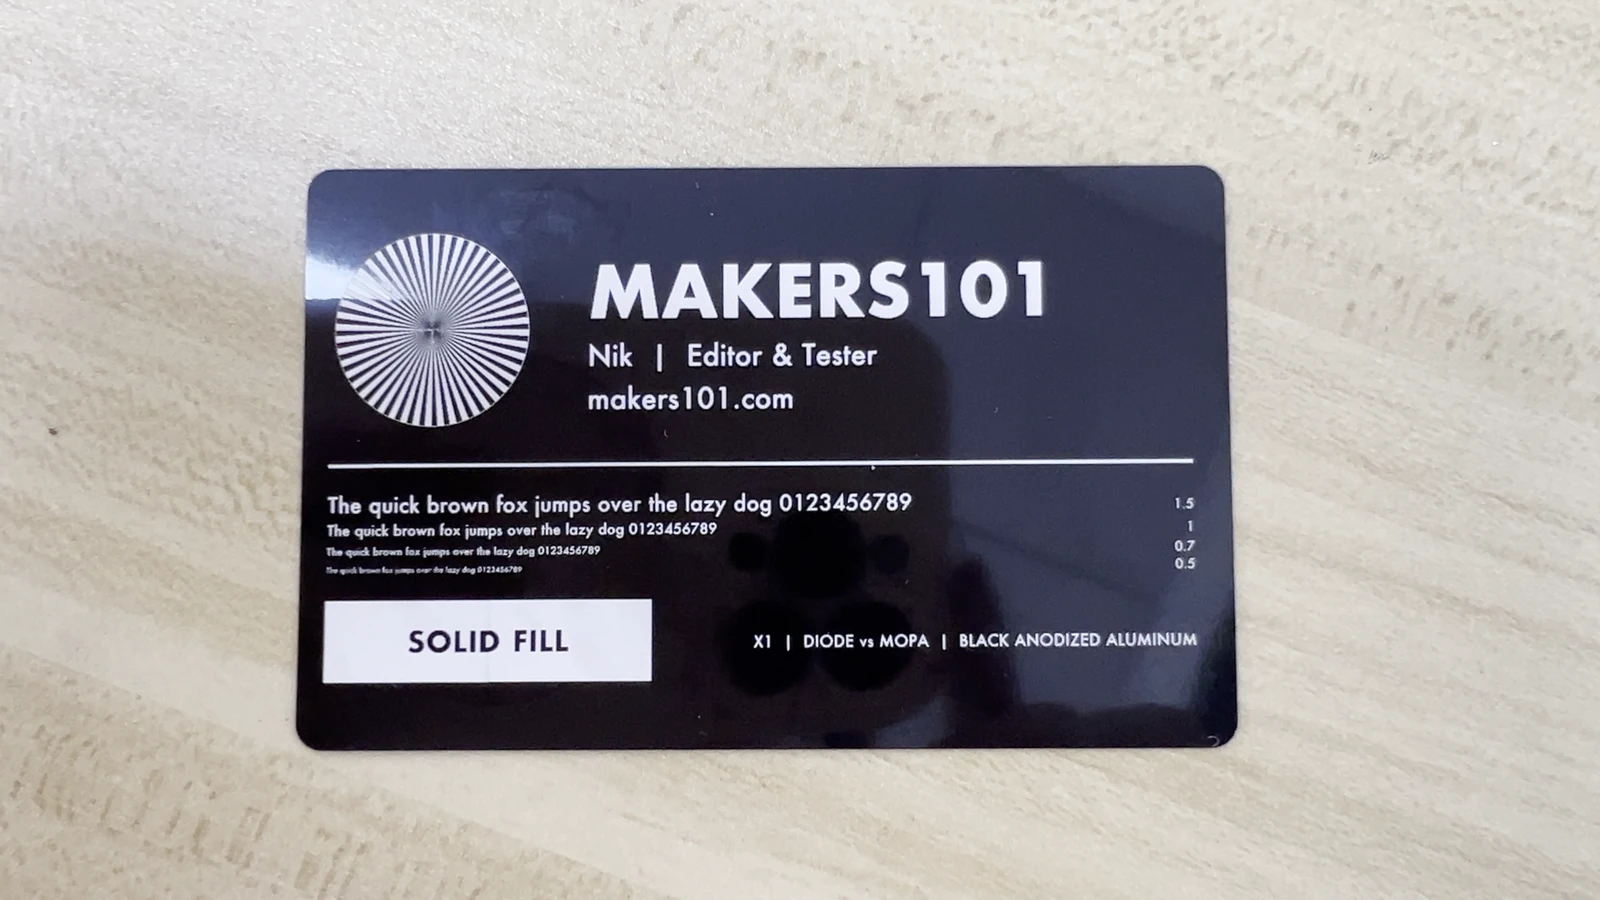
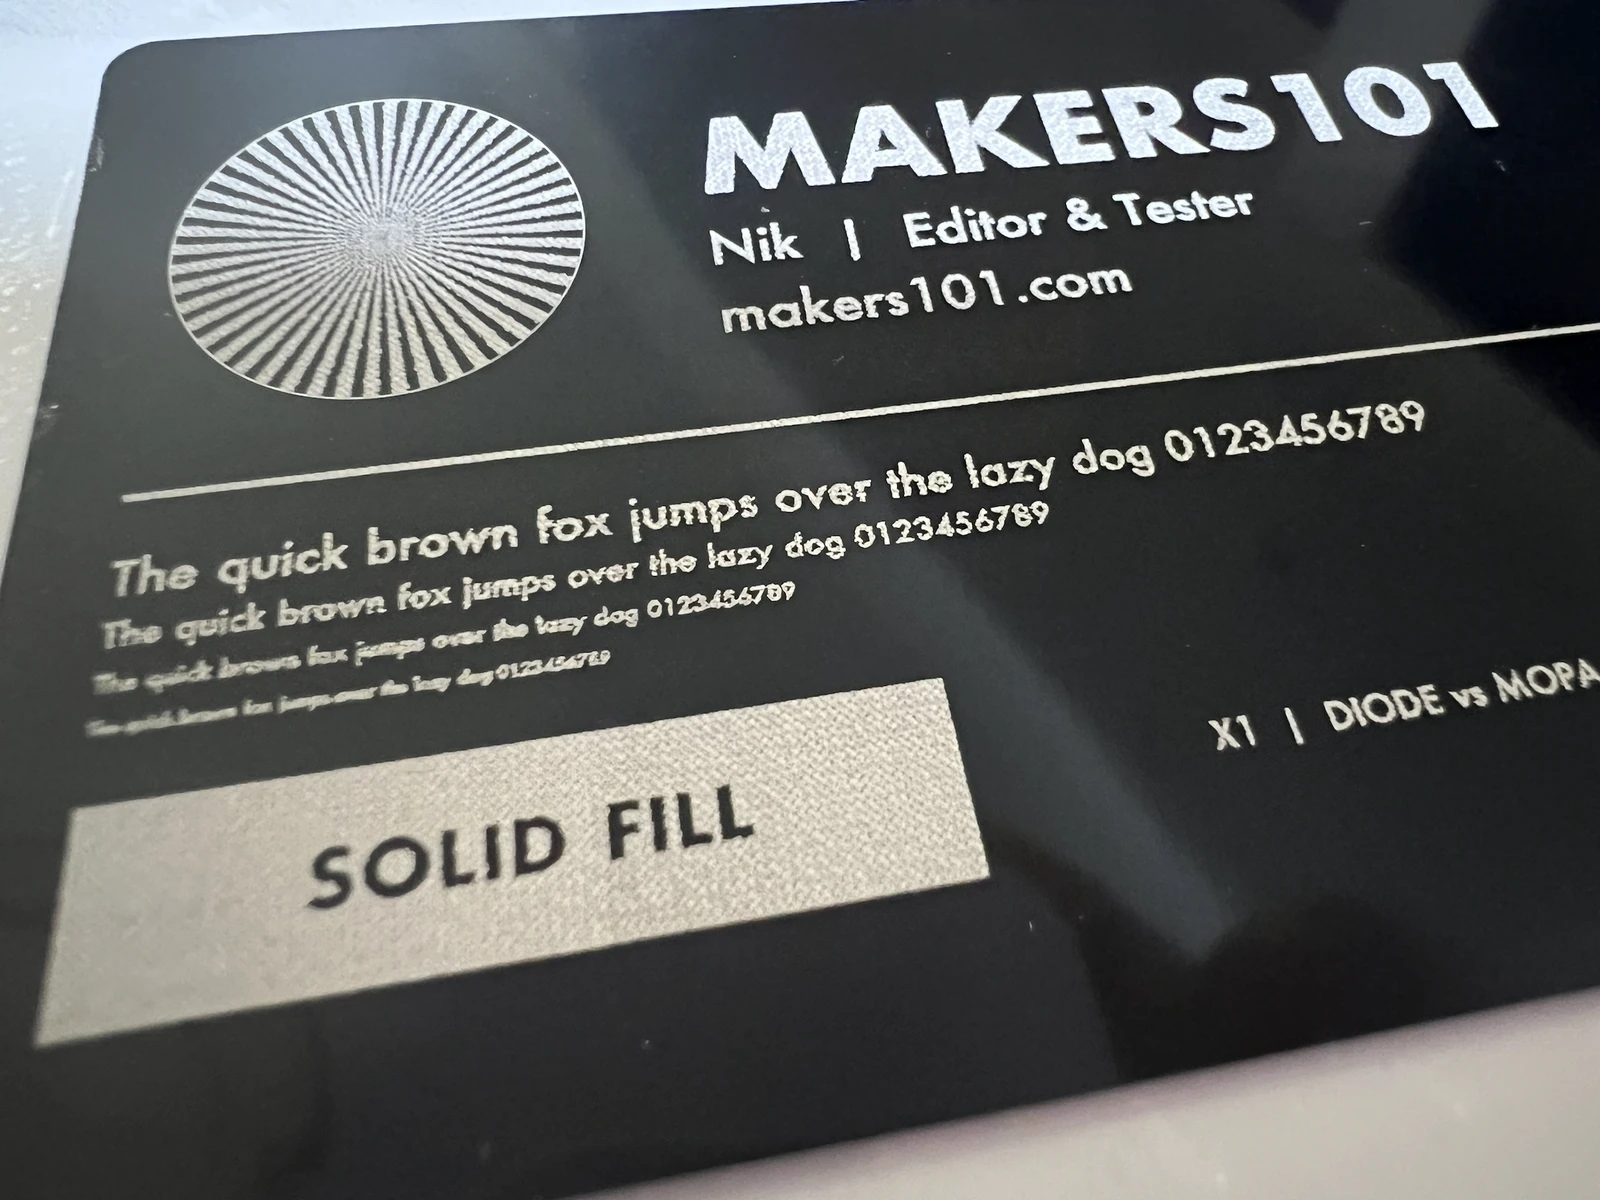
The images were taken at different angles and magnifications, so I judged the difference by eye on the finished cards.
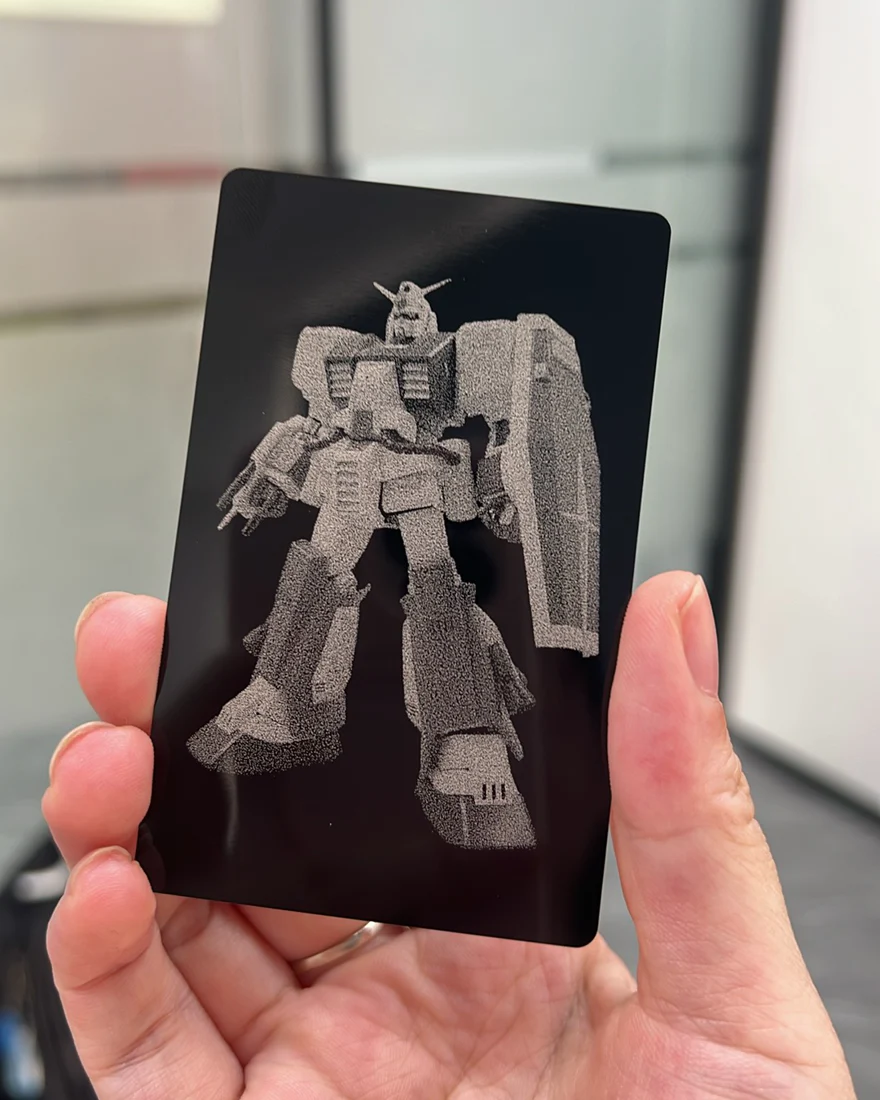
The MOPA card gave me more continuous small lettering, tidier edges and more even fills. The diode left a rougher texture, and some of the smallest characters broke up or merged.
On the MOPA card, I could still read the smallest 0.5 mm design-size text, although it was slightly fuzzy and jagged. That was the smallest text in the design, not a measured resolution limit. I would use larger lettering where easy reading matters.
For small lettering on these anodized cards, MOPA was the more convincing choice.
| Recorded MOPA control | Line engraving | Fill engraving |
|---|---|---|
| Power | 20% | 20% |
| Speed | 1,500 mm/s | 2,000 mm/s |
| Engraving density | — | 180 |
The table uses the density value shown in Studio. Both runs produced surface marks on anodized aluminum.
My First 60W MOPA Metal Color Test
One 60W MOPA color grid gave me a wide range on a single metal sample, from gold and orange to magenta, blue and teal. I’d like to use some of those colors in future designs and see which shades I can reproduce consistently.
MOPA Artwork on Photo Engraving Paper
For these landscapes, I used black photo engraving paper.
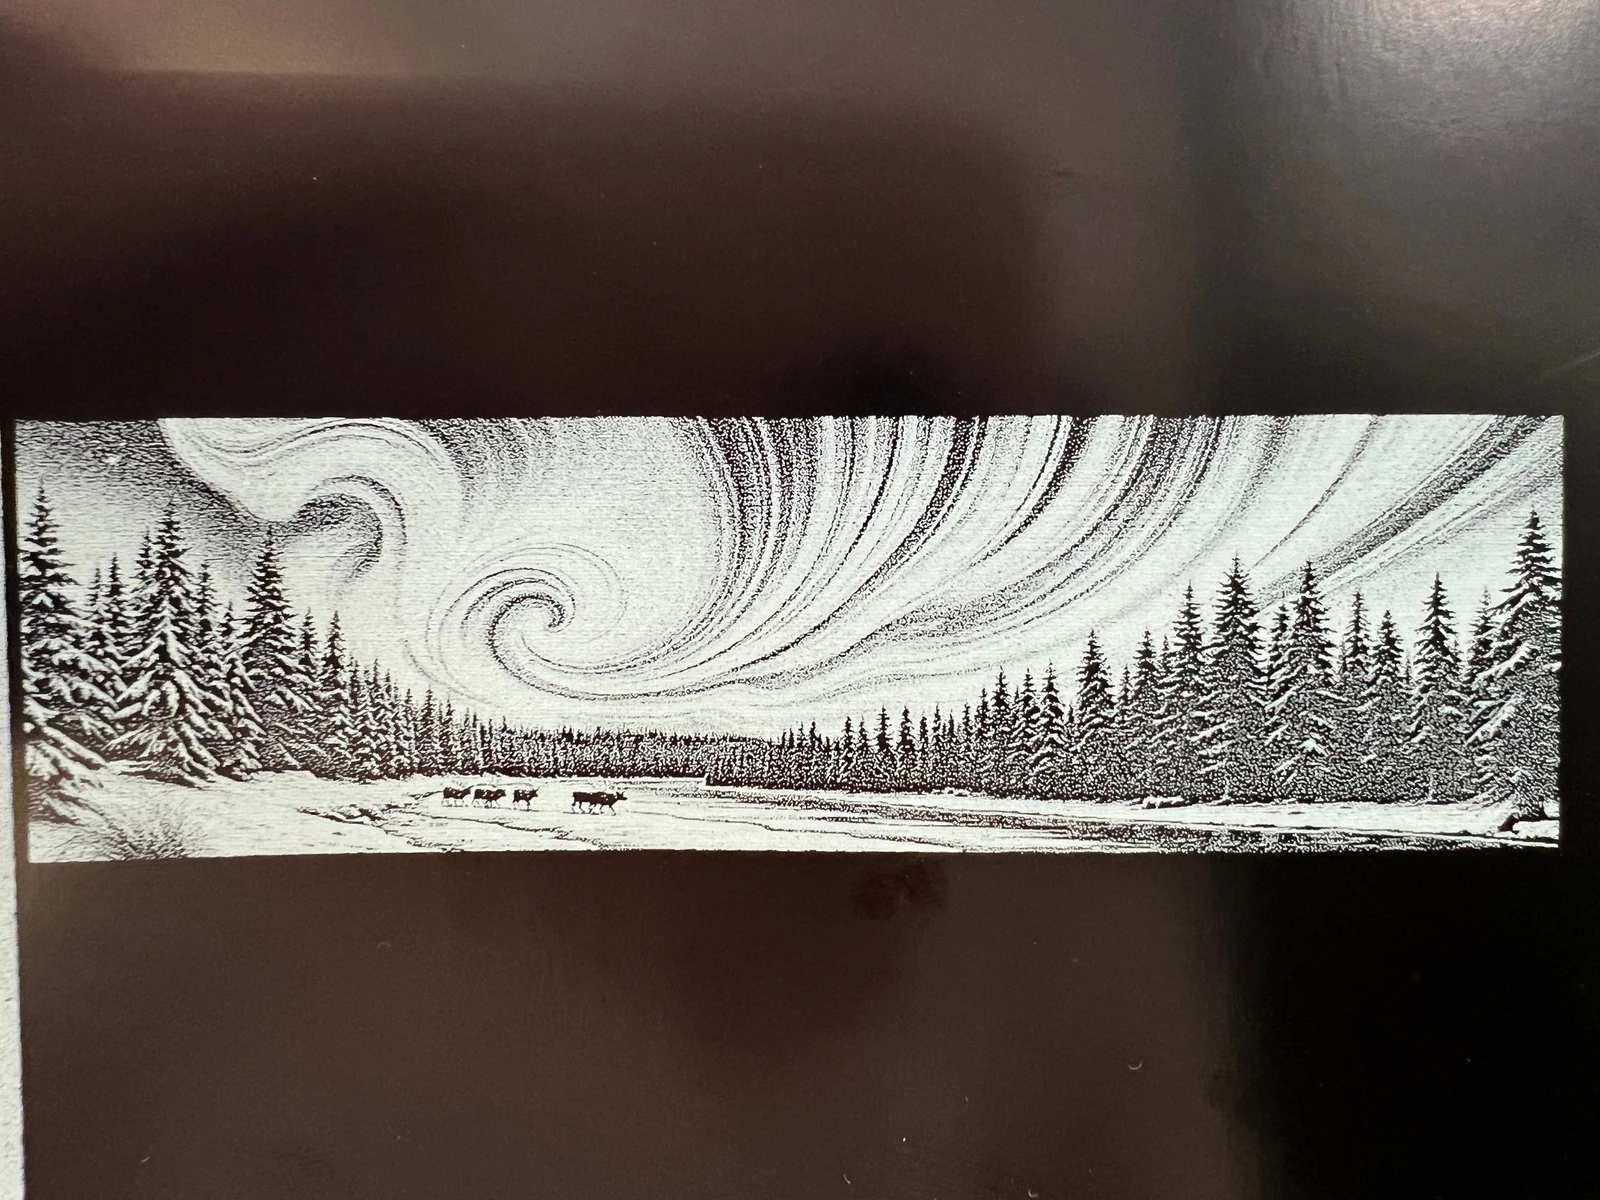
The finished piece. I was particularly pleased with the large composition and the contrast between the trees and the sky.
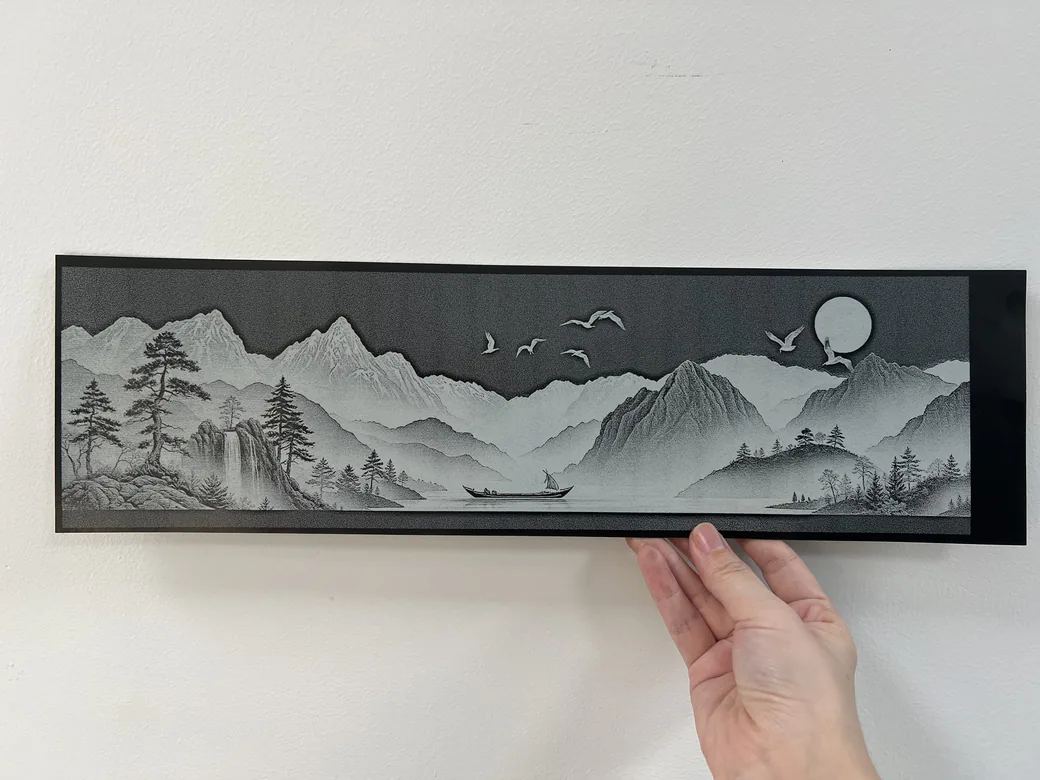
A second piece from the xTool X1 artwork tests.
The job succeeded on the first attempt using the recommended photo preset.
- Power and dot duration: 20%, 90 µs.
- Resolution and passes: 350 DPI, one pass.
- Image processing: Jarvis, feathering count 4, interleaved.
Is the 60W MOPA Upgrade Worth the Extra Cost?
The clearest reason in these tests is small lettering on anodized aluminum. If cards like these are a regular part of your work, MOPA’s more continuous characters and tidier fill give you a concrete quality benefit to weigh against the $2,680 difference between the two Standalone configurations listed above.
For mostly wood and acrylic projects, I would start with CO₂ + Diode Galvo. Those sources handled the cutting and engraving jobs that mattered most to me, and these tests give me no reason to add MOPA solely for that work.
I’d weigh the extra cost against how often those small details or metal finishes matter to an order.
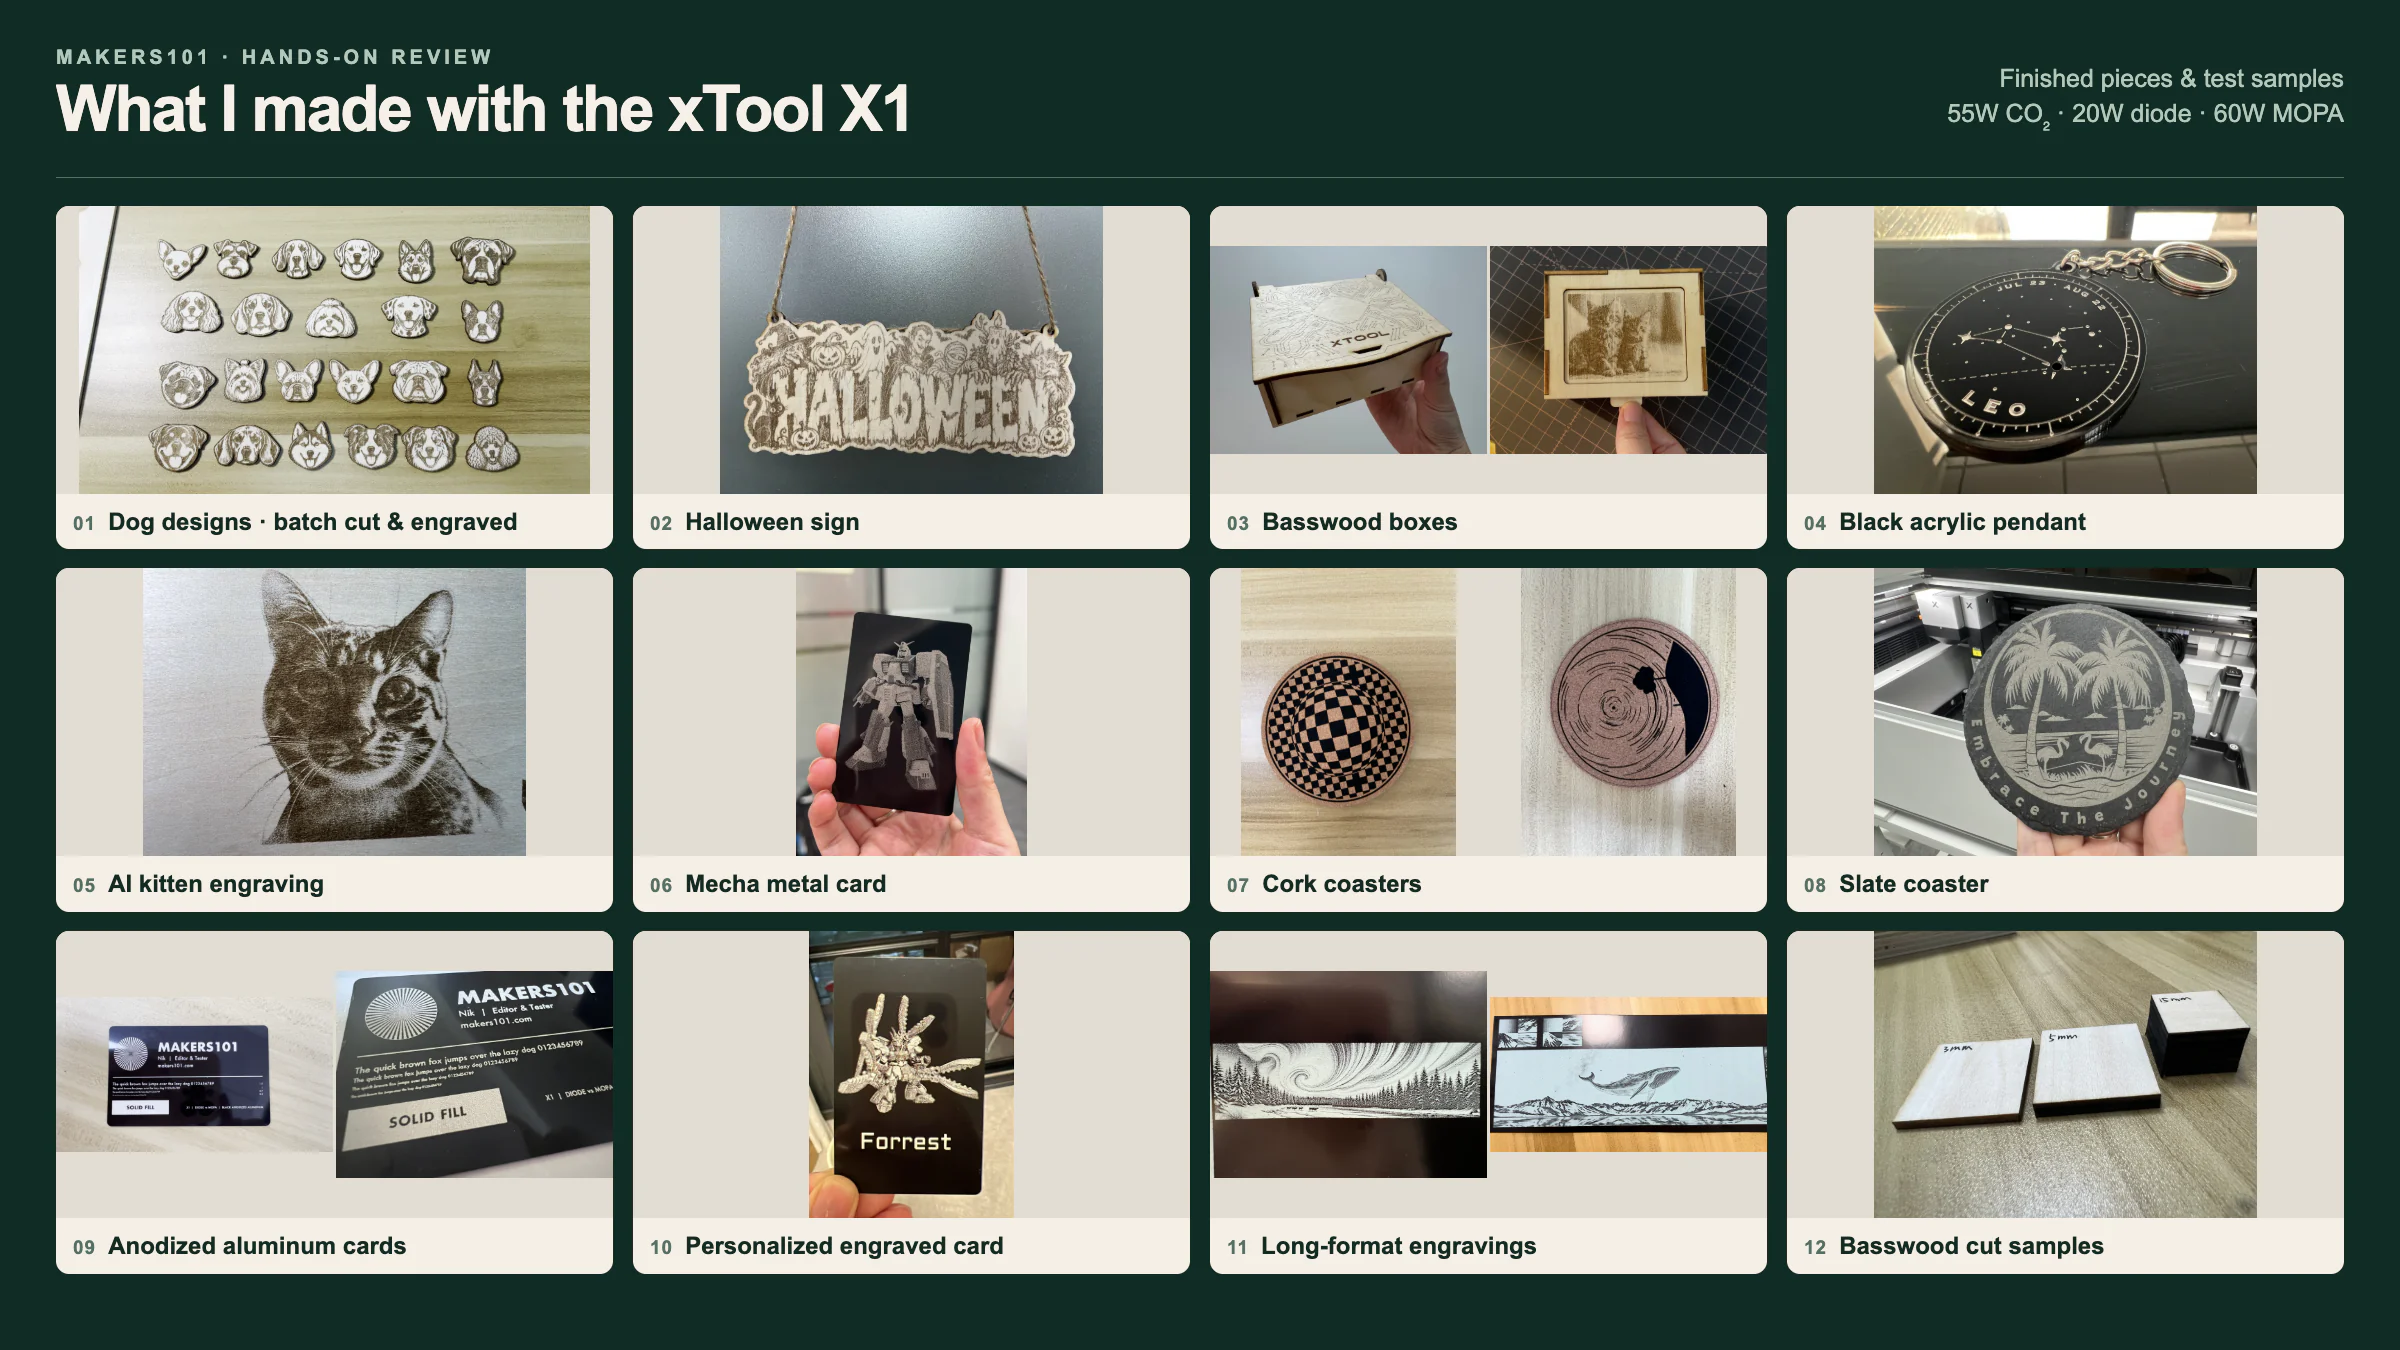
My xTool X1 Project Portfolio
Here are the finished pieces and test samples from my review, from basswood signs and acrylic pendants to coasters, anodized cards and my MOPA color grid.
xTool Studio Software and Everyday Use
I ran every job in xTool Studio, which the X1 currently requires for processing control. LightBurn isn’t supported at the time of publication. xTool’s software compatibility notes.
Autofocus and Camera Alignment in Practice
Auto mode took care of focusing and gave me a camera preview for placement. I checked the layout and chose the material and preset before starting the job.
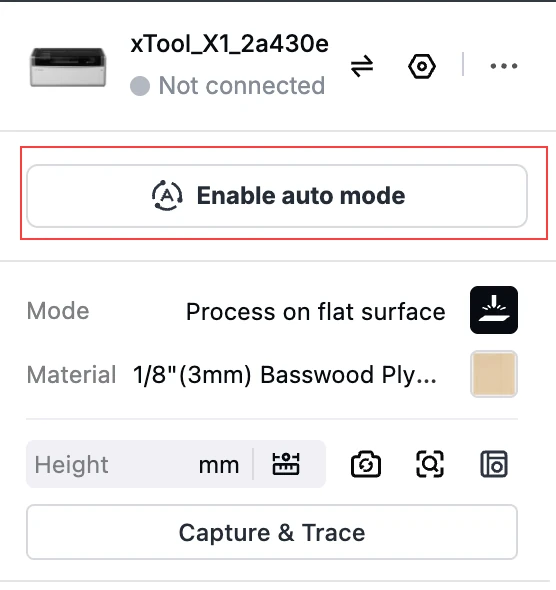
Across the projects I checked, I saw no obvious alignment error. When the material color looked similar to the bed, I sometimes took another photo before placing the design. That was my precaution, not a necessary step on every job.
With the project and settings ready, I could typically get from placing the material to starting the job in about a minute. The exact time depended on the design and settings.
xTool Studio: How I Set Up a Job
In Studio, my usual sequence was to position the artwork on the camera preview, pick a material preset and assign each layer its own operation and laser source. For the pendant, I could set up the linework, filled details and outline in one project. For the dog batch, I arranged all 25 designs on the same camera view before sending the job.
For photos, Studio’s presets gave me a starting point. Its material-test grid let me compare settings on a basswood offcut before committing a larger piece.
One pre-release software hiccup interrupted my second project. Studio asked for a required value even after I had entered the engraving and cutting settings. Turning auto mode off exposed the thickness field. Turning it back on reran the height measurement and camera capture, which cleared the error for me.
Atomm: Where I Started My Designs
My keepsake box started in Atomm’s Box Generator. Once I had the flat layout, I placed a photo on the lid panel in Studio. The project library offers ready-made designs, and Atomm also has tools for preparing images. I used its background removal to isolate the artwork. That feature uses Atomm credits, so I can pay for it with the credits in my account. Atomm’s guide to credits
Workspace, Cleaning, Noise and Safety
The dimensions in the design section are worth checking against your workspace before ordering. Leave room for the open lid, rear modules, and exhaust routing; the body footprint alone does not describe the full installation space.
The main cleanup drawback is the lack of a removable waste tray. Offcuts collect at the bottom of the enclosure and need regular removal. I would welcome a manufacturer-designed protective tray that lifts out for cleaning.
With the exhaust hose routed out a window, I noticed little odor while engraving and a slight smell while cutting. I found the view through the tinted lid fairly dim during ordinary use. Noise was roughly 60–70 dB in my setup. I’d treat that as a rough reading for my workshop.
The lid interlock stopped an actual job: a friend thought engraving had finished and opened the lid while it was running. The machine paused immediately. Because the job had just started, I repositioned the design and restarted it.
I follow xTool’s ventilation and safety instructions and stay with the machine while it runs. xTool rates the enclosed X1 as Class 1 when used as intended and classifies it as Class 4 when working with the conveyor feeder. xTool’s conveyor safety guidance
Should You Buy the xTool X1?
For a shop that engraves and cuts on most days, I’d buy the X1. In my workshop, the same machine made a sign, turned the leftover wood into a batch of dog designs, and handled acrylic pendants and metal cards. The large bed, camera positioning and automatic focus made the most difference when I had several pieces to place and check.
If you already run your shop in LightBurn, factor the move to xTool Studio into the purchase.
Which X1 Configuration I’d Choose
| If my work looked like this | What I’d choose |
|---|---|
| Mostly cutting wood or acrylic | I’d start with the 55W CO₂ Standalone. It covers the kind of sheet cutting I did in this review. |
| Repeat orders that need both engraving and cutting | I’d choose 55W CO₂ + 20W Diode Galvo. The black acrylic pendant is a good example of where I’d use the diode for detail and the CO₂ for the outline. |
| Regular metal marking alongside wood and acrylic | I’d consider the 30W fiber for standard marking, which is where xTool positions it. I’d add the 60W MOPA if small lettering on anodized cards is a regular requirement, or if I need compatible metal color marking. |
| Glass or crystal personalization | I’d look at the 5W UV option for the surface and inner engraving that xTool lists. I’d match it to the material and finish I need before buying. |
For photo keepsakes on wood, I’d try the preset on a scrap of the intended material first. My cat samples showed the difference clearly. The diode gave me more contrast, while the CO₂ showed some whiskers and fine fur lines more clearly.
Which Accessories Would Earn Their Space
For regular orders of long wood or acrylic signs, I’d add the conveyor. xTool lists conveyor mode for the CO₂ source. I’d add the RA3 rotary if I were selling tumblers or other round items. xTool’s conveyor FAQ
The Versatile bundle includes both and the mobile stand. I appreciated the stand’s wheels for reaching the rear of my review unit. I’d look at All-in-One if I already planned to buy the AP2 purifier, then compare the bundle premium with the individual prices above.
Before ordering, I’d measure the space with the lid open, leave room for the rear module and exhaust, and think about how often I’d actually swap external sources. If I needed to keep two orders running at once, I’d budget for two separate stations. For a shop that can run jobs in sequence and wants to add capabilities as the work changes, this is a machine I’d recommend. Compare all X1 configurations and bundles.
- Up to 6,000 mm/s galvo
- 24.2 × 12.6 in galvo area
- Class 1 with enclosure closed
- 3 positioning cameras
xTool X1 FAQ
Can the xTool X1 Engrave and Cut Without Moving the Material?
Yes. I assigned engraving and cutting to separate Studio layers, kept the material in place and ran the engraving before cutting the pieces free.
Can You Add MOPA, Fiber or UV Modules Later?
Yes. The 55W CO₂ laser comes with the machine, and the 20W Diode Galvo module enables the optional 60W MOPA, 30W Fiber and 5W UV sources. You can connect one external source at a time. See setup and installation for what a physical module change involves.
Can the xTool X1 Cut 15 mm Basswood?
Yes. I cut through my 15 mm basswood sample in one pass with Studio’s default 55W CO₂ cutting preset. I gave the cut piece a light push to release it.