
Heads up — some of the links below are affiliate links. If you buy through them, I earn a small commission (at no extra cost to you), which helps cover the gear I test. Thanks!
You loaded a fresh spool, hit print, and got stringing and faint popping sounds. The layers snap when you flex them. Most people blame the printer. It’s almost never the printer.
It’s wet filament. Plastic pulls moisture out of the air, and damp filament prints badly no matter how dialed-in your machine is. The good news: you don’t need a $60 store-bought unit to fix it. A simple DIY filament dryer box costs about $15 to build and works just as well for keeping filament dry.
Here’s what you’ll get: three build tiers (a passive box, a heated box, and honest advice on when to just buy one), plus the one step almost every guide skips that decides whether any of this actually works.
- Passive vs. heated: desiccant maintains dry air. Heat removes water from the filament itself.
- Container matters: use a polypropylene (PP) box. It doesn’t absorb moisture the way some plastics do.
- Target under 20% RH on a cheap hygrometer. Around 10% is ideal.
- Dry the spool first. Sealing wet filament in a box just overwhelms the desiccant.
- Print straight from the box through a PTFE feed port. No need to open it.
A DIY filament dryer box is a cheap airtight container fitted with desiccant and a hygrometer to keep your filament dry. A passive box ($10-15) holds already-dry filament in low humidity. A heated box goes further and actively pulls moisture out of damp spools.
Table of Contents
Passive vs. Heated vs. Buying: Pick Your Path First
Start by picking the right tool for your problem. The three paths solve different things, and building the wrong one wastes an afternoon.
A passive box is a sealed container with desiccant. It keeps humidity low so dry filament stays dry. It does not rescue a soaked spool, because desiccant only conditions the air around the filament. A heated box adds warmth and airflow, which actively drives moisture out of the plastic. That’s a real difference, not a marketing one: active heating removes water, passive desiccant only holds a dry environment. Buying a ready-made dryer skips the build entirely and gives you temperature control out of the box.
| Path | Cost | Best for | What it does |
|---|---|---|---|
| Passive dry box | $10-15 | Storing already-dry PLA/PETG | Maintains low humidity, no power |
| Heated dry box | $20-50 | Reviving damp nylon, TPU, PETG | Actively drives moisture out |
| Store-bought dryer | $40-60 | Hands-off drying with presets | Controlled heat, plug and play |
For most people, a passive box is enough. Only the thirstier materials really justify building a heated one, the ones like nylon and flexible TPU. If you want the temperature-and-time numbers for each material, our filament drying guide has them in one place.
Build 1: The $15 Passive Dry Box
This is the cheapest way in, and it’s where you should start. The whole thing is a sealed food container with three cheap parts inside.
What You’ll Need
Keep the parts list short. You need an airtight container, something to remove moisture, something to measure it, and a way to feed filament out.
- Airtight container (a cereal-style dry-food container or a Really Useful Box). Size it for a full 1kg spool, so a roughly 5-6L box. Pick polypropylene (PP), because PP doesn’t absorb moisture and holds a low-humidity environment long-term.
- Color-changing silica gel desiccant, about 50-100g per spool, so you can see when it’s saturated.
- A digital hygrometer to actually read the humidity instead of guessing.
- A PTFE bulkhead fitting and tube so you can feed filament out without opening the lid.


How to Build It (Step by Step)
The build takes about 20 minutes and needs almost no tools. Here’s the sequence.
- Set up the inside. Drop in the spool so it can spin freely. Many makers print a small snap-together insert with roller bearings, a hygrometer clip, and a silica holder, and the parts click together with no screws or glue.
- Drill the feed port. Pick a spot on the side level with the spool. Pre-drill with a small bit first, then step up to size. Soft plastic cracks if you go straight in with a big bit.
- Thread the fitting. Hand-thread the PTFE bulkhead fitting into the hole and push the tube in.
- Load and seal. Fill the silica holder, snap in the hygrometer, feed the filament through the port, and close the lid.
One warning on printed parts: don’t print them in PLA. PLA is hygroscopic itself, so it soaks up moisture and works against the box. Print inserts in PETG or PCTG instead.
Now you can pull filament through the PTFE port and print without opening the box at all.
Choosing and Recharging Your Desiccant
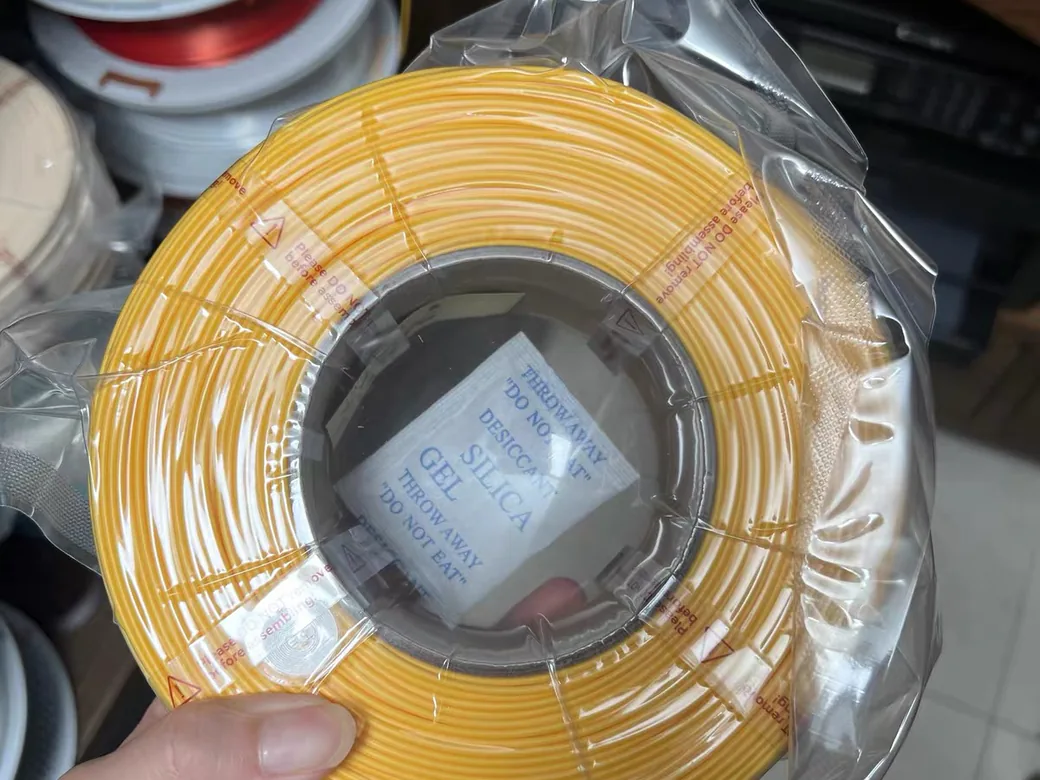
Your desiccant is the engine of a passive box, so pick a good one and keep it fresh. Silica gel absorbs roughly 40% of its own weight in water and is reusable once you dry it out. Color-changing beads make life easy: they shift color when saturated, so you know when to recharge.
| Desiccant | Recharge method | Best for |
|---|---|---|
| Color-changing silica gel | Oven or filament dryer, low heat | Most people, easy to read |
| Activated alumina | Filament dryer, ~1-1.5 hr high heat | Heavy users wanting lower RH |
To recharge, bake saturated beads in a low oven or a filament dryer until the color resets. Don’t microwave loose beads, and never let them cook at high temperature in a sealed bag.
The Part Everyone Gets Wrong: Sealing
Sealing is where most DIY boxes quietly fail. A box that isn’t airtight leaks humid room air back in faster than the desiccant can pull it out, and your hygrometer never drops.
The most-asked question in DIY drybox threads is exactly this: how do you seal the spot where the PTFE tube passes through the wall? Keep that hole snug around the fitting, and resist the urge to cut large openings anywhere, since every big cutout ruins the moisture barrier. A cleaner trick from serious builders: skip drilling the box entirely and use a printed lid with a foam cord gasket, which seals tight and stays fully reversible. Done right, a sealed box plus fresh desiccant holds around 10% RH.
Build 2: The Heated Dry Box That Actually Dries
If your filament is already damp, a passive box won’t save it. You need heat and airflow to push the water back out. This is the “active” tier, and it’s worth it mainly for the thirstier materials in our 3D printing filament guide: nylon, PETG, and TPU.
Your Heat Source Options (4 Tiers)
There’s a heat source to match every budget and skill level. Pick the simplest one that fits you.
- Free: an old printer bed. Set the heated bed to about 55°C for PLA, sit the spool on top, and drape an enclosure or box over it to trap the heat.
- ~$20: a reptile heating mat. A small 15x28cm mat draws only about 7 watts and holds a gentle, stable warmth inside a sealed box.
- Mid: a PTC heater plus a controller. A 12V PTC element with an XH-W1209 thermostat and a small 12V fan circulates warm air around the spool. This is the classic Reddit build.
- Top: an Arduino closed loop. Pair an Arduino with a DHT22 sensor to control temperature and humidity precisely, with a live readout on an LCD. More work, but full control.
Temperature Targets (Don’t Cook Your Filament)
Before you plug anything in, respect the ceiling. Push much past 60°C with PLA and it softens, sags, and can fuse into a solid brick on the spool. A heated box is not an oven, so use the per-material numbers in the next section and stay under each material’s limit.
Don’t Skip This: Dry Your Filament BEFORE You Store It
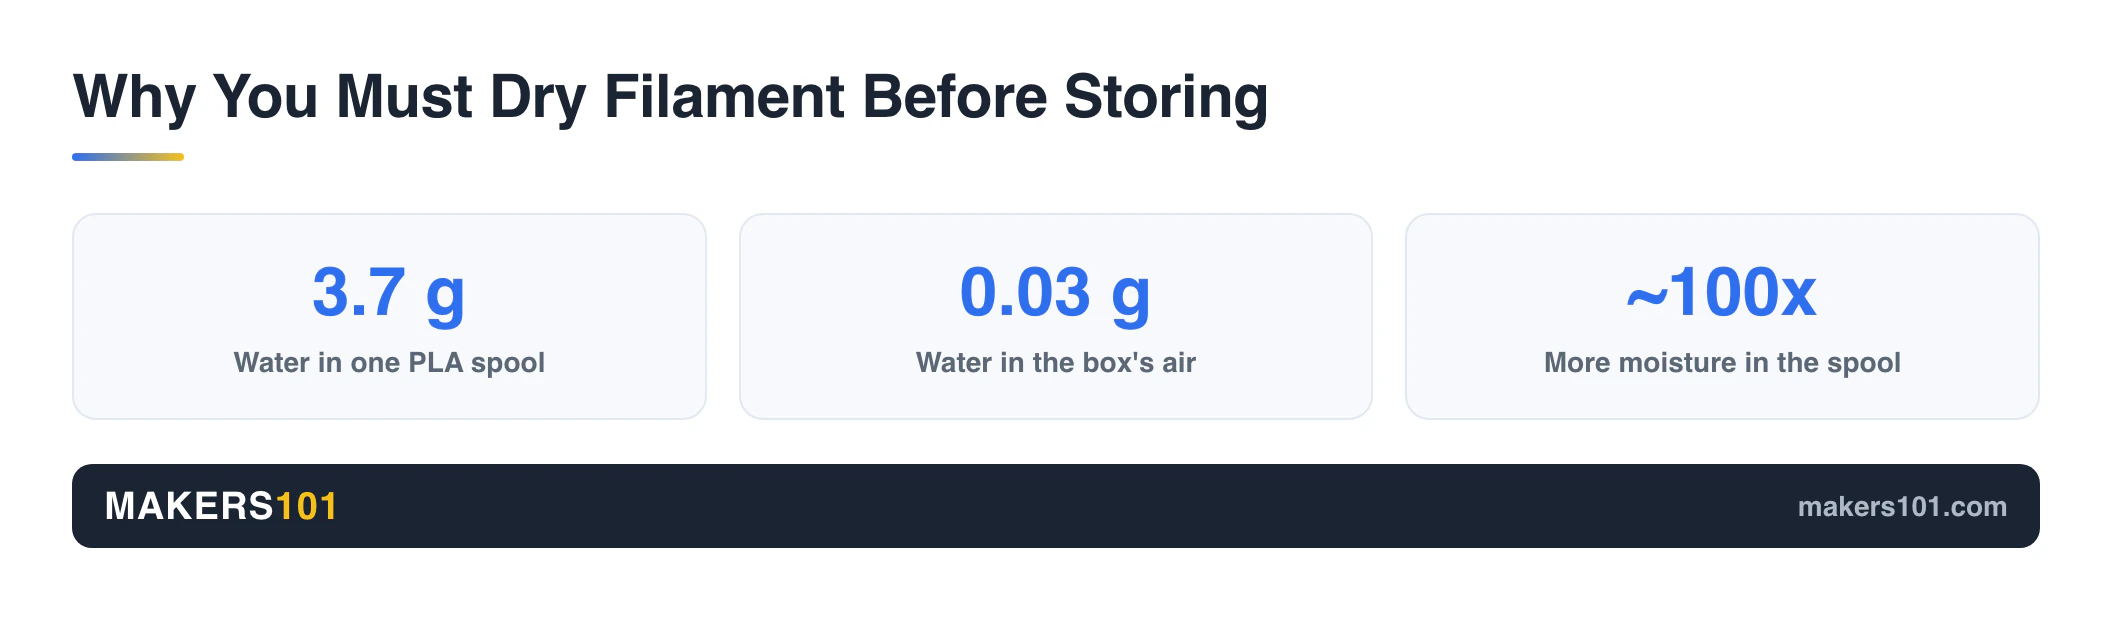
Here’s what most guides won’t tell you: a fresh box of desiccant can’t dry a wet spool, so you have to dry the spool first. The reason is a stark mismatch in how much water is involved.
A single PLA spool stored in a normal room can hold about 3.7 grams of water, much of it in the cardboard core. The air inside a sealed dry box holds only around 0.03 grams. That means a spool carries roughly 100 times more moisture than the air around it. Seal a wet spool in a passive box and the desiccant is overwhelmed instantly, so the humidity reading barely moves.
So the workflow is: dry the spool with heat first, then store it in your passive box to keep it dry. Use these targets, then aim to hold storage humidity under 20% RH on your hygrometer.
| Material | Drying temp | Time |
|---|---|---|
| PLA | 45-55°C | 4-6 hrs |
| PETG | 60-70°C | 4-6 hrs |
| TPU | 50-60°C | 4-6 hrs |
| Nylon | 75-90°C | 6-12 hrs |
| Polycarbonate | 80-100°C | 6-8 hrs |
For the full storage routine after drying, including how long different materials stay usable, see our guide on how to dry and store filament.
DIY vs. Buying a Dryer: The Honest Math
Sometimes the smart move is to just buy one, and I’d rather tell you that than sell you an afternoon of drilling. DIY makes sense when you already own a suitable container, you enjoy the build, or you mainly need cheap passive storage for a growing spool collection. A stack of $12 boxes beats a stack of $50 dryers when all you’re doing is keeping dry filament dry. We compared six ways to house a growing collection, boxes included.
Buying makes sense when you want reliable, hands-off drying with real temperature control and presets. A ready-made unit like a SUNLU dryer runs about $40-60, heats several spools at once, and lets you print straight from it. Here’s the combo I’d actually recommend: DIY passive boxes for storage, plus one store-bought dryer for reviving damp spools. If you want to compare models before you spend, our filament dryer buying guide breaks down the main options. The four-spool SUNLU S4 is the one most people land on, so we put it through its paces.

- 4 Spool Capacity: SUNLU 3D printer filament dryer S4 can dry up to four 1kg 3D printer filaments, enhancing drying efficiency and printing quality…
- Large Dimensions: SUNLU filament dryer S4 is notably large in size with external dimensions of 460(L) * 220(W) * 310(H)mm, internal dimensions of…
- 8 Filament Exit Holes: SUNLU filament dryer S4 features eight filament outlets for multiple printers and various filament loading angles, ensuring…
- 350W PTC Heater: SUNLU filament dryer S4 is equipped with a 350W PTC heater, offering safety and higher heating efficiency (50% higher than the…
- 3 Circulation Fans: Three high-quality fans circulate air inside, ensuring consistent temperature across the entire area for more even drying with…
Common Mistakes to Avoid
Most DIY dryer boxes fail for a handful of predictable reasons. Check yourself against this list before you build.
- Printing inserts in PLA. It absorbs moisture and fights the box. Use PETG or PCTG.
- A box with air leaks. Humid room air seeps back in and the humidity never drops.
- No hygrometer. Without a reading you’re guessing, and guessing fails silently.
- Storing wet filament. Dry it with heat first, or the desiccant never catches up.
- Oven drying. Home ovens run hot and uneven, and can melt or warp a spool.
- Sharing a food dehydrator. Don’t use the same unit for food and filament.
- Cooking your filament. Overheating a passive-turned-heated box past PLA’s safe limit softens the spool.
FAQ
Can I use rice instead of silica gel?
Not really. Rice absorbs some moisture, but nowhere near enough to hold a spool at low humidity, and it doesn’t recharge cleanly. Use color-changing silica gel or activated alumina instead. They pull far more water and you can regenerate them with heat.
What if my box isn’t perfectly airtight?
A slightly leaky box still helps, but it won’t hold low humidity for long. Focus on the lid seal and the tube pass-through first. Foam weather-stripping around the rim tightens things up, and a snap-on printed replacement lid seals even better without drilling more holes.
How long does filament last in a dry box?
Once you’ve dried a spool and sealed it with good desiccant, it can stay print-ready for months. The trick is discipline: dry it once, put it in the box, and stop opening the lid every day. Each opening lets humid air back in.
Do I really need to dry filament, or is a DIY box enough?
For PLA in a dry climate, storage alone often does the job. For PETG and especially nylon, you’ll usually need active drying with heat first, then a sealed box to hold it there. Match the effort to the material.
Can I print directly from the dry box?
Yes. That’s the point of the PTFE feed port. Filament runs from the sealed box through the tube to your extruder, so the spool stays protected the entire print.
What humidity should I aim for?
Keep it under 20% RH for reliable storage, and around 10% is ideal. A cheap digital hygrometer inside the box tells you at a glance whether your seal and desiccant are doing their job.