
Heads up — some of the links below are affiliate links. If you buy through them, I earn a small commission (at no extra cost to you), which helps cover the gear I test. Thanks!
- Most filament storage ideas fail on the same three questions. Answer them before you buy anything: how humid your room is, how many spools you own, and whether you have wall space, floor space, or neither.
- The famous IKEA shelf hack still doubles your capacity, but as of publication it costs $14.99, not the sub-$10 figure everyone still quotes.
- Storage holds filament dry. It won’t rescue a damp spool fast enough to save tonight’s print, so dry first and store second.
- Past roughly 20 spools, your real problem stops being “where do I put this” and becomes “which one is the grey PLA.”
- Desiccant that has quietly filled up stops absorbing and starts giving water back. An unchecked container is worse than no container.
Most filament storage ideas you find online are really moisture articles wearing a costume. They tell you plastic absorbs water, then sell you a sealed box. That advice is fine. It just doesn’t answer the question you actually have, which is where forty spools are supposed to live in a room that already has a printer in it.
Your collection grew the way everyone’s does. Two spools became eight, a Black Friday order made it twenty, and now there’s a stack behind the monitor and a cardboard box on the floor you step over daily. You spend real minutes hunting for one specific color.
So this guide covers six setups with the numbers attached. What each one holds, what it actually costs, and the part every other article leaves out: what it fails to do.
Need the moisture side of this too? Our guide on how to dry and store filament covers drying temperatures and desiccant chemistry in depth. This one is about where the spools go.
Table of Contents
- All Six Filament Storage Ideas at a Glance
- Start Here: Three Questions That Narrow It Down
- The Part Nobody Plans For: Finding the Right Spool
- Storage Keeps Filament Dry. It Won’t Rescue a Wet Spool in Time.
- How Long Does Stored Filament Actually Last?
- Where These Setups Go Wrong
- Frequently Asked Questions
All Six Filament Storage Ideas at a Glance
| Setup | Holds | Real cost | Blocks moisture? | Best for |
|---|---|---|---|---|
| IKEA VESKEN shelf | 12–14 spools | $14.99 (as of 2026-08-03) | No | Small rooms, tight budgets |
| Sealed tubs + desiccant | 1 spool per tub | Low, per tub | Yes | Anyone; scales one tub at a time |
| Vacuum bags | Unlimited, stacks flat | About a dollar per spool | Yes, best in class | Long-term storage, the spools you rarely reach for |
| Wall rack | 43 per row, 129 total | Around $125 for three rows (about $55 hardware, $70 filament, 2023 build) | No | Big collections, floor space gone |
| Printed boxes and drawers | Modular drawers: 8 per drawer, up to 12 drawers | Sealed boxes: roughly $10 each in filament | Yes, with a gasket | Makers with printer hours to spare |
| Dryer as storage | 1–4 spools | Mid-range | Yes, actively | Nylon, TPU, PVA |
One number decides more than people expect: spool width. A standard 1kg spool runs about 200mm across, but width varies by brand and that width is the hidden gate on every sealed option. Printed and molded boxes each have a ceiling, and the widest spools miss it more often than people expect. Measure your widest one before you commit to anything with a lid.
Start Here: Three Questions That Narrow It Down
Humidity decides whether you need sealing at all, spool count decides whether per-spool sealing still scales, and available wall or floor space decides the form factor. Answer those three and most of the six options below rule themselves out.
How humid is your room, really? Not your city, your room. This is the single biggest variable and it splits the community hard. One maker in Arizona put it plainly on Reddit: local humidity is low all year, so why seal anything? He’s mostly right, and the reason is worth knowing. Brandon Santana, printing in California’s dry climate, leaves everyday filament out without trouble. Nylon and PA6 are the exception even there, because they pull in moisture within two to three hours of open air. Dry region plus PLA means you can prioritize organization over sealing. Humid region or engineering materials means sealing comes first.
How many spools do you have? Ten spools and sixty spools are different problems with different answers. Under about fifteen, a sealed tub per spool is genuinely enough. Past that, per-spool sealing turns into a wall of tubs and you need to think about density.
Wall, floor, or neither? A wall rack needs studs and permission, which rules it out for a lot of renters. Floor units need footprint. If you have neither, vacuum bags stack flat in a closet and stop being a furniture problem.
Not sure which materials in your collection are the thirsty ones? Our 3D printing filament guide sorts them by how fast they drink.
Idea 1: The IKEA Shelf That Doubles Your Capacity
The cheapest way to double your storage density, as long as you don’t need moisture protection.
The trick belongs to Grant at 3D Musketeers, and it’s a genuine hack in the original sense: the IKEA VESKEN is a bathroom organizer. Nobody at IKEA was thinking about PLA. You lay spools on their side rather than standing them up, which fits six to seven per shelf across two usable shelves. That’s 12 to 14 spools in a footprint one spool wide, roughly double what a normal shelf gives you in the same floor space.
It’s polypropylene with ventilation holes, weighs about two pounds, and rolls on castors. His workshop is under 200 square feet and houses close to 30 printers, so the density claim comes from someone with a real constraint.
One correction, because this hack circulates constantly as the “under $10” solution. It isn’t anymore. The price has climbed since that 2022 video and the current figure is in the table above, checked the day this was published. Still cheap. Just no longer the number everyone repeats.
- Twice the spools on the same patch of floor
- Rolls out of the way when you need the room
- Ventilated, so nothing traps damp air against a spool
- The top shelf is too short for spools and only takes tools
- Spools in their original boxes tip over, so the boxes have to go
- No way to tell spools apart once they’re stacked sideways
- Zero moisture protection, by design
Grant flagged the identification problem himself and planned to add duct tape labels or QR codes later. Every dense storage system runs into it eventually, which is why it gets its own section below.
Idea 2: Sealed Tubs and Desiccant (The Baseline That Scales)
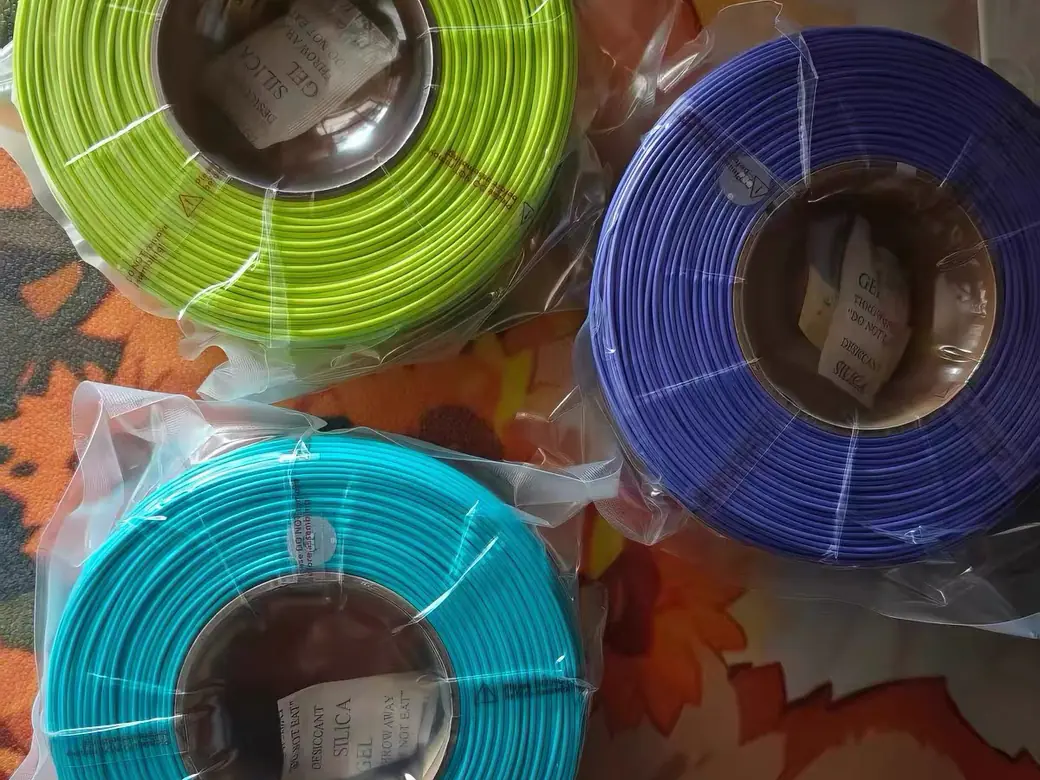
One spool, one airtight tub, one scoop of desiccant. It’s the only sealed method that grows one unit at a time without a redesign.
Here’s the money-saving part. The Main Cave channel, running 23 spools this way, points out that generic cereal storage tubs and the ones marketed for filament are frequently the same product with different labels, at roughly half the price. Check the dimensions rather than the marketing.
Each tub gets a hygrometer and a desiccant holder, both of which you can print. His numbers: a desiccant holder takes about 1 hour 51 minutes, so batch four or five at once, and a hygrometer bracket is 22 minutes and 8 grams. Print them in PLA unless they’ll see heat. Anything that goes inside a running dryer needs PETG or better, or you’ll warp the part you just made.
If the budget is zero, there’s still a floor: put the spool back in its original box with the bag it shipped in. Not airtight, but meaningfully better than a shelf.


A caveat on cheap hygrometers, since almost every guide recommends one without qualification. The common budget units spec their accuracy over roughly the 30 to 80% range, and read less precisely outside it. Filament storage targets 10 to 20%. So a ten dollar meter is excellent at answering “is this box actually sealed” and unreliable as a referee between 10% and 15%. Buy one, trust the trend, don’t trust the decimal.
- Scales one tub at a time, forever
- Cheapest true sealing per spool
- Generic tubs cost about half what filament-branded ones do
- One spool per tub eats shelf space fast
- Desiccant needs checking and recharging
- Stacks of identical tubs create the labeling problem all over again
Idea 3: Vacuum Bags for Spools You Won’t Touch for Months
The lowest cost per spool for genuine long-term sealing, paid for in convenience.
Lukis3D Studio landed here after trying the obvious thing first. Resealable zip bags failed: air finds its way back in. Purpose-made filament vacuum bags worked but cost more, and he didn’t trust their zip mechanism either. So he switched to generic food-grade vacuum bag rolls and cut his own.
The method is simple. A 20-foot roll of 12-inch-wide bag material, cut to about 14 inches per bag, yields around 15 bags. Seal one end, load the spool with a desiccant pack, pump the air out, seal it.
The detail worth stealing is the one nobody mentions: leave slack above the seal. That extra material lets you cut and reseal the same bag five to seven times as you use and re-store the spool. Without it, one bag is one use.
His own rule for what goes in a bag is sound. Seal the deep reserves. Leave the everyday colors in something you can open with one hand.

- Best moisture protection per dollar
- Stacks flat, so no furniture required
- With the slack trick, a bag survives five to seven cycles
- Every retrieval costs a reseal
- Hand pumping 25 spools is genuinely tedious
- Months under vacuum may deform a spool, though nobody seems to have tested it properly
Idea 4: A Wall Rack When the Floor Is Full
Maximum capacity, lowest cost per spool, and no moisture protection whatsoever.
Uncle Jessy built the open-source Rep Rack system using 10-foot metal conduit from a hardware store, mounted in three rows. Each row takes 43 spools. Three rows is roughly 129 spools on one wall, which is more than most hobbyists will ever own.
His 2023 build tally is broken out in the comparison table, with slightly more going to filament than to hardware, though the build consumed less than three spools of PETG. That’s what one maker spent in one region in one year, not a price tag. Conduit costs vary.
Two practical notes from the install. Mount the cleats vertically rather than horizontally so the rows actually line up. And check the load: each row carries around 113 pounds, about 340 pounds across three. That’s a real structural number. It needs studs, not drywall anchors, and it needs a landlord who won’t mind.
- Highest capacity per dollar of any option here
- Open source and endlessly modifiable
- Costs nothing in floor space
- No sealing at all, so it’s a dry-climate or PLA-only solution
- Requires a wall you’re allowed to drill into
- Loaded weight is significant and demands proper mounting
Idea 5: Printed Boxes and Drawers (Maximum Control, Maximum Hours)
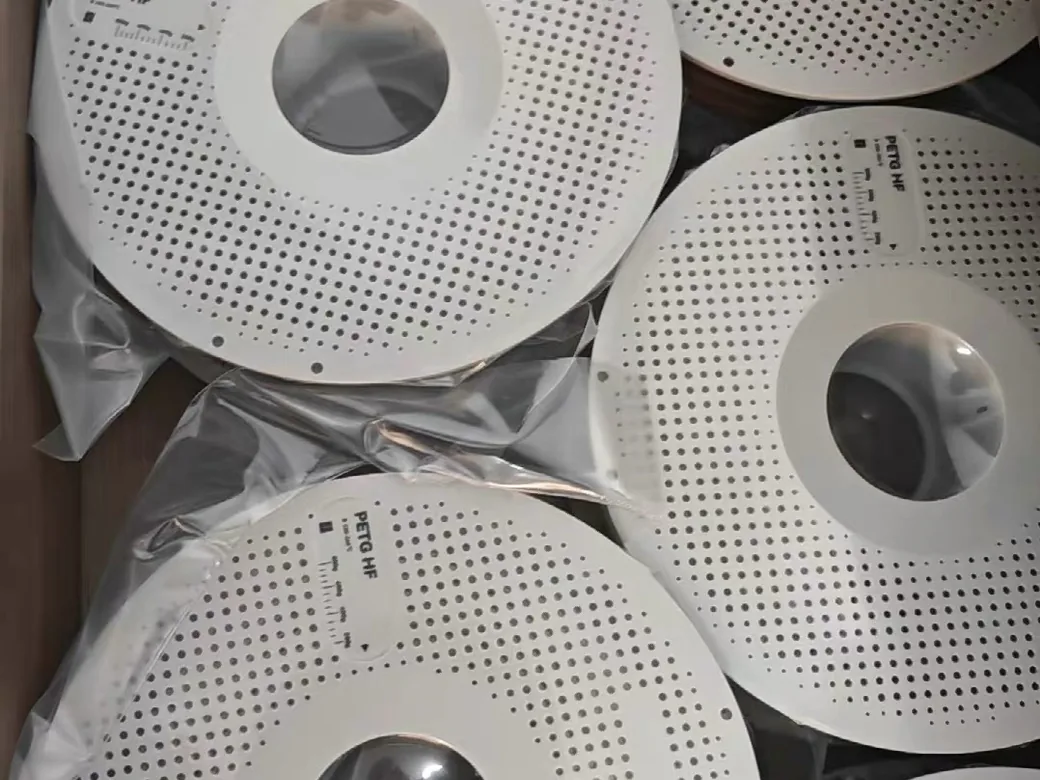
The best fit for your exact spools and shelf, bought with printer time instead of money.
Two builds show the range. Unnecessary Inventions designed a modular drawer system, open source on MakerWorld, stacking 12 shelves at about 8 spools each. The clever part is the hardware: two-inch PVC pipe cut to length riding on kitchen cabinet drawer slides. Small parts printed on an X1C, the large frame on an H2D.
At the other end, KellerLab’s dry rack boxes use about 760 grams of filament each, landing under ten dollars per box when filament is on sale. And here is the compatibility gate again: the standard box fits spools up to 68mm wide, the jumbo version up to 72mm. Measure first.
Then there’s the cautionary tale. Lukis3D Studio’s full build ran 80 boxes at roughly 300 grams and six hours each. Total: 27kg of filament, 480 hours of printing, and three months of calendar time, for a materials bill he put in the mid hundreds. The finished system weighs up to 43kg. It looks superb. It is also a quarter-year commitment that most people underestimate at the start.
If a printed dryer box is where you’re heading, we walked through three approaches in how to build a DIY filament dryer box.
- Fits your spools and your shelf exactly
- Cheap in cash if you already own the printer
- Gasketed designs seal genuinely well
- Print time is the real cost and it’s easy to underestimate
- Width limits mean some spools simply won’t fit
- Needs a working printer, which is circular if yours is down
Idea 6: A Dryer That Doubles as Storage
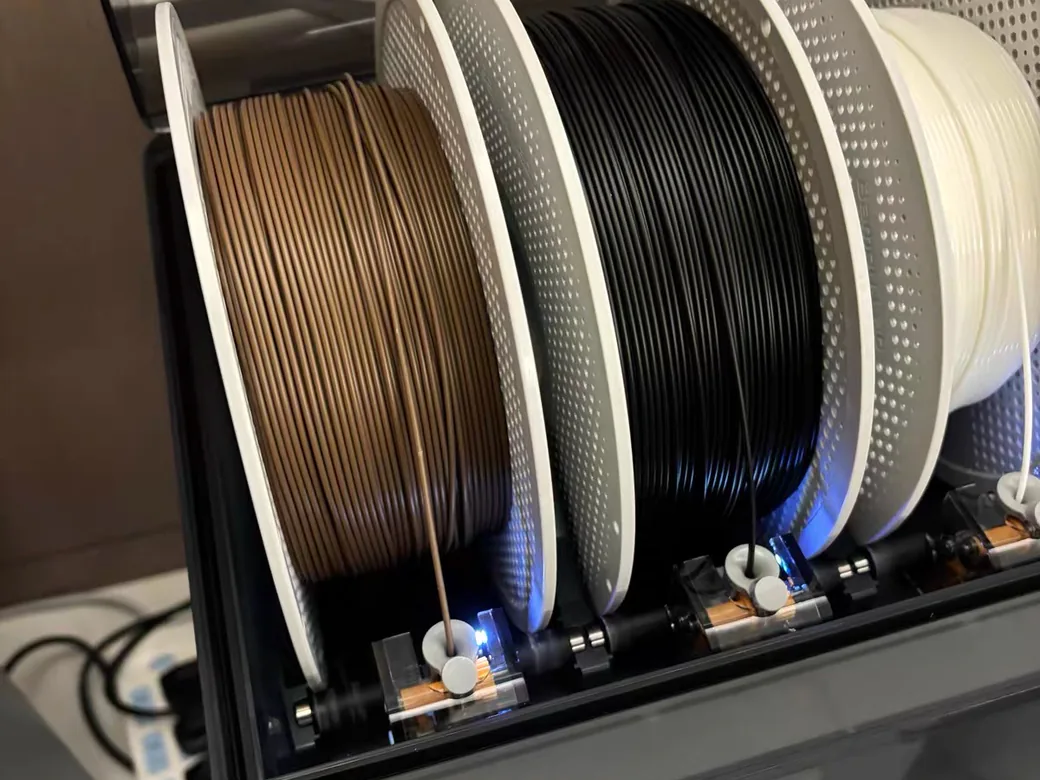
Worth a slot only for materials that rehydrate fast enough to justify the power draw.
A heated dryer with a sealed chamber is the one setup that both stores and actively maintains. GunplaMark’s printed drybox holds 10% humidity measured on a hygrometer and has run for months, TPU included. His stated goal is the right way to think about it: dry a spool once, seal it, and leave it alone for the life of the filament.
There’s a safety angle too. The Next Layer makes the case that heated drying is power-hungry and not ideal to leave running unattended, while low-power desiccant circulation is safer for continuous use. For a box that lives switched on, that distinction matters. He also found a dryer loaded with wet filament tanked his air readings harder than a full day of ABS printing did. We unpack that in what actually pollutes a print room.
Capacity is the limitation. Most units hold one to four spools, so this is a nylon-and-TPU solution, not a storage strategy. If you’re choosing a unit, we ranked six of them in our best filament dryers guide.

- The only option that maintains dryness rather than just preserving it
- Doubles as your drying hardware
- Print-through models feed the printer directly
- One to four spools is not a collection
- Continuous power draw
- Cost per spool is the highest here by a wide margin
The Part Nobody Plans For: Finding the Right Spool
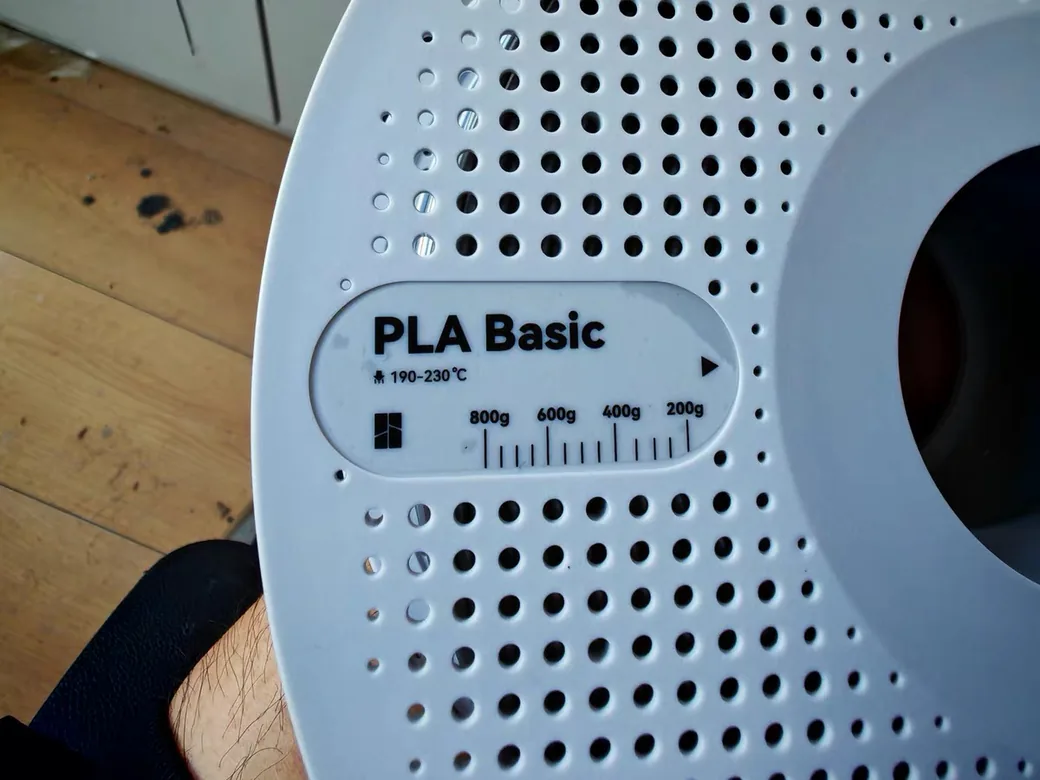
Somewhere around twenty spools, your problem quietly changes. Storage is solved. Identification isn’t.
Every setup above creates this. Sideways spools on a VESKEN show you an edge, not a label. Identical sealed tubs are a wall of grey plastic.
Two separate posts on r/3Dprinting show the same wall from different angles. One user, a decade into an on-and-off relationship with the hobby, got fed up hunting for the right spool, bought a rack, and paired it with printed calibration cards so colors could be identified on sight. Another, mid-way through the same job, summed up where it lands: “Just need to get the tags printed for each container now. Only problem is that I need another one almost as big for the 24 containers that didn’t fit.”
Two solutions stand out, and they attack it from opposite ends.
The thorough one is Main Cave’s label scheme. Each tub carries the material, the color name, the manufacturer’s SKU, the hex color value, and the print temperature. The hex value is the part most people skip and later wish they hadn’t, because “grey” covers about nine spools and a hex code covers one.
The elegant one comes from Lukis3D Studio: print each storage box in the color of the filament it holds. No labels, no reading, no system to maintain. The box is the label. The post sharing that build pulled 1,785 upvotes and nearly 300 comments on r/BambuLab, which tells you how much the identification problem resonates.
Whichever you choose, front-load it. Main Cave’s honest summary of his own build was that the initial printing is a lot of work, and after that it’s just labels, about half an hour. That ratio holds for most systems.
Storage Keeps Filament Dry. It Won’t Rescue a Wet Spool in Time.
No container dries a wet spool on the timescale you actually need. Storage works in weeks; drying works in hours.
The clearest evidence comes from The Next Layer’s active desiccant cabinet, which circulates air through silica gel with a fan rather than letting it sit passively. Empty, that cabinet went from 42% to 27% relative humidity in 15 minutes, and reached 22% up top and 18% at the bottom overnight. Genuinely effective.
Then he loaded it with spools that had already absorbed moisture, and humidity climbed to 34%. The likely explanation is that the wet filament released moisture faster than the desiccant could take it up.
Two things happened next, and both matter. Swapping the saturated desiccant for fresh brought the cabinet back down to 18%. And a polycarbonate part printed from a spool that had been sitting in there came out better than expected, which suggests the setup had slowly dried it over time.
So the honest version is narrower than “storage can’t dry filament.” Active circulation does pull moisture out gradually, given enough desiccant capacity and enough patience. What it cannot do is turn a wet spool around quickly, which is exactly what you need when a print is queued.
So the order is fixed: dry first, then store. Reverse it and you’ve sealed a wet spool into a nice container. If you don’t own a dryer, there are ways to dry filament without one, and the filament drying guide tool gives you material-specific temperatures.
How Long Does Stored Filament Actually Last?
Stored properly, good filament lasts years. Stored badly, thirsty materials can degrade in weeks. The storage conditions matter far more than the date on the box.
Ultimaker publishes usable anchors for its own materials: roughly one year for moisture-sensitive types like PVA, nylon, and TPU 95A, and up to two years for more chemically inert materials like PP and PC, under proper storage. Treat those as directional for other brands rather than absolute.
Climate shifts the whole scale. The same spool in a dry California workshop and a humid basement have completely different lifespans, and Brandon Santana’s two-to-three-hour figure for nylon in open air shows how fast the clock runs for the thirsty materials specifically.
PLA deserves one caveat. Lukis3D Studio’s observation from working through many brands is that PLA varies a lot between manufacturers and batches. Some soak up moisture readily, others shrug it off. “PLA is forgiving” is a useful rule of thumb and a bad guarantee.
Temperature is the other half of the equation and it’s easier to get right. Ultimaker’s guidance for its own materials is a storage range of -20 to +30°C for most filaments, with ABS narrower at 15 to 25°C and PVA needing relative humidity under 50%. In practical terms that means normal room temperature, away from radiators, sunny windows, and unheated garages. Wide temperature swings do their own damage independent of moisture, making spools brittle or warped.
Judge by symptoms rather than dates. Brittle strands that snap off the spool, popping at the nozzle, and a rough or fuzzy surface finish tell you more than any expiry estimate.
Where These Setups Go Wrong
Four things account for most of the disappointment: saturated desiccant, bad recharging, ignored weight limits, and buying before measuring.
Desiccant that’s quietly saturated. This is the big one. The Next Layer’s testing showed that saturated desiccant releases moisture back into the box, which means an unmonitored container can actively work against you. Color-indicating beads exist precisely so this is visible. Look at them.
Recharging desiccant wrong. Manufacturer guidance for indicating silica gel is an oven at 200 to 250°F, and explicitly not above 250°F. The microwave method that circulates online doesn’t match that guidance. KellerLab hit a related problem from the other side: baking a polycarbonate desiccant compartment at 100 to 105°C worked less well than higher heat, but oven temperature swings risk deforming the part itself.
Ignoring weight. A three-row wall rack loaded out is around 340 pounds. A fully printed 80-box system reaches 43kg. Both need mounting or flooring that can take it, and neither video leads with that.
Buying before measuring. Spool width kills more sealed-storage plans than anything else, and the printed-box ceilings under Idea 5 are the ones to check against.
KellerLab’s summary is the honest frame for all of it: no dry box keeps filament dry forever. It only slows the process down. Every setup here is a rate reduction, not a permanent fix, which is why the desiccant and the hygrometer are half the system.
Frequently Asked Questions
What is the best thing to store filaments in?
An airtight container with desiccant, and the specific container matters less than the seal. Sealed tubs work for spools you use weekly, vacuum bags for the deep reserves. Add a rechargeable desiccant and a way to read the humidity, and you’ve covered the vast majority of storage problems.
How do you store PLA filament when you’re not using it?
Seal it in an airtight tub or bag with a desiccant pack, away from sunlight and heat swings. PLA is more forgiving than nylon or TPU, so an open rack in a dry room is often fine. Just be aware that PLA behavior varies noticeably between brands and batches, so treat forgiveness as likely rather than guaranteed.
Are Ziploc bags good for storing filament?
They’re better than nothing and worse than they look. Resealable zip bags leak slowly, and one maker who tested them for filament storage found air worked its way back in over time. For a few weeks with a desiccant pack, fine. For months of storage, a vacuum bag or a gasketed tub is the better call.
Is 5 year old PLA filament still good?
Often yes, if it was sealed with active desiccant the whole time. Age alone doesn’t ruin filament; moisture exposure does. Bend a length off the spool before committing to a long print. If it snaps cleanly rather than flexing, or if it pops and strings once printing, dry it before you judge it.
What’s the best filament storage for small spaces?
Vacuum bags, because they stack flat and need no furniture. If you want spools visible and reachable, a narrow shelf unit with spools laid on their sides doubles density in the same footprint. Both approaches beat stacking tubs when the floor is the constraint.