
I earn a commission if you buy through links on this page, at no extra cost to you. As an Amazon Associate, I earn from qualifying purchases.
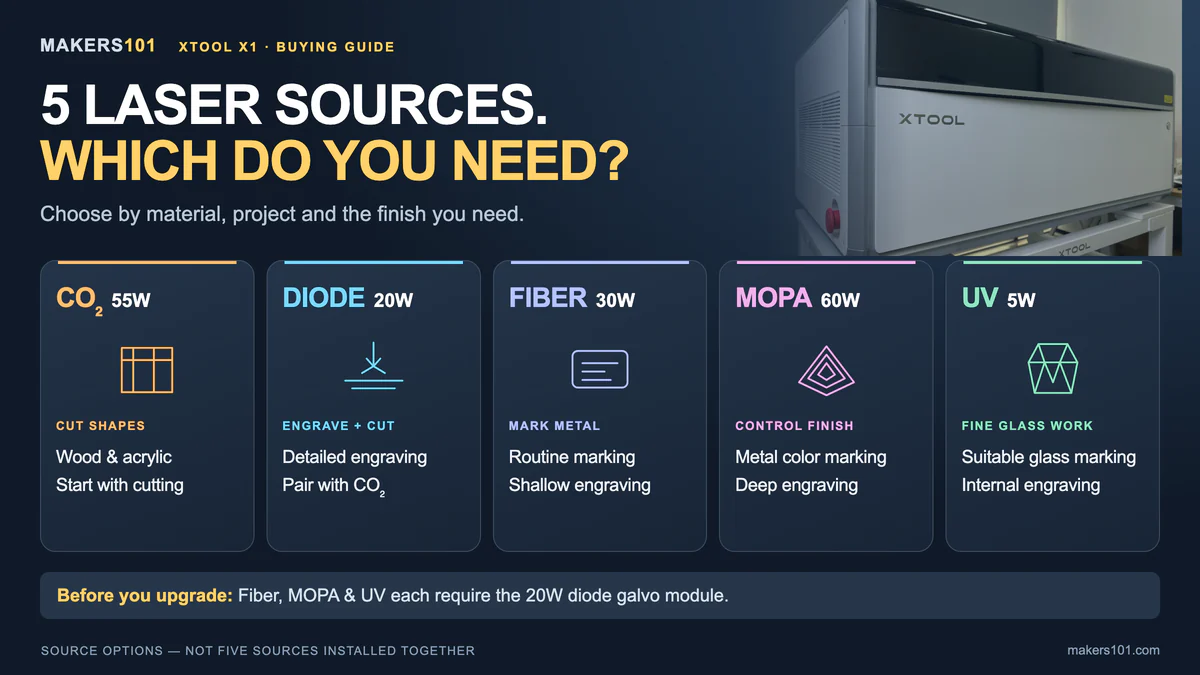
Start with the products you want to make. Wooden signs and acrylic shapes need the X1’s 55W CO₂ source. Add the 20W diode galvo for regular jobs that combine detailed engraving and cutting. For metal nameplates, shortlist 30W fiber; for metal color marking or deep engraving, consider 60W MOPA. Choose 5W UV for suitable glass surface marking or engraving inside compatible crystal.
You do not need all five sources. CO₂ works on its own. Fiber, MOPA and UV each need the 20W diode galvo module as well. Start with the smallest setup that can make your first products.
xTool supplied my review machine and accessories. My setup has the 55W CO₂, 20W diode and 60W MOPA sources. I do not own the 30W fiber or 5W UV source, so recommendations for those two use published specifications. Purchase links may earn a commission.
Table of Contents
List Your First Three Products Before Choosing Modules
Write down the material, the operation and the finish you need for each product. “Metal gifts” leaves too much unanswered. A logo on black anodized aluminum, a mark on bare stainless steel and a deeply engraved metal part are different jobs.
For each product, answer four questions:
- Product: What finished item will you deliver?
- Material: Include color, coating and thickness where relevant.
- Operation: Cut the outline, engrave a surface, remove a coating or engrave inside glass?
- Acceptance: What must the lettering, edges or finish look like before you can sell it?
If your three products are wooden signs, acrylic ornaments and engraved wood keepsakes, keep your initial shortlist focused on CO₂ and diode. Revisit metal and UV sources when a specific product creates a reason to buy them.
Match the Operation to the Laser Source
Start with the job in the left column. Then test the actual material you plan to sell: two blanks described as “acrylic” or “metal” may need different settings and produce different results.
| Material and operation | Source to consider | What to check | What you can defer |
|---|---|---|---|
| Wood or acrylic outline cutting | 55W CO₂ | Thickness, edge finish and a complete cut | Metal and UV sources |
| Detailed wood engraving followed by cutting | 20W diode galvo + CO₂ | Desired contrast, detail and complete job time | Fiber, MOPA and UV |
| Removing the dark surface on anodized aluminum | Test your existing source; consider MOPA for demanding detail | Letter continuity and fill on your actual cards | A second metal source without a separate job |
| Routine bare-metal marking or shallow engraving | 30W fiber | Required mark and material | MOPA if its additional controls are unnecessary |
| Stainless-steel color marking or deep metal engraving | 60W MOPA | Sample quality and repeatability | 30W fiber unless it serves another purpose |
| Suitable glass marking or internal crystal engraving | 5W UV + diode galvo module | Surface versus internal work, shape and usable area | UV when glass is outside your product plan |
| Cutting through metal sheet | Verify the exact material and thickness separately | A demonstrated through-cut | Any purchase based only on a marking demonstration |
Marking a surface is different from cutting through a sheet. A name or logo on metal does not prove that the source can cut the part out. The 30W fiber option is for marking and shallow engraving; confirm any metal-cutting job separately.
How to Add Metal or Glass Capability to a CO₂ X1
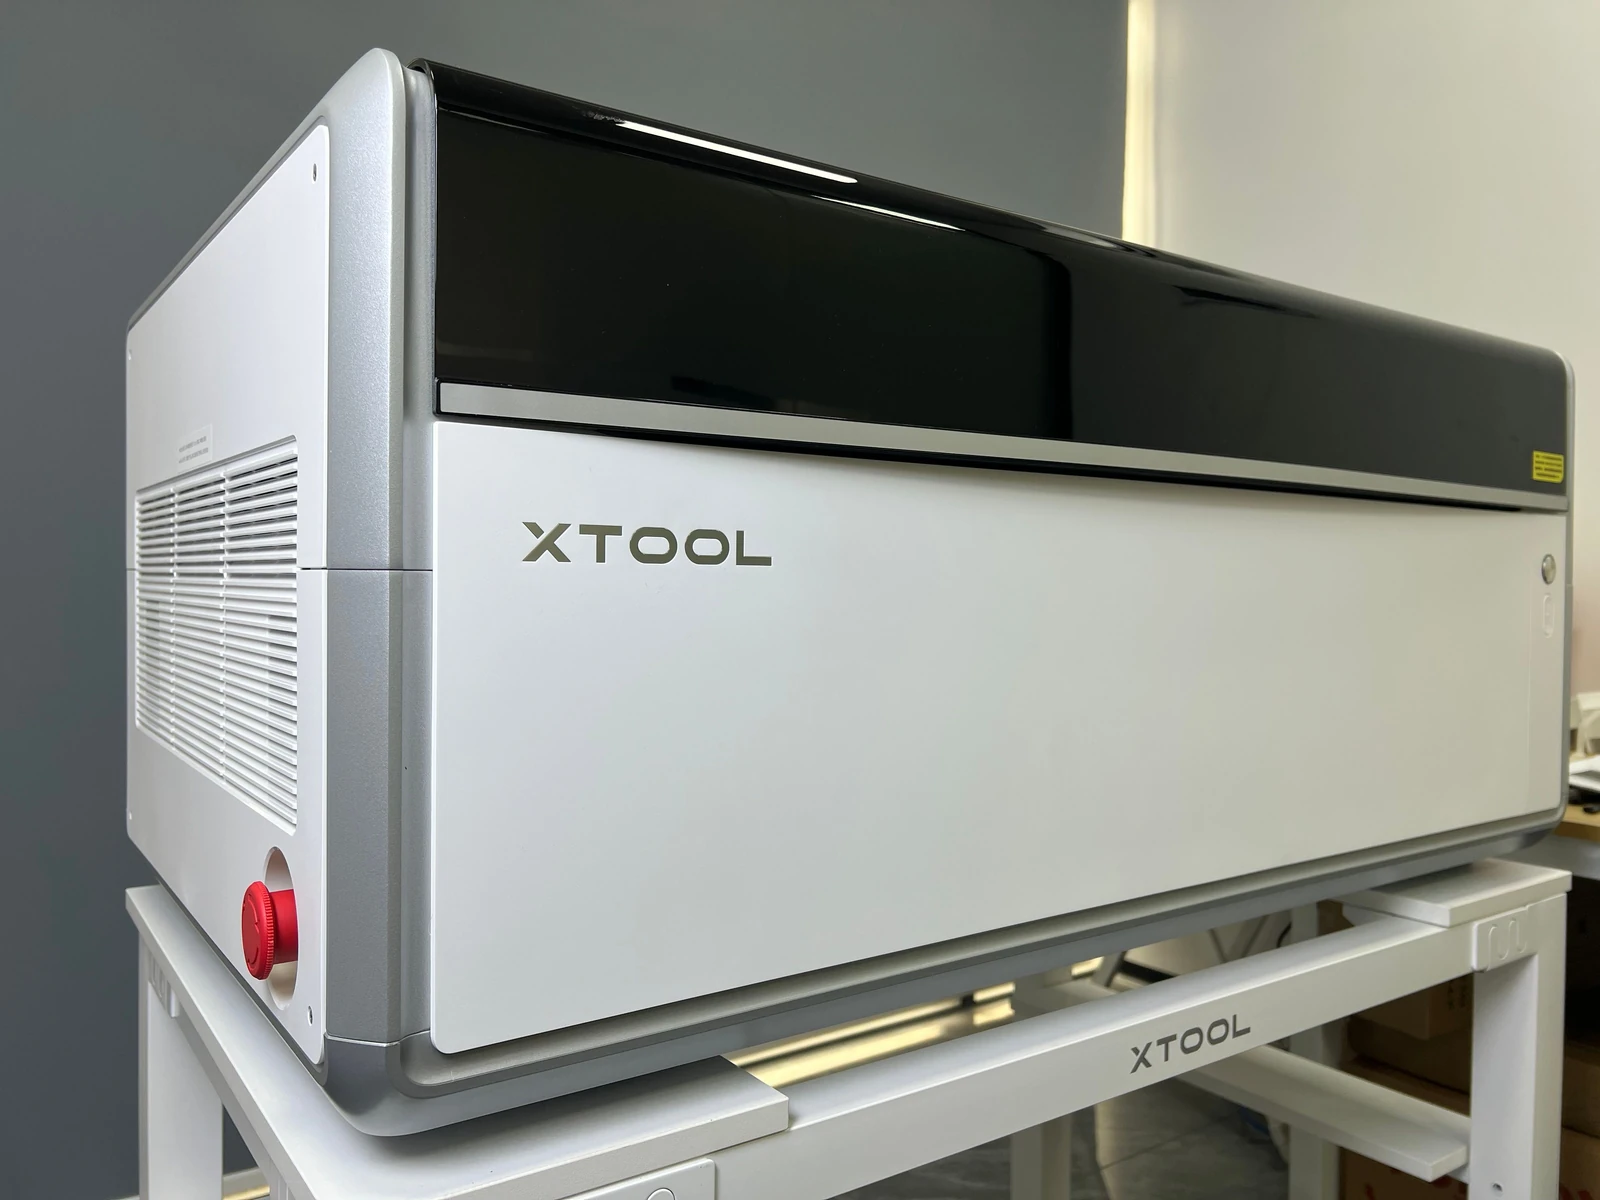
Think of the X1 as a base machine with an optional engraving module and a choice of add-ons:
- Start with 55W CO₂. It is included in the base X1 and works on its own for wood and acrylic cutting and engraving.
- Add the 20W diode galvo module when you need it. This adds a diode engraving source and the hardware needed to use the optional metal and UV sources. “Galvo” refers to the mirrors that steer the engraving beam.
- Choose an external source for a specific job. Add 30W fiber for routine metal marking, 60W MOPA for metal color or deep engraving, or 5W UV for suitable glass work. Each needs the diode galvo module from step 2.
Example: If you want CO₂ cutting and MOPA metal engraving, your shopping list is X1 with 55W CO₂ + 20W diode galvo module + 60W MOPA source. You do not need to buy the 30W fiber or UV source too.
You can add the diode module later to a CO₂-only X1. The machine accepts one external source at a time, so buying both MOPA and UV means physically changing that rear-mounted source between those jobs. Check that your chosen bundle includes every item on your shopping list.
Check the design size too: the maximum area for one source is 615 × 320 mm. A job that combines CO₂ with another source uses 527 × 297 mm. Glass inner engraving and some other modes have smaller limits, so use the area for the job you will actually run.
Four Buying Paths for Different Products
1. Mostly Cutting Wood and Acrylic: Start with CO₂
Products: Wooden name signs, cut-out ornaments, acrylic shapes and simple engraved gifts. Start here if cutting the outline is the main job.
Buy: X1 with 55W CO₂. You can cut wood and suitable acrylic, including clear acrylic, and try CO₂ engraving before paying for a second source. Use laser-safe stock rather than assuming any plastic is suitable.
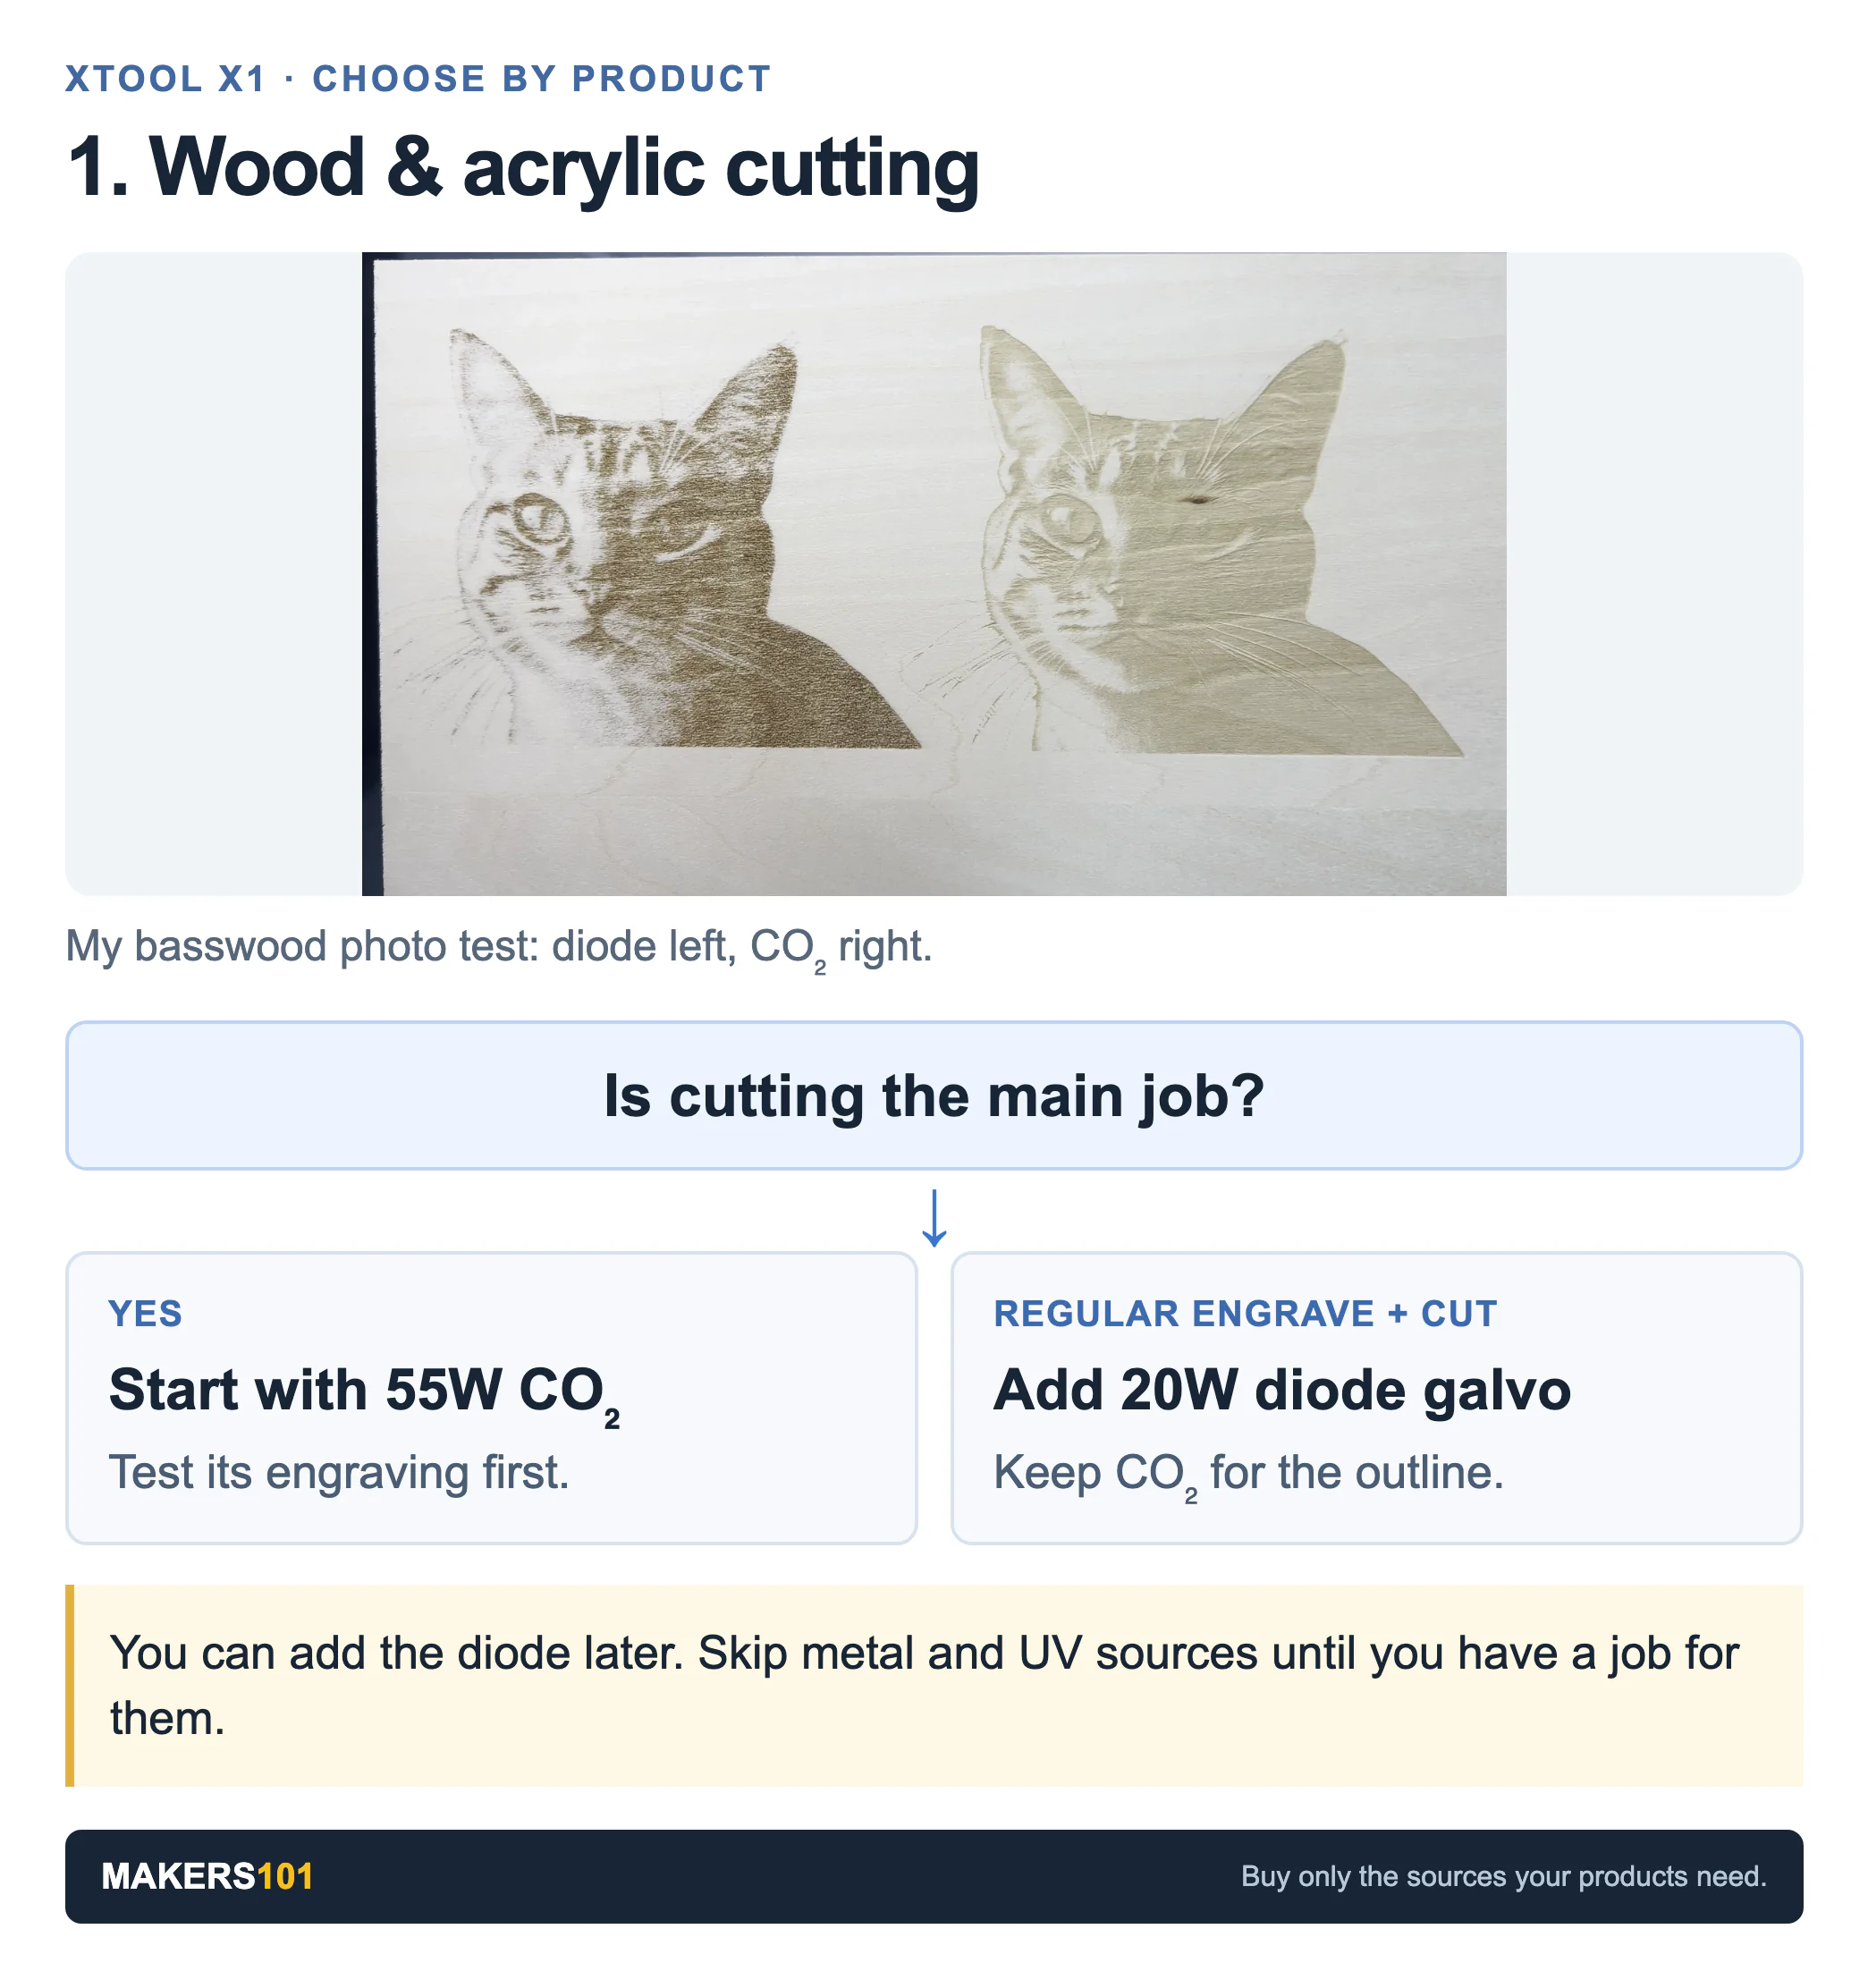
For a wooden photo keepsake, test the engraving before adding hardware. I engraved the same cat image on 3 mm basswood with the diode and CO₂ using each source’s default photo preset. The diode gave a darker image with stronger contrast. The paler CO₂ sample showed some whiskers and fine fur lines more clearly.
Add a source only if the sample gives you a reason. If CO₂ produces the finish you want, keep using it. If engraving becomes a regular part of your products, compare it with the diode on the same stock.
2. Engraving and Cutting the Same Product: Consider CO₂ + Diode
Products: Engraved-and-cut acrylic keychains, personalized wooden ornaments and detailed wooden signs. Choose this path when both the picture or lettering and the cut outline matter.
Buy: X1 with 55W CO₂ + 20W diode galvo. Use the diode for suitable engraving and CO₂ to cut the outline. My Leo keychain is one example: both samples used 3 mm black acrylic and CO₂ cutting. Diode engraving followed by CO₂ cutting took 44 seconds; CO₂ engraving and cutting took about 6 minutes with the settings I used.
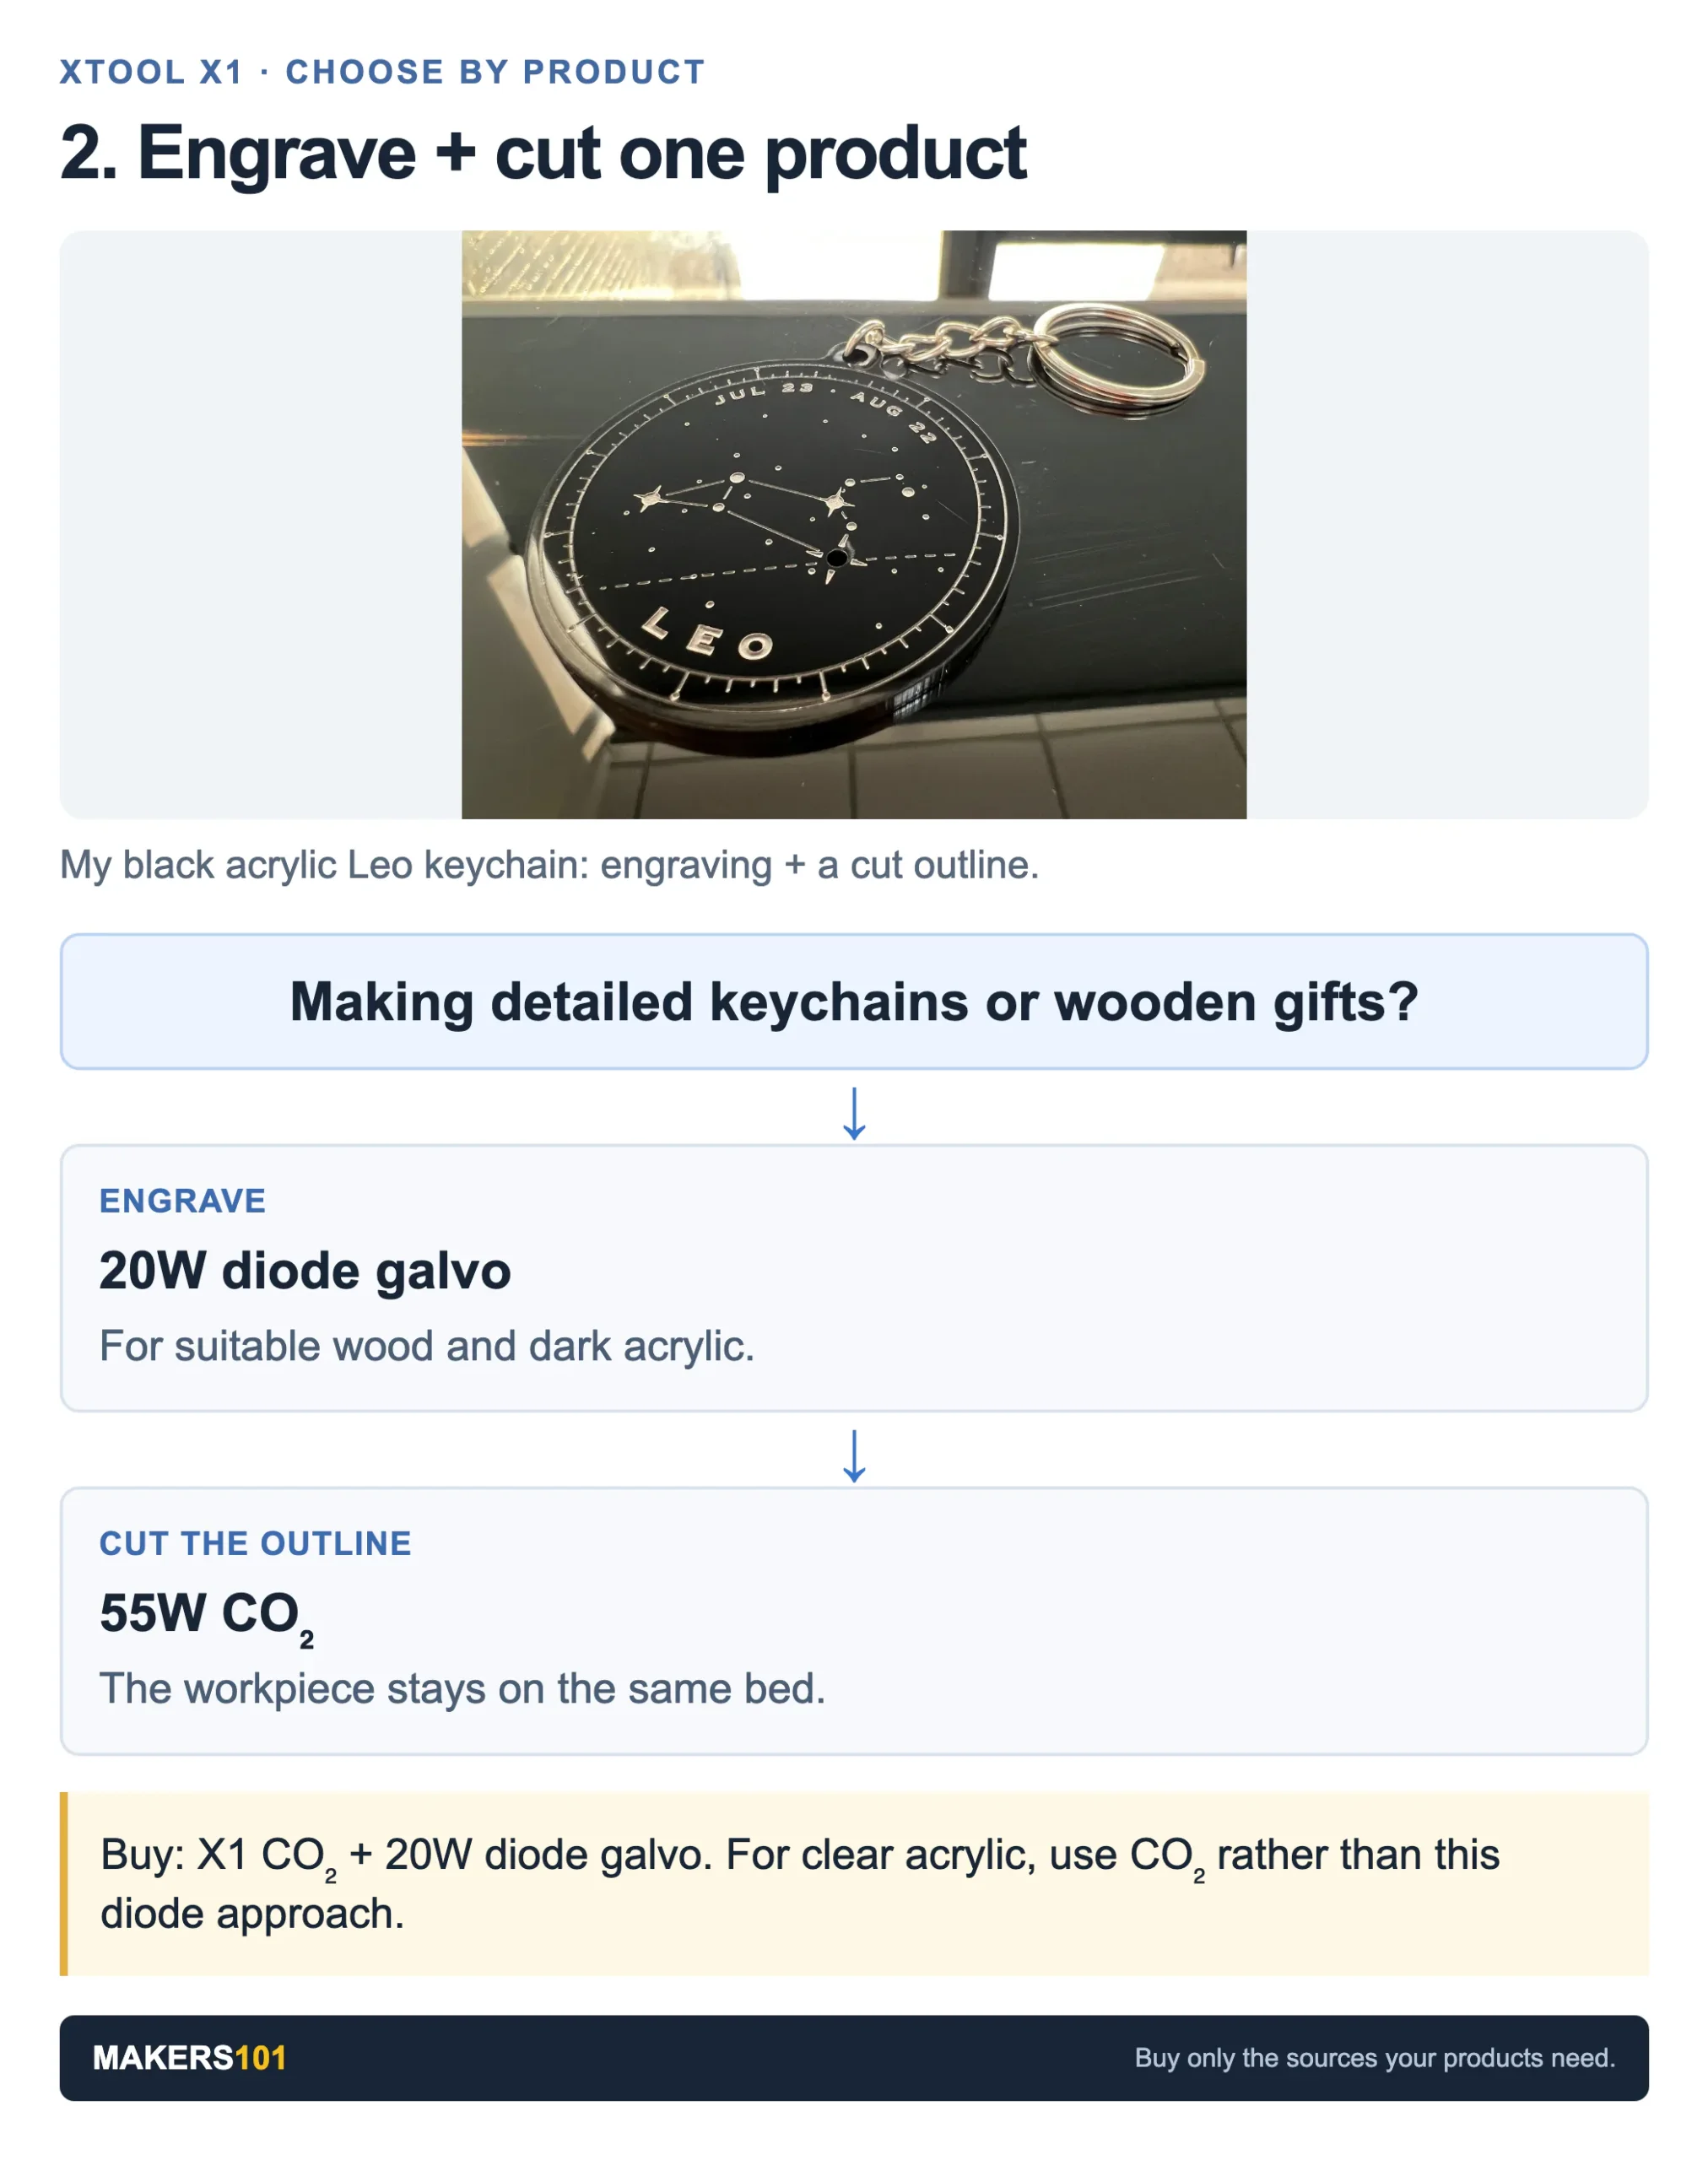
The two runs used different engraving settings, so those times describe this complete project, not a speed increase you can expect on every design. The X1 review shows the settings and finished samples.
For clear acrylic, use CO₂. Blue diode light passes through clear acrylic too easily for this engraving approach. The result on my black keychain is a reason to test dark acrylic, not a promise for every color.
3. Metal Products: Choose the Required Finish Before Fiber or MOPA
Products: Metal nameplates, serial-number tags, personalized cards, colored stainless-steel gifts or engraved relief pieces. Choose the finish before choosing between fiber and MOPA.
Buy: X1 with CO₂ + 20W diode galvo + one metal source. Start with 30W fiber for ordinary names, logos and shallow engraving. Consider 60W MOPA when you need stainless-steel color marking or deeper engraving. Test the intended finish on your own material before offering it to customers.

For a concrete example, I engraved black anodized aluminum cards about 84 × 52 × 0.2 mm with MOPA and the diode. MOPA produced more continuous small lettering and more even fills. The photos differ in angle and magnification, and this was a visual comparison. I did not test the 30W fiber against MOPA.
You usually have no reason to buy both metal sources at the start. If MOPA covers the work you plan to sell, identify a separate job before adding 30W fiber. If you only need simple names and logos, ask whether fiber already meets the finish you need.
For simple anodized labels, test your existing setup first. For bare metal, deep relief or a through-cut, request a sample matching that exact operation. A bright mark made by removing a dark surface layer proves only that surface result.
4. Glass Products: Add UV After Checking the Exact Workpiece
Products: Fine designs on suitable glass, or a photo, name or design engraved inside a compatible crystal blank. Choose the surface finish or internal design you want before buying UV.
Buy: X1 with CO₂ + 20W diode galvo + 5W UV. The diode module is required even if you plan to use UV rather than diode engraving. Use UV here for fine marking and internal engraving, not glass cutting or deep surface engraving.

A blank fitting inside the machine does not mean the design can go anywhere inside it. For internal engraving on a workpiece over 50 mm and up to 100 mm high, the usable region is within 60 mm of its right edge. X1 does not support crystal-ball internal engraving. Check the height and design-position limits against your chosen blank.
Ask for a matching sample before ordering. Use the same glass type, shape, dimensions and internal design position you intend to sell. I do not have an X1 UV test result, so the glass recommendation is not a firsthand result.
Buying Now Versus Adding a Source Later
Buy the modules needed for a product you are ready to make. If an extra source only supports an idea you have yet to develop, the X1’s upgrade path gives you room to wait.
When I first installed my 60W MOPA backpack, the physical installation took roughly 15 minutes. Including calibration, that first setup took around 30 to 60 minutes, as I recall. Calibration accounted for most of the time; fitting the backpack itself felt quick. I have not swapped between external laser-source backpacks.
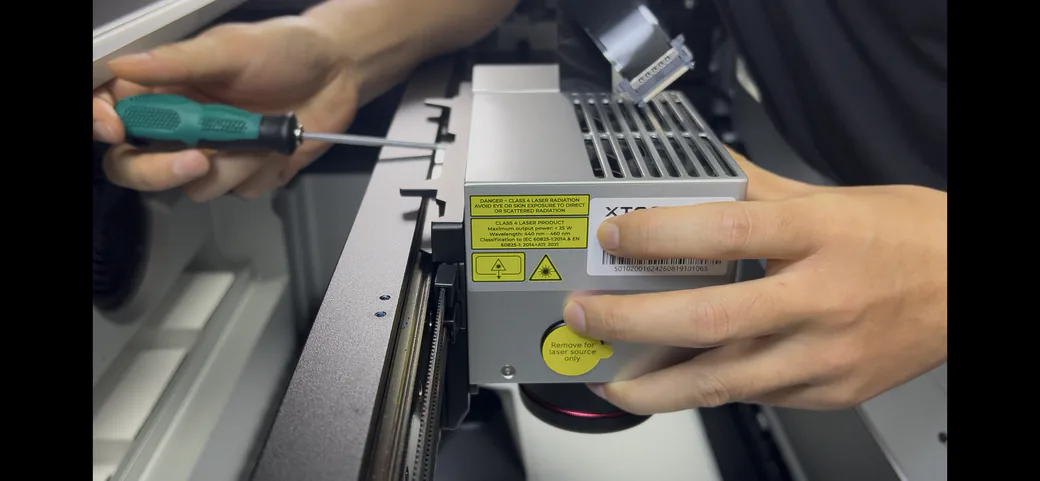
Choosing a source in Studio is easy; changing the physical rear-mounted source is a different job. After replacing or reinstalling one, allow for vibration, optical alignment, focus and flying-galvo calibration, then run a test piece. Follow the calibration checklist. My first installation does not tell you how long a later swap will take.
Compare two complete shopping lists before deciding:
- The machine configuration, required diode galvo module, selected external source and task-specific accessories bought together.
- The starting configuration plus the same additions purchased later, including installation time and sample material for verification.
Compare complete configurations in the X1 pricing guide, then check the selected bundle on the sales page. Include extraction, work holding, any required lens or positioning accessory, and checkout charges. Do not treat a bundle price difference as the price of buying an individual module later.

Check software before committing, too. X1 currently uses xTool Studio for processing control and does not support LightBurn. If your production files depend on LightBurn, establish how you will prepare and run those jobs before buying hardware.
If You Already Own Another Laser, Buy Around the Gap
List the jobs your current machines already finish acceptably. Then identify what the proposed X1 configuration would add: a missing material process, a useful combined workflow or a result you cannot currently achieve.
An existing metal marker may remove the immediate need for an X1 metal source. An existing CO₂ machine may already handle your cutting. Keep independent machines in the comparison if cutting one order while marking another is important; a purchase that consolidates processes can also change how you schedule them.
Before requesting a quote, send the seller your three product briefs and ask for the smallest configuration that can demonstrate each result. Require the sample to match your material, operation and acceptable finish. That gives every proposed module a job to justify.
Configuration and material references
X1 configuration and upgrade requirements · Source and material compatibility · Processing areas by mode. Workshop examples and test conditions are covered in the linked X1 review.