
Last updated: August 2026. All factory values verified against UltiMaker Cura 5.13.0.
You ticked Enable Ironing, sliced the same model again, and the top surface came out looking about the same. Maybe slightly worse, with a faint grid of dents you can catch in raking light.
That’s the normal result, and your printer isn’t the problem. The Cura ironing settings are tuned for safety out of the box. Most of the popular recipes people copy off Reddit were written in a different slicer, using option names Cura doesn’t even have. The naming gap is the small one. Layer height at a specific Z is a setting Cura simply doesn’t have.
So this guide does three things. It gives you the factory value of every ironing setting in Cura and what each one controls. It shows you the two numbers Cura works out for you, which you should stop overriding. And it walks you through finding your own values in a single test print.
Table of Contents
- Cura Ironing Settings at a Glance
- What the Cura Ironing Settings Do at Their Factory Values
- Ironing Settings to Start With for PLA, PETG, and ABS
- Why Every Guide Gives You a Different Ironing Number
- Two Ironing Settings Cura Calculates For You
- Turn On Monotonic Ordering Before You Touch Flow
- What Ironing Actually Costs You
- When Ironing Is the Wrong Tool for the Surface
- Calibrate Ironing in Cura With One Test Print
- Six Ways Ironing Goes Wrong (And Which Number to Change)
- Ironing Settings in Orca, Bambu Studio, PrusaSlicer, and Creality Print
- Frequently Asked Questions
Cura Ironing Settings at a Glance
The whole panel in one table, with what to move first. Everything below is verified against the settings definition file that ships with Cura 5.13.0, which you can read yourself at Ultimaker/Cura on GitHub.
| Setting | Cura factory default | Start with | Called this elsewhere |
|---|---|---|---|
| Enable Ironing | Off | On, for flat-topped models only | Ironing / Ironing Type |
| Ironing Pattern | Zig Zag | Leave on Zig Zag | Rectilinear (Orca, Bambu Studio) |
| Ironing Flow | 10% | 15% to 25%, then calibrate | Flow rate (PrusaSlicer) |
| Ironing Line Spacing | 0.1 mm | Half your nozzle diameter | Spacing between ironing passes |
| Ironing Inset | 0.38 mm on a stock 0.4 nozzle (calculated) | Leave it alone | Ironing Inset |
| Ironing Speed | 20 mm/s (derived) | Leave it, fix Top/Bottom Speed instead | Speed |
| Monotonic Ironing Order | Off | On | No direct equivalent |
| Iron Only Highest Layer | Off | On for tall multi-surface models | Ironing Type: Topmost surface only |
Two more numbers matter and sit outside the ironing panel: Ironing Acceleration defaults to 3000 mm/s², and Ironing Jerk to 20 mm/s. Both simply follow your Top/Bottom values.
If you edit profiles by hand or search Cura’s documentation, these settings carry different internal keys: `ironing_enabled`, `ironing_pattern`, `ironing_flow`, `ironing_line_spacing`, `ironing_inset`, `speed_ironing`, `ironing_monotonic` and `ironing_only_highest_layer`.
A quick version history, because guides written for older builds still circulate. Ironing arrived in Cura 2.7 back in autumn 2017. Monotonic ordering landed in Cura 4.11, covering top and bottom layers and ironing together. If a guide tells you monotonic ironing does not exist in your version, check the build before you believe it.
What the Cura Ironing Settings Do at Their Factory Values
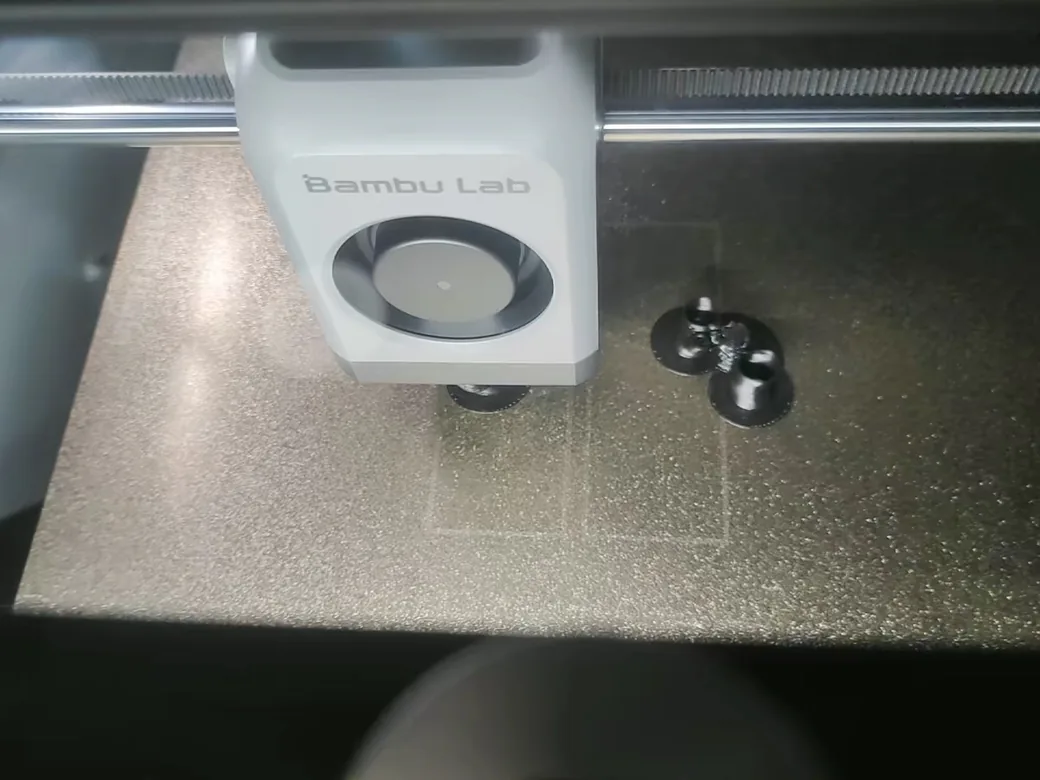
Ironing is a second pass over a finished top surface with almost no material coming out. Cura’s own description puts it well: the nozzle goes over the top surface one additional time, extruding very little, so that “the pressure in the nozzle chamber is kept high so that the creases in the surface are filled with material.”
Think of it as troweling wet plaster. You’re pushing material sideways into the low spots while it’s still soft.
Which explains why the factory flow of 10% disappoints so many people. Ten percent is enough pressure to smear the surface and often not enough to fill it. Cura’s own note says too much flow “results in overextrusion and blips on the side of the surface,” so the default sits at the cautious end on purpose.
The guard rails tell you how much room you have. Cura flags Ironing Flow above 50%, and Ironing Speed above 100 mm/s. Line spacing gets capped against your nozzle tip’s outer diameter, which is wider than the bore.
Where Cura Hides These Settings
Open Print settings and search for “ironing”. Enable Ironing sits under Shell, and ticking it un-greys everything below.
Two settings won’t show up at all on a fresh install. Monotonic Ironing Order and Monotonic Top/Bottom Order are hidden. Open the hamburger menu in the print settings panel, choose Manage setting visibility, then search for “monotonic”. Set the visibility preset to Expert while you’re in there.
Ironing Settings to Start With for PLA, PETG, and ABS
Start here, print one part, then calibrate. These are not “best” values. They are a bracket that sits between Cura’s cautious factory numbers and what the community actually runs.
| Setting | Starting value | Why this number |
|---|---|---|
| Ironing Flow | 15% to 25% | Above Cura’s 10% default, below the 50% warning line |
| Ironing Speed | 20 to 30 mm/s | Cura’s derived default is 20 mm/s |
| Ironing Line Spacing | Half your nozzle diameter | 0.2 mm on a 0.4 mm nozzle, 0.3 mm on a 0.6 mm |
| Ironing Pattern | Zig Zag | Concentric shrinks your inset without telling you |
| Monotonic Ironing Order | On | Costs almost no time, fixes the worst artifact |
The line spacing rule comes from Fischer 3D, who keeps ironing line spacing at half the nozzle diameter or tighter. It’s the most portable rule here, because it scales with your hardware instead of assuming everyone runs the same nozzle.
Note the “or tighter”. The two highest-voted community recipes below run 0.15 mm, and several sources sit at 0.10 mm. Both are inside the rule on a 0.4 nozzle. Start at half your nozzle diameter, then tighten if the surface still shows gaps. Every step tighter costs you time.
Material moves the flow number more than anything else. Snapmaker’s guide splits it at roughly 10% for PLA and 15% for PETG and ABS, and Prusa’s knowledge base rates ASA as the material that irons best. PETG comes with a warning attached: Prusa notes it’s more likely to stick to the nozzle during ironing.
Fischer 3D also puts a floor under flow, staying in the 10% to 20% band because feeding too little material invites a clog. Every other guide only warns you about flow being too high. Both ends bite.
Ender 3 and Other Bed Slingers
Ironing settings don’t key off the printer model. They key off three things: nozzle diameter, layer height, Top/Bottom Speed.
That last one catches Ender 3 owners, because Cura calculates Ironing Speed from it. Before you touch the ironing panel, look up Top/Bottom Speed in whatever profile you’re running. The next section explains what Cura does with it.
For a starting profile built around your actual printer and filament, our print settings finder beats a copied screenshot.
Why Every Guide Gives You a Different Ironing Number
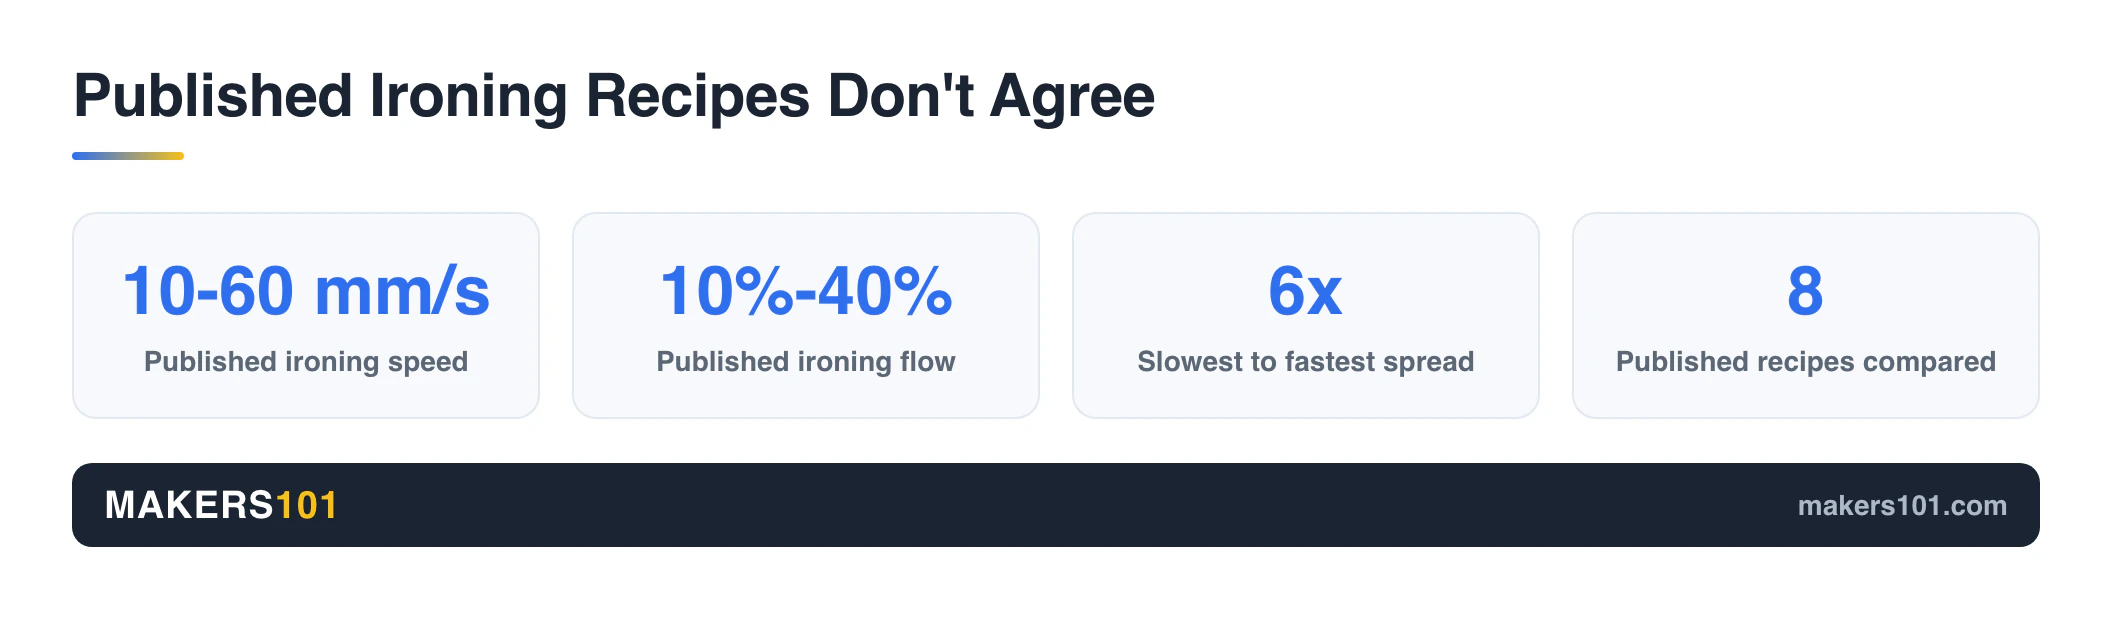
The right ironing number depends on four things at once: your nozzle, your layer height, your filament, your top surface speed. Nobody publishing a recipe tells you all four of theirs, which is why no two guides agree.
Line the published recipes up side by side. Each row below is what that source recommends, except the top row, which is what Cura ships.
| Source | Slicer | Ironing speed | Ironing flow | Line spacing |
|---|---|---|---|---|
| Cura factory default | Cura 5.13.0 | 20 mm/s | 10% | 0.10 mm |
| CKTechCheck | Cura | 20 mm/s | 10% | 0.10 mm |
| Snapmaker guide | Generic | 10 to 20 mm/s | 10% to 15% | 0.15 to 0.25 mm |
| Fischer 3D | Orca | Not stated | 10% to 20% | Nozzle diameter ÷ 2 |
| The Buildplate Brain | Orca | 25 mm/s | 30% | Not stated |
| r/BambuLab, 2,634 upvotes | Bambu Studio | 30 mm/s | 20% | 0.15 mm |
| JanTec Engineering | PrusaSlicer | Not stated | 35% | 0.10 mm |
| Uncle Jessy | Elegoo Centauri Carbon | 50 mm/s | 40% | Not stated |
| r/3Dprinting, 8,888 upvotes | Bambu Studio terms | 60 mm/s | 30% | 0.15 mm |
Published speeds run from 10 mm/s at the slow end to 60 at the fast end. Flow runs 10% to 40%. The two highest-voted Reddit threads flatly contradict each other: one uses 30% flow at 60 mm/s, the other 20% at 30 mm/s. Both authors call the result perfect.
Everybody does raise flow above Cura’s 10%, though. The author of that 2,634-upvote Bambu thread was blunt about it, saying the only real change was moving Ironing Flow from 10% to 20%, and that the defaults are just poorly configured.
If this pattern feels familiar, it should. It’s the same reason every guide gives a different PETG print temp: the published number is the answer to somebody else’s setup.
Those threads are still worth reading, especially the comments, where people report what happened on other machines. Just read them as data points.
Two Ironing Settings Cura Calculates For You
Both look like plain numbers in the interface. They aren’t. Cura recalculates each from your other settings, and typing over them severs that link permanently for that profile.
Ironing Inset Is Derived From Your Flow and Pattern
Inset is how far in from the model edge ironing stops. Cura’s reason for having it is blunt: “Ironing all the way to the edge of the mesh may result in a jagged edge on your print.”
The value you see is computed. Cura’s formula reads:
“` wall_line_width_0 / 2 + ( ironing_line_spacing – skin_line_width (1 + ironing_flow / 100) / 2 if pattern is Concentric else skin_line_width (1 – ironing_flow / 100) / 2 if pattern is Zig Zag ) “`
Run that on a stock profile with Zig Zag and you get the table below. These figures are calculated from Cura’s own formula. Treat them as what the slicer should resolve to on a stock profile.
| Ironing Flow | Resulting Ironing Inset |
|---|---|
| 10% (factory) | 0.380 mm |
| 20% | 0.360 mm |
| 30% | 0.340 mm |
| 50% (warning line) | 0.300 mm |
Notice how gentle that is. Triple your flow and the inset moves by four hundredths of a millimetre. Cura is quietly compensating for you.
Now switch the pattern to Concentric and keep everything else identical.
At 10% flow, the inset collapses from 0.380 mm to 0.080 mm. That is roughly a fifth of the clearance, which means ironing now runs almost to the model edge. This is the mechanism behind those Ultimaker forum threads about jagged edges and a raised lip around the perimeter. CKTechCheck ran into the same artifact and described having to trim the resulting rim off by hand.
So the answer to “Concentric or Zig Zag” is not really about which pattern looks nicer. Concentric quietly hands you a quarter of the edge clearance, and it also disables Monotonic Ironing Order outright.
Ironing Speed Is Two Thirds of Your Top/Bottom Speed
The second derived value is simpler:
“` Ironing Speed = Top/Bottom Speed × 20 / 30 “`
Cura’s factory Top/Bottom Speed is 30 mm/s, which is exactly where the familiar ironing default comes from. Change one and the other follows.
| Your Top/Bottom Speed | Ironing Speed Cura picks |
|---|---|
| 30 mm/s (factory) | 20 mm/s |
| 45 mm/s | 30 mm/s |
| 60 mm/s | 40 mm/s |
| 90 mm/s | 60 mm/s |
This is why copying “60 mm/s” out of a Reddit post so often disappoints. In Cura, that figure is what you get when your top surface is already being printed at 90 mm/s. Hard-code it into the ironing field while your Top/Bottom Speed sits at 30, and the iron pass now moves three times faster than the layer it’s supposed to be smoothing.
It’s worth checking published advice against those guard rails too. Anycubic’s guide suggests running ironing at 30% to 40% of normal print speed and gives 90 to 120 mm/s as an example for a 300 mm/s base. That upper figure sits past the ceiling where Cura itself starts warning you.
Turn On Monotonic Ordering Before You Touch Flow
Cura has three monotonic switches. On a fresh install, none of them is doing anything.
- Monotonic Ironing Order ships off. So does Monotonic Top/Bottom Order.
- Monotonic Top Surface Order ships set to True. It only becomes active when Top Surface Skin Layers is above zero, and that setting defaults to 0, so the option sits greyed out while reading as enabled.
Monotonic ordering forces the nozzle to lay lines in one consistent direction across the surface. Without it, the slicer skips around to save travel and comes back later to fill the gaps. Every return leaves a seam.
ModBot tested this on a Voron 0.1, printing an ABS part with five walls, five top and bottom layers, 20% infill. Without ironing, monotonic ordering gave visibly more even top lines. With ironing on, the difference was night and day: standard ironing left a large gash and a run of pits where the nozzle jumped back, monotonic ironing left one barely visible line. Added print time was close to imperceptible.
Experienced people disagree here. CKTechCheck, testing in Cura in 2022, couldn’t think of a use case for Monotonic Ironing Order and left it off. The measured comparison points the other way, so turn it on.
One catch. Choosing Concentric disables Monotonic Ironing Order entirely, which is a second reason to stay on Zig Zag.
The Two Top-Surface Settings That Come First
Ironing works on top of whatever surface your normal top layers produced. A poor foundation irons into a smoother poor foundation.
Two defaults are worth reviewing before you start. Top/Bottom Pattern ships as Lines, and Top/Bottom Thickness ships as 0.8 mm. Snapmaker’s guide recommends at least six top layers at 0.2 mm, which works out to 1.2 mm, noticeably more than Cura’s default.
Uncle Jessy hit the same wall from the other direction. A model with large flat areas kept showing top layer scarring even with ironing enabled, and raising top layers from five to eight cleared it completely. If ironing is not fixing your surface, add top layers before you add flow.
What Ironing Actually Costs You
Ironing charges you in three currencies: print time, part thickness, and stress on the hotend. The first two scale with how much flat top surface your model has.
The Time Bill
Ironing is slow because the passes are packed tightly. At the factory 0.1 mm line spacing, a surface ten centimetres across needs a thousand passes.
I worked the following out from path geometry. No prints were timed, and acceleration is ignored, so read these as a floor. Real machines will be slower.
| Top surface | Line spacing | Ironing speed | Ironing time |
|---|---|---|---|
| 100 x 100 mm | 0.1 mm (factory) | 20 mm/s (factory) | 83 min |
| 100 x 100 mm | 0.15 mm | 60 mm/s | 19 min |
| 200 x 200 mm | 0.1 mm | 20 mm/s | 5.6 hours |
Measured numbers land in the same territory. JanTec Engineering clocked roughly one hour fifty minutes added to a face that size, and close to eight hours on a logo plate at default speed. CKTechCheck saw a smaller model go from 24 to 31 minutes, about 30% more.
Fischer 3D points at the shipped speed, describing Orca’s typical 15 mm/s ironing default as slow enough to add significant time. Cura’s own derived default is not much better on a large flat face.
Uncle Jessy’s timing is the one nobody expects. He ran the same part three ways: 15 minutes with no ironing, 19 with his tuned settings, 22 with the defaults. Calibrated ironing came out faster and smoother than default ironing.
Iron Only Highest Layer is your other lever. Left off, Cura irons every upward-facing surface in the model. Fischer 3D reckons ironing every solid layer buys almost nothing over ironing just the top, and Kennedy DIY settles on the middle option in Bambu Studio, ironing any top surface with nothing above it.
Ironing Makes Your Part Measurably Thicker
Any ironing flow above 0% puts extra material on the surface. JanTec Engineering measured the result at roughly 0.05 mm of added thickness.
On a nameplate that’s invisible. On a lid that has to drop into a recess, or anything you dimensioned to a tolerance, it’s real. Print your test coupons with ironing on if the final part will have ironing on.
What Ironing Does to Your Hotend
Ironing runs the hotend hot and slow with almost nothing moving through it. That’s an unusual duty cycle, and Prusa’s knowledge base flags heat creep and clogging risk here, especially with PLA in a warm room. Fischer 3D’s 10% flow floor comes from the same place.
A standard nozzle also isn’t shaped for this job. JanTec Engineering points out that the orifice in the middle leaves a circular witness mark, and material building up on the flat land gets dragged into streaks. They had a 5 mm flat-faced copper nozzle machined to test the idea. It worked in principle and couldn’t be automated, because the slicer wouldn’t tool-change mid-layer.
Your practical takeaway is smaller. A nozzle with buildup on its face smears that buildup across every surface you iron, so wipe or swap it before a calibration run. Our guide to how nozzle size and shape change your surface finish covers what else moves when you change nozzles.
When Ironing Is the Wrong Tool for the Surface
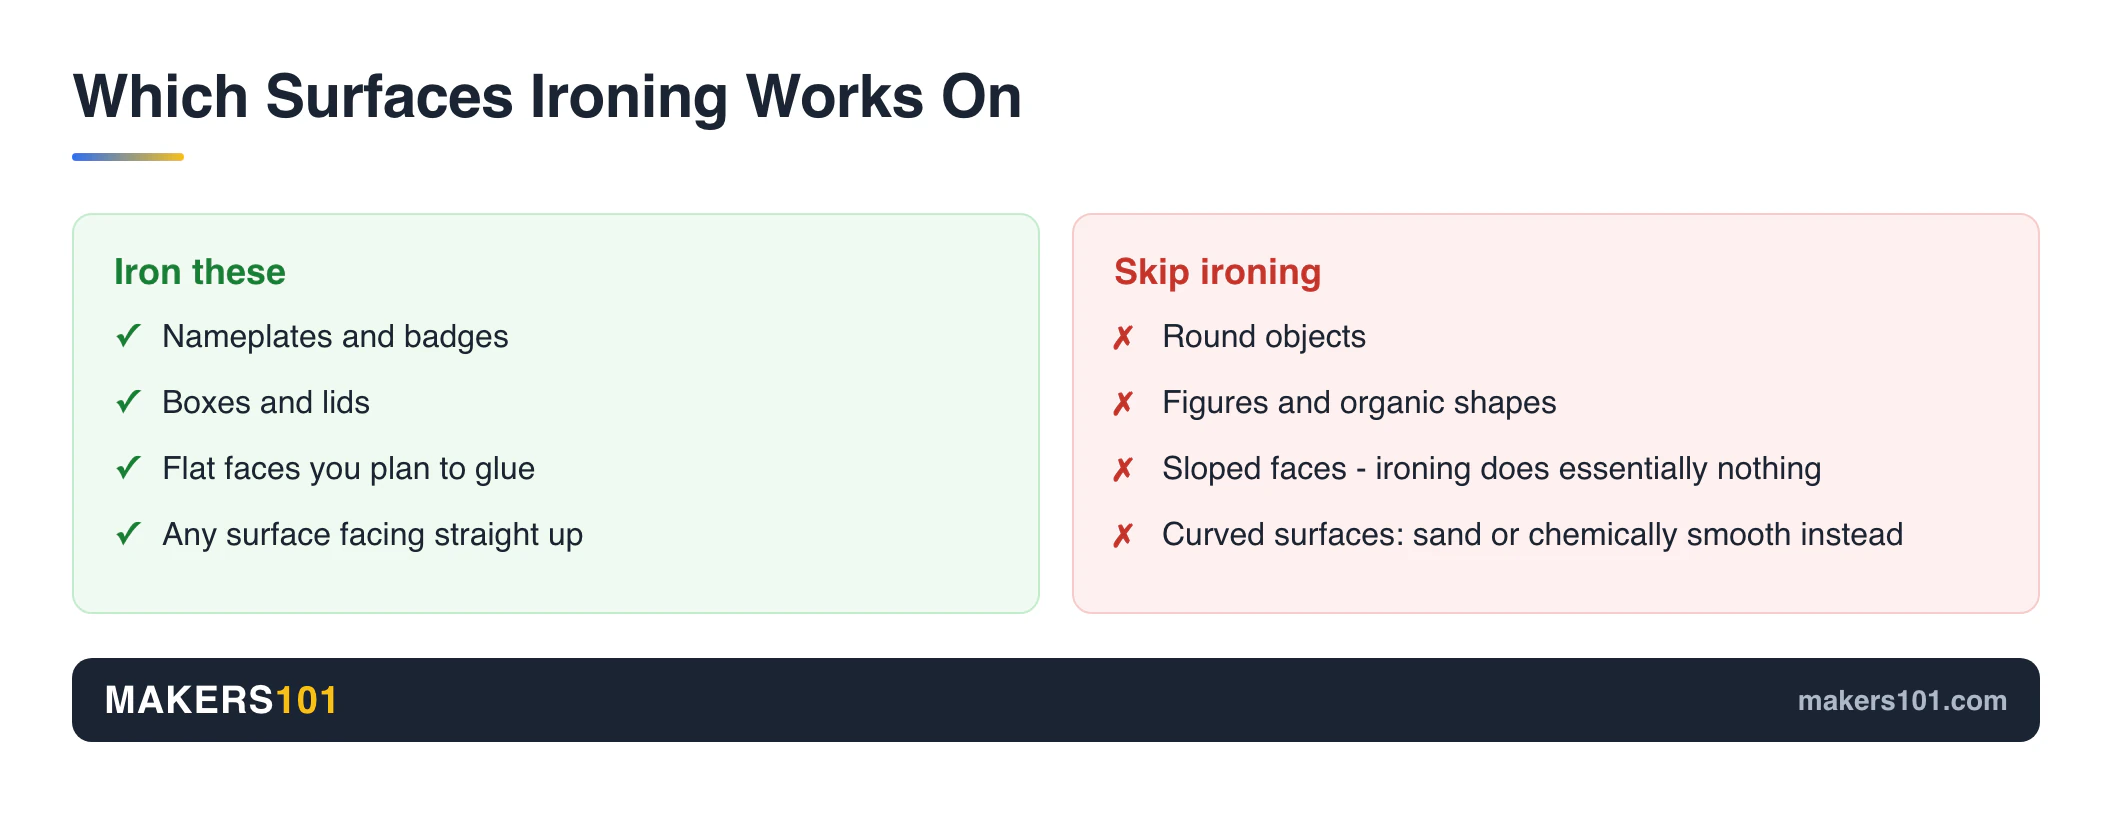
Ironing only works on surfaces that face straight up. On organic shapes and sloped faces it does essentially nothing in a general-purpose slicer, which is JanTec Engineering’s cleanest summary of the boundary.
Prusa’s knowledge base draws the same line with examples. Ironing suits nameplates and badges, boxes and lids, plus any flat face you plan to glue to something else. It doesn’t suit round objects, figures or organic shapes.
So if your part is a dragon, stop here. Ironing will add time and change nothing. Sanding and chemical smoothing are the tools for curved surfaces, and Snapmaker’s guide is one of the few that compares all three side by side.
Calibrate Ironing in Cura With One Test Print
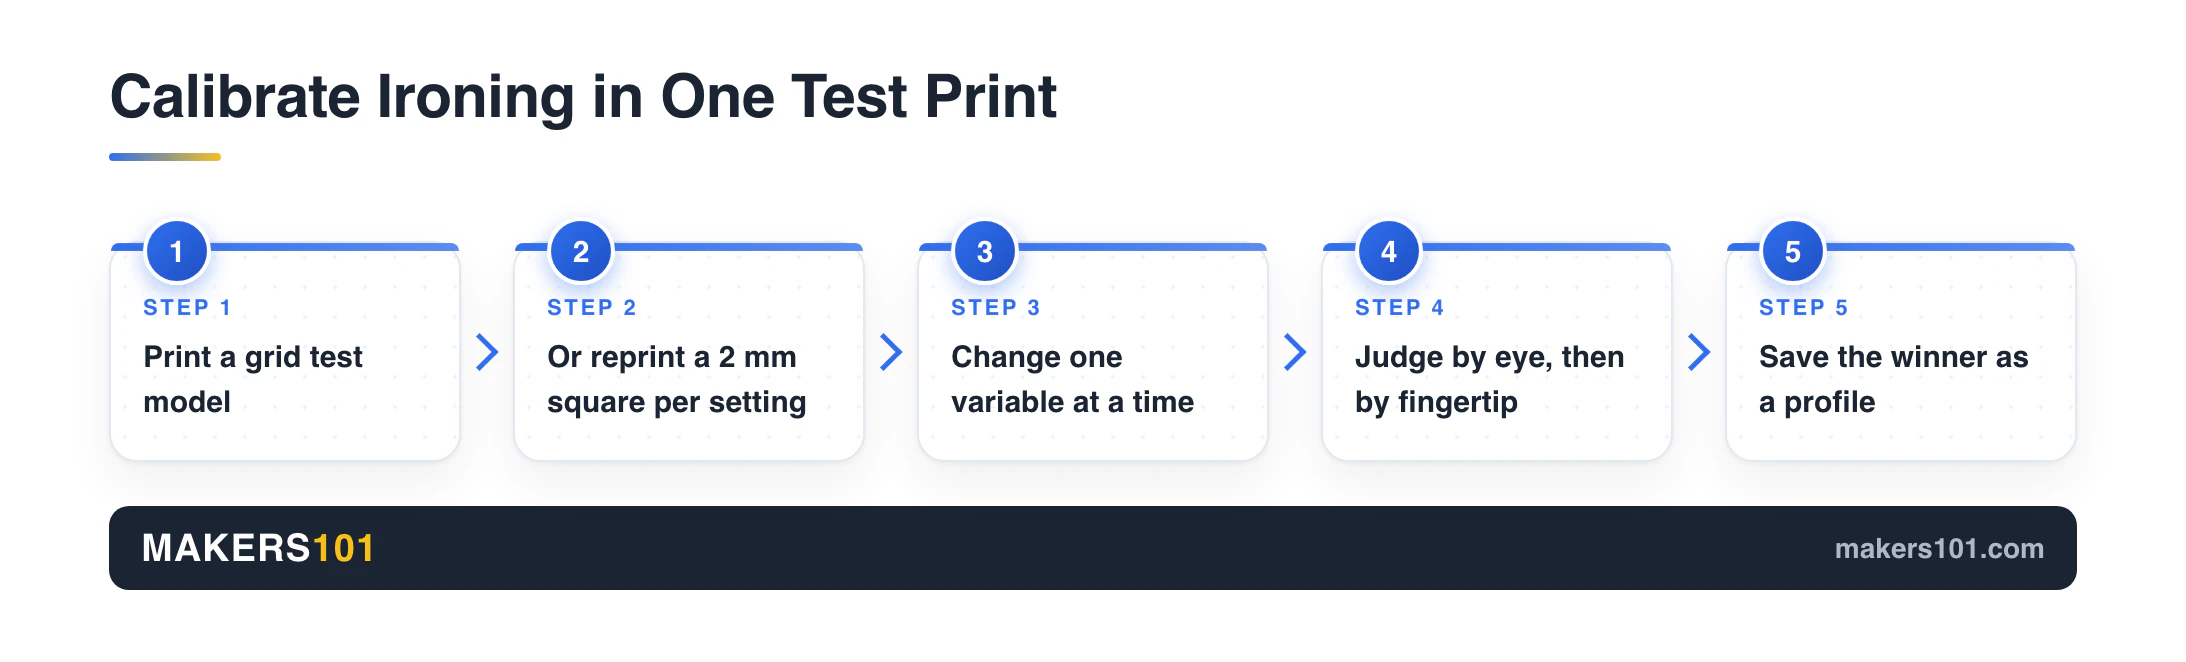
You’re looking for two numbers: flow and speed, on your machine with your filament. A grid test finds both at once.
1. Get a grid model. Leogan Pro’s ironing test on Printables and user Ti’s PLA and PETG test on MakerWorld both give you a row of blocks, each with a different speed and flow pair. Uncle Jessy’s full run of the Printables grid took 1 hour 53 minutes. 2. Print something smaller if you’re impatient. Fischer 3D uses a plain 2 mm tall square and reprints it per setting, under ten minutes a go. Slower overall, faster to a first answer. 3. Change one thing at a time. Lock your layer height. Lock your nozzle and filament. Vary only speed and flow. 4. Judge it twice. Kennedy DIY’s standard is a flat, shiny top with no visible layer lines. The Buildplate Brain adds the test photos can’t fake: tilt the part under a light, then run a fingertip across every block. Under-extrusion you can’t quite see is easy to feel. 5. Save the winner as a profile. Do it immediately, before you forget which block won.
The whole loop is a few minutes of hands-on time, and the same procedure works for PLA and PETG. If you’ve never run a settings sweep, our walkthrough on how to read a calibration cube teaches the same read-the-artifact skill on an easier part.
Six Ways Ironing Goes Wrong (And Which Number to Change)
Six failure modes cover almost everything people report. Find your symptom in the left column, change the one setting named on the right.
| What you see | Cause | Change this |
|---|---|---|
| Grid of shallow unfilled pockets | Under-extrusion | Raise flow, or lower speed |
| Blobs and material piled on the surface | Over-extrusion | Lower flow, or raise speed |
| Fine rippled texture, “salmon skin” | Ironing speed too high | Lower ironing speed |
| Raised lip or rim around the edge | Inset too small | Switch off Concentric, stop overriding inset |
| One deep gash plus pits, always in the same place | Nozzle jumping back | Turn on Monotonic Ironing Order |
| A single scar dragged across a finished surface | Travel moves touching the top | Turn on Z-hop for this job |
The under and over-extrusion pair comes from Kennedy DIY, who photographed both. The useful part is that each cause works in two directions: pockets mean speed too high or flow too low, blobs mean speed too low or flow too high. Change one variable per print or you won’t know which one moved.
Salmon skin is Uncle Jessy’s name for the ripple that shows up once ironing speed climbs too far. Handy label, because it looks like nothing else.
The last row hurts most. Fischer 3D finished an ironing pass, then watched the nozzle travel straight across the fresh surface and leave a scar down the middle. The fix is Z-hop for that print only, around 0.4 mm, set to lift on top surfaces. Your base printer profile stays untouched.
Ironing Settings in Orca, Bambu Studio, PrusaSlicer, and Creality Print
Most ironing recipes circulating right now were written in Bambu Studio or Orca. Their option names don’t match Cura’s, which is why copying one fails before you’ve changed a single value.
| Cura | Orca / Bambu Studio | PrusaSlicer |
|---|---|---|
| Enable Ironing (checkbox) | Ironing Type (dropdown) | Ironing Type (dropdown) |
| Iron Only Highest Layer | “Topmost surface only” | “Topmost surface only” |
| Ironing Pattern: Concentric, Zig Zag | Rectilinear, Concentric | Not exposed |
| No equivalent | Ironing Angle | No equivalent |
| Ironing Flow | Ironing Flow | Flow rate |
| Ironing Line Spacing | Ironing Line Spacing | Spacing between ironing passes |
| Ironing Speed | Ironing Speed | Speed |
| Monotonic Ironing Order | No direct equivalent | No direct equivalent |
Look at what that 8,888-upvote recipe actually asks for: Rectilinear pattern, ironing direction at 45 degrees, a hard-set inset of 0.21 mm.
In Cura the first has no matching option name. The second has no input field at all. The third overrides a value Cura would rather calculate for you. Three settings, none transferable.
The Bambu recipe with 2,634 upvotes is the same story, with Ironing Angle set to -1 and Ironing Type on All Surfaces. Neither string exists in Cura.
Published guides blur the line too. Creality’s guide walks through Creality Print and Cura side by side and lists concentric, zigzag and rectilinear together as ironing pattern options. Only the first two exist in Cura’s definition file, so check which slicer a parameter list is actually describing before you go hunting for a setting.
Creality Print users get the shortest list, with the same caveat applied to me: the guide I am citing covers Creality Print and Cura together, so read these as its general ironing advice. It puts ironing flow at 10% by default, keeps ironing speed in the same slow window Cura lands in, and sets spacing between 0.1 and 0.15 mm. Close enough to Cura’s bracket that the calibration routine below transfers directly.
The Buildplate Brain’s Orca route is short if you’ve moved over: Quality tab, find Ironing, set Type to All top surfaces, keep Pattern on rectilinear, enter your calibrated speed and flow, save as a new process. For the equivalent tour of another slicer’s numbers, see what every Bambu Studio cooling number actually does.
Frequently Asked Questions
Does ironing make a difference in 3D printing?
On flat top surfaces it does, and the change is easy to see in raking light. Top-face layer lines largely disappear and the surface picks up a uniform finish. On curved or sloped surfaces it makes no meaningful difference, and it does nothing at all for warping or stringing. Those are structural faults, and ironing only touches the skin.
What is the ironing angle in 3D printing?
It’s the direction the ironing passes run across the surface. Bambu Studio and Orca expose it as a numeric field where -1 means follow the default. Cura has no ironing angle setting at all, only a pattern choice of Concentric or Zig Zag, so any recipe telling you to set an angle was written for a different slicer.
What are the best Cura ironing settings for an Ender 3?
The same starting point as any other 0.4 mm machine: 15% to 25% flow, 0.2 mm line spacing, Zig Zag, Monotonic Ironing Order on. Check your profile’s Top/Bottom Speed first, because Cura derives Ironing Speed from it at a two-thirds ratio. Then run a grid test, because the right flow tracks your filament more closely than your printer.
What are the best ironing settings for PLA?
Start at 15% to 20% flow and around 20 mm/s, then calibrate. PLA irons well, but it carries the highest heat creep risk of the common filaments, so watch for clogging on long passes in a warm room. ASA gives the best ironing results of any common material.
Does ironing clog your nozzle?
It can, from both directions. Running very low flow for a long slow pass is the classic cause, which is why Fischer 3D won’t go below 10%. Prusa separately flags heat creep, because the hotend sits hot for minutes while almost no filament moves through it. PLA on a hot day is the usual victim.
Can ironing smooth curved or organic surfaces?
No. Ironing only touches upward-facing flat areas, so a sphere or a figurine gets nothing out of it. Those parts need post-processing, and our guide on how to smooth PLA with XTC-3D covers a beginner-safe route that works on any geometry.