
Heads up — some of the links below are affiliate links. If you buy through them, I earn a small commission (at no extra cost to you), which helps cover the gear I test. Thanks!
If you have a PLA print covered in layer lines, XTC-3D looks tempting. Brush it on, wait a few hours, and the part should look smooth.
That’s the promise.
The reality is still useful, but less magical. If you’re asking how to smooth PLA with XTC-3D, the honest answer is that it can make a print look cleaner much faster, provided you apply it as a controlled coating rather than a miracle filler. It doesn’t vapor-smooth PLA, and it doesn’t remove every finishing step.
This guide shows how to use it safely, where it works best, and when a simpler sanding and primer workflow makes more sense. We walk that whole route in 3D print sanding.
- XTC-3D smooths PLA by adding a thin epoxy skin over the print. It doesn’t chemically melt PLA like acetone vapor smoothing does with ABS.
- Use it for display pieces, cosplay props, masks, painted models, and simple shapes where a glossy coating is acceptable.
- Avoid it on fine details, snap fits, threads, flexible parts, food-contact parts, and PLA parts that will sit in heat.
- The workflow is simple: prep the print, measure carefully, apply a thin coat, cure, inspect, sand lightly, then prime and paint.
- Yes, XTC-3D works on PLA. The catch is that it works like a coating, so the best results still come from clean prep and thin application.
Table of Contents
- First, What XTC-3D Actually Does to PLA
- What You’ll Need
- Before You Mix: Prep the PLA Print
- How to Mix XTC-3D Without Wasting the Batch
- How to Brush XTC-3D onto PLA
- Cure, Inspect, Sand, Prime, Paint
- Common XTC-3D Mistakes on PLA
- XTC-3D vs Generic Epoxy vs Sand/Prime/Paint
- My Beginner Recommendation
- Sources Checked
- FAQ
First, What XTC-3D Actually Does to PLA
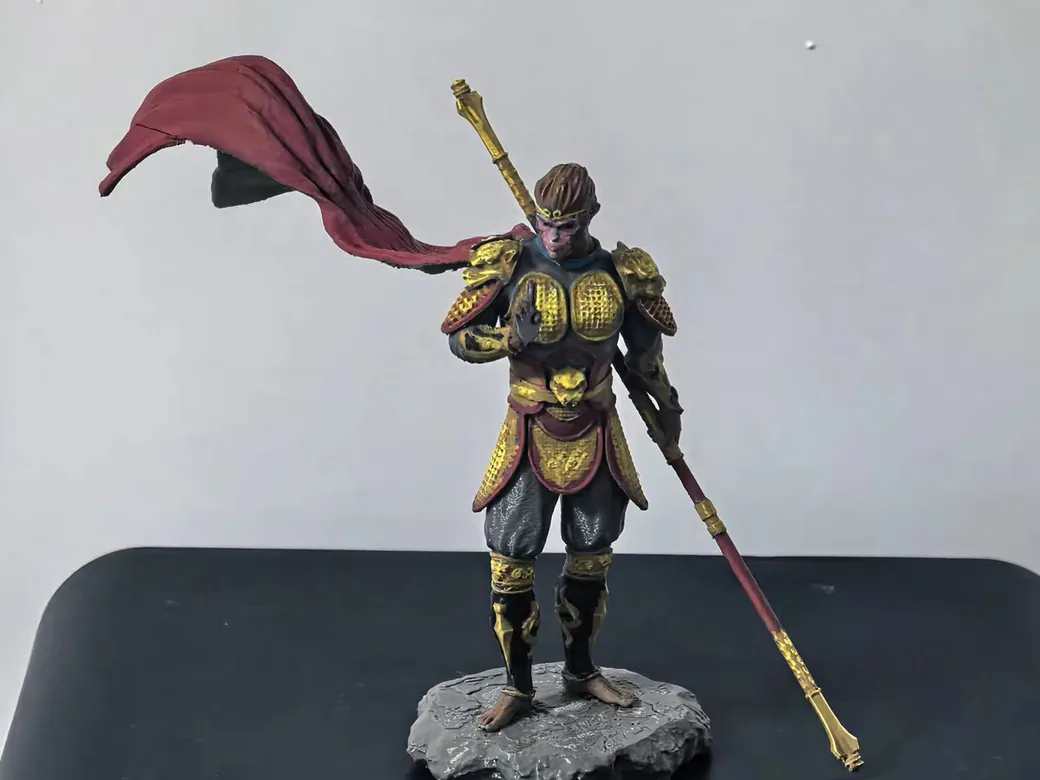
XTC-3D doesn’t dissolve PLA. It coats PLA with a thin layer of self-leveling epoxy, then cures into a hard surface you can sand before primer and paint.
Think of it like clear coat over wood grain. It can fill shallow texture and make the surface look smoother, but the wood is still underneath. If the print has blobs, deep ridges, bad seams, or tiny sharp details, the coating can’t make those problems disappear cleanly.
Smooth-On describes XTC-3D as a protective coating made from two liquids mixed together and brushed onto printed parts. The official page also lists several compatible media: PLA, ABS, SLS prints, powder prints, and other rigid surfaces.
The important word is coating.
That matters because many beginners arrive here after reading about acetone smoothing. Acetone vapor is mainly an ABS trick. PLA is less predictable. Some creators claim solvent wipe methods can mark certain PLA blends, but it’s a shaky path for a finished model.
If you’re still choosing material for a future project, read our best 3D printer filament guide before committing. The easiest finish often starts before post-processing.
| Use XTC-3D for | Avoid XTC-3D for |
|---|---|
| Cosplay props | Threads and snap fits |
| Display models | Tiny facial details |
| Simple painted parts | Flexible parts |
| Glossy decorative pieces | Heat-exposed PLA |
| Simple waterproofing jobs | Casual food-safe claims |
What You’ll Need
The safest beginner setup is boring: small batches, accurate measuring, basic protection, disposable tools, plus a scrap print. Don’t start by coating the one part you spent 18 hours printing.
Safety comes before the finish. Read Smooth-On’s product page and technical bulletin before mixing. At minimum, use nitrile gloves, eye protection, sleeves, plus strong ventilation. If the SDS or your workspace calls for a respirator, use the right cartridge instead of guessing. Mixed epoxy can also heat up in a deep cup, so keep batches small and spread the material thin.
| Item | Why it matters | Beginner note |
|---|---|---|
| XTC-3D Part A and Part B | The actual coating | Keep both at room temperature |
| Nitrile gloves | Keeps epoxy off your skin | Use fresh gloves before cleanup |
| Safety glasses | Protects against splashes | Don’t skip this |
| Ventilation or respirator | Reduces fume exposure | Follow the product SDS |
| Foam or chip brush | Applies the thin coat | Foam usually leaves fewer marks |
| Accurate cups or scale | Controls cure quality | Don’t eyeball the ratio |
| Flat foil tray | Spreads mixed epoxy thin | Helps reduce heat buildup |
| 320 to 400 grit sandpaper | Smooths after cure | Wet sanding can reduce heat |
| Filler primer | Shows remaining flaws | Use before final paint |
| Part stand or handle | Lets you rotate the print | Keeps fingers out of wet epoxy |

- High-Performance 3D Print Coating – Clear top coat for smoothing & finishing 3D printed parts.
- Ideal for application to both SLA & SLS prints, as well as PLA, ABS, Laywoo, Powder Printed Parts, and other rigid media.
- Mix Ratio of 2A:1B by Volume -Working time of 10 minutes – Cures to hard, impact-resistant coating in 3.5 hours – 80D Shore Hardness.
- Epoxy top coating self-levels and wets out uniformly without leaving brush strokes; offers excellent coverage.
- Perform a small-scale test of your project materials to determine suitability and compatibility. Refer to the technical bulletin for more information…

- NIOSH-APPROVED OV RESPIRATORY PROTECTION: 3M Organic Vapor Cartridge 6001 helps reduce exposure to certain organic vapors encountered during…
- NIOSH-APPROVED: 3M Particulate Filter 5P71, P95 provides at least 95% filtration efficiency against solids and liquid aerosols, as well as oil-based…
- USE FOR: Professional paint spraying, spray adhesives, sealants, solvents, and pesticides
- KIT INCLUDES: One facepiece, one pair of replaceable 6001 cartridges, one pair of 501 retainers and two pairs of replaceable 5P71 filters
- 3M BAYONET CONNECTION: Makes it compatible with a wide range of 3M cartridges and filters

If you’re not sure the print itself is worth finishing, check the filament choice first with the Filament Picker. It’s better to change material before printing than to rescue the wrong material afterward.
Before You Mix: Prep the PLA Print
XTC-3D hides layer lines best when the PLA print is already clean. It won’t fix loose strings, elephant foot, blobs, or under-extruded walls.
Start by removing supports and brims, then clean up any stringing. Trim sharp burrs with flush cutters or a hobby knife. If the part has a rough seam or one raised blob, knock that down before coating.
Dust, skin oil, and loose sanding powder can all sit under the coating and show up later.
I’d also print a small test coupon from the same PLA. A calibration cube or failed print is enough. The goal isn’t beauty. You want to see how your filament color and layer height react before you touch the real part.
Plan how you’ll hold the part before the epoxy is mixed. A screw through a hidden hole, temporary handle, dowel, or printed stand can save the finish. If you have to grab the wet part with your glove, you’re already improvising.
Some “rough PLA” problems should be fixed in the slicer first. If your walls are inconsistent or your surface has gaps, use a print settings finder or revisit your nozzle temp for PLA before reaching for epoxy.
How to Mix XTC-3D Without Wasting the Batch
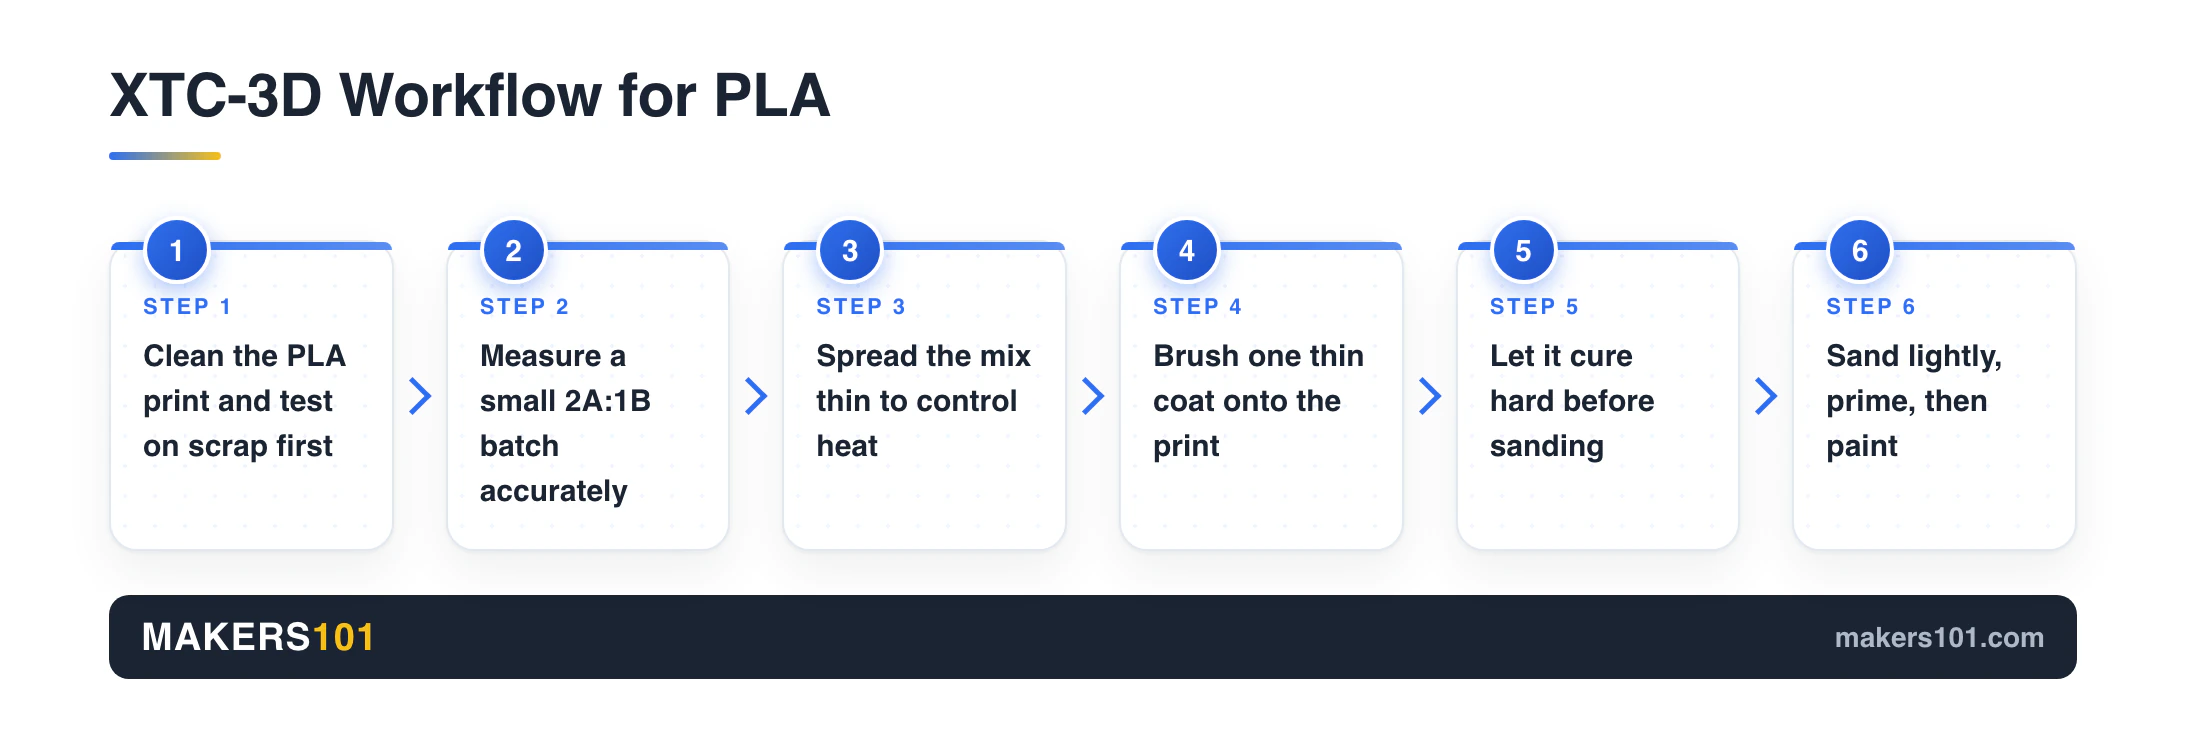
Mix small and measure accurately. XTC-3D has a short working window, and a thick cup of mixed epoxy can heat up faster than beginners expect.
Smooth-On lists the mix ratio as 2A:1B by volume or 100A:42B by weight. Pick one method and stick to it. Don’t mix by vibes.
The official product data lists a 10-minute pot life, 20-minute thin-film working time, about 2 hours tack-free time, and roughly 3.5 hours cure time in the technical table. The overview also describes about a 4-hour cure depending on mass and temperature.
Here is the practical translation: once you combine Part A and Part B, the clock starts.
For your first attempt, mix less than you think you need. Spread the mixed epoxy into a shallow aluminum foil tray instead of leaving it as a deep blob in a cup. Smooth-On specifically warns that concentrated mixed material can generate heat, and the company recommends reducing the mass to increase working time.
Use clean plastic, metal, or wax-free paper containers. Don’t use foam or glass mixing containers. Scrape the sides and bottom while mixing so the resin and hardener actually combine.
One private test note is worth taking seriously: in a Batman mask comparison, the XTC-3D batch hardened in the cup in under five minutes. That may not happen every time, but it is exactly the kind of mistake that ruins a large part.
How to Brush XTC-3D onto PLA
Brush on one very thin coat. A heavy coat sounds faster, but it usually creates drips, buried details, and sanding work later.
Start on the least visible side of the print. Load the brush lightly, then spread the coating until it wets the surface without forming thick pools. On vertical surfaces, keep watching for runs for the first few minutes.
Work in sections on complex shapes. A mask, helmet, prop handle, or figure doesn’t need one heroic pass. If a section has teeth, engravings, holes, threads, or sharp panel lines, use less coating there or mask it off.
For most beginner projects, one thin coat is enough to learn the material. If the first coat isn’t enough, don’t rush the second coat. Follow the product instructions for recoat timing, then test whether the surface is tacky hard or fully cured before adding more.
XTC-3D bonds to itself. Flooding the part still creates more cleanup. The cleaner move is simple: coat thinly, cure, inspect, then decide.
Cure, Inspect, Sand, Prime, Paint
Use cure time as a readiness check. The part is ready for the next step when the coating is hard enough to sand cleanly.
Official cure numbers are useful, but your room temperature, batch size, coat thickness, and part geometry all matter. One creator testing XTC-3D waited 24 hours before priming because the practical dry time ran longer than expected.
After cure, inspect the part under a strong light. Look for runs, missed spots, trapped dust, bubbles, or places where detail disappeared. If you want a painted finish, this is where light sanding earns its keep.
In one XTC-3D vs generic epoxy test, the coated print still needed 320-grit sanding before primer. The coating reduced the work, but it didn’t replace finishing.
For paint-ready PLA, use this sequence:
1. Let the coating cure hard. 2. Sand lightly with 320 to 400 grit. 3. Wipe the part clean. 4. Apply filler primer or plastic-compatible primer. 5. Sand again if the primer reveals lines. 6. Paint in thin coats.
If the final finish matters, pair this workflow with our best paint for 3D prints guide. Primer usually does more for the final look than beginners expect.
Common XTC-3D Mistakes on PLA
Most bad XTC-3D results come from too much resin, poor measuring, slow application, or expecting the coating to fix geometry it can’t fix.
The first mistake is mixing too much. A big batch feels efficient until it heats up, thickens, or cures before you finish brushing.
The second mistake is applying a thick coat. Thick epoxy runs downhill. It also fills small details, softens crisp edges, and creates glossy low spots you have to sand later.
The third mistake is trusting the clear coat by eye. Clear resin can make missed spots hard to see. Rotate the part under a bright light while it is still workable.
The fourth mistake is using it on the wrong print. A simple prop panel can look much better after XTC-3D. A tiny face, gear tooth, snap clip, or screw thread can get worse.
The fifth mistake is believing property claims too broadly. A coated PLA cup may become more waterproof in a simple test. Complex prints still need careful inspection around seams, holes, plus hidden surfaces. A coated PLA test may gain a little strength, but one private note found only modest strength gains around 4 to 10 percent. Sealing is the one claim that holds up. We go deeper into whether PLA is waterproof on its own.
And heat resistance is the big one.
In one test, uncoated PLA deformed at 51 C and epoxy-coated PLA deformed at 53 C. That’s not enough to turn PLA into a hot-car material. If heat matters, pick PETG, ASA, ABS, or another suitable material from the start.
XTC-3D vs Generic Epoxy vs Sand/Prime/Paint
XTC-3D is convenient because it’s documented for 3D prints. Generic epoxy can be cheaper and sometimes similar, but you’ll need to test viscosity, working time, cure behavior, sandability, plus paint compatibility yourself.
| Method | Best for | Tradeoff |
|---|---|---|
| XTC-3D | First controlled epoxy workflow | Higher cost, short working time |
| Generic epoxy | Budget experiments | More testing and unknowns |
| Filler primer + sanding | Reliable painted finish | More manual labor |
| Better print settings | Reducing lines before finishing | Slower or different print setup |
| Filled/textured filament | Hiding lines visually | Different material look |
The private video notes are consistent here. XTC-3D works. It just may not be worth the premium if a tested generic epoxy gives the same final look after sanding and primer.
That doesn’t make every epoxy equal. Some formulas are too thick, too yellow, too brittle, too slow, too fast, or hard to sand. XTC-3D’s advantage is that it comes with a known 3D-printing workflow and official documentation.
If you want to reduce post-processing before it starts, nozzle choice also matters. A smaller nozzle can make layer lines less visible, but it adds print time. Start with our 3D printer nozzles guide if you are trying to improve the raw print first.
My Beginner Recommendation
If this is your first XTC-3D project, coat a scrap PLA print first. Then use one thin coat on a simple part you plan to paint.
Don’t start with a detailed miniature, a functional snap-fit, or a part that must survive heat. That’s where epoxy coating creates false confidence.
My default beginner workflow would be:
1. Print the part as cleanly as you can. 2. Remove supports and obvious defects. 3. Test XTC-3D on scrap PLA. 4. Mix a small, accurate batch. 5. Brush one thin coat. 6. Let it cure longer than the minimum if you’re unsure. 7. Sand lightly. 8. Prime and paint.
That gives you the main benefit: faster smoothing and easier paint prep.
It also keeps the promise honest.
Sources Checked
The product-specific mix ratio, working time, cure guidance, compatible materials, and safety reminders in this guide were checked against Smooth-On’s XTC-3D product page and technical bulletin. Workshop observations are practical examples from specific prints; your resin batch, PLA blend, room temperature, and geometry can behave differently.
FAQ
How to get a PLA 3D print smooth?
For PLA, the reliable beginner methods are sanding, filler primer, paint, plus an epoxy coating such as XTC-3D. You can also reduce visible lines before printing with better orientation, smaller layer height, smaller nozzle, or textured/filled filament.
How long does it take for Smooth-On XTC-3D to cure?
Smooth-On lists short working and cure windows, including 10-minute pot life and about 3.5 to 4 hours cure depending on conditions. In real workshops, thicker coats, cooler rooms, and complex shapes can need more waiting time before sanding or priming.
Does rubbing alcohol smooth PLA?
Rubbing alcohol isn’t a reliable way to smooth normal PLA. It may clean some surfaces, but it shouldn’t be treated as a PLA layer-line smoothing method.
What chemical smooths PLA prints?
For beginners, a brush-on epoxy coating is more predictable than solvent smoothing PLA. Some solvents can react with specific PLA blends, but results vary and the safety risks are higher.
Can you paint over XTC-3D?
Yes. Once cured, XTC-3D can be sanded before primer and paint. For best results, lightly sand the cured coating before primer.
Is XTC-3D waterproof?
It can improve waterproofing, especially on simple shapes with thin walls. One private test note found an epoxy-coated vase-mode cup stopped leaking, while the uncoated cup leaked. Don’t assume complex parts are sealed everywhere.
Does XTC-3D make PLA stronger?
It can add a hard coating and may modestly improve strength, but it is not a structural upgrade. One test note found only about 4 to 10 percent improvement.
Does XTC-3D make PLA heat-resistant?
For beginner projects, treat the answer as no. One test note found coated PLA deforming only about 2 C higher than uncoated PLA. Choose a heat-resistant filament instead.
Is XTC-3D food-safe on PLA?
Don’t assume that. Food safety depends on the epoxy, filament, printer path, mixing accuracy, cure quality, surface cracks, cleaning method, and intended use. A casual coating isn’t enough evidence. Here’s what a coating has to clear before it counts, conditions and all.