
Heads up — some of the links below are affiliate links. If you buy through them, I earn a small commission (at no extra cost to you), which helps cover the gear I test. Thanks!
- Open 3D print sanding at 180 to 220 grit. Go coarser only for badly pronounced layer lines or before spray putty, which needs the scratches to grip. Coarse grits and power tools together round off edges, so be careful pairing them.
- Heat is what ruins PLA. Clogged sandpaper means you’re pressing too hard, not that the grit is wrong.
- Sandpaper knocks down high points. Filler is what makes a surface smooth.
- One maker stopwatched a full helmet at under two hours by hand, using a 30-minute-cure filler primer and excluding all drying waits. Chasing a mirror finish on bare plastic takes days and usually looks worse.
- Stop at around 1500 grit on primer. Paint needs something to grip.
You pulled the part off the plate, ran a thumb across it, and felt every single layer. So you’re going to sand it. The hard part is knowing which sheet to reach for first and when you’re allowed to stop.
The two most upvoted sanding threads on r/3Dprinting are someone asking which sandpaper to use on a specific print, and someone holding up a model asking how they should even go about it. Both are questions about where to start. Most guides answer neither. They hand you a grit chart and wish you luck.
This pulls from twelve creators who filmed themselves sanding, including several who take you through a complete build and a few who spent an entire video testing tools or methods against each other. They flatly contradict each other in places. That turns out to be the useful part.
Table of Contents
- The Four-Step Loop Behind Every Smooth Print
- What Sanding Actually Fixes (And What It Doesn’t)
- Three Print Settings That Cut Your Sanding Time in Half
- The Grit Ladder: Where to Start and Where to Stop
- Why PLA Feels Impossible to Sand (It’s Heat, Not Hardness)
- Wet Sanding: When It’s Worth the Mess
- Sanding Tools, Ranked by What They’re Good At (And How They Fail)
- How Long 3D Print Sanding Actually Takes
- Sandpaper Alone Won’t Get You a Glass Finish (Someone Tested It)
- Sanding Resin Prints Is a Different Job
- Before You Paint, Don’t Sand It Too Smooth
- Seven Mistakes That Ruin an Otherwise Good Print
- When You Shouldn’t Sand at All
- FAQ
The Four-Step Loop Behind Every Smooth Print
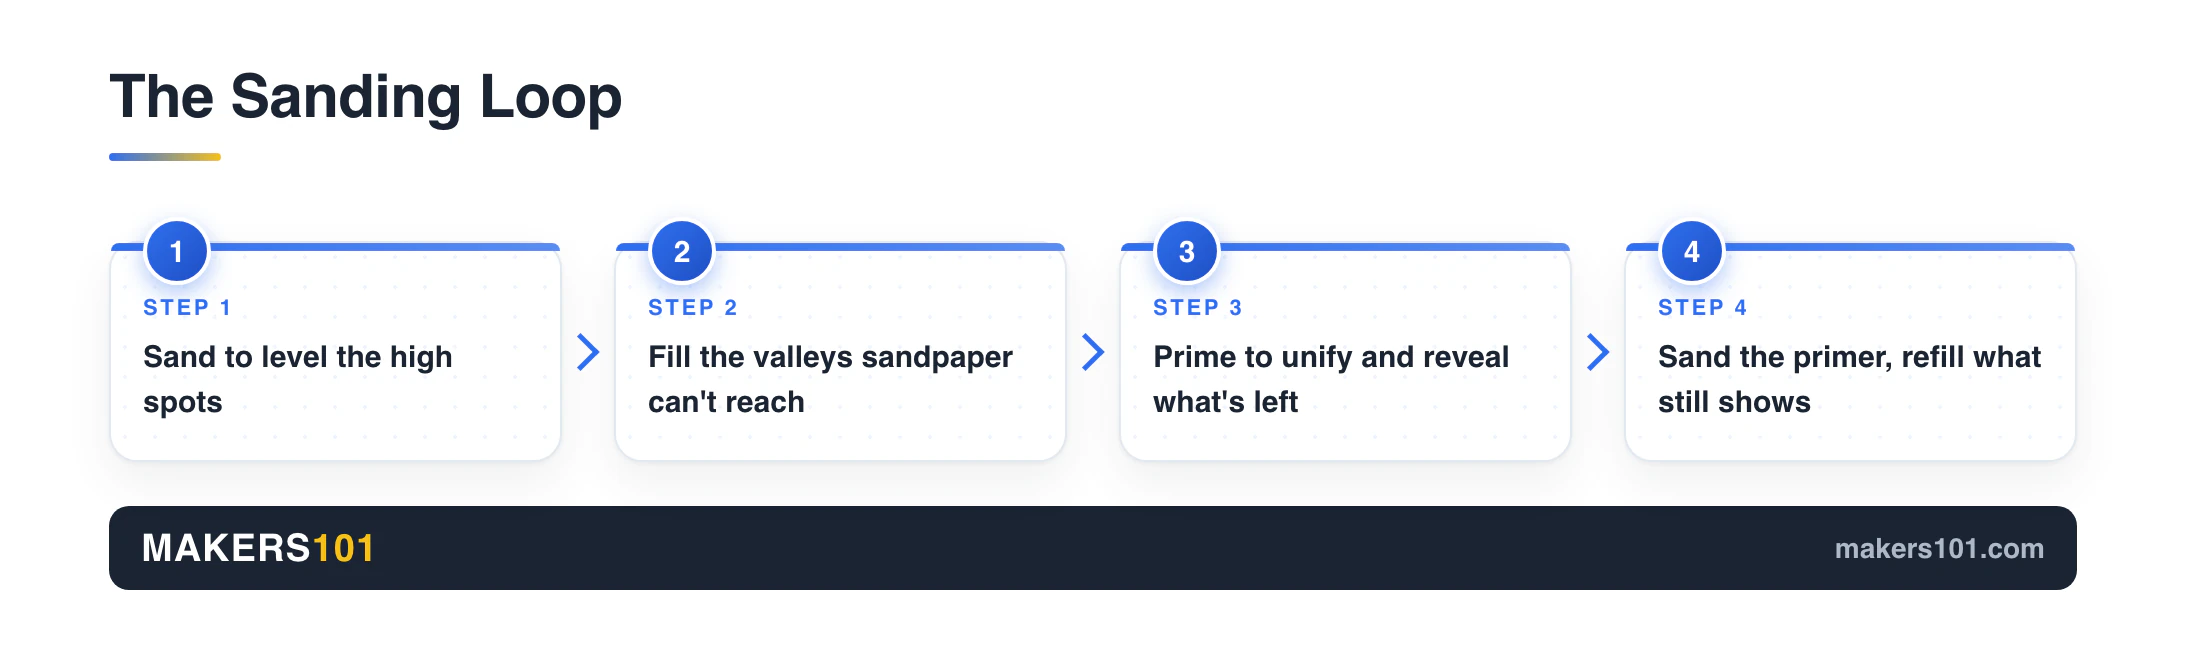
Every smooth print comes out of the same loop: sand, fill, prime, sand again. You repeat it until nothing shows through the primer.
Each step has one job. Sandpaper levels the high spots. Filler drops into the valleys sandpaper can’t reach. Primer unifies the surface so you can see what’s left. Then you sand the primer, and whatever still shows gets filled again.
NuggetsInclusive ranked ten different layer-line tricks against each other on the same model. This loop took the top spot as the one method that delivers a consistent surface every time, with acetone vapor smoothing close behind on results alone.
At a Glance: The Whole Sanding Job
| Stage | Grit | Main tool | Skip it when |
|---|---|---|---|
| Knock down high spots | 180-220 by default, 60-80 only before spray putty | Power sander or sheets | Layer height 0.12mm or finer, no paint |
| Fill | none | Putty, filler primer, UV resin | The part has no gaps or pinholes |
| Sand the filler | 220-320 | Hand, with block or sponge | You skipped filling |
| Pre-primer pass | 400 | Hand | You’re not painting |
| After primer | 600-1500, wet | Wet-dry paper | You’re going matte |
Drying times are the one thing you can’t rush here. Glazing putty wants about 30 minutes, filler primer 20 to 30 between thin coats, and up to 24 hours if you lay it on thick.
What Sanding Actually Fixes (And What It Doesn’t)
Sandpaper only removes material that sticks out. Anything recessed stays exactly where it is, however long you go at it.
Pull a part off the bed and you’re usually looking at five separate problems: layer lines, a Z seam, support scars, terracing across shallow top surfaces, and whatever your nozzle did when it hiccupped. Emily Boe walks through that exact list on a Sabine helmet off a Creality CR-10.
Sandpaper handles the layer lines and the terracing. Files clear support scars and seams far faster. Gouges from a nozzle clog sit below the surface, so they need filler.
Kevin at 3D Printed Props runs into this on builds with pronounced artifacts. Some sit too deep to sand out, and grinding down far enough to reach the bottom of them costs you the shape around them.
The line that reframes the whole job comes from Emily Boe: “The goal is not to smooth the print but to knock down the high points.”
You aren’t trying to polish plastic. You’re leveling a surface so that filler and primer can do the smoothing.
Three Print Settings That Cut Your Sanding Time in Half
Most of your sanding workload gets decided before you press print. Three settings do the heavy lifting, and not one of the six guides currently ranking for this topic gives the first one a heading.
Wall count comes first. M.M’s Prop Shop runs a minimum of four walls, four top layers, and three bottom layers on anything headed for sanding. Go thinner and you’ll sand straight through into infill. There’s no recovering from that. You reprint.
Layer height is a trade. Angus at Maker’s Muse prints gentle curves at 0.12mm. Galactic Armory ran 0.16mm on a Master Chief helmet. Darkwing Dad argues for 0.24 or 0.28mm with around 10% infill, on the grounds that finer layers cost more at the printer than they save at the bench.
They’re optimizing different things, which is why the numbers spread so far. Finer layers move hours off the sanding bench and onto the print. Decide which of the two you’d rather spend. Anything at 0.32mm and up adds noticeable work, per Darkwing Dad.
Orientation is free. Faces printed against the plate pick up the plate’s texture, so point your show surface up or outward. And don’t bother slowing the printer down: NuggetsInclusive halved print speed and saw almost no change in layer visibility. Point a flat face up and the slicer can finish it for you before you ever pick up a sheet. That’s what ironing is for, though Cura’s ironing defaults need work.
Squeezing finer layers out of the hardware you already own is its own rabbit hole, and we’ve measured how far you can push a 0.4mm nozzle.
The Grit Ladder: Where to Start and Where to Stop
There is no single number, and anyone who gives you one is hiding something. Start at 180 to 220 unless you have a specific reason to go coarser, and the rest of this section is about what counts as a specific reason.
Grit numbers run from around 40 at the coarsest to 2000 and beyond at the finest. The lower the number, the more material comes off per stroke.
| Grit | What this pass is doing | Skip it when |
|---|---|---|
| 60-80 | Tearing down heavy layer lines, keying the surface for spray putty | Lines are shallow. Take extra care here with power tools |
| 120 | Erasing the 60-80 scratches | You started at 180 or higher |
| 180-220 | The default opening for most prints | Never |
| 240-320 | Sanding filler back flush | You skipped filling |
| 400 | Final inspection before primer | You’re not painting |
| 600-1500 | Wet sanding primer | You’re going matte |
| 2000+ | Polishing bare plastic | Almost always |
Four experienced creators open at four different grits, and all four of them fill afterward. So “will you fill?” explains nothing. Here is what each one actually says about their own choice.
| Creator | Opens at | Their stated reason |
|---|---|---|
| Maker’s Muse | 60 | The scratches are deliberate. Automotive spray putty needs a keyed surface to grab |
| Kevin (3D Printed Props) | 80 | Only on pronounced artifacts, then straight up through 120, 220, 320, 400 |
| Darkwing Dad | 180-220 | Goes to 120-160 only when he must, and carefully, because power tools round off edges |
| Zibartas | 240 | Coarse scratches take longer to remove than they ever saved him |
Kevin and Darkwing Dad are worth sitting with, because they fill with essentially the same products. Darkwing Dad uses glazing putty and filler primer, and he’s explicit that filler primer is a sprayable version of the same putty. Kevin uses filler primer plus Bondo spot putty. Same toolkit, 100 grit apart on the opening pass.
So the filler isn’t deciding it either. Three things are:
How bad the lines actually are. Kevin reserves 80 grit for pronounced artifacts. On a clean print he’d have no reason to go there.
Whether a power tool is involved. This is Darkwing Dad’s stated limit. A coarse disc on a spinning tool rounds edges and eats detail faster than your hand ever will.
What you’re willing to spend walking it back. Zibartas’s whole argument is arithmetic. Every 60 grit trench has to be chased out by 120, then 220, then 320. He’d rather never cut it.
Notice that spray putty is the one filler that genuinely changes the answer, and it changes it for a reason nobody else’s filler shares: it needs the scratches for adhesion. That’s keying. It’s a genuine exception, and it doesn’t generalise into a rule about how thick your filler is.
Sanding bare with no filler at all is the one case none of these four actually document, so treat any specific number for it with suspicion. Zibartas’s arithmetic is still the best guide available: whatever you cut, you have to walk back.
Both of the parts behind my own notes here, a Benchy and a phone stand in PLA, went on to be painted.
Your stopping point is set by what comes after. Darkwing Dad treats 400 grit as an inspection pass, going over the whole part hunting for anything he missed. How much further you climb depends on your paint, which comes up further down.
Skipping grits feels efficient and isn’t. A 220 pass can’t remove an 80 grit gouge, so you end up back at 120 anyway.
Why PLA Feels Impossible to Sand (It’s Heat, Not Hardness)
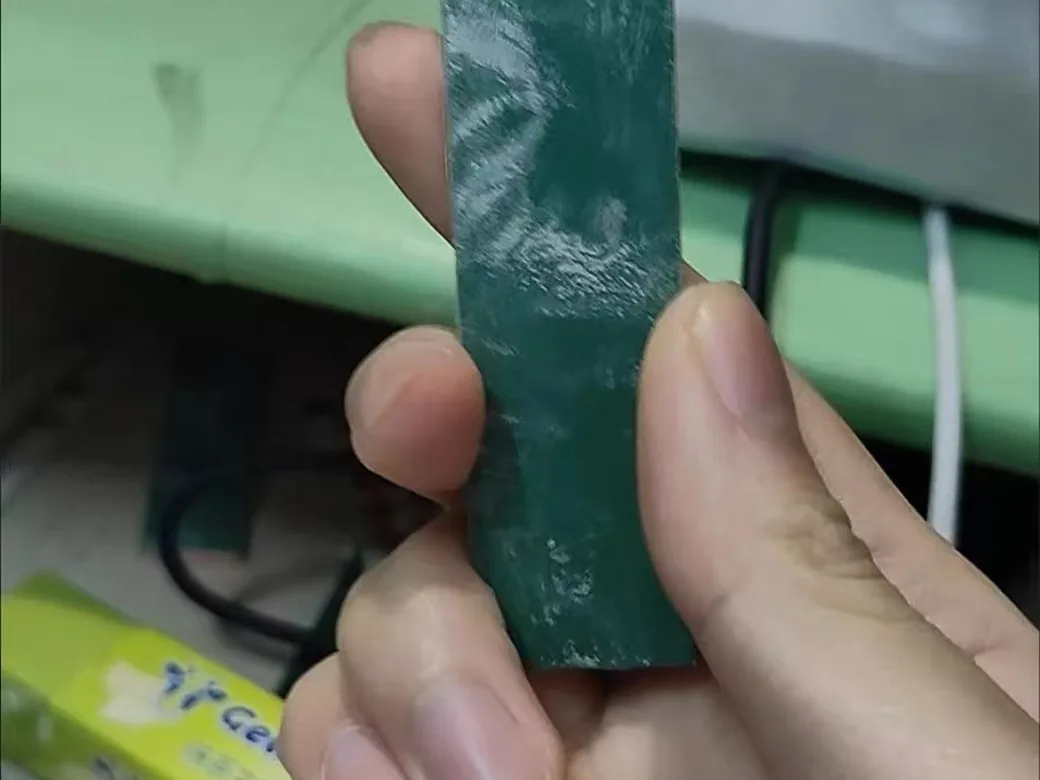
PLA isn’t too hard to sand. It’s too soft to stay solid once it warms up, and friction gets it there quickly.
M.M’s Prop Shop puts it bluntly after finishing the same model in three materials: “PLA basically does not sand.” That’s a working prop maker’s verdict, and it lands.
Three other creators, working separately, point at the same cause. Greedy 3D warns that a mouse sander melts PLA if you hold it in one spot. Emily Boe gives the identical warning about her electric sander. Zibartas tells you to let the paper glide, because pressing hard melts the plastic.
Friction generates heat. The surface softens, smears instead of powdering, and packs itself into the abrasive. At that point you’re rubbing plastic against plastic.
Clogged paper tells you to ease off. The paper is usually fine.
Light pressure. Keep moving. Run power tools slow, and stop before the part gets hot enough to smear. Zibartas has a line for it worth stealing: “Slow is smooth, and smooth is fast.”
| Material | How it sands | Main risk | What to do |
|---|---|---|---|
| PLA | Hardest work of the four | Melting, clogged paper | Light pressure, constant movement |
| PETG | Noticeably easier than PLA | Still heat sensitive | Same technique, less babysitting |
| ABS | Easiest by a wide margin | Fumes | A foot sander gets it near-smooth in one pass |
| Resin | Fast with the right bit | White marks, dust toxicity | Diamond bits, full protective gear |
M.M’s Prop Shop also turns ABS’s solubility into a tool. An acetone slurry made from dissolved ABS fills gaps and bonds parts, and he rates that bond stronger than glue. That comes up a lot on models printed in sections. Where you put the seam decides how much filling you’ll do later.
Wet Sanding: When It’s Worth the Mess
On FDM prints, wet sanding belongs at the end of the job. Bring water in after filler or primer, generally from 600 grit upward. Resin work is the exception, and it goes wet much earlier.
No airborne dust. The paper stops clogging, because water carries the slurry away. And the sheets last considerably longer, which offsets what wet-dry paper costs.
Loot Studios uses water paper on resin, running 120 grit to remove material quickly and 320 to refine.
One hard rule if a powered tool is involved: keep water out of the machine. Oasim Karmieh wet sands by hand for exactly this reason.
Sanding Tools, Ranked by What They’re Good At (And How They Fail)
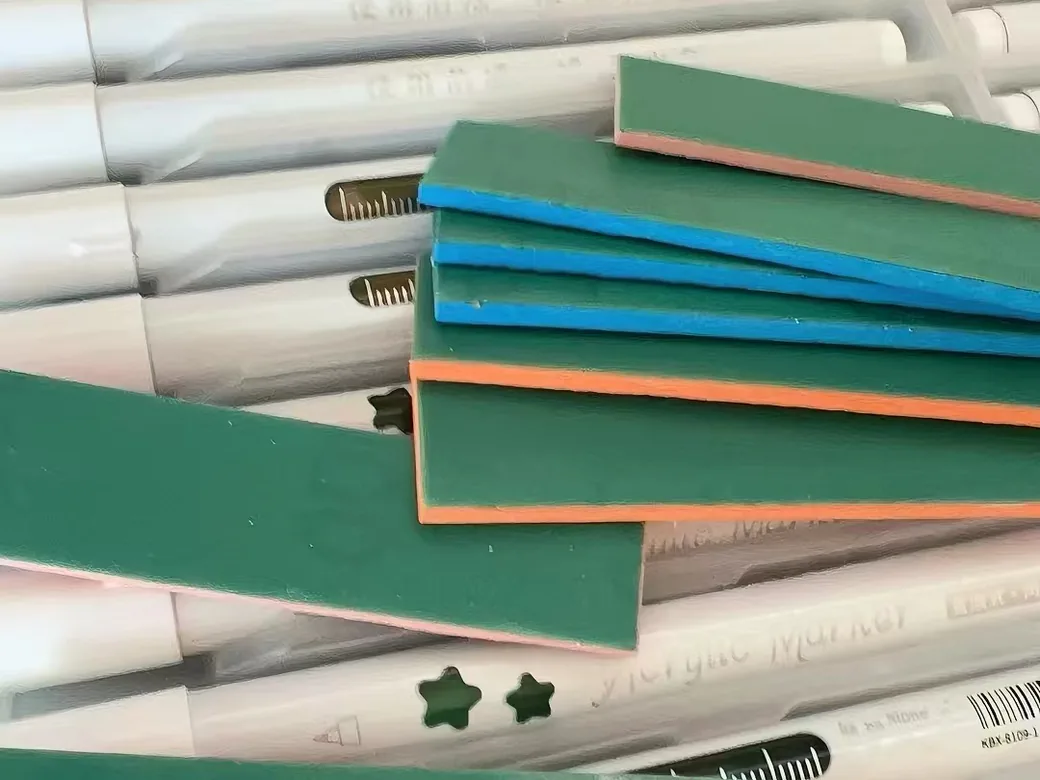
There’s no all-purpose sanding tool. Each one has a job it does well and a specific way it wrecks parts.
| Tool | Best at | How it fails | Rough cost |
|---|---|---|---|
| Loose sheets | Everything, eventually | Slow and tiring | Pennies |
| Sanding block or multi-grit kit | Flat faces, grit variety | Useless in tight curves | ~£10 for a 70-strip 40-2000 set |
| Sanding sponge (3M interface pads) | Contours, gentle finishing | Barely touches fresh layer lines | Low |
| Metal and miniature files (Army Painter) | Seams, support scars, tight slots | Too aggressive on flat faces | Low |
| Mouse sander | Large flat areas | Melts PLA the moment you pause | ~$30 |
| Foot sander (callus remover) | Bulk removal, speed | Heat under pressure, crude control | ~£30 |
| Pen sander | Nooks and small details | Slow across area | Mid |
| Proxxon linear sander | Detailed and curved parts | Needs a separate transformer | Mid, plus the transformer |
| Rotary tool or Dremel | Support nubs, drilling | Eats material, leaves scuffs | Mid |
| Micro grinder with diamond bits | Resin | Overkill on FDM | Mid |
Those figures are whatever each creator quoted in their own video, in their own currency, so treat them as ballpark.
One tool gets named a favorite by two creators independently. M.M’s Prop Shop calls the foot sander the GOAT of 3D printing sanding tools. Greedy 3D jokes that foot sanders should just be called 3D printer sanders. It’s a callus remover. It works.
The Dremel is where opinion turns. Oasim Karmieh stopped using his for finishing because it removed too much material and left scuff marks on detailed and rounded pieces. You can absolutely sand with one. Keep the speed low and point it at support nubs and awkward corners. Keep it off show surfaces.
Buying a Proxxon linear sander comes with one trap: the transformer is sold separately. Oasim bought his assuming it plugged into the wall.
My own experience splits from two of these creators on one item. Darkwing Dad recommends 3M sanding sponges as interface pads, and Oasim cuts the same sponges up and hot-glues them onto his sander heads. On those two PLA parts, both printed at 0.2mm, a sanding sponge made almost no difference and plain sheets did the work.
Both observations hold, because they describe different surfaces. A sponge conforms to curves and spreads pressure evenly, which is what a large helmet shell needs. Knocking the tops off fresh layer lines on a small part asks for a rigid backing instead.
Oasim’s sponge trick still holds up if you own a powered sander. Cut the sponge to shape and attach it with hot glue instead of a strong adhesive, so you can peel it off when it wears out.
The rest of the bench is covered in our rundown of which 3D printer accessories are actually must-haves.

- Full Range Kit includes 128 color-coded abrasive sheets ranging 60–5000 grit. Breakdown: 14 coarse/medium grades…
- 4 intuitive color grades for quick identification: green coarse for fast material removal, yellow medium for surface leveling, red fine for detail…
- Comes with ergonomic micro finger sand blocks, perfectly fit tight corners, curved surfaces and narrow grooves ordinary sanding tools cannot access.
- Universal hook-and-loop backing enables fast sheet swap without sticky adhesive residue, keep steady workflow during wood and epoxy resin crafting.
- Portable multi-grit sanding set widely used in wooden furniture restoration, scale model refining, resin art and automotive paint touch-up.
How Long 3D Print Sanding Actually Takes
Sanding time tracks the finish you’re chasing. Part size matters much less than people assume. Three measured data points bracket the range.
Aaron at Galactic Armory timed himself sanding a Master Chief helmet with a stopwatch, by hand, using no power tools at all. He logged the filling and sanding at 103.5 minutes and reports 1 hour 43 minutes for the job, against a widely repeated claim that a helmet is a six to twelve hour affair. Either way you read his numbers, it lands under two hours.
He also discloses what made that possible. The helmets came off Bambu Lab X1 Carbons at 0.16mm. He used a Seymour high-build filler primer that cures in about 30 minutes instead of overnight, and filled layer lines with SLA resin under a UV lamp, an 18-minute step. Setup and teardown were excluded from the clock, along with every drying wait.
At the other end, NuggetsInclusive spent close to three days polishing up to 5000 grit and finished with a surface he described as dingy and scratched.
For a single mid-size part, JustGee3D spent around 30 minutes on 80 grit alone before moving up the ladder. Those two parts of mine took at least half an hour by hand between them.
Interpolating between those three measurements, here’s roughly where a small to mid-size part lands. Treat this table as our estimate. Nobody has timed these tiers directly.
| Target | Our estimate |
|---|---|
| Good enough for primer | Half an hour to an hour on a small part |
| Ready for matte paint | One to two hours |
| Ready for gloss | Several hours, spread across fill and primer cycles |
| Mirror finish on bare plastic | Days, and expect disappointment |
Sandpaper Alone Won’t Get You a Glass Finish (Someone Tested It)
You can sand a bare print as flat as a filled and primed one. You won’t get it as shiny, and the effort involved is enough that the person who ran the test won’t repeat it.
JustGee3D printed the same half sphere twice. One got nothing but sandpaper, 80 grit through 2000. The control went the standard route: 80 and 120 grit, acetone and Bondo, 220, filler primer, wet sanding at 220 and 400, then red paint and a 1K clear coat. Worth noting before you weigh the result: the two prints didn’t start equal. The sanded-only sphere was printed at a fixed 0.2mm, the control at variable layer height. The video doesn’t address what that difference contributed, but variable layer height plausibly gave the control a head start on smoothness, so factor it in.
The sanded-only sphere came out as smooth as the control, arguably smoother. What it lacked was gloss, and he puts that down to his own polishing skill. The method itself held up.
The cost was real. He burned through a pile of sandpaper and his hand cramped up. His verdict: “I would not do just sanding by itself; I’d go with sanding and Bondo because it’s faster and more efficient.”
So if you want a finish without paint, sandpaper alone gets you a clean matte surface. Gloss is a separate project.
Where the Smoothness Actually Comes From
Filler does the work sandpaper can’t. It adds material to the valleys.
| Filler | Fills | Dry time | Watch out for |
|---|---|---|---|
| Glazing putty | Pinholes, sanding marks | ~30 min | Apply with a gloved finger in detail areas |
| Filler primer | Fine layer lines | 20-30 min between coats | Thin coats; thick ones want 12-24 hours |
| Bondo spot putty | Seams, deeper gouges | Varies | Apply thin, thick layers crack |
| Wood filler + acetone | Broad layer lines | Under 30 min | Roughly 2:1 filler to acetone |
| UV resin | Cracks and fine valleys | Seconds under UV | Cure in layers, never one thick pour |
Emily Boe’s wood filler mix is the cheapest entry on that list. DAP Plastic Wood thinned with about half its volume in acetone, worked to the consistency of melted ice cream, then brushed on across the layer lines so it sinks between them. The acetone also drops dry time under 30 minutes.
Then sand it back thin. Her instruction is to take the filler down as far as you can without the layer lines reappearing.
UV resin splits opinion. Zibartas reaches for it because it stays liquid until you cure it, seeps into cracks, and sands easily afterward. Loot Studios thickens theirs with baby powder to make three consistencies, one for holes, one for seams, one for gaps. Zibartas specifically warns against the powder, saying it creates a strange texture that changes how the surface takes paint. M.M’s Prop Shop reaches for fumed silica.
Both thickeners do the structural job, so pick by what the surface has to do next. Leave the baby powder out of anything you’ll spray, since that’s the specific failure Zibartas describes. Fumed silica buys you the same thickness without the paint problem.

- VERSATILE FORMULA repairs scratches, pinholes, holes and nicks
- CAN BE USED ON metal, fiberglass and wood as well as sanded and primed or painted surfaces
- FEATURES 3-minute work time
- Fast drying sandable in 30 minutes
- Non-staining to help ensure a consistent paint finish

Sanding Resin Prints Is a Different Job
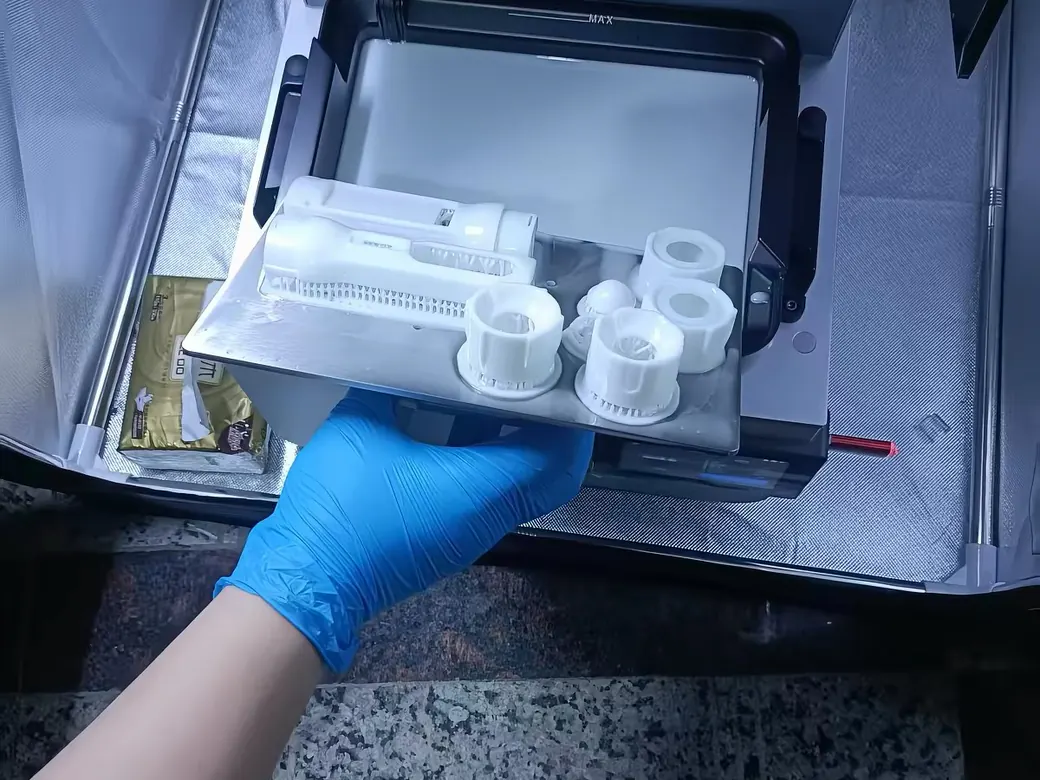
Resin parts change the order, the tools, and the problem you end up fixing.
Nothing starts until the part is washed in IPA, de-supported, then fully UV cured. Sanding a green part gets you nowhere.
Loot Studios runs a micro grinder with diamond bits, which cut resin quickly without erasing detail, then moves to water paper at 120 and 320. Hollow parts need their drain holes filled, and the filler is resin thickened to a paste and cured in layers so the inside actually hardens.
Sanded resin then goes chalky white, and no FDM guide prepares you for it. Brushing on plain resin and curing it removes the marks but leaves the surface glossy. The fix is elegant: brush the sanding dust you just created back over the part and the matte finish returns.
Gear up properly for this one. Wear nitrile gloves and a filtered mask, plus eye protection rated for UV.
Before You Paint, Don’t Sand It Too Smooth
Finer isn’t automatically better. Take primer much past 1500 grit and paint starts struggling to hold on.
Zibartas wet sands filler primer at 1000 or 1500 and stops there deliberately, because a surface that slick gives paint nothing to key into. It’s the same logic as starting coarse before filler, running in reverse.
Wash the part before primer. Kevin uses soap and water to clear the sanding dust, and wears gloves from that point on, because skin oils on a prepped surface show up in the paint.
How far you sand also depends on what you’re spraying. Gloss and metallic paints reflect light and hide small flaws. Matte finishes expose them. Zibartas sums it up as “the shininess hides a lot of crimes,” and demonstrates it with gloss metallic purple against satin black on identically prepared plates.
A gloss black base under chrome paint gives a deeper metallic result. Expired spray paint bubbles, which ruins a surface you spent hours on.
Darkwing Dad adds a primer sealer before color, especially with metallics, to stop the surface absorbing paint unevenly. Match the sealer to your topcoat: black under dark colors, white or grey under light ones.
Once the part is prepped, the next decision is which paint to use on 3D prints.
Seven Mistakes That Ruin an Otherwise Good Print
1. Sanding a part with thin walls. Four walls minimum, or you break through into infill and start over. 2. Parking a power sander in one spot. PLA melts in seconds. 3. Skipping grits. A 220 pass will not remove an 80 grit scratch. 4. Over-sanding. Sharp edges round off and small details vanish. Darkwing Dad warns about it specifically when power tools are involved. 5. Expecting a mirror from sandpaper alone. See the test above. 6. Sanding primer too fine. Paint needs grip. 7. Skipping dust protection. This one can actually hurt you.
Greedy 3D treats this as non-negotiable: sanding throws off particles you shouldn’t breathe, so you want respiratory protection with particulate filters, plus ventilation and extraction if you have it. Kevin points out that sanded filler primer and putty behave like powder, and he masks up even when working outdoors. Resin adds UV eye protection to the list. Replace your filters on whatever schedule the manufacturer gives you.

- NIOSH-APPROVED: Organic Vapor/P100 combination cartridge helps reduce expose to certain organic vapors and provides at least 99.97% filtration…
- OIL-PROOF FILTERS: Included P100 particulate filters are oil-proof (Use according to manufacturer’s time use restrictions when oil aerosols are…
- USE FOR: Relief from certain non-harmful particles and annoying odors
- KIT INCLUDES: One facepiece and one pair of replaceable organic vapor/P100 combination cartridges (#60921)
- 3M BAYONET CONNECTION: Makes it compatible with a wide range of 3M cartridges and filters
Sanding is only one of the own goals waiting for you. We’ve collected the beginner 3D printing mistakes that cause most failed prints separately.
When You Shouldn’t Sand at All
Three routes get you around sanding, and each one costs you something.
Choose a filament that disguises them. NuggetsInclusive tested six filled filaments on the same model. Carbon fiber PETG came out best, with marble PLA and Polyterra also breaking up the surface enough to distract the eye. No post-processing required.
Smooth it chemically. Acetone vapor gives ABS a clean surface, though a shiny one, and it can’t be done in a closed room. The bigger cost is geometric. Angus at Maker’s Muse points out that chemical smoothing rounds off sharp edges and blobs fine details together. PVB filament smooths with ethanol, which is friendlier to handle, and carries the same detail penalty.
Coat over it. Two-part epoxy, or UV resin mixed with talcum powder, brushed onto large surfaces like helmet shells, fills layer lines fast. Same trade: edges soften. Use the slow-cure epoxy. The five-minute stuff sets before it has time to self-level.
Skipping areas is legitimate too. Emily Boe leaves the inside of her helmet ears rough, because other printed parts cover them.
Laser polishing and hair dryers both come up as shortcuts. Neither one holds up. Laser polishing proved unreliable in testing and couldn’t reach every surface. Nobody in this group tested a hair dryer, so take the next sentence as reasoning. The temperature that would reflow a PLA surface sits well past the point where the part starts to sag.
If layer lines are the thing you’re really fighting, you can pick a filament that hides layer lines before you print instead of after.
FAQ
Can 3D prints be sanded down?
Yes, and most materials sand fine with the right technique. The limit is heat. PLA softens and clogs your paper if you press hard or leave a powered sander in one place. Work with light pressure and keep the tool moving.
What kind of sandpaper to use on 3D prints?
Standard aluminium oxide wet-dry sheets cover almost everything you’ll do. A multi-grit block or kit spanning roughly 40 to 2000 grit runs about £10 and handles a full progression on its own. Add a metal file for seams and support scars, which sand slowly and file quickly.
What is the best way to sand a PLA 3D print?
Open at 180 to 220 grit unless the layer lines are badly pronounced or you’re about to spray automotive putty, which needs coarse scratches to key into. Climb from there through 320 to a 400 grit inspection pass, using light pressure the whole way, and go wet past 600. Every coarse scratch you cut has to be walked back by a finer grit, so opening coarse without a reason just adds work later.
Can you use a Dremel to sand 3D prints?
You can, within limits. Rotary tools remove material quickly and leave scuff marks on curved or detailed surfaces, which is why some prop makers drop them for finishing work. Run it slow, confine it to support nubs and tight spots, and steer well clear of anything you intend to paint.
Is it safe to sand 3D prints?
Only with respiratory protection. Sanding produces fine particulates you shouldn’t breathe, and sanded filler primer produces dust finer still. Use a mask with particulate filters, ventilate the space, and add eye protection when resin is involved.
Can a hair dryer smooth PLA?
No. PLA softens well before it flows, so the part sags while the layer lines stay exactly where they were. None of the twelve creators behind this guide tested the idea, which is worth saying plainly. Use filler and primer, or move to a filament that smooths chemically.
Why do people not sand their 3D prints?
Usually because the part doesn’t need it. A functional bracket works fine with its layer lines showing, and sanding something you’ll never look at closely is wasted time. The other reasons are honest ones: it’s slow, it makes a mess you need protection from, and a careless pass rounds off detail you can’t put back. Sanding earns its place on display pieces and anything getting painted.
Is there a way to smooth out 3D prints without sanding?
Yes, three of them. Print in a filled filament like carbon fiber PETG that disguises layer lines, smooth chemically with acetone on ABS or ethanol on PVB, or brush on an epoxy or UV resin coating. All three soften fine details, so they suit shells and props better than parts with crisp edges. If the filament route appeals, our best PETG filament picks include the carbon fiber blends.