
I earn a commission if you buy through links on this page, at no extra cost to you. As an Amazon Associate, I earn from qualifying purchases.
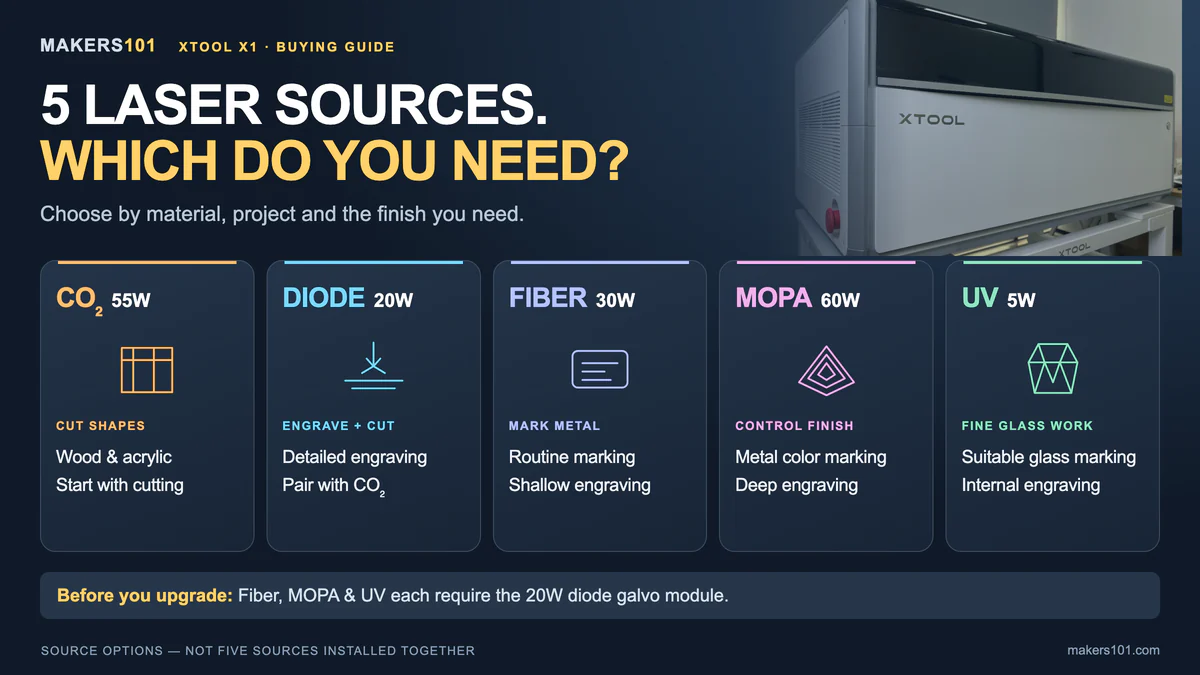
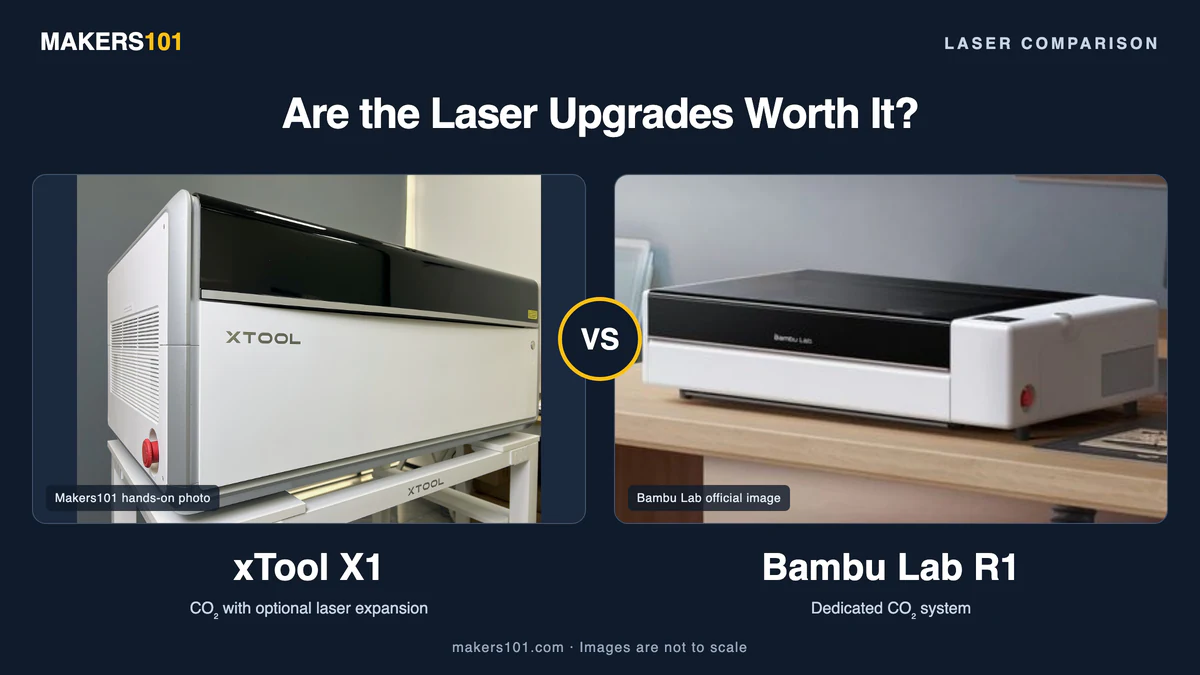
Both machines start with 55W CO₂ for wood and acrylic. The xTool X1 vs Bambu R1 choice becomes more involved when you need fast galvo engraving, metal relief or glass inner engraving: the X1 can expand to five laser types, with one external source installed at a time.
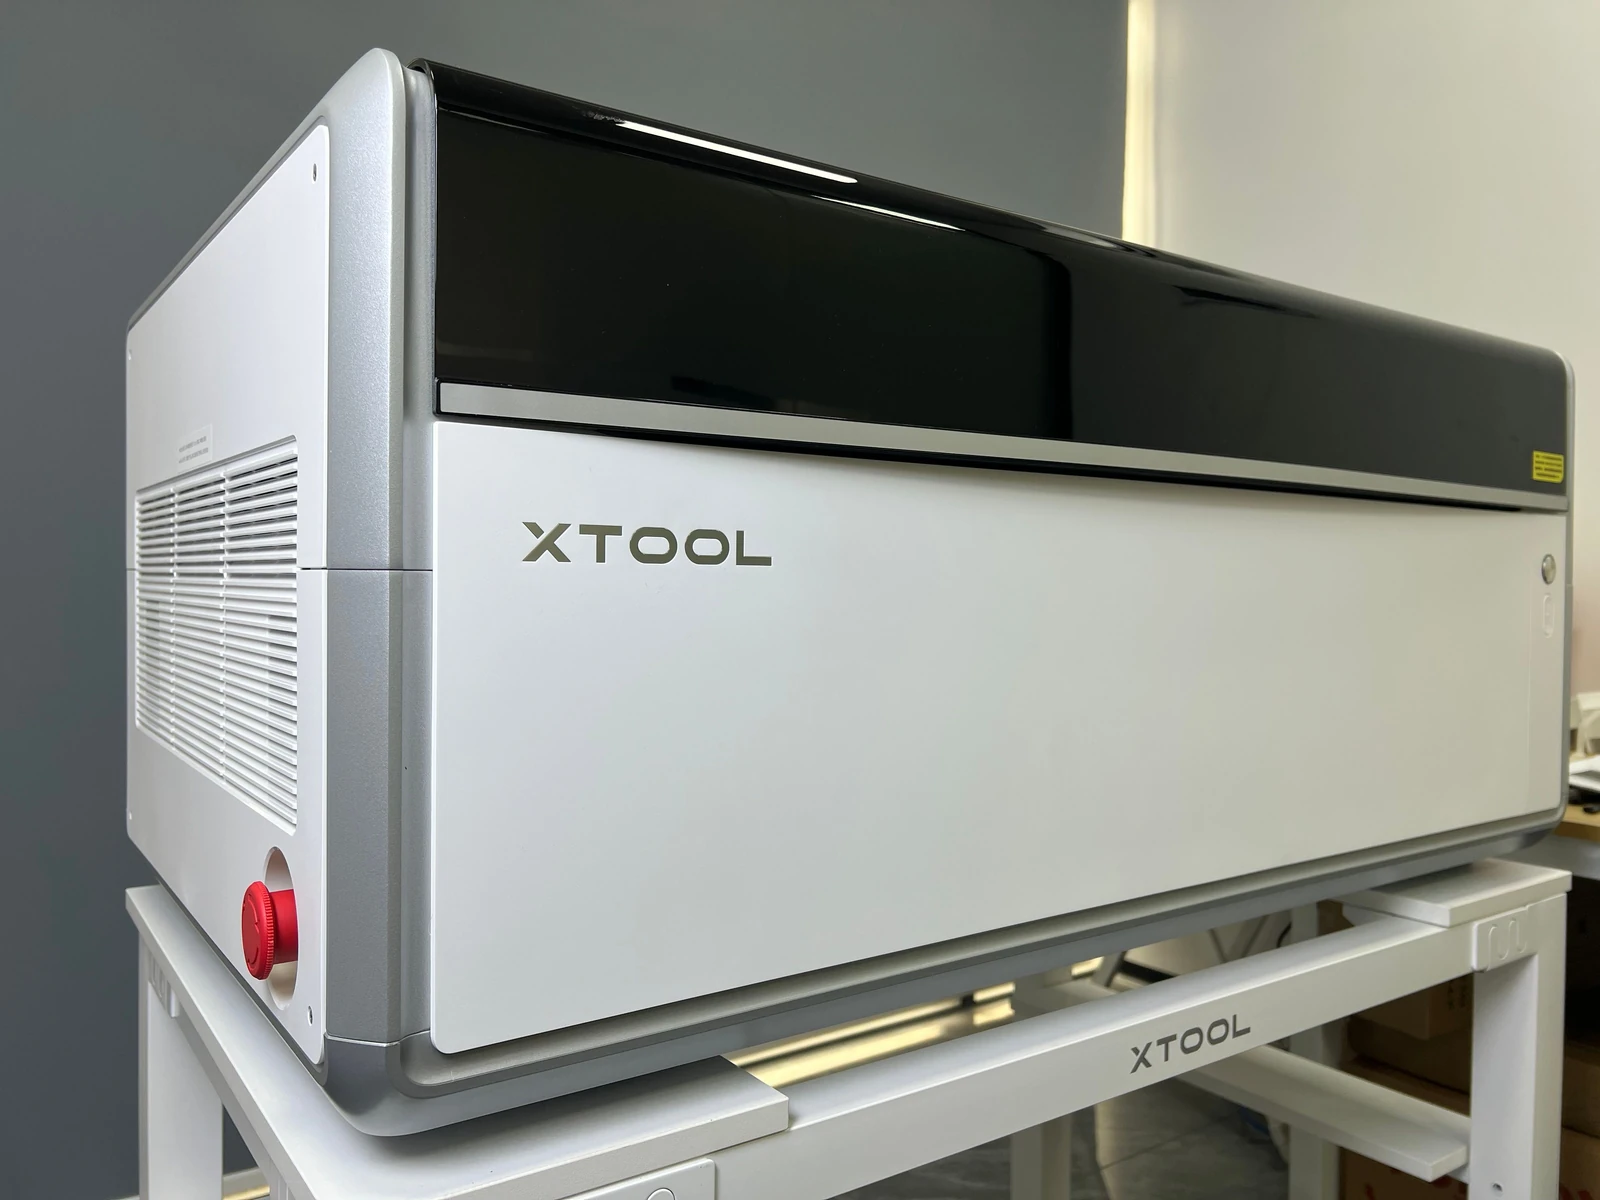
I’ve used the X1 for several weeks, making wood, acrylic, and anodized aluminum pieces. Combining engraving and cutting was useful, while the machine’s size and cleanup demanded space and time.
Quick verdict: Put the R1 first on your shortlist for mainly wood and clear-acrylic CO₂ work. Choose the X1 with the diode galvo when faster scanning or future metal and glass processes solve a specific need. Budget for the required modules, and allow for calibration when physically changing a backpack.
xTool supplied the X1 review unit and accessories. Purchase links may earn a commission.

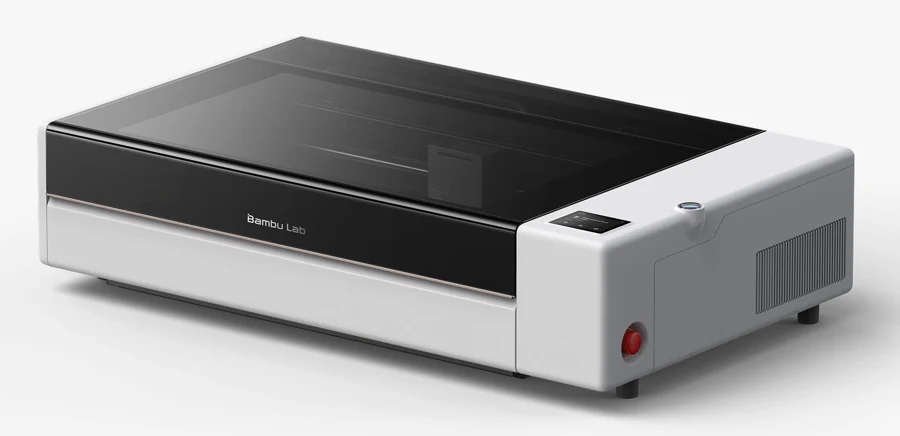
Table of Contents
- xTool X1 vs Bambu R1: Specs at a Glance
- xTool X1 vs Bambu R1: Prices and Upgrade Costs
- xTool X1 and Bambu R1 Materials: Wood, Acrylic, Photos, and Metal
- xTool X1 Galvo Speed, Bambu R1 Gantry Speed, and Work Area
- Bambu R1 Automatic Alignment vs xTool X1 Backpack Calibration
- xTool X1 and Bambu R1: Studio, Suite, and LightBurn
- Choose xTool X1 or Bambu R1 Around Your Next Three Projects
- xTool X1 vs Bambu R1 FAQ
xTool X1 vs Bambu R1: Specs at a Glance
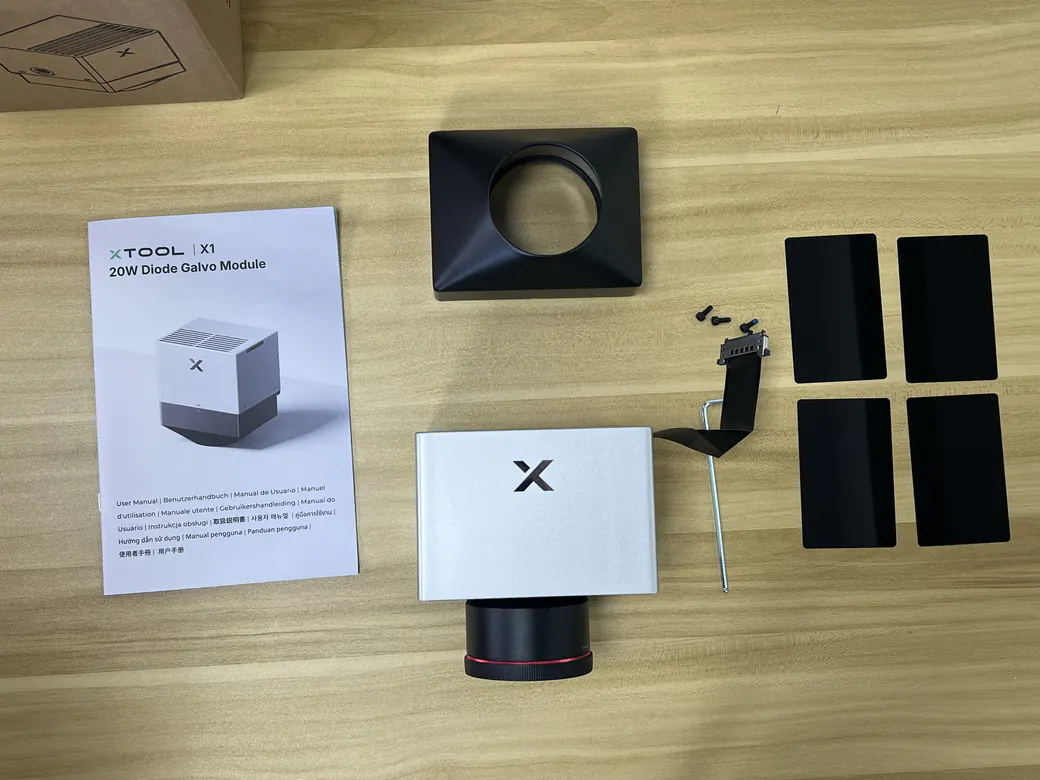
The base X1 is CO₂-only. The diode galvo costs extra. Fiber, MOPA and UV sources also require that galvo module, so your selected bundle determines the available processes.
| Feature | xTool X1 | Bambu Lab R1 |
|---|---|---|
| Included laser | 55W CO₂ | 55W CO₂ |
| Expansion | Optional 20W diode galvo, then compatible 30W fiber, 60W MOPA, or 5W UV source | Dedicated CO₂ system; no equivalent backpack expansion offered |
| Standard flat processing area | Up to 615 × 320 mm for an individual source | 600 × 300 mm |
| Combined-source area | 527 × 297 mm when CO₂ is included | No corresponding multi-source mode |
| Published maximum speed | CO₂ travel: 600 mm/s; optional galvo engraving: 6,000 mm/s | Engraving: 1,000 mm/s |
| Main software | xTool Studio | Bambu Suite |
| LightBurn workflow | Currently unsupported on X1 | Version 2.2 exports compatible G-code; Suite sends the job |
The maximum flat area depends on the mode. Batch jobs, embossing and inner engraving have their own processing limits.
xTool X1 vs Bambu R1: Prices and Upgrade Costs
The R1 is the lower-priced CO₂ base in this US lineup. X1 bundles add galvo engraving and optional external sources. All prices below are for new machines in the specified configurations, before checkout taxes or additional offers.
US Base Machines and Bundles
| Machine or configuration | US listed price (November 13, 2026) | What the figure represents |
|---|---|---|
| Bambu Lab R1 | $2,499 | R1 base machine with the standard short-focus lens |
| X1 Single CO₂ Standalone | $3,399 | Public listed configuration price |
| X1 CO₂ + Diode Galvo Standalone | $3,999 | Public listed configuration price |
| X1 CO₂ + Diode Galvo + 30W Fiber Standalone | $5,799 | Public listed configuration price |
| X1 CO₂ + Diode Galvo + 60W MOPA Standalone | $6,679 | Public listed configuration price |
| X1 CO₂ + Diode Galvo + 5W UV Standalone | $6,499 | Public listed configuration price |
Check package contents and destination-specific shipping for the R1 US base configuration and X1 configurations.
The X1 rows show complete machine configurations. You cannot subtract the base price and assume the result is the price of buying a backpack separately later. Bundle pricing and separate-source pricing can differ.
Rotary, Conveyor, and Extraction Accessories
For X1 expansion, the chain is X1 base → 20W Diode Galvo Module → compatible external source. Adding a MOPA, fiber, or UV backpack to a CO₂-only machine requires that galvo module too.
A rotary, conveyor, stand, purifier, and other accessories also depend on the package. On the R1, the conveyor, riser, rotary, and medium- or long-focus lenses are separate options. Its thickest advertised cuts have lens requirements, so the maximum-thickness headline does not describe every out-of-box setup.
For a CO₂-only order, start with either base row above and confirm exhaust routing, lens and stock size. For an X1 metal order, use the matching three-source Standalone row, which includes the diode galvo. R1 rotary work also requires the riser base. A stand, conveyor or purifier needs its own package check; do not assume these are included in a machine-and-source price.
xTool X1 and Bambu R1 Materials: Wood, Acrylic, Photos, and Metal
Wood and clear acrylic are sensible reasons to consider either CO₂ machine. The X1 becomes more interesting when you need another wavelength or a galvo engraving workflow. Choose that extra source around a material and a result you can name.
Wood and Acrylic Cutting
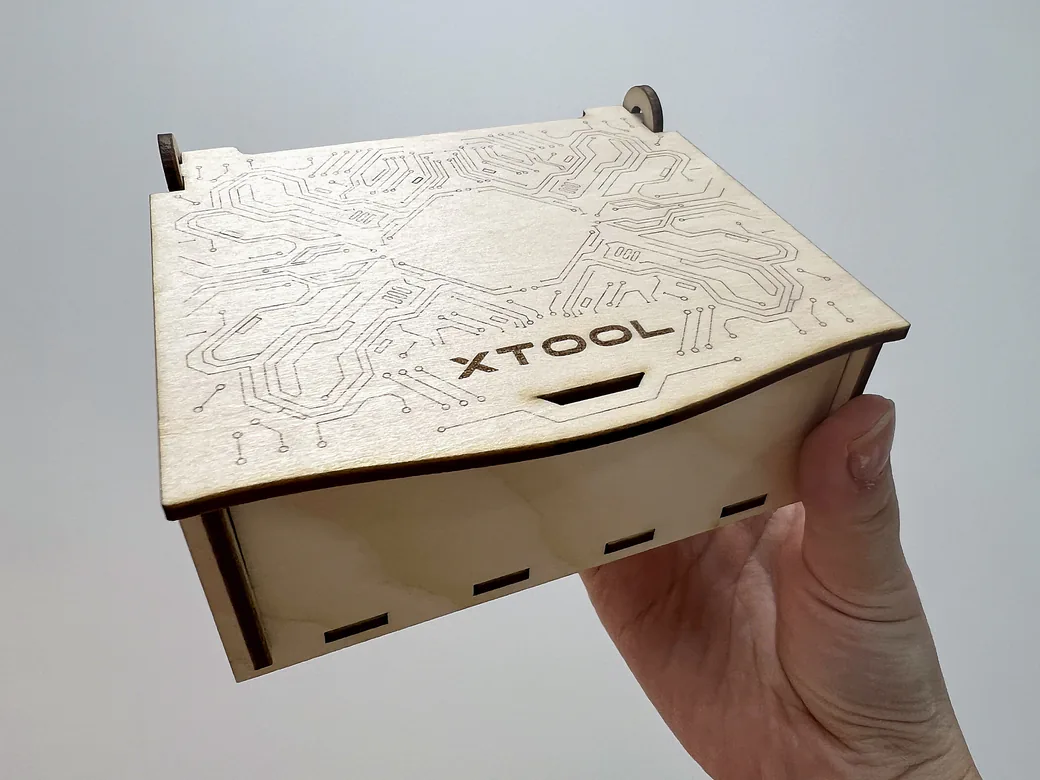
Our X1 projects include successful basswood cuts and 3 mm black and white acrylic cuts. The acrylic edges were smooth.
The R1 needed multiple passes for cleaner cuts in 6 mm acrylic and plywood at 80% power in one cutting test. A particular half-inch plywood sample still resisted a single-pass cut at full power and the slowest tested setting.
If you’re making layered ornaments, signs or box parts, I’d ask for a sample cut in the sheet material you plan to use. Glue, wood species, thickness, focus and air assist can all change the result, so that sample is more useful than a maximum-thickness claim.
xTool X1 Diode and CO₂ Photo Presets Produce Different Finishes
On the same basswood board, our X1 diode and CO₂ photo presets produced visibly different cat portraits. The diode result was darker, with stronger contrast. CO₂ produced a paler image with some fine whisker and fur lines easier to distinguish.
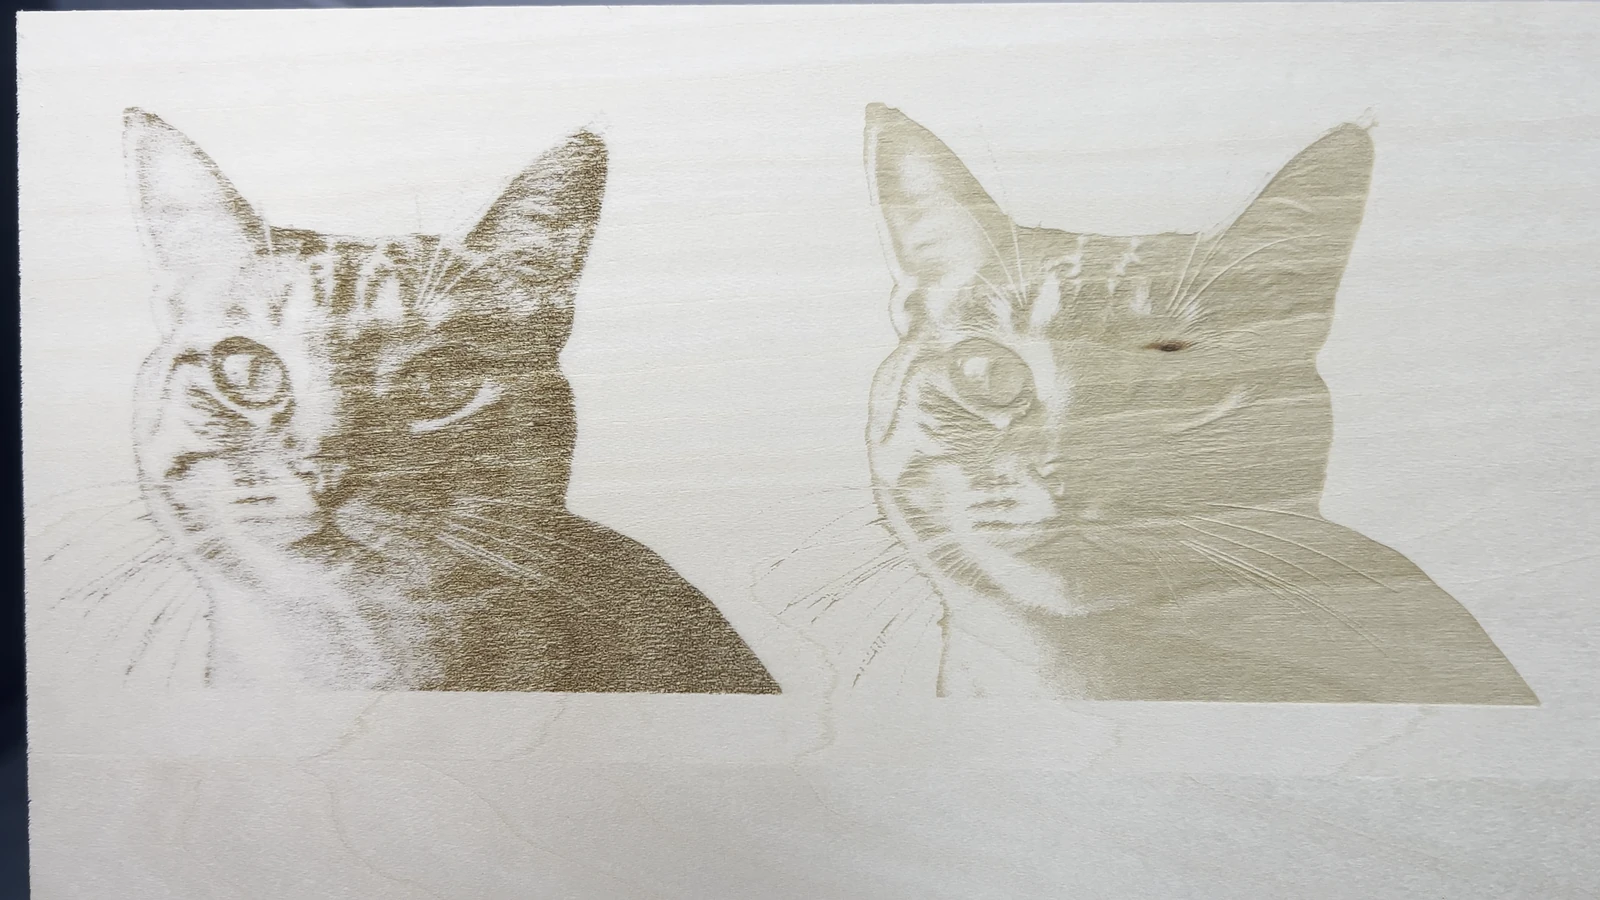
Left: 20W diode. Right: 55W CO₂. Same image on the same 3 mm basswood board, using each source’s default Studio photo preset.
These photos compare complete preset results, not power alone: the wavelength, optics and preset all changed. The full X1 hands-on review includes the project settings.
Try photo engraving on your intended material with the laser you already own before buying another source. In one slate test, four sources produced similar-looking results with unoptimized settings.
Metal Work with MOPA and Fiber
Removing a coating is different from deeply engraving bare metal. Both machines’ CO₂ sources can serve some coated-material jobs, while the X1’s optional fiber or MOPA configuration opens dedicated metal processing. UV adds another route for suitable glass work, including inner engraving under specific material and depth conditions.
Our black anodized aluminum cards gave the 60W MOPA a practical use: the lettering looked more continuous and the fills more even than the diode sample. The smallest 0.5 mm design-size text remained recognizable, with fuzzy, jagged edges. This checks readability at that design size, without measuring dimensional accuracy.
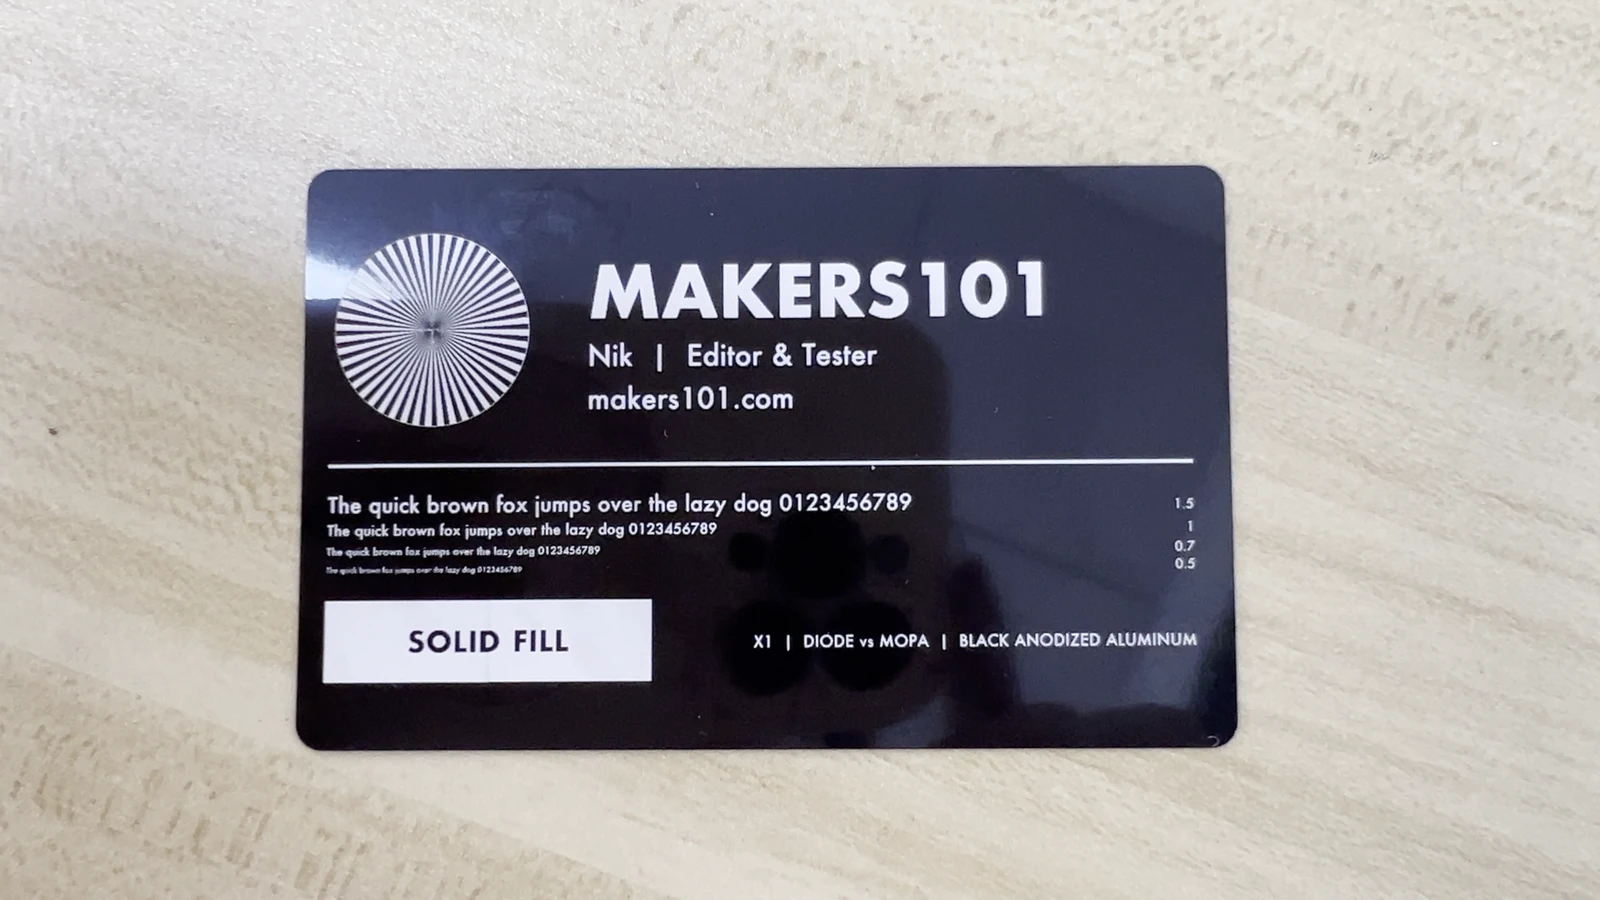
X1 60W MOPA sample. The smallest lettering still needs a close look.
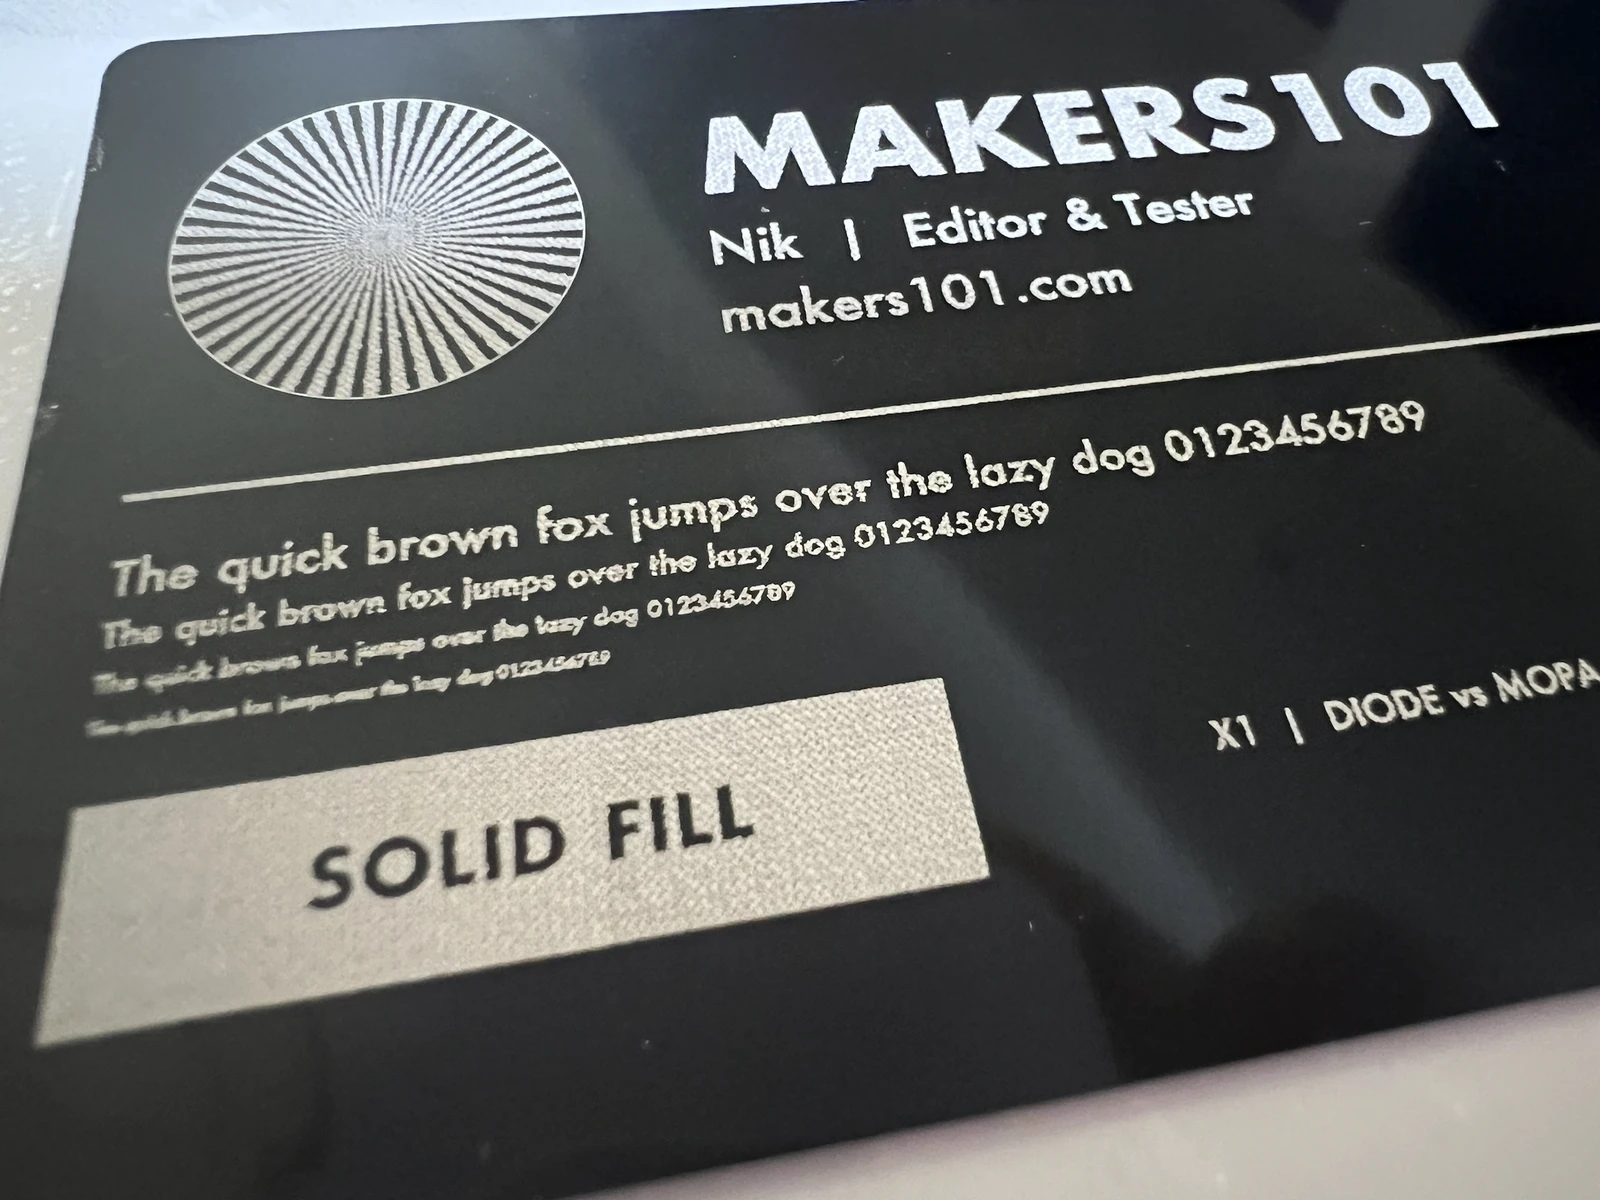
X1 diode comparison. Lighting and magnification differ between these photographs; this is a qualitative comparison.
For metal tags like ours, I’d start with the finish you want: coating removal, dark marking, color or deep relief. Your existing diode may already cover some surface-marking needs on anodized aluminum. I preferred the MOPA finish on these cards, but they do not demonstrate deep bare-metal engraving.
The optional sources support MOPA coin relief and UV glass inner engraving. A compatible fiber source also supports engraving brass. Choose the source for the material and finish you plan to make.
xTool X1 Galvo Speed, Bambu R1 Gantry Speed, and Work Area
X1’s galvo maximum is scanning speed. R1 moves a CO₂ head. The two specifications describe different processing systems and cannot establish a sixfold difference in finished-project time.
xTool X1 Galvo Scanning vs CO₂ Cutting
The X1 coordinates local scanning by the galvo mirrors with gantry movement to cover a larger design. CO₂ cutting follows its own gantry path, so an engraved-and-cut job spends part of its time on each system.
Separate machines are worth considering when metal and glass orders overlap. They can run in parallel; one X1 needs a hardware change to alternate its external sources.
Peak scanning speed excludes loading, calibration and cleanup, all of which occupy time between orders.

xTool X1 Combined-Source Working Area
The X1’s 615 × 320 mm single-source area becomes 527 × 297 mm for combination processing that includes CO₂. Some embossing and UV inner-engraving modes impose other limits. If you need engraving and cutting to register on one large panel, check that shared area before buying.
The R1 provides a standard 600 × 300 mm workspace. Its optional conveyor handles stock up to 3,000 mm long; the X1 conveyor’s processing area reaches 610 × 1,220 mm. Leave enough space to support the material around either machine.
A long sign can fit the bed’s width and still exceed its usable depth. Check both design dimensions before adding a conveyor.
Bambu R1 Automatic Alignment vs xTool X1 Backpack Calibration
R1 automatically aligns its CO₂ mirrors. X1 physical backpack changes involve optical-path alignment, focusing and flying-galvo calibration. That makes how often you change sources part of the buying decision.
Bambu R1 Mirror Alignment and Camera Placement
R1’s advertised optical-alignment cycle is about a minute. A sensor measures the beam position, and motorized mirrors correct the path, replacing manual mirror adjustments.
An early R1 review sample had corner-positioning errors, although its close-up-camera contour work was useful. Check placement with a small test at the intended position before committing a finished piece.
Selecting an xTool X1 Source vs Replacing a Backpack
With the diode and MOPA installed, selecting a source for each layer in Studio was convenient in our X1 setup. Physically changing the backpack requires alignment and calibration.
Physical source changes can involve awkward fasteners, loose cables and a full calibration sequence. One timed changeover took about an hour; that is a single test, not a fixed swap time. Budget for calibration if you often alternate MOPA and UV.
Flying-galvo calibration needs official xTool cards. Leaving one external source installed avoids repeated calibration between orders.
Installation Space, Extraction, and Cleanup
Allow 1,300 × 1,000 × 900 mm for the X1 installation, including space to open the lid fully. Leave rear and side clearance for cooling, the backpack and the exhaust hose.
In our X1, offcuts collect at the bottom of the enclosure because there is no removable waste tray. They need regular removal, so leave access for cleaning as well as loading.
Let smoke clear before opening the lid. Check whether your fan and purifier start with the machine or need their own switch, and plan where the hose will run.
Keep an operating laser supervised, including when automatic sensors or fire protection are fitted.
xTool X1 and Bambu R1: Studio, Suite, and LightBurn
The X1 currently uses xTool Studio for machine control. The R1 has a supported LightBurn export workflow, but you still use Bambu Suite to send the file. Existing LightBurn users should check that distinction before choosing hardware.
xTool X1 Studio and LightBurn Compatibility
LightBurn does not currently control the X1. Use xTool Studio for processing; compatibility on another xTool model does not carry over.
In our X1 workflow, Studio’s camera capture and focusing helped prepare a job, but the artwork still needed positioning. Those functions reduced setup steps without removing the need to check the layout against the material.
Bambu R1 LightBurn 2.2 Export and Transfer
To run a supported flat-material R1 job from LightBurn 2.2:
- Install LightBurn and import Bambu’s device configuration.
- Prepare a supported flat-material job and set its processing parameters.
- Export the compatible G-code file.
- Import and send it through Bambu Suite, then start at the machine.
The R1’s LightBurn 2.2 export workflow does not include rotary processing or direct machine control. Bambu Suite is still required to send the job.
Choose xTool X1 or Bambu R1 Around Your Next Three Projects
To narrow this down, I’d write out your next three projects with their materials, finished sizes and engraving effects, then assign a source to each. On the X1, engraving inside glass or deeply removing metal requires a suitable optional source. If all three projects are CO₂ jobs, you can leave the extra wavelengths off your order for now.
| Your work | Configuration to evaluate | Main check before ordering |
|---|---|---|
| Mainly wooden ornaments, acrylic signs, and boxes | R1 CO₂ or X1 Single CO₂ | Sample cut, extraction, complete order price |
| Detailed wood or dark-acrylic engraving alongside cutting | X1 CO₂ + Diode Galvo | Shared working area and acceptable photo finish |
| Bare-metal marking or deeper metal work | X1 with the appropriate fiber or MOPA source, or a dedicated metal laser | Required galvo hardware, finish, and depth on your material |
| Glass inner engraving | X1 galvo + UV source or a dedicated UV machine | Compatible glass, depth, and usable inner-engraving area |
| Frequent alternating metal and glass orders | X1 with planned changeovers, or separate dedicated machines | Allow for changeover calibration; one reviewer reported about an hour. Check whether jobs must run in parallel. |
For a workshop mixing wood and metal, our wood-and-metal laser selection guide can help you compare a modular setup with separate machines.
xTool X1 vs Bambu R1 FAQ
Is the Bambu R1 Enough for Wood and Clear Acrylic?
Its 55W CO₂ source is designed for these materials, so you do not need an X1 metal or UV backpack for ordinary wooden ornaments or acrylic signs. Check your required size and cut on the intended sheet. The X1 diode galvo adds a separate engraving workflow if that is part of the job; our laser wavelength guide explains the material differences.
Does Bambu R1 Require a Bambu 3D Printer?
No. R1 is a standalone CO₂ laser. It uses Bambu Suite and can process laser jobs without a Bambu 3D printer.
How Much xTool X1 Work Area Is Available for Combined Engraving and Cutting?
Combination mode that includes CO₂ uses 527 × 297 mm. The 615 × 320 mm maximum for an individual source does not carry over to that shared mode. For a panel that nearly fills the bed, check the combined footprint before laying out the design.
Can Bambu R1 Deep-Engrave Metal or Engrave Inside Glass?
R1’s CO₂ source engraves glass surfaces and marks suitable coated metals. Deep bare-metal engraving needs a suitable fiber or MOPA source. Glass inner engraving needs the X1’s optional UV source, compatible glass and the diode galvo module.
Does xTool X1 Single CO₂ Need the Diode Galvo Module for MOPA?
Yes. The 60W MOPA source needs the 20W Diode Galvo Module to deliver its beam to the workpiece. The same prerequisite applies to the compatible fiber and UV sources.
Can the Bambu R1 Use LightBurn Without Bambu Suite?
With LightBurn 2.2, export G-code and send it through Bambu Suite. This workflow supports compatible flat jobs; it does not provide direct machine control or rotary processing.
Is the xTool X1 Six Times Faster Than Bambu R1?
That calculation compares two maximum-speed specifications for different processing systems. Actual completion time depends on the job and its settings, with setup and finishing adding more time. A job dominated by CO₂ cutting has less opportunity to benefit from faster galvo engraving.
CERTAIN CONTENT THAT APPEARS ON THIS SITE COMES FROM AMAZON. THIS CONTENT IS PROVIDED ‘AS IS’ AND IS SUBJECT TO CHANGE OR REMOVAL AT ANY TIME.
Price details
Product prices and availability are accurate as of the date/time indicated and are subject to change. Any price and availability information displayed on Amazon.com at the time of purchase will apply to the purchase of this product.