Heads up — some of the links below are affiliate links. If you buy through them, I earn a small commission (at no extra cost to you), which helps cover the gear I test. Thanks!
- Top 10 Laser Engraving Pro Tips work best as a fixed sequence. Verify the stock and prepare the workspace, examine optics and focus, test one change on matching scrap, use Preview and Frame, then confirm placement. Log the complete winning setup and inspect the first piece before committing valuable material or a full batch.
- Confirm material safety. Start the exhaust. Prepare for fire.
- Inspect the lens and verify focal height before raising power. Test scrap first.
- Use LightBurn Preview and Frame to catch file and placement errors.
- Save every setting and examine the first piece from each new batch.
These ten pro tips address a familiar problem: your design can look perfect on screen and still come out faint, smoky, blurry, or slightly off-center. Several small problems can create the same ugly result.
Adding power is rarely the best first move. Extra heat can hide dirty optics, poor focus, wrong units, or a bad file while making scorching worse.
Use a better order: verify the material and safety setup, inspect the machine, test the settings, preview the file, then lock down placement. You will leave with a repeatable check for both engraving and cutting jobs.
Table of Contents
- Top 10 Laser Engraving Pro Tips: Your Two-Minute Preflight
- Laser Engraving Toolkit: What You Need Before Using These Pro Tips
- 1. Match the Laser Wavelength to the Material Before Copying Settings
- 2. Fix Laser Safety and Exhaust Before Chasing Engraving Quality
- 3. Clean Laser Optics and Set Focus Before Raising Power
- 4. Run a LightBurn Material Test for Every Material Batch
- 5. Tune Laser Speed and Power Together With Passes and Line Interval
- At a Glance: Laser Engraving Variables That Change Quality
- 6. Use Air Assist Differently for Laser Engraving and Cutting
- 7. Catch Wrong Modes and Double Cuts in LightBurn Preview
- 8. Use Masking and Surface Prep to Control Laser Smoke Stains
- 9. Build a Laser Engraving Jig for Repeatable Placement and Batches
- 10. Save a Laser Material Library and Maintenance Log
- Laser Engraving Quality Troubleshooting: What to Check First
- FAQ: Laser Engraving Pro Tips
- Better Laser Engraving Comes From Better Checks
Top 10 Laser Engraving Pro Tips: Your Two-Minute Preflight
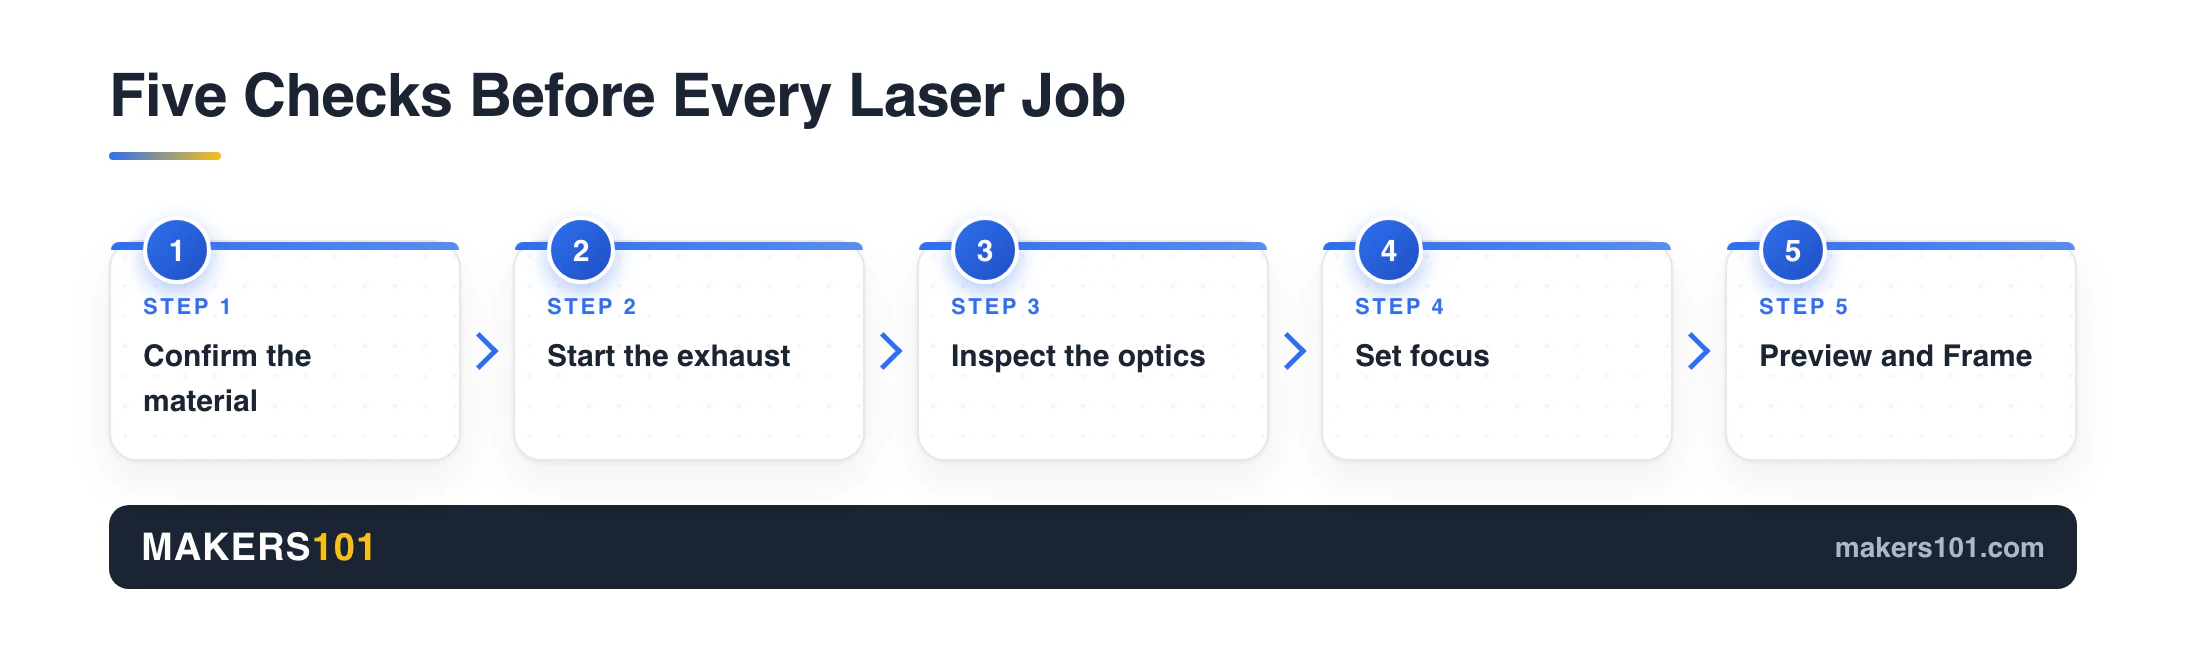
Run the same five checks before every job. This two-minute habit catches expensive mistakes while the laser is still off.
- Know the material. Confirm its type and coating. Check thickness and laser compatibility.
- Start the exhaust. Check airflow at the outlet and follow your machine’s startup procedure.
- Inspect the optics. Look for residue or visible damage.
- Set focus. Use the gauge, autofocus routine, or method specified for your machine.
- Preview and Frame. Confirm output paths and order. Check size and physical position.
Keep this order: begin with safety and material, move to optics and focus, then finish with software settings and placement. If a result fails, walk backward through that sequence instead of changing three controls at once.
Laser Engraving Toolkit: What You Need Before Using These Pro Tips
You need a few basic tools and a known-safe workspace. A larger accessory pile cannot compensate for unknown material or poor exhaust.
| Item | Why you need it | When to use it | Safety note |
|---|---|---|---|
| Manufacturer manual | Confirms focus and maintenance limits | Setup and troubleshooting | Follow it over generic advice |
| Material label or SDS | Identifies composition and hazards | Before processing a new material | Do not laser unknown stock |
| Same-batch scrap | Makes settings tests meaningful | Before the finished piece | Match thickness and surface |
| Focus and cleaning tools | Restores a predictable beam | Before tuning power | Use approved cleaning methods |
| Exhaust and fire plan | Controls fumes and fire response | Every job | Never leave the laser unattended |
Protective eyewear must match the laser wavelength, optical density requirement, and machine instructions. The range printed on a lens matters more than its color. Enclosures and interlocks also remain part of the protection system, as OSHA’s laser-control guidance explains. Use only protection specified by the laser or enclosure manufacturer; this article does not certify a particular pair of glasses.
1. Match the Laser Wavelength to the Material Before Copying Settings
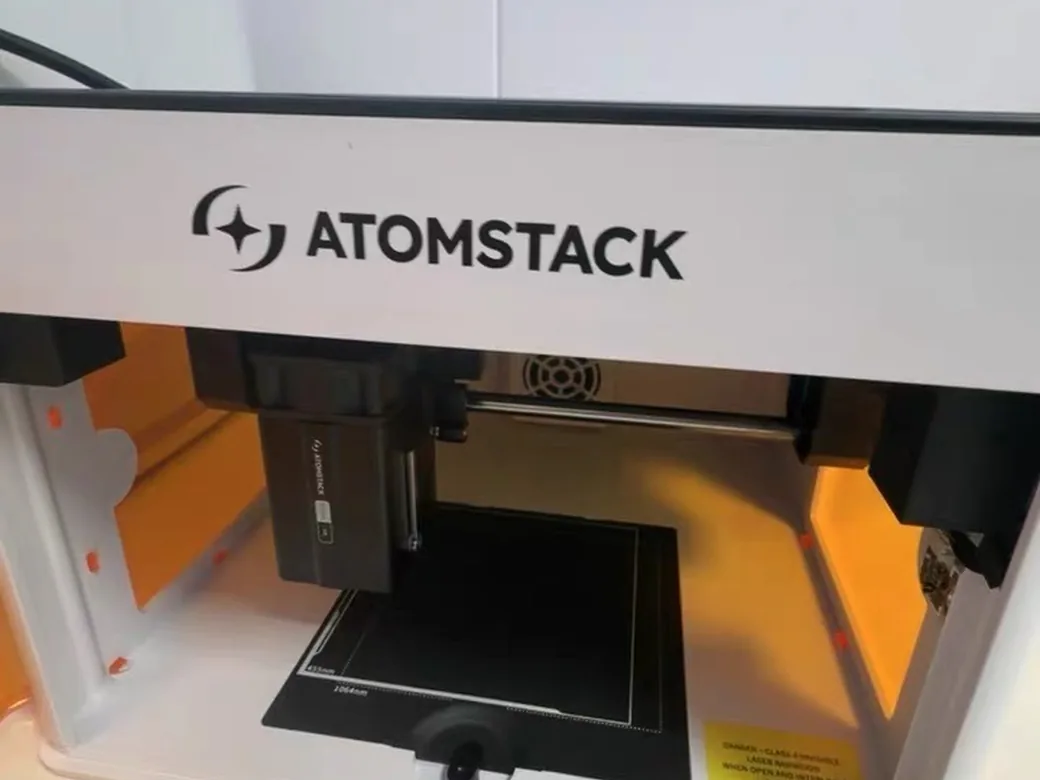
A speed-and-power recipe cannot overcome poor wavelength absorption. It also cannot make an unsafe material safe.
Blue diode lasers, CO2 machines, and fiber or infrared sources interact with materials differently. A blue diode can remove the dyed surface on some anodized aluminum, for example, while bare aluminum may show almost no direct mark under the same machine. A marking compound changes that surface interaction, so its result should never be described as direct deep engraving.
Use a material-first check:
- Read the stock label and supplier data.
- Confirm the exact coating or adhesive.
- Check the machine maker’s allowed-material list.
- Find the Safety Data Sheet when composition is unclear.
- Test scrap only after the material passes the safety check.
PVC and vinyl are clear stop signs. The University of Illinois laser-cutter safety guide warns that PVC can release chlorine gas and corrode machine parts when cut. Unknown faux leather can also contain vinyl, so a product name like “laser leather” is not enough evidence.
If you are unsure which source fits a material, use our diode vs CO2 vs IR laser guide. Choose the laser-material pair first. Settings come second.
2. Fix Laser Safety and Exhaust Before Chasing Engraving Quality
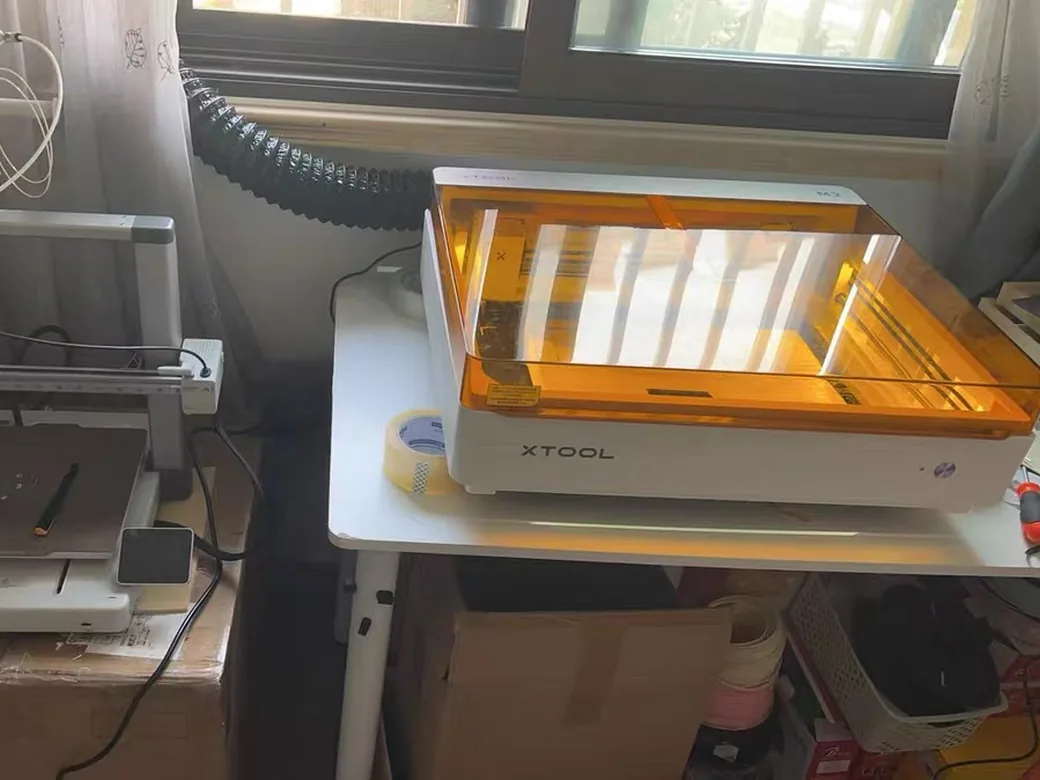
Stop the job if the enclosure, exhaust, material, or fire plan is uncertain. A clean engraving is not worth an unsafe room.
Laser radiation can injure eyes and skin, and reflected light can remain hazardous. The FDA’s laser safety FAQ notes that Class IV products can cause direct or reflected-beam injuries plus fire risk. A fully enclosed machine may use controls that reduce accessible exposure, but those controls only help when the enclosure and interlocks work as designed.
Smoke needs its own plan. Use the dedicated exhaust or manufacturer-approved control specified for your system. A filter running beside the machine, or the absence of a strong smell, does not prove the air is safe.
Before pressing Start, confirm that you can answer yes to each question:
- Is the enclosure or guarding in place?
- Is the exhaust running and routed correctly?
- Is the material known and approved?
- Can you stop the machine immediately?
- Will you remain with the machine for the full job?
- Is the work area clear, with the appropriate fire response ready?
One maker’s retrospective after more than 800 laser projects began with a first cut that filled the room with smoke. Ventilation belongs at the start of the workflow. Delaying it creates risk.
3. Clean Laser Optics and Set Focus Before Raising Power
A dirty lens or wrong focal distance can make a proven setting look weak. Correct both before adding heat.
Turn the machine off and let the optics cool. Then follow the manufacturer’s cleaning method, using only approved supplies. Inspect protective windows and lenses for residue, chips, or coating damage before reinstalling anything.
Set focus with the gauge or autofocus routine made for your machine and lens. Don’t borrow a focus distance from another lens. A small focus error spreads the beam, which reduces energy density and softens fine detail.
Run a small known pattern after cleaning and focusing. If the result returns to normal, your old power setting was never the problem.
Laser power also tells you little about detail by itself. In a documented 800-project retrospective, the maker preferred a 10W diode head for some photo engraving because its smaller spot produced finer detail than a higher-power module on that setup. Test that principle on your hardware. Every 10W laser can differ.
CO2 owners may also need mirror-alignment checks. That procedure is machine-specific and can expose hazardous radiation. Use the manufacturer’s instructions. Generic shortcuts can be unsafe.
4. Run a LightBurn Material Test for Every Material Batch
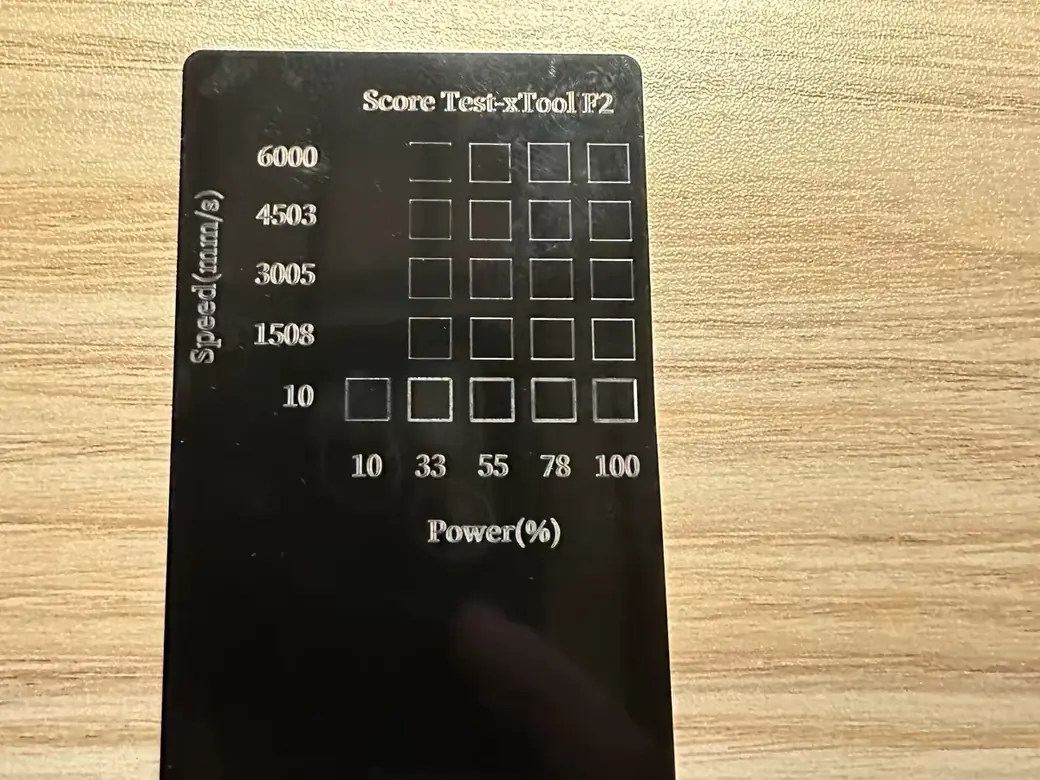
A labeled test grid on matching scrap gives you better settings than a screenshot from someone else’s machine. Repeat the test when the material, coating, thickness, lens, or laser changes.
LightBurn includes a Material Test generator under Laser Tools → Material Test. Its official guide lets you vary two parameters across a grid. Available choices include speed and power plus interval or passes. Frequency and Q-pulse width appear only on supported systems.
Use this short process:
- Place scrap from the same sheet or batch on the bed.
- Choose two variables, such as speed and power.
- Set a conservative range from manufacturer guidance.
- Check every unit, especially
mm/sversusmm/min. - Preview the grid, then Frame its location.
- Run the test while supervising the machine.
- Circle the best cell and write the date and material batch on it.
Units deserve their own check. LightBurn warns that the same number in millimeters per second is far faster than in millimeters per minute. A unit mix-up can deliver far too little heat or dangerously too much.
Wood grain and moisture change absorption. Adhesive plus paint or another coating can change it again. One anodized-aluminum test in our private research produced a different best range from settings found online. A second batch also behaved differently, which is why the physical sample matters as much as the saved preset.
5. Tune Laser Speed and Power Together With Passes and Line Interval
Engraving quality depends on how much energy reaches each area. Speed and power change that result. Passes and focus also shape it. Line interval adds another control.
- Speed controls how long the beam stays over an area.
- Power controls the commanded laser output within your machine’s limits.
- Passes repeat the path and add more exposure.
- Line interval sets the distance between raster scan lines.
- Focus changes spot size and energy density at the surface.
Change one variable per test. If you raise power and slow the machine together, you will not know which change fixed the mark or caused the burn.
| Symptom | First variable to inspect | Then check | Avoid |
|---|---|---|---|
| Faint mark | Focus and clean optics | Speed/power test | Blindly adding passes |
| Scorched wood | Delivered heat | Airflow and masking | Changing three controls |
| Muddy photo | Line interval | Focus and image mode | Assuming more lines help |
| Visible scan gaps | Line interval | Focus and material flatness | Copying another lens value |
The LightBurn Interval Test guide explains why tighter spacing does not guarantee better detail. Lines that overlap too much can darken the image, blur detail, and increase runtime. Wide spacing can leave visible gaps.
Use magnification and good light when comparing samples. Select the interval where lines meet cleanly without obvious gaps or excessive overlap, then confirm that choice with the actual artwork.
At a Glance: Laser Engraving Variables That Change Quality
Use this table when a result changes unexpectedly. It shows which relationships to test. It provides no universal preset.
| Variable | What it changes | Too little | Too much | Best check |
|---|---|---|---|---|
| Focus accuracy | Spot size and detail | Soft, weak mark | Same failure in opposite direction | Manufacturer focus routine |
| Speed | Exposure time | Darker or burned result | Faint or incomplete mark | Material Test grid |
| Power | Energy command | Faint mark | Scorching or melting | Material Test grid |
| Passes | Repeated exposure | Incomplete depth/cut | Wider heat damage | One-pass comparison |
| Line interval | Raster overlap | Visible gaps | Muddy image, longer runtime | Interval Test |
| Air assist | Smoke and debris | Staining or flare-up | Lost detail on some jobs | Controlled A/B sample |
| Material batch | Absorption and consistency | Unpredictable result | Not applicable | Same-batch scrap |
| Optics condition | Energy reaching material | Weak, uneven output | Not applicable | Inspection and clean test |
Read “too little” and “too much” in context. Speed works in the opposite direction from power: less speed usually means more exposure at each point.
6. Use Air Assist Differently for Laser Engraving and Cutting
Air assist should control flame and smoke while clearing debris. The useful flow depends on your laser and nozzle. Your material and operation matter too.
Cutting often benefits from stronger, well-directed airflow. It clears smoke from the kerf and can reduce flare-ups and char. For fine engraving, include a lower-flow sample in your comparison. Judge its detail and contrast, then look for residue on the actual material.
Test the effect instead of following a universal on/off rule:
- Prepare two matching scraps.
- Keep focus and speed identical. Don’t change power, passes, or artwork.
- Change only the air setting.
- Compare flame behavior, edge cleanliness, smoke stain, and detail.
- Save the winning air setting with the rest of the preset.
An experienced maker reported cleaner cuts after replacing a weak built-in CO2 pump with a stronger external air source. That result proves airflow can matter. It does not tell you the correct pressure for a different nozzle or machine.
The adjustable pump below is a general accessory. Compatibility still needs checking. Review the hose and nozzle, controller integration, power requirements, plus the laser maker’s guidance.

- 【Cut Deeper & Faster】- Ortur laser air assist is equipped with adjustable airflow from 0-30L/min to suppress smoke and dust touch the lens from…
- 【Wide Compatibility】- This air assist for laser cutter is compatible with 99% of the laser engravers on the market. It has a conversion tube, a…
- 【Clean Surface & Smooth Edge】- Ortur air assist pump uses air to quickly reduce the temperature of the cutting material surface, prevent excessive…
- 【Easy Installation】- Easy to install and use. Reference to the user manual, you can simply plug and use this air pump, no need to buy additional…
- 【All Metal Structure Design】- This air pump is in all metal structure design, which has high strength, relatively stable chemical properties…
7. Catch Wrong Modes and Double Cuts in LightBurn Preview
Preview the job and inspect its paths before sending anything. This catches wrong modes, hidden shapes, bad order, and duplicate lines without wasting material.
LightBurn’s common output modes create different results:
- Line follows vector paths. Use it for cutting, scoring, or vector outlines.
- Fill scans across closed shapes. Use it for solid text and filled artwork.
- Fill + Line fills the shape, then traces its outline.
Open Preview and play the simulation. Black paths show where the laser will fire, while red paths show travel moves. Look for unexpected outlines, long jumps, a second pass around a shared edge, or a layer running earlier than planned.
Duplicate vectors deserve special attention. Two lines occupying the same place can look like one line on screen while forcing the laser to cut twice. LightBurn’s Remove Overlapping Lines option can prevent that repeated path, but you should still inspect the result after changing optimization settings.
For complex files, select by layer and send only the objects you intend to run. LightBurn can also calculate simple values and unit conversions inside numeric fields. Those shortcuts save time only after you confirm the final units.
Finish with Frame. Preview checks the digital route; Frame checks where that route sits on the real material.
8. Use Masking and Surface Prep to Control Laser Smoke Stains
Use laser-safe paper masking when smoke residue would spoil the surface. Check the mask material and adhesive. Test its removal method on scrap too.
Apply the mask smoothly with no bubbles or lifted edges. Engrave through it, let the material cool, then peel it away before gentle cleanup. This works especially well on wood surfaces where smoke can settle around light engraving.
Avoid vinyl-based masking. A material used as protection still passes through the beam, so it must meet the same safety standard as the workpiece.
Surface treatments can also change contrast. Baking-soda washes, marking compounds, and other pretreatments have material-specific chemistry and handling requirements. Treat each as a separate experiment, follow its safety instructions, and never use a coating to justify lasering unknown stock.
Masking controls residue. It cannot repair poor focus, excessive heat, or weak exhaust.
9. Build a Laser Engraving Jig for Repeatable Placement and Batches
A fixed jig and stable origin beat centering every blank by eye. They also make a batch easier to inspect and repeat.
Secure a sacrificial board or fixture so it cannot shift. Frame the part outline and create safe locator marks. Place one blank, then run a first article before loading the full batch.
The exact coordinate method depends on your machine. Gantry systems may use Current Position, User Origin, or Absolute Coordinates. Galvo workflows handle positioning differently, so keep one documented origin method for each device.
A practical batch workflow looks like this:
- Secure the fixture to the bed.
- Frame or mark the blank locations.
- Place one item and run the first article.
- Check position and contrast. Inspect the surface finish.
- Lock the origin and load the remaining blanks.
- Recheck the first item from every new material batch.
One anodized-card workflow used a secured board with burned locator lines so each card returned to the same coordinates. The next batch still showed a surface difference. The fixture preserved position, while the first-article check caught the material change.
For multiple items, leave enough spacing for warped blanks and fixture edges. Framing a full array is cheaper than discovering that the last tumbler or card sits outside the usable field.
10. Save a Laser Material Library and Maintenance Log
Record the complete setup behind every good sample. A note that says “30% power” cannot reproduce a result by itself.
Save these fields together:
- Laser machine/source and lens
- Material identity: supplier, batch, coating, thickness
- Focus method and focal position
- Speed value and unit
- Power/passes plus line interval and image mode
- Air-assist setting and exhaust setup
- Date and result photo plus maintenance state
LightBurn’s Material Library can organize tested cut settings for reuse. Give each preset a descriptive name, then keep a physical or photographed test tile beside the record. The sample shows texture and contrast that a number cannot capture.
Maintenance belongs in the same history. A setting may drift as the lens gathers smoke film, the bed collects debris, exhaust flow weakens, or mechanical parts loosen. Follow the machine manual for cleaning and service intervals, then note each change.
LightBurn’s Start Here function can sometimes rescue an interrupted job. Use it only when the material and coordinate reference have not moved, and confirm the restart in Preview. If either moved, rebuild the reference. Frame again before restarting.
Laser Engraving Quality Troubleshooting: What to Check First
Diagnose in order and change one variable at a time. The table below points you to the first useful check.
| Symptom | First check | Next check | Avoid |
|---|---|---|---|
| Faint everywhere | Lens and focus | Units, speed, power | Adding passes immediately |
| Dark or scorched | Speed/power exposure | Air and masking | Raising power again |
| Muddy photo | Line interval | Focus, image mode | Assuming higher LPI wins |
| Horizontal gaps | Interval and flatness | Belt/motion system | Editing the artwork first |
| Shifted placement | Frame and origin | Jig movement | Re-running without reference |
| Double-burned edges | Duplicate vectors | Cut order | Treating it as a focus issue |
| Results worsen over time | Optics and exhaust | Bed and maintenance log | Rebuilding every preset |
| Smoke remains indoors | Exhaust path and material | Filter condition | Trusting odor alone |
This sequence keeps causes visible. A clean lens may fix every saved preset at once, while random power changes create eight new settings with the same dirty optic.
If the problem follows one material batch, return to Tip 4. If every material changes, inspect the machine and exhaust before rebuilding your library.
FAQ: Laser Engraving Pro Tips
What are some tips and tricks for successful laser engraving?
A useful routine for applying the Top 10 Laser Engraving Pro Tips is straightforward. Verify the material and start the exhaust. Clean the optics and set focus, then run a same-batch test grid. Preview and Frame the file before starting, then save the full setup with units and a result photo.
How do you improve laser engraving quality?
Begin with an optics inspection and a fresh focus check. Then test speed and power, refine line interval, compare airflow, and inspect the artwork for wrong modes or duplicate paths. Adjust a single control in each comparison so you can identify the cause.
What are the best things to laser engrave?
Choose flat, consistent blanks that your laser manufacturer approves. Common examples include unfinished wood or suitable acrylic. Slate, coated metal, and anodized aluminum can also work when the laser wavelength fits. Test scrap from the actual batch before using a finished item.
What are the top five laser engravers?
The useful shortlist changes with your material and job. A diode, CO2, fiber, or UV machine may lead a different category. Our best laser engravers by material and use guide separates those choices instead of forcing one overall ranking.
Should air assist be on when laser engraving?
Set airflow high enough to clear fumes and suppress flare-ups, then inspect detail and staining. Cuts commonly need more airflow. For fine engraving, compare a lower-flow sample on the actual material. A universal switch position doesn’t exist.
How often should laser optics be cleaned?
Inspect optics at the interval specified by the manufacturer and whenever output changes. Smoke-heavy materials, weak exhaust, and frequent use can shorten that interval. Never clean hot optics or use an unapproved chemical.
What speed and power should I use for laser engraving?
Use the manufacturer’s guidance, confirm whether speed is entered per second or per minute, and run a LightBurn Material Test on matching scrap. Record the laser source and lens with the winning sample. Add material details and speed units. Save power, passes, interval, plus the air setting.
Why does my laser engraving look blurry, uneven, or muddy?
Inspect the optics and repeat the focus check. Check material flatness too. If those pass, test scan spacing and the selected image-processing mode, then check the machine’s belt or motion system according to its manual. Raising power can make a focus or motion problem darker without making it sharper.
Is it safe to use a laser engraver indoors?
Indoor use requires the enclosure or guarding, exhaust or exposure control, known-safe material, fire readiness, and supervision required in the machine manual and under local rules. A desktop filter, safety glasses, or the absence of odor cannot prove the complete setup is safe.
Better Laser Engraving Comes From Better Checks
Cleaner laser engraving comes from controlling variables in the right order. One magic preset will never replace that process.
Before the job: confirm the material and laser match, start the safety systems, inspect the optics, set focus, and test matching scrap.
Before pressing Start: Preview the paths, remove duplicate lines, choose airflow and masking deliberately, Frame the job, and confirm the jig or origin.
After the job: label the sample, save every setting with its units, examine the initial result whenever the stock batch changes, and record any maintenance change.
Try one small challenge on your next project. Change one variable, circle the best test square, photograph it, and save the complete setup. Your goal is a process that makes the second attempt predictable.
If your machine combines several laser sources, learn how diode, fiber, MOPA, or UV laser modules change the material relationship. The same disciplined checks still apply.