
Heads up — some of the links below are affiliate links. If you buy through them, I earn a small commission (at no extra cost to you), which helps cover the gear I test. Thanks!
Last updated: August 2026
If you’re looking for an XTC-3D alternative, you probably want one of three things: a smoother print, a sealed print, or a paint-ready surface without paying for a specialty coating. That choice matters. Epoxy, filler primer, UV resin filler, solvents, and better filament all solve different problems.
The mistake is treating them as one big group.
Table of Contents
- How I’m Treating the Evidence
- At-a-Glance: XTC-3D Alternatives by Use Case
- Method Specs at a Glance
- Quick Decision Workflow
- Best XTC-3D Alternative by Budget and Time
- How to Test a Generic Epoxy Substitute
- What XTC-3D Actually Does
- Best Overall Substitute: Thin Two-Part Epoxy Coating
- Best for Paint Prep: Filler Primer + Spot Putty
- Best Cheap DIY Method: UV Resin + Baby Powder
- Best Material-First Alternative: PETG, ABS, or ASA
- Best Solvent-Based Option: 3D Gloop or Ethyl Acetate
- What Not to Use an XTC-3D Alternative For
- Safety Checklist Before You Coat a Print
- My Recommendation: Choose by Finish, Not by Brand
- FAQ
- The nearest drop-in substitute is brush-on two-part epoxy. Use it when you need gloss or waterproofing, not when you need crisp tiny details.
- For painted props, filler primer plus spot putty is usually the smarter path. It sands back instead of building a thick clear shell.
- UV resin mixed with powder can work well on large smooth surfaces, but it takes multiple coats, curing, sanding, primer, paint, and clear coat.
- If heat resistance is the goal, don’t coat PLA and hope. Choose a hotter-running material.
- XTC-3D works, but it isn’t magic. It can blur detail, cure slower in real workflows, and still need sanding.
At-a-Glance: XTC-3D Alternatives by Use Case
| Use case | Best alternative | Why it works | Main downside |
|---|---|---|---|
| Waterproof PLA | Thin epoxy coating | Seals pores and layer gaps | Can pool and blur detail |
| Paint-ready props | Filler primer + spot putty | Easy to sand and repeat | Needs sanding time |
| Large helmets | UV resin + powder | Builds a sandable filler layer | Messy around small details |
| Cheapest coating test | Generic two-part coating resin | Similar chemistry can work | Must test cure and finish |
| ABS prints | Acetone smoothing or ABS slurry | Uses the material itself | Fumes and warping risk |
| PLA solvent smoothing | 3D Gloop or ethyl acetate | Chemically softens PLA | Easy to overdo |
| Hot environments | Better heat-tolerant filament | Material solves the real problem | May need new print settings |
If I had to simplify it: use epoxy for sealing, primer for painting, UV resin filler for big cosplay surfaces, and better filament for heat.
Method Specs at a Glance
| Method | Best for | Key facts | Avoid when | Confidence |
|---|---|---|---|---|
| XTC-3D | Thin glossy sealing | 2A:1B mix, short pot life, 3.5-hour listed cure | Fine detail and heat fixes | High for specs, mixed for workflow |
| Generic two-part epoxy | Waterproofing and gloss | Similar coating behavior in tests | Miniatures, text, recessed detail | Medium, must scrap-test |
| Filler primer + spot putty | Painted props | Sandable, repeatable, easy to correct | Clear gloss or waterproofing | High for paint prep |
| UV resin + powder | Large cosplay shells | Builds a filler layer, then sands | Engraved texture and tiny features | Medium, skill-dependent |
| PETG, ABS, or ASA | Heat or outdoor needs | Changes the material problem first | Users who only need surface gloss | High for heat logic |
| 3D Gloop or ethyl acetate | Solvent smoothing | Chemically softens PLA surface | Poor ventilation or beginner use | Lower here, no current product card |
Quick Decision Workflow
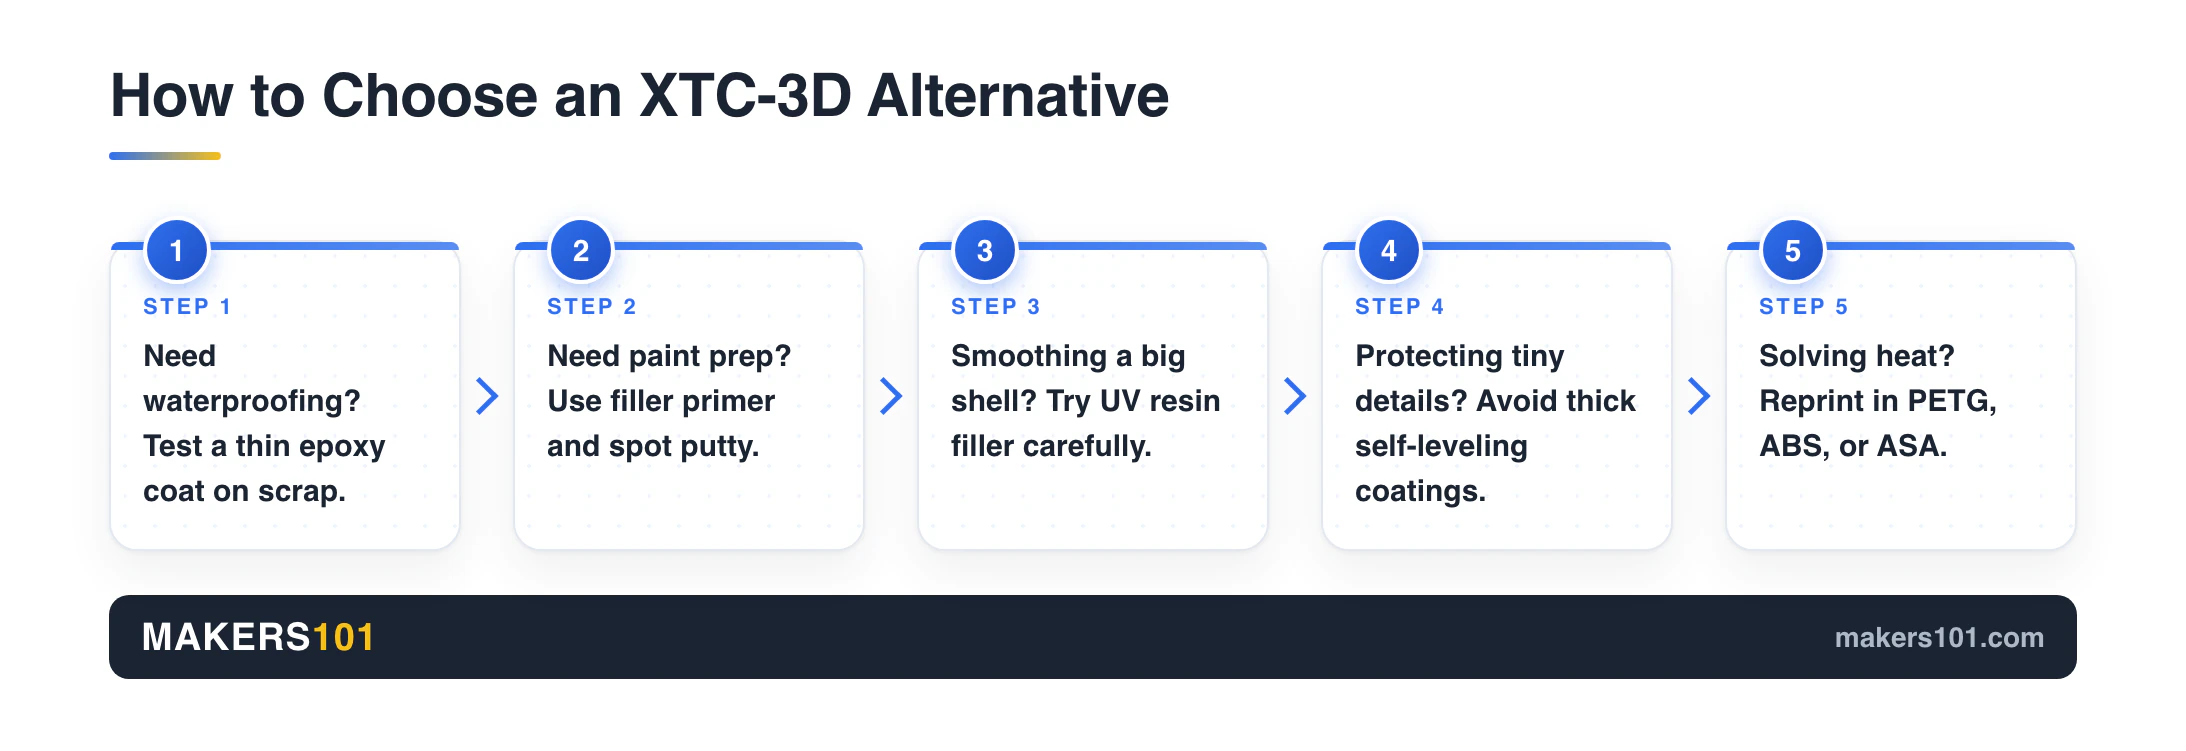
1. If the part must hold water, test a thin epoxy coat on scrap first. 2. If the part will be painted, start with sandable primer and seam filler. 3. If the surface is a large helmet or armor panel, consider UV resin filler only after a small cure test. 4. If fine detail matters, stay away from thick self-leveling coatings. 5. If heat is the problem, reprint in a better material before coating anything.
Best XTC-3D Alternative by Budget and Time
Choose the method that reaches your finish target with the least wasted rework. The cheapest bottle on the shelf can become expensive if it adds sanding, repainting, or a failed print. If sanding is the route you land on, here’s what grit to start sanding at.
| Method | Typical materials | Hands-on time | Cost level | Use when |
|---|---|---|---|---|
| Filler primer workflow | Sandpaper, spot putty, filler primer | Medium | Low to medium | The part will be painted |
| Thin epoxy coat | Two-part coating resin, brush, gloves | Low to medium | Medium | You need gloss or waterproofing |
| UV resin filler | UV resin, powder, UV light, alcohol | High | Low to medium | The surface is large and simple |
| Material switch | PETG, ABS, or ASA filament | Print-time change | Medium | Heat or outdoor use matters |
| Solvent route | 3D Gloop or ethyl acetate | Low, but risky | Variable | You already know the material behavior |
For a beginner, the primer workflow has the best mistake profile. You can sand it back, add another light coat, and recover from a bad pass. Epoxy and UV resin are less forgiving because the mistake cures into the surface.
For a display model that stays indoors and only needs gloss, epoxy can be faster. A painted cosplay helmet usually benefits more from filler primer because paint creates the final finish. For a part that will sit in a warm car or outdoors, the cheapest route is often reprinting once in a better filament instead of coating PLA twice.
How to Test a Generic Epoxy Substitute
Do not test a new resin on the finished print first. Print a small scrap with the same filament, layer height, wall count, and detail level as the real part.
1. Mix a very small batch and note how long it stays brushable. 2. Brush one flat area, one vertical wall, and one detailed corner. 3. Check for pooling after 10 minutes. 4. Let it cure fully before sanding. 5. Sand a small patch and see whether it powders cleanly or gums up. 6. Prime or paint a corner if the final part will be painted.
If the resin stays tacky, fills detail, smells harsher than expected, or sands poorly, do not use it as your XTC-3D substitute. A cheap bottle is not cheap after it ruins a long print.
What XTC-3D Actually Does
XTC-3D is a two-part epoxy-style coating made for smoothing and finishing 3D printed parts. Smooth-On lists a 2A:1B mix ratio by volume, a 10-minute pot life, about 20 minutes of thin-film working time, and a 3.5-hour cure time. It is meant to be brushed on in a very thin layer.
That official baseline is useful. The real-world part is messier.
In one FDM skull test, XTC-3D visibly reduced layer lines, but it also softened small details like teeth. In another epoxy coating test, it made a thin vase-mode cup waterproof, but only improved PLA strength by about 4 to 10 percent. The heat result was even more blunt: plain PLA bent at 51 C, while the coated sample bent at 53 C.
So yes, XTC-3D can smooth and seal prints.
It won’t turn PLA into a heat-resistant engineering plastic.
Best Overall Substitute: Thin Two-Part Epoxy Coating
A light two-part epoxy coat is the closest substitute for XTC-3D because it does the same basic job: it flows over the surface, fills small layer gaps, cures hard, and creates a sealed glossy skin. This is the best alternative when the part needs to hold water or look like a clear-coated display model.
The strongest evidence is waterproofing. In one vase-mode cup test, the uncoated PLA cup leaked, while the epoxy-coated cup stayed dry underneath even though the coating was applied only to the outside. That is exactly the kind of job where epoxy makes sense. You can also get there without coating at all. Here’s how to make PLA hold water with settings alone.
Strength is a weaker argument. The same test found only about a 4 to 10 percent tensile strength gain. That’s real, but it isn’t enough to justify epoxy for structural parts. If a bracket breaks, fix the design, wall count, material, or print orientation first.
The biggest practical issue is detail. A cheaper two-part resin tested against XTC-3D gave a similar visual result at roughly one quarter of the cost, but both resin-style coatings shared the same risk: they can soften fine features and pool in low spots. On large flat surfaces, that’s manageable. On teeth, scales, lettering, and miniature faces, it can ruin the work.
Best for Paint Prep: Filler Primer + Spot Putty
If your final goal is paint, filler primer is usually the better XTC-3D alternative. It fills shallow layer lines, dries into a sandable surface, and lets you remove excess material instead of trapping the part under a glossy resin coat.
This is the safer workflow for helmets, props, and display parts. Sand the high spots first. Use glazing or spot putty on seams. Spray filler primer. Sand back. Repeat only where the layer lines still show.
The primer choice can matter, but be careful with single-test conclusions. In one short side-by-side test, Seymour filler primer covered layer lines better than Rust-Oleum after one and two coats. The creator called Seymour roughly 3x pricier, while the Makers101 fact card shows a more nuanced picture: Seymour is more expensive per can, yet the value comparison improves when stated as area covered for each dollar.
For most readers, Rust-Oleum is the default budget pick. Seymour is the upgrade if you’re working on a large cosplay piece and want fewer filling rounds. Either way, primer isn’t a no-sanding method. It’s a better-sanding method.
See our guide to the best paint for 3D prints if your end goal is a clean painted finish.
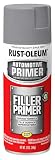
- Filler primer is suitable for use on wood, metal and fiberglass surfaces
- Oil based paint with Stops Rust formula provides rust resistant base coat for cars, trucks and other vehicles
- Covers up to 12 sq ft and dries to the touch (and can be recoated) in 10 minutes
- Filler spray paint fills minor surface imperfections with excellent rust resistance
- Flat finish can be covered with any topcoat with superior adhesion


- Specifically formulated to meet the performance needs of body shop personnel
- Minimizes the appearance of deep surface scratches on metal surfaces
- Dries fast to form a thick, sandable base coat in no time
- Large sprayhead gives a professional looking application
- Heat resistant up to 250˚F and VOC Compliant
Best Cheap DIY Method: UV Resin + Baby Powder
A UV resin and baby powder slurry is a useful DIY smoothing method for large, smooth surfaces. Think helmets, armor panels, and decorative shells. Don’t think tiny miniatures.
One test used a dome printed at 0.3 mm layer height with honeycomb detail. The starting mix was roughly two parts UV resin to one part powder, blended to a milk or cream-like consistency. After one coat, the layer lines were already reduced. The final polished result, though, took several coats, UV curing, alcohol wiping, sanding, filler primer, paint, clear coat, and wet sanding.
That last sentence matters.
This method is not a quick dip. It is a build-and-sand workflow. It can look excellent, but only if you control pooling and clean out details before curing. The same test showed resin filling some small honeycomb details where the application was not careful.
Use this when you want a cheap filler layer on a big surface. Skip it when the printed texture is part of the design.
Best Material-First Alternative: PETG, ABS, or ASA
Sometimes the best XTC-3D alternative is not a coating at all. If your real problem is heat, sanding behavior, or outdoor use, choose a better filament before you start brushing chemicals over PLA.
PETG is a good first step for functional parts. It sands more cleanly than PLA in one finishing workflow, and it gives you better practical temperature tolerance than coated PLA. If you’re already thinking about car interiors, outdoor planters, or parts that sit near warmth, PETG is usually a better conversation than epoxy-coated PLA.
ABS and ASA go further. ABS can be sanded aggressively and smoothed with acetone. You can also make ABS slurry to fill seams and bond parts. That makes ABS powerful for prop finishing, but it comes with a cost: fumes, warping, ventilation, and enclosure needs.
ASA is the outdoor-minded cousin. If UV and heat matter more than easy printing, read our heat resistant 3D printing filament guide before you coat anything.
For a premium ASA example, Prusament ASA is already in our fact library. It is not the automatic pick for every reader. It simply shows that the “alternative” can be a verified material choice, not another finishing chemical.
The reason is simple. In the epoxy heat test, coating PLA moved deformation from 51 C to only 53 C. That is not a fix. That is a rounding error for real-world use.
For material choice, the 3DPKit Filament Picker is a better starting point than another layer of resin.
Best Solvent-Based Option: 3D Gloop or Ethyl Acetate
Solvent smoothing can work, but I would treat it as the advanced option. It can reduce PLA layer lines by softening the plastic surface, but the same chemistry that smooths the print can also damage it.
3D Gloop is the more packaged route compared with raw solvent because it is sold for filament-specific use. I am not treating it as a verified product pick here because I don’t have a current Makers101 fact card for it. Some guides list it as a PLA smoothing method alongside epoxy, but the trade-off is still safety, speed, and control. Work time can be short, and the chemistry needs ventilation and protective gear.
Ethyl acetate is the more DIY solvent route. It can smooth PLA, but it’s easy to over-apply. Use small tests first, work quickly, and don’t assume it will behave the same on every PLA blend.
For beginners, I would start with filler primer before solvents. It is slower, but mistakes are easier to sand away.
What Not to Use an XTC-3D Alternative For
Don’t use a coating when the problem is actually material choice, print settings, geometry, or unrealistic expectations. A coating can improve a surface. It can’t fix every reason a print looks rough.
Don’t use epoxy to make PLA heat-safe. The test data here doesn’t support that.
Do not use thick resin on fine detail. Teeth, lettering, engraved lines, and miniature features can disappear under a self-leveling layer.
Don’t use coating as your main strength upgrade. A 4 to 10 percent gain isn’t nothing, but it isn’t a redesign.
Do not assume food contact is safe because the outside looks sealed. Food-safe prints require food-safe resin, suitable filament, a clean printer, accurate mix ratio, full cure, and no cracks or hidden pores. That is a high bar.
And don’t forget the print itself. One finishing workflow recommends at least four walls, four top layers, and three bottom layers before aggressive sanding, so you don’t sand through into infill. Better prep saves more time than a miracle coating.
If the visible lines are coming from coarse settings, tune the print first. Our 0.4mm nozzle quality guide and the 3DPKit Print Settings Finder are better first moves.
Safety Checklist Before You Coat a Print
Any XTC-3D alternative that cures chemically deserves the same respect as resin, paint, or solvent work. The part may be small. The chemistry is not.
Before you start:
- Wear gloves and eye protection.
- Work with ventilation.
- Use a respirator when sanding cured resin, primer, or filler.
- Mix small epoxy batches.
- Spread mixed epoxy out instead of leaving it in a deep cup.
- Test on scrap before coating the real part.
- Apply thin coats.
- Let the coating cure fully before sanding or painting.
Smooth-On specifically warns that mixed XTC-3D is exothermic. A large concentrated mass can generate enough heat to melt a plastic cup, burn skin, or ignite combustible material. Generic epoxy resins can share the same risk, so don’t treat them casually.
My Recommendation: Choose by Finish, Not by Brand
The best XTC-3D alternative depends on the finish you want.
If you need waterproofing, brush on a very light epoxy layer and accept the detail risk. If you want paint-ready props, start with primer and spot putty. If you’re smoothing a big helmet on a budget, a UV resin filler mix is worth testing on scrap. If you print ABS safely, acetone smoothing or ABS slurry can save finishing time.
If you need heat resistance, stop looking at coatings.
Print the right material instead.
FAQ
Is XTC-3D just epoxy?
XTC-3D is a specialized two-part epoxy-style coating for 3D prints. Regular epoxy resin can sometimes work as an alternative, but you need to test viscosity, cure time, yellowing, sanding behavior, and detail loss before using it on a finished part.
Is XTC-3D good?
Yes, XTC-3D is good when you want a thin brushed coating that smooths layer lines and can seal a print. It is less good when the model has tiny details, sharp lettering, heat exposure, or a finish that will be sanded and painted anyway.
What is the best XTC-3D alternative?
For sealing and gloss, use epoxy in a thin brushed layer. For paint prep, use primer plus spot putty. For large cosplay surfaces, test a UV resin powder mix. For heat resistance, change the filament before you reach for a coating.
Can I use regular epoxy resin instead of XTC-3D?
Yes, but don’t assume every epoxy behaves like XTC-3D. Test it on scrap first. Look for thin application, predictable cure, low pooling, sandability, and whether it preserves the level of detail you need.
Is filler primer better than XTC-3D?
For painted parts, often yes. Filler primer is easier to sand back and correct. XTC-3D is better when you want a clear glossy sealed surface or stronger waterproofing.
Does epoxy coating make PLA heat resistant?
Not in a meaningful way. In one test, plain PLA deformed at 51 C and the epoxy-coated sample deformed at 53 C. If heat matters, switch to a more suitable filament before you coat the part.
Does epoxy coating make 3D prints stronger?
Only a little in the test I would trust for this question. The measured PLA tensile gain was about 4 to 10 percent, which is not enough to rescue a weak bracket, hook, or mount. Treat epoxy as a surface finish first.
Can epoxy coating make 3D prints waterproof?
Yes, it can. One test showed a thin vase-mode PLA cup leaking before coating and staying dry after an exterior epoxy coating. Complex shapes may still leak if the coating misses internal gaps or cracks.
Is XTC-3D safe for food contact?
Don’t assume that. Food contact depends on the resin, filament, printer cleanliness, accurate mixing, full cure, and whether the finished part has cracks or pores. For casual makers, it’s safer not to promise food-safe prints.
What is the cheapest way to smooth PLA prints?
For painted PLA, filler primer plus sanding is usually the cheapest practical path. For large smooth surfaces, a resin-and-powder filler can be affordable, but it takes more steps and more cleanup than it first appears.
What is the safest XTC-3D alternative for beginners?
For paint prep, filler primer is the safest place to start because mistakes can be sanded back. Use gloves, ventilation, and a respirator when sanding. Save epoxy, UV resin, and solvents for controlled tests after you understand the workflow.
What should I use if I need to preserve fine detail?
Use light sanding, thin primer passes, and local spot putty. Avoid thick epoxy, heavy UV resin slurry, and aggressive solvent smoothing on teeth, text, engraved lines, miniature faces, or decorative texture.