
Heads up — some of the links below are affiliate links. If you buy through them, I earn a small commission (at no extra cost to you), which helps cover the gear I test. Thanks!
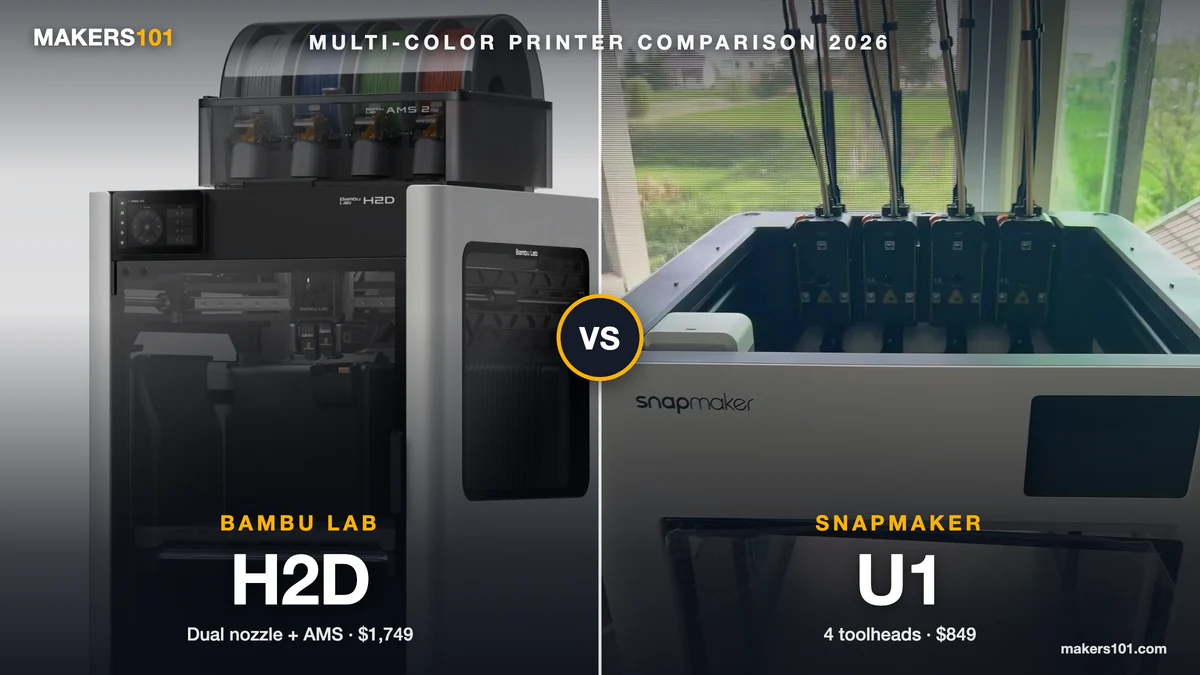
- Bambu Lab H2D vs Snapmaker U1 comes down to color count and materials. The U1 swaps between four loaded toolheads, so three- and four-color prints finish faster with almost no purge. The H2D is purge-free for two colors, then falls back to AMS purging.
- Single-color speed is a tie. In a side-by-side test, three dragons took 2h48m on the H2D and 2h49m on the U1. Add two more colors and the gap opens: 5h7m for the H2D versus 3h22m for the U1.
- The H2D wins on engineering filament and size. It has a 350°C nozzle, a 65°C actively heated chamber, and the larger build volume. The U1 runs a cooler nozzle on a smaller bed, with an optional unheated Top Cover.
- The U1 costs about half as much as the H2D AMS Combo at official US store prices.
- Four colors or fewer, multi-color TPU, or a small print business: buy the U1. ABS/ASA/carbon fiber, big parts, laser cutting, or more than four colors: buy the H2D.
You’ve narrowed it down to two very different machines, and the price gap makes the choice feel heavier than it should. One is Bambu’s enclosed dual-nozzle workhorse. The other is Snapmaker’s four-toolhead printer at roughly half the cost.
Many comparisons online test the H2C, Bambu’s Vortek hotend changer, instead. That’s a different machine. The real Bambu Lab H2D vs Snapmaker U1 question hinges on one detail: the H2D only prints purge-free with two colors.
I pulled together two side-by-side H2D vs U1 tests on YouTube, from stlDenise3D and Empty Nesters 3D Printing, plus a 2,700-hour U1 print-farm log and several U1 vs H2C reviews. My own U1 fills in the rest.
One disclosure up front: I haven’t owned an H2D, so the H2D numbers come from those tests and Bambu’s store listing. Every source is linked at the end.
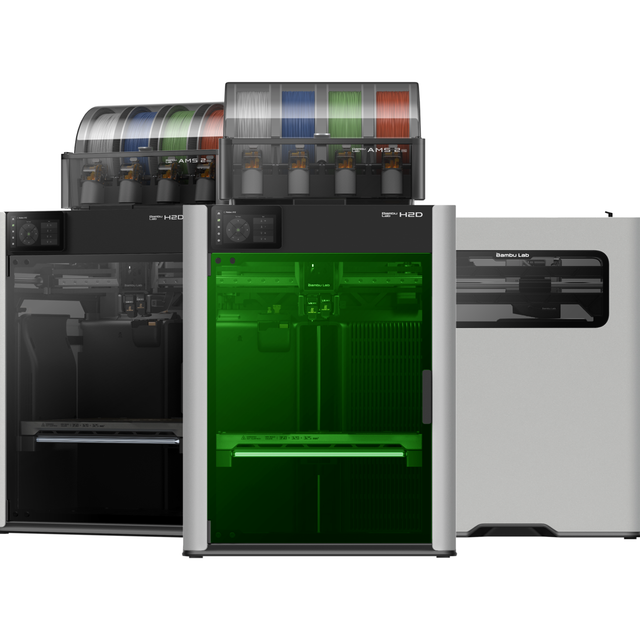
- Two nozzles in one toolhead, up to 350°C
- 325 × 320 × 325 mm with one nozzle; 65°C active chamber
- Optional 10W or 40W laser module

- 【4-Toolhead System with 5-Second Tool Changer】 Powered by the SnapSwap system, Snapmaker U1 multi-color 3D printer features four independent…
- 【5X Faster Printing, 5X Less Waste】 Unlike traditional filament-changing systems, Snapmaker U1 3D printer swaps toolheads instead of repeatedly…
- 【True Multi-Material & Mixed-Material Printing】 Snapmaker U1 3D printer combines rigid and flexible materials, water-soluble supports, and…
- 【Smart Calibration】 Automatic toolhead offset calibration, vibration compensation, fine-tuned extrusion, and perfect first-layer work together to…
- 【Easy to Use for Beginners & Professionals】 With a built-in model library, Snapmaker Orca — custom open-source slicing software, makes it easy…

Table of Contents
- Bambu Lab H2D vs Snapmaker U1 Specs and Prices at a Glance
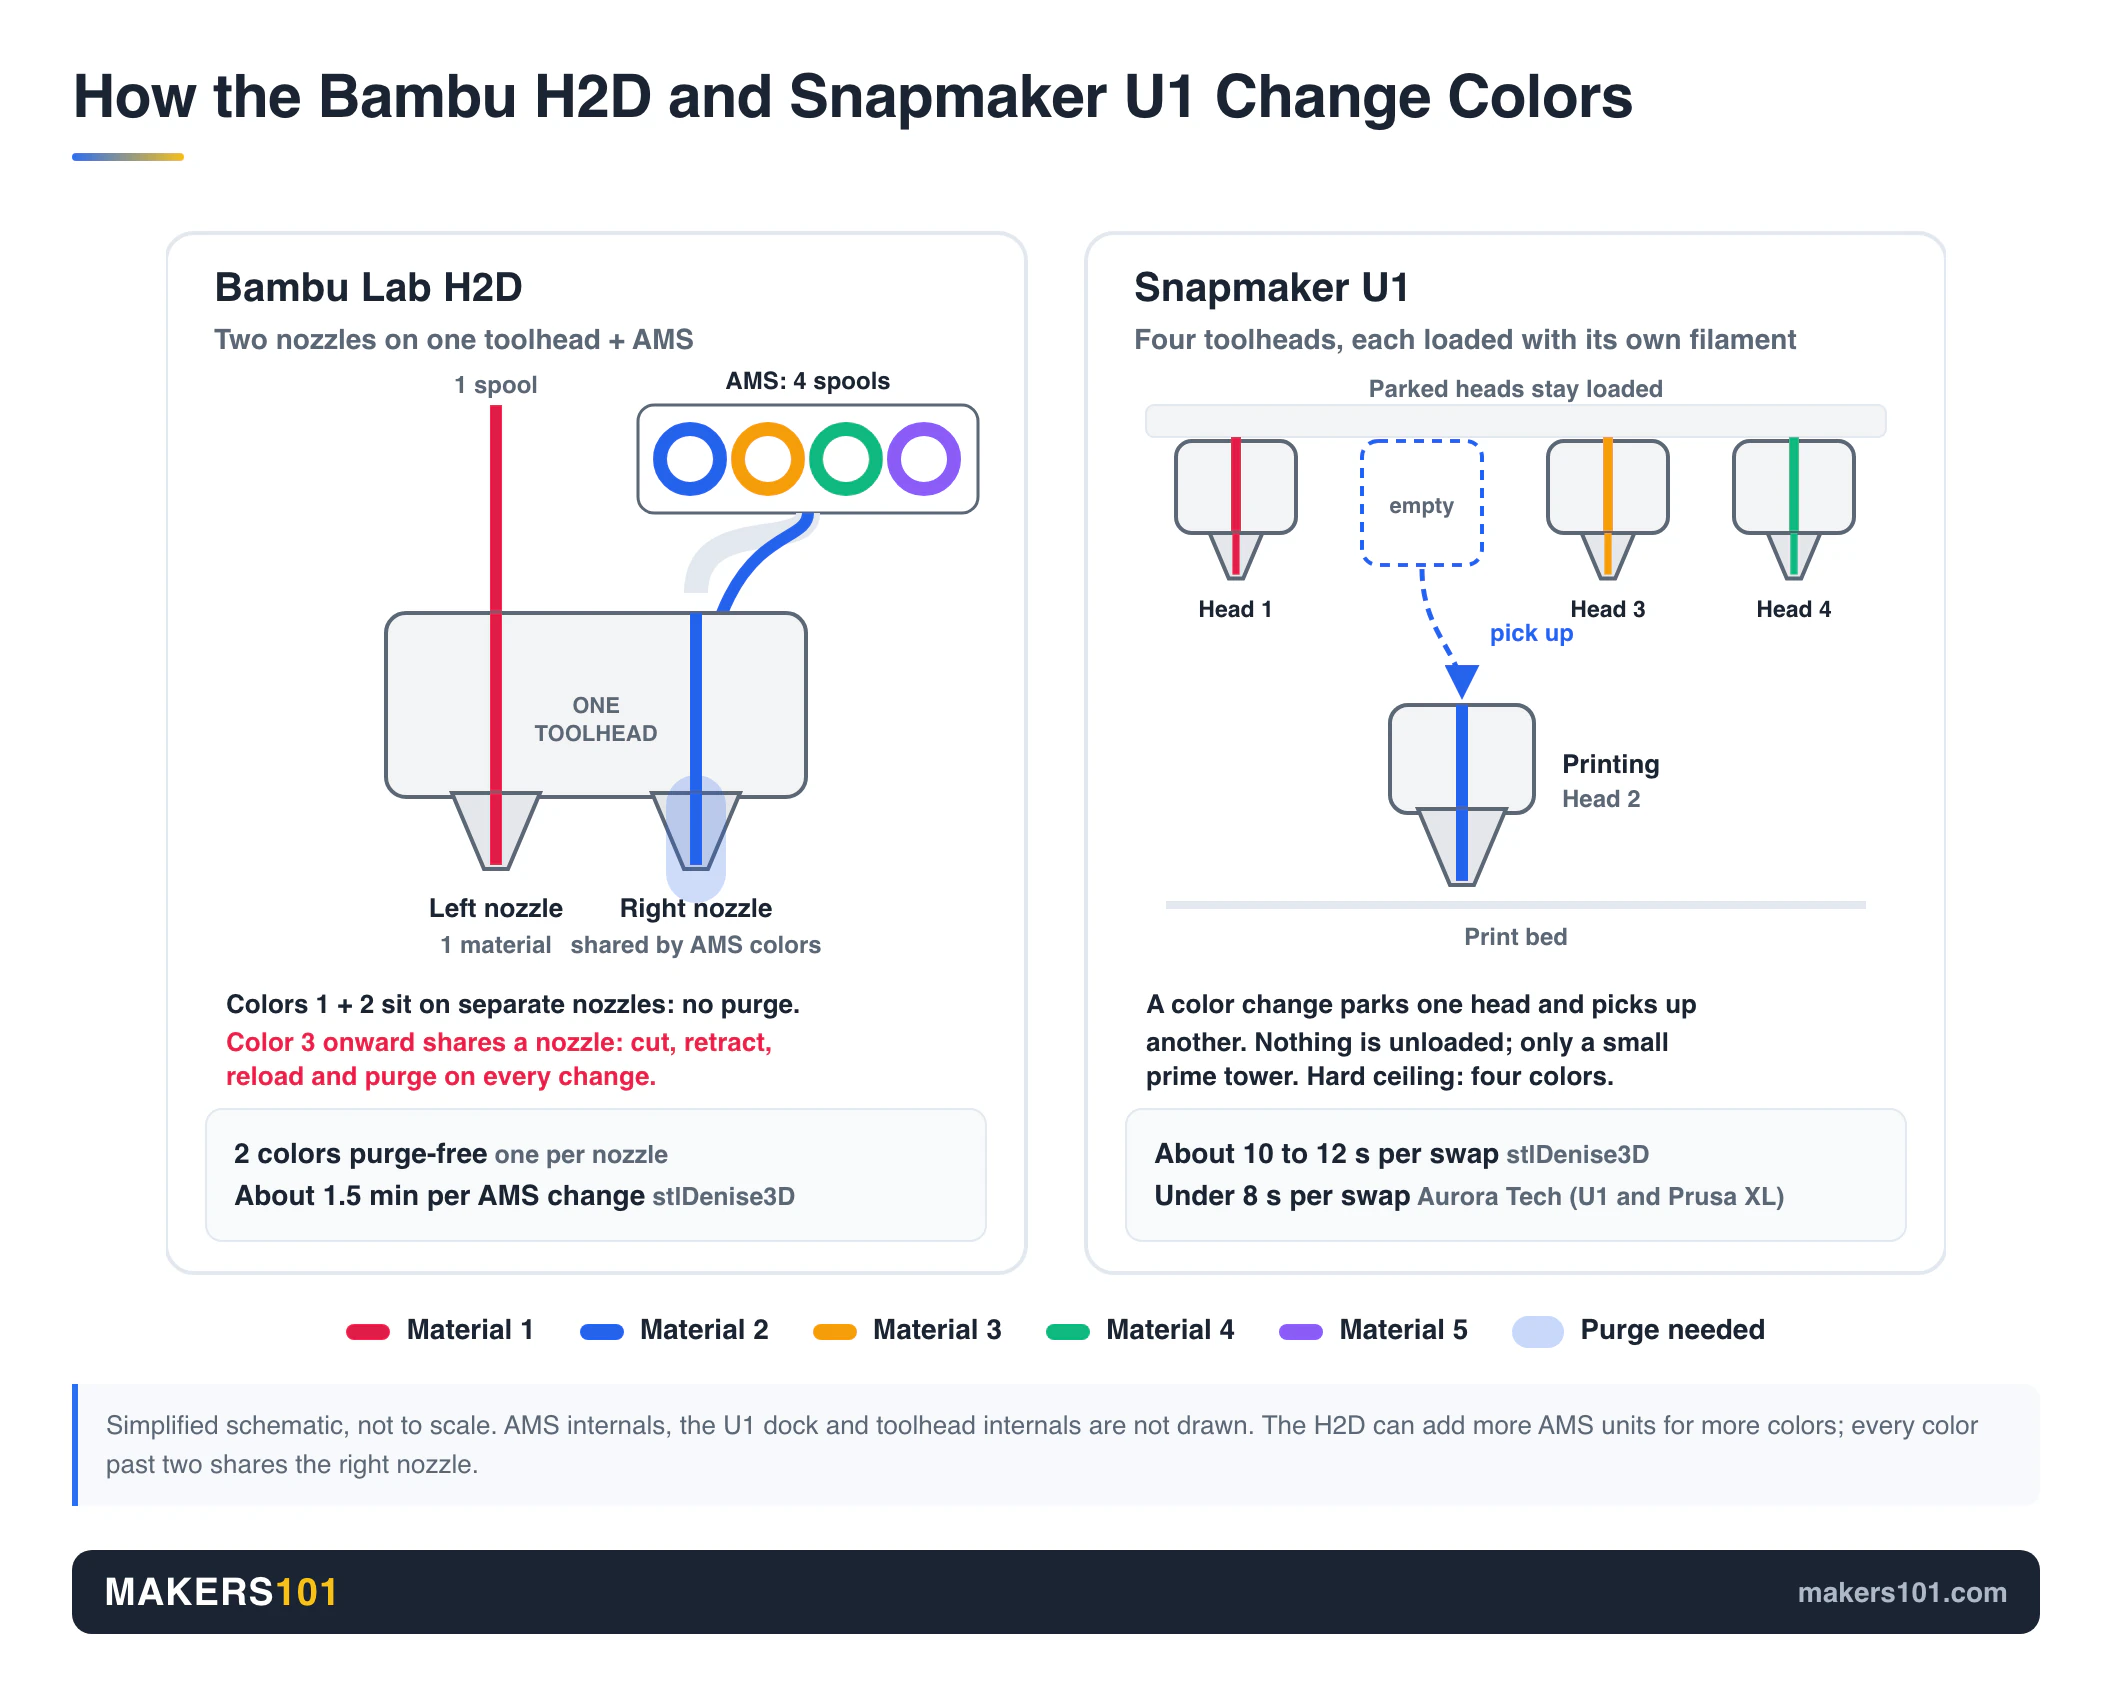
- How the H2D and Snapmaker U1 Change Colors: Two Nozzles Plus AMS vs Four Toolheads
- H2D vs U1 Print Speed: Single-Color Tie, Multi-Color Gap
- H2D vs U1 Filament Waste and Cost per Print
- Bambu H2D vs Snapmaker U1 Build Volume: Which Prints Bigger Parts?
- Materials on the H2D vs U1: Heated Chamber vs Open Top
- H2D vs U1 Print Quality: Can You Tell the Prints Apart?
- Bambu Studio and MakerWorld vs Snapmaker Orca: Software and App Compared
- Snapmaker U1 Downsides and Reliability vs the Bambu H2D
- What Only the Bambu H2D Does: Laser Module, Cutting, and the Vortek Upgrade
- H2D vs U1 Total Cost in October 2026: What You Actually Pay
- Which Should You Buy: Bambu Lab H2D or Snapmaker U1?
- FAQ: Bambu Lab H2D vs Snapmaker U1
- Sources for This H2D vs U1 Comparison
Bambu Lab H2D vs Snapmaker U1 Specs and Prices at a Glance
The H2D is the bigger, hotter, fully enclosed machine. The U1 is the faster multi-color machine, and it costs far less. Prices in the table come from the Bambu Lab H2D store page and the Snapmaker U1 store page, and they move with promotions.
| Spec | Bambu Lab H2D | Snapmaker U1 | Edge |
|---|---|---|---|
| Multi-color method | 2 nozzles on one toolhead + AMS | 4 independent toolheads | Depends on color count |
| Purge-free colors | 2 | 4 | U1 |
| Build volume | 325 × 320 × 325 mm (one nozzle); 300 × 320 × 325 mm (both nozzles); 350 mm wide combined, same filament in both nozzles | 270 × 270 × 270 mm | H2D |
| Max nozzle temp | 350°C | 300°C | H2D |
| Chamber | Enclosed, 65°C active heating | Open top; optional Top Cover, no active heating | H2D |
| Rated speed | 600 mm/s (Bambu PLA Matte) | 500 mm/s, 20,000 mm/s² | Tie in real prints |
| Noise (Empty Nesters 3D Printing) | 56 dB | 63.3 dB | H2D |
| Camera | 1080p with AI monitoring | 720p, 1 to 3 fps | H2D |
| Laser and cutting | Optional 10W or 40W module | None | H2D |
| Price (Oct 2, 2026) | $1,549 standalone; $1,749 AMS Combo | $849 | U1 |
How the H2D and Snapmaker U1 Change Colors: Two Nozzles Plus AMS vs Four Toolheads
The H2D carries two nozzles on a single toolhead and feeds them from AMS units: the four-spool AMS 2 Pro or the single-spool AMS HT, which adds drying.
The U1 parks four complete toolheads, each loaded with its own filament, and picks up whichever one the layer needs. That one difference drives every speed and waste gap that follows.
Why the Bambu H2D Is Purge-Free Only for Two Colors
With two colors, the H2D gives each one its own nozzle, and switching between them leaves little more than a prime tower. That’s the H2D at its best.
Add a third color and the math changes. Colors three and four have to share a nozzle, so the H2D falls back to classic AMS behavior: cut, retract, reload, and purge.
With one AMS attached, the H2D handles five colors this way: one on the left nozzle and four through the AMS on the right.
Think of a painter with two brushes. Two colors are easy. A third means washing a brush every time it comes back.
What the Snapmaker U1 Toolchanger Skips: Cut, Retract, Reload, Purge
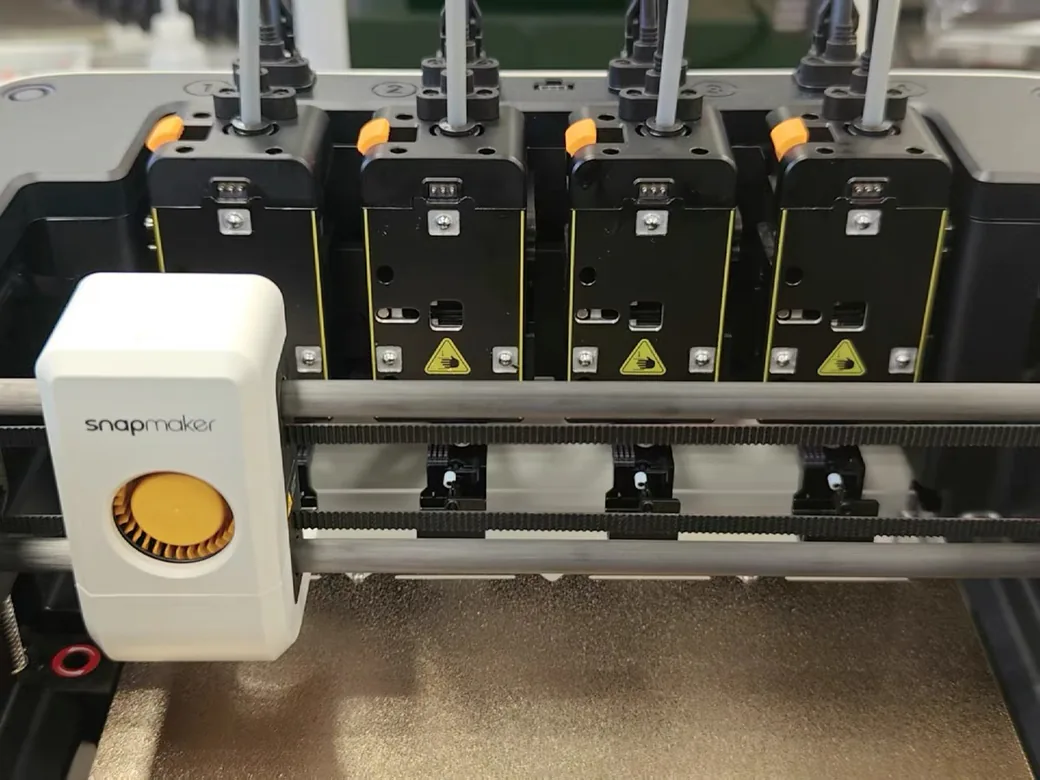
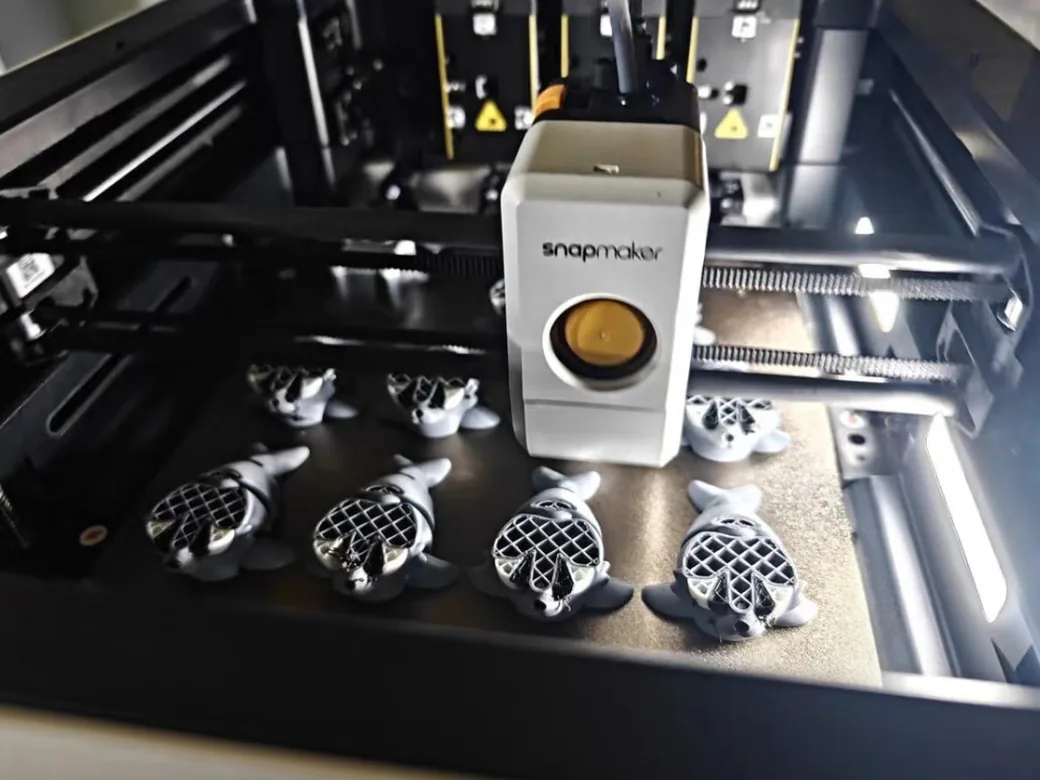
The U1 never unloads filament during a color change. Each toolhead stays loaded, so a change means parking one head and picking up another. Each swap takes about 10 to 12 seconds.
Toolchanger swaps (U1 and Prusa XL) have been clocked at under 8 seconds. An AMS change is a different order of magnitude: 1.5 to 2.5 minutes on a first-generation AMS, and about 1.5 minutes per change on the H2D in the dragon test below. Prusa’s new INDX changer for the Core One takes a bit longer per swap, and we compare it with the H2D here.
The trade-off is a hard ceiling. Four toolheads means four colors. The H2D can keep adding AMS units for more colors, and it pays for each one in time and purge.
H2D vs U1 Print Speed: Single-Color Tie, Multi-Color Gap
For single-color prints, the H2D and U1 finish at essentially the same time. Once a print needs three or more colors, the U1 pulls well ahead because it skips the AMS purge cycle.
The cleanest data is stlDenise3D’s run of the same three-dragon file on both machines with similar default settings (200 mm/s outer walls, 300 mm/s inner walls). Empty Nesters 3D Printing, who owns both printers, ran a second model.
| Test print | Bambu H2D | Snapmaker U1 | Tester |
|---|---|---|---|
| 3 dragons, single color | 2h48m | 2h49m | stlDenise3D |
| 3 dragons, three colors | 5h7m | 3h22m | stlDenise3D |
| Cookie dragon egg, multi-color | 3h59m | 3h11m | Empty Nesters 3D Printing |
The three-color run shows where the gap comes from. The H2D’s file needed 174 filament changes across 136 layers and called on the AMS 54 times, at roughly 1.5 minutes per AMS change. The U1’s three-color version took only 33 minutes longer than its own single-color run.
Spec-sheet speed barely matters here. Bambu rates the H2D at 600 mm/s (measured with Bambu PLA Matte) and Snapmaker rates the U1 at 500 mm/s, but printers rarely reach their top speed in real prints.
One caution from my own U1: its slicer estimates run optimistic. A print Snapmaker Orca estimated at 14h35m actually took 17h46m, about 22% longer. Budget for that if you quote turnaround times to customers.
Bambu’s hotend changer narrows the gap without closing it, as our Bambu H2C vs Snapmaker U1 comparison shows.
H2D vs U1 Filament Waste and Cost per Print
The U1 wasted less filament in every multi-color test we found, and the gap grows with each extra color. On two-color jobs the H2D should come close, since each color gets its own nozzle. From the third color on, it falls well behind.
In the three-color dragon print, the H2D purged about 15 g of black and nearly 3 g of gold, plus a prime tower of about 15 g.
The U1 left only a small prime tower of a couple of grams. For context, the same file on a single-nozzle H2S wasted about 104 g, including 70 g of a specialty pink.
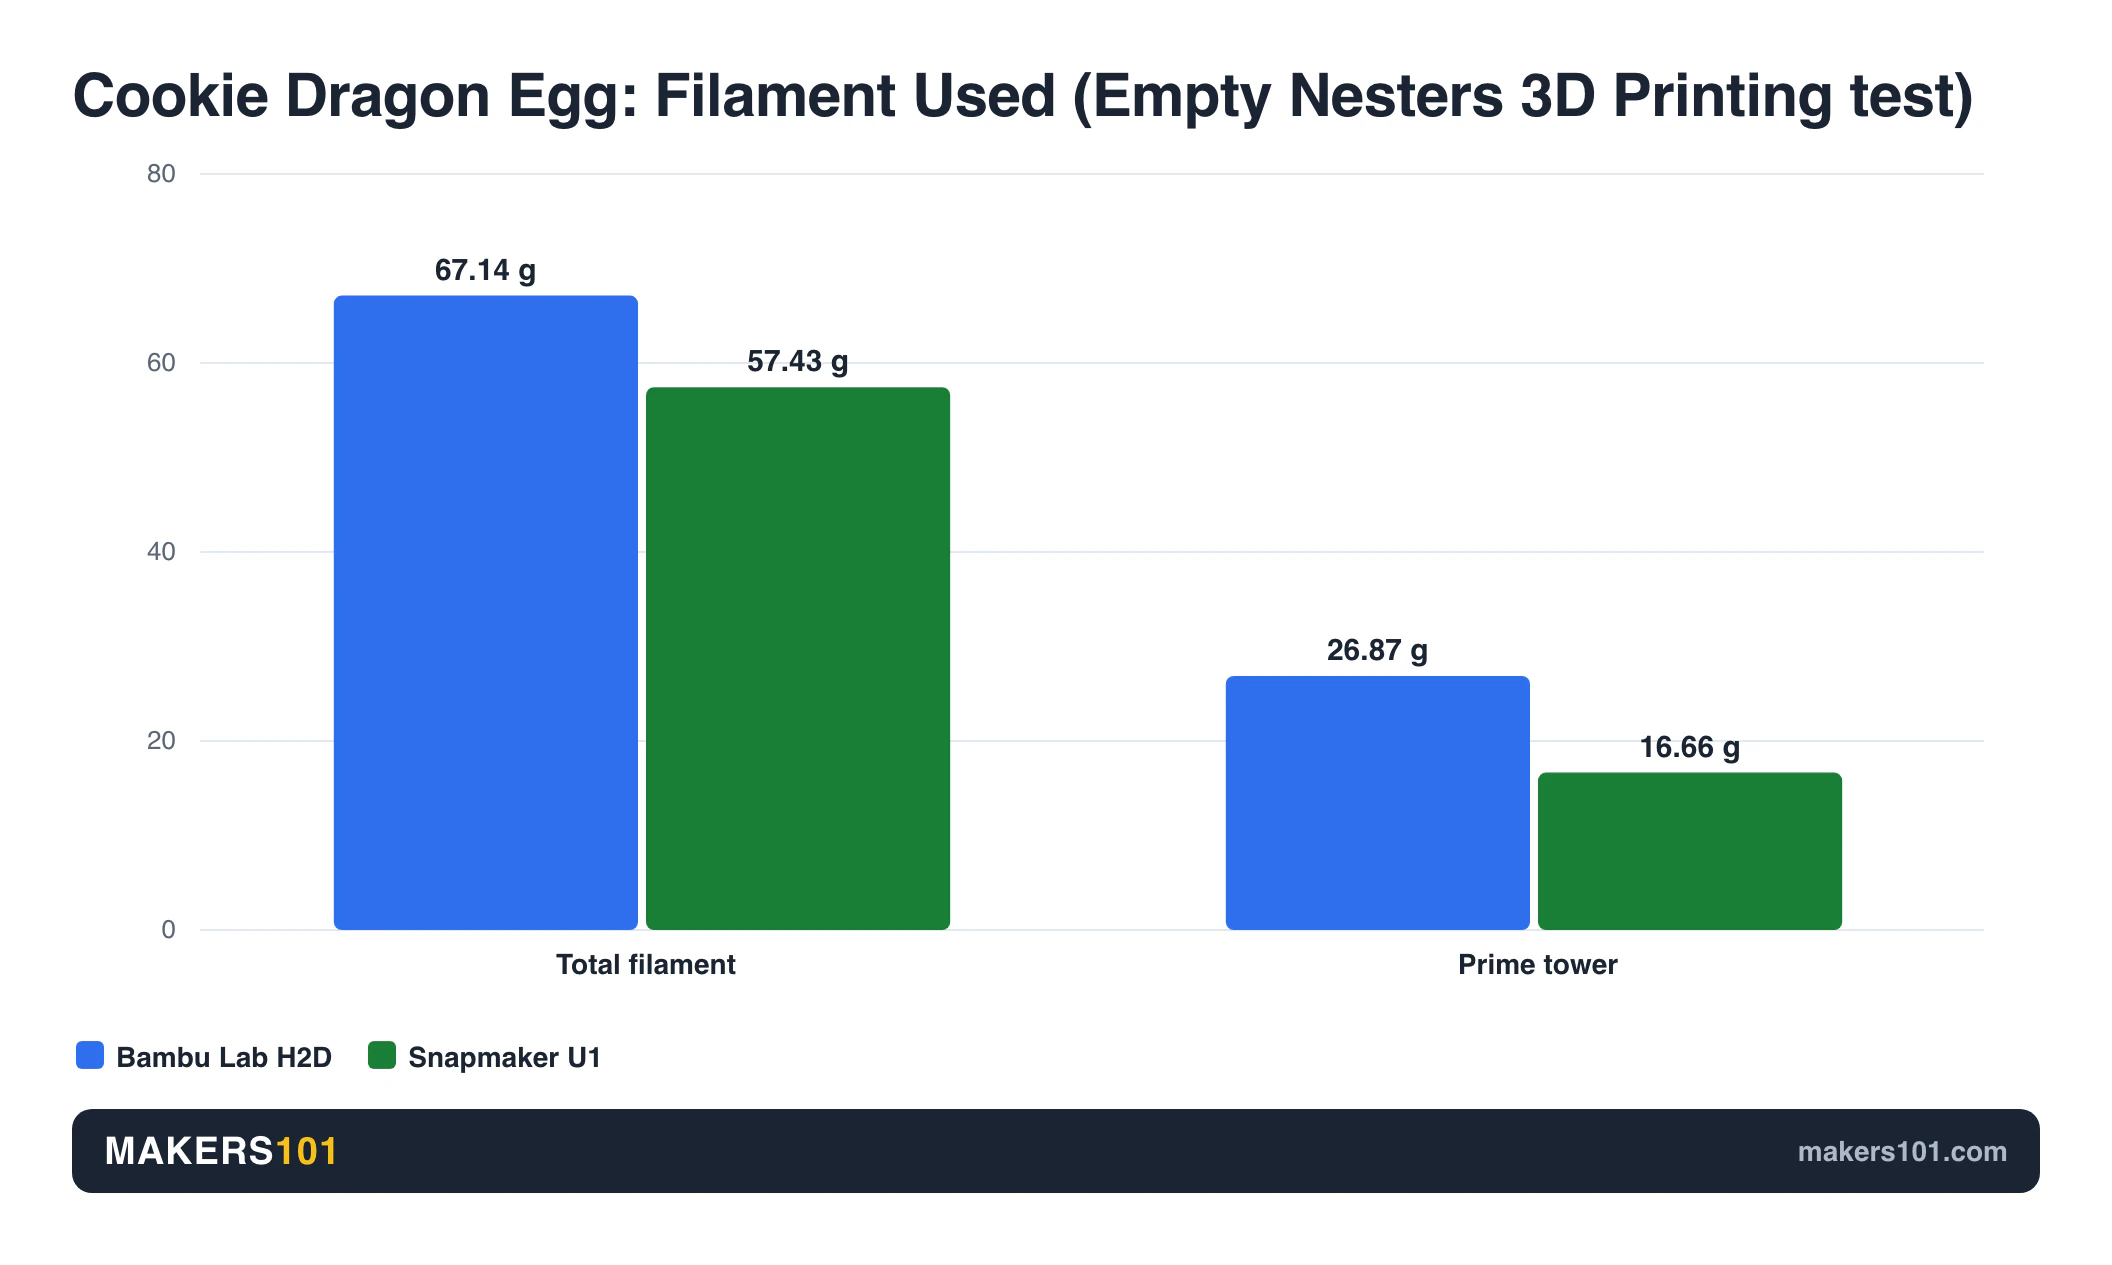
The cookie dragon egg test shows the same pattern. The H2D run used 67.14 g in total, including a 26.87 g tower. The U1 printed a 40.77 g model plus a 16.66 g tower, 57.43 g in total, so roughly 10 g less filament for the same egg.
Ten grams per print sounds trivial. Multiply it across a market-stall inventory and it adds up fast. Basically Benski’s U1 has logged 839 hours and more than 31,000 tool changes across its four heads, and its waste bin has never needed emptying.
If you stick with an AMS machine, these options for AMS filament poo keep the purge out of the trash.
Bambu H2D vs Snapmaker U1 Build Volume: Which Prints Bigger Parts?
The H2D prints larger parts: 325 × 320 × 325 mm with a single nozzle and 300 × 320 × 325 mm when both nozzles share a print. The U1 is a 270 mm cube.
The H2D’s headline 350 mm width only applies when both nozzles run the same filament, because neither nozzle reaches the far edge alone.
The H2 family has an odd quirk: paying more buys a smaller usable width. The single-nozzle H2S offers 340 mm, while the H2D drops to 300 mm with both nozzles and gives up 15 mm of height to fit its larger toolhead.
The U1’s smaller bed has its own catch. A large four-color model can force you to shrink the prime tower to fit, and the tall toolchanger frame needs a box nearly the size of the machine to enclose it.
The H2D isn’t compact either. Bambu recommends 700 × 700 × 1100 mm of clear space around it.
Materials on the H2D vs U1: Heated Chamber vs Open Top
The H2D is the better buy for ABS, ASA, and carbon-fiber filament because of its actively heated chamber. For multi-color TPU, the U1 wins.
ABS, ASA, and Carbon-Fiber Filaments: Why the H2D Leads
For ABS, ASA, nylon, and carbon-fiber blends, the H2D is the safer buy. It pairs a 350°C nozzle with a 65°C actively heated, fully enclosed chamber. It also ships with hardened steel nozzles.
The U1’s nozzle maxes out at 300°C, and its top is open. Snapmaker sells an optional Top Cover that encloses the frame without heating it. Abrasive filaments also need upgraded nozzles on the U1.
Owners on r/BambuLab steering a beginner toward ABS and ASA made the same point: the U1 isn’t fully enclosed without the cover, and it’s never actively heated. Some U1 owners add a third-party Panda Breath heater. That works, but it’s a mod you maintain yourself.
Multi-Color TPU: Where the Snapmaker U1 Wins
If you want flexible parts in more than two colors, the U1 is the one to buy. Each toolhead feeds its own spool directly, so soft filament never has to travel through a long AMS path.
Soft TPU doesn’t push reliably through AMS tubing, which caps the H2D at two-color TPU (one spool per nozzle). Bambu’s stiffer TPU for AMS is the one exception. The 3D Printing Zone ran four soft TPUs (85A and 90A) through the U1 in a single job.
I’ve printed TPU 90A alongside PLA on my own U1 with the Top Cover fitted, and it worked. Toy, grip, and shoe-part makers should weigh this heavily. Start with a dependable spool from our best TPU filament rankings, since soft TPU is the least forgiving filament here.
H2D vs U1 Print Quality: Can You Tell the Prints Apart?
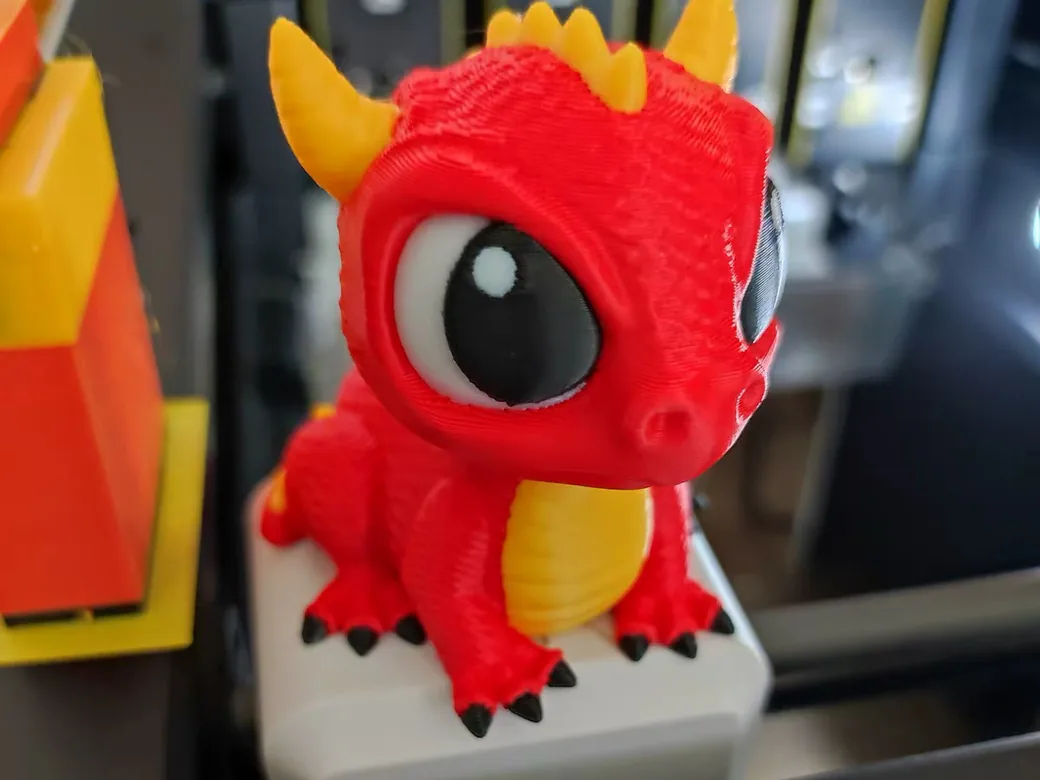
Mostly, you can’t tell H2D and U1 prints apart. With the same models, filament, and settings on both machines, the Empty Nesters side-by-side produced parts the tester couldn’t tell apart, and neither machine showed color bleed.
Differences show up on flat, smooth surfaces. In a U1 vs H2C review, PRINTING PERSPECTIVE rated the U1’s extrusion as average, with weaker flat surfaces that organic, detailed models tend to hide. The reviewer tied visible VFA (fine vertical ripples) to the U1’s coarser belt pitch; Bambu’s H2 series uses finer-pitch belts.
Toolhead alignment is tight, with all four U1 nozzles measured within 0.05 mm of each other. On my U1, print quality is fine. Nothing more, nothing less.
If smooth flat panels matter most, the H2-series belts point to a Bambu edge, though none of the H2D vs U1 tests in this guide isolated flat surfaces. For figurines, either one works.
Bambu Studio and MakerWorld vs Snapmaker Orca: Software and App Compared
Bambu’s software is the smoother experience, especially from a phone. The U1 runs Snapmaker Orca, Snapmaker’s build of OrcaSlicer, and it works well on a desktop once you learn its quirks.
The biggest friction is MakerWorld files. Bambu Studio 3MF files can throw invalid-value errors in Snapmaker Orca and sometimes fail to carry over default settings.
One fix suggested on r/snapmaker is to import the model as an object instead of opening the 3MF. The most upvoted reply in the same thread warns that anyone who likes sending prints from a phone will miss Bambu Handy.
Monitoring follows the same pattern. The H2D has AI monitoring and a 1080p camera, while the U1’s camera runs at 720p and 1 to 3 frames per second.
Still, ecosystem lock-in is easy to overrate. Any printer can use MakerWorld STLs, and the app and RFID tags are conveniences. As stlDenise3D put it, “Ecosystems are just training wheels for people new to 3D printing.”
Snapmaker U1 Downsides and Reliability vs the Bambu H2D
The U1’s main downsides are software polish, an open-top frame, more noise, and support experiences that vary by owner. Long-term hardware reliability looks strong in the largest dataset available.
The largest dataset comes from Initiative Design, a small print farm running three U1s. Across roughly 2,700 hours (2,100, 530, and 100 hours) and about 99,000 tool changes, the only fault was a single pogo-pin error on one machine that cleared itself.
No nozzles or PTFE tubes were replaced. Three machines is a small sample, and the creator discloses a Snapmaker affiliate partnership while saying the printers weren’t sponsored.
Not every owner is that lucky. One U1 owner on Reddit reported nothing but problems since early January 2026, with no reply from Snapmaker support.
My own U1 isn’t flawless either. I’ve hit tool-change errors that forced a manual pause even with the Top Cover fitted, so don’t count on the cover to fix every contact issue.
Noise favors Bambu: 56 dB for the H2D against 63.3 dB for the U1, and the open-top U1 also measured louder at close range than an enclosed H2C.
Power draw is a quiet point in the U1’s favor. On a 120 V outlet, the U1 measured 8 W idle and 364 W peak.
An H2C in the same test drew 20 W idle and peaked at 1,361 W. None of these testers published H2D power figures, so treat the H2C numbers as a rough Bambu reference.
The H2D has one convenience the U1 lacks: filament drying inside the AMS ecosystem. The AMS HT dries a single spool, though the AMS 2 Pro can’t dry while a print is running.
We haven’t seen an H2D running-hours log to match that farm’s U1 data. Bambu’s reliability reputation comes up again and again on Reddit, so weigh it as reputation until someone publishes the numbers.
What Only the Bambu H2D Does: Laser Module, Cutting, and the Vortek Upgrade
The H2D is a printer you can grow into. It accepts an optional 10W or 40W laser and cutting module, and Bambu sells a Vortek kit that converts it into an H2C. The U1 has neither path.
Bambu sells the H2D as a Laser Full Combo, and a standard H2D can add the same capability with a Laser Upgrade Kit. The 10W module is rated at 400 mm/s and the 40W at 1000 mm/s.
One cost has shown up on the H2C Laser Edition: long-term laser use dirties the interior and leaves a lingering wood smell.
The Vortek upgrade is a harder sell. Bambu’s own Vortek Upgrade Kit listing estimates 4 to 5 hours of installation, calls it advanced work, and recommends buying an H2C instead for better value. The H2D version of the kit was also out of stock on October 2.
If you don’t need the laser or parts wider than 256 mm, our Bambu X2D vs H2D comparison covers the cheaper Bambu dual-nozzle option.
H2D vs U1 Total Cost in October 2026: What You Actually Pay
Even with its optional Top Cover, the U1 costs a little over half as much as an H2D AMS Combo. All prices come from the official US stores.
| Setup | What you get | Price (Oct 2, 2026) |
|---|---|---|
| H2D standalone | Two purge-free colors, no AMS | $1,549 (list $1,749) |
| H2D AMS Combo | H2D plus AMS for 3+ colors | $1,749 (list $1,999) |
| H2D AMS HT bundle | H2D plus single-spool drying AMS HT | $1,849 (list $2,099) |
| H2D Laser Full Combo 10W | Adds 10W laser and cutting | $2,149 (list $2,549) |
| H2D AMS Combo + Vortek Upgrade Kit | H2C-style hotend changing | $2,548 (kit out of stock) |
| H2C AMS Combo (reference) | Vortek built in | $2,199 |
| Snapmaker U1 | Four toolheads | $849 (list $999) |
| U1 + Top Cover | Enclosed frame, unheated | $998 |
| Spare U1 toolhead | One replacement head | $64.99 |
Two numbers stand out. Buying an H2D now and adding the Vortek kit later costs more than buying an H2C outright. And a spare U1 toolhead is cheap enough to keep on the shelf, so one failed head doesn’t stop a print business for days.
For print sellers, the waste savings alone make a case against the H2C: two U1s can recover their cost faster than one H2C. Run your own numbers in the 3DPKit print cost calculator with your real filament prices and purge weights.
Which Should You Buy: Bambu Lab H2D or Snapmaker U1?
Buy the Snapmaker U1 if your prints use four colors or fewer and you mostly run PLA, PETG, or TPU. Choose the Bambu Lab H2D when you need engineering filaments, bigger parts, a laser, or five-plus colors.
Buy the Snapmaker U1 if:
- Most of your prints use three or four colors and purge waste bothers you
- You want multi-color TPU for toys, grips, or shoe parts
- You sell prints and filament cost per part matters (this is where I’d put the U1 first)
- You’re comfortable with a desktop slicer workflow
Buy the Bambu Lab H2D if:
- You print ABS, ASA, nylon, or carbon fiber and want an actively heated chamber
- Your parts regularly outgrow the U1’s bed
- You want laser engraving and cutting in the same machine
- You need more than four colors and can accept the purge
- You want phone-first printing from MakerWorld through Bambu Handy
Still torn? The print seller in the Reddit section below runs both and splits jobs by color count.
First-Week Setup Tips for the Snapmaker U1 and Bambu H2D
If you buy the Snapmaker U1:
- Import MakerWorld 3MF files as objects in Snapmaker Orca instead of opening them, then copy over the settings Bambu Studio showed
- Pad the slicer’s time estimate by about 20% before you promise a pickup date (my one long print ran 22% over)
- Shrink the prime tower when a large four-color model won’t fit the U1’s bed
- Order the Top Cover before your first ABS or ASA job, and keep one spare toolhead on the shelf
If you buy the Bambu H2D:
- Put your two most-used colors on separate nozzles, since that pairing is the only purge-free setup
- Choose the AMS HT bundle if you want a spool dried in the ecosystem, and remember the AMS 2 Pro won’t dry mid-print
- Keep three-plus-color jobs for times the purge waste and extra hours are acceptable
What Reddit Owners of Both the H2D and U1 Say
The most useful comment came from a farmer’s-market seller on r/BambuLab_Community who owns a U1, H2D, and H2C.
They use the H2D for larger prints and keep it to two or three colors. The H2C handles anything over four colors, and the U1 takes everything at four colors or fewer.
On the U1’s tinkering reputation, the top reply in a 108-comment r/snapmaker thread says the U1 “gives you the OPTION to tinker. It doesn’t really require it.”
If the H2D’s price is the sticking point, our X2D vs Snapmaker U1 comparison pits the U1 against Bambu’s cheaper dual-nozzle machine.
- Two nozzles in one toolhead, up to 350°C
- 325 × 320 × 325 mm with one nozzle; 65°C active chamber
- Optional 10W or 40W laser module
- 【4-Toolhead System with 5-Second Tool Changer】 Powered by the SnapSwap system, Snapmaker U1 multi-color 3D printer features four independent…
- 【5X Faster Printing, 5X Less Waste】 Unlike traditional filament-changing systems, Snapmaker U1 3D printer swaps toolheads instead of repeatedly…
- 【True Multi-Material & Mixed-Material Printing】 Snapmaker U1 3D printer combines rigid and flexible materials, water-soluble supports, and…
- 【Smart Calibration】 Automatic toolhead offset calibration, vibration compensation, fine-tuned extrusion, and perfect first-layer work together to…
- 【Easy to Use for Beginners & Professionals】 With a built-in model library, Snapmaker Orca — custom open-source slicing software, makes it easy…
FAQ: Bambu Lab H2D vs Snapmaker U1
Which printer is better, the Snapmaker U1 or the Bambu H2D?
In the Bambu Lab H2D vs Snapmaker U1 matchup, the U1 is faster for multi-color PLA, PETG, and TPU with four colors or fewer. It also wastes less filament and costs far less. For engineering filaments, large parts, laser work, or five-plus colors, the Bambu H2D is the better machine. Single-color print speed is roughly equal.
Is Snapmaker better than Bambu Lab?
Snapmaker’s U1 beats Bambu’s AMS-based printers at fast, low-waste printing in four colors or fewer. Bambu still leads on software polish, its phone app, enclosed high-temperature printing, and product range. Which brand is better depends on which of those you print most.
Which printer is better than the Snapmaker U1?
For more than four colors, the Bambu H2C’s Vortek system prints up to seven colors with little waste, though each swap is slower. For ABS and ASA, an enclosed, actively heated printer such as the H2D suits better. For four-color work, the U1 is hard to beat at its price.
What are the downsides of the Snapmaker U1 printer?
The main downsides are the four-color ceiling, a 300°C nozzle limit, an open top that needs an optional cover, no active chamber heating, and a less polished slicer and app. It is also louder than enclosed Bambu printers. Some owners report poor support, while one three-machine print farm logged about 2,700 hours with a single minor fault.
Can the Bambu H2D print more than four colors?
Yes. With AMS units attached, the H2D can load far more colors than the U1’s four. Only two of them are purge-free. Every color beyond two shares a nozzle and has to be purged, which adds time and waste.
Does the Snapmaker U1 need the Top Cover for ABS?
For ABS and ASA, treat the Top Cover as required. It encloses the open top without heating the chamber, so large ABS parts stay harder to print than in the H2D’s actively heated chamber. A third-party chamber heater is the usual owner workaround.
Is the H2D worth the extra money over the U1?
Only if you’ll use what the U1 can’t do: high-temperature engineering filaments, parts wider than 270 mm, or the laser and cutting module. If you mostly print colorful PLA, the extra money buys a slower multi-color workflow.
Sources for This H2D vs U1 Comparison
Test numbers come from these videos and threads. My own notes cover the Snapmaker U1 only.
- stlDenise3D: Snapmaker U1 vs Bambu Lab H2D: speed, print quality, and waste (YouTube)
- Empty Nesters 3D Printing: Snapmaker U1 vs Bambu Lab H2D comparison (YouTube)
- Initiative Design: Six months and 2,700 hours with three Snapmaker U1s (YouTube)
- FauxHammer: Bambu H2S vs H2D vs H2C (YouTube)
- The 3D Printing Zone: Snapmaker U1 vs Bambu Lab H2C: speed, power, noise, and maintenance (YouTube)
- Basically Benski: Bambu H2C vs Snapmaker U1 for hobbyists and print sellers (YouTube)
- PRINTING PERSPECTIVE: Snapmaker U1 vs Bambu Lab H2C: print quality and convenience (YouTube)
- Aurora Tech: Bambu Lab H2C review: hotend changer vs toolchangers (YouTube)
- r/BambuLab: Complete beginner: Snapmaker U1 or X2D?
- r/BambuLab_Community: Need help deciding between U1 and H2C
- r/snapmaker: Coming from a Bambu A1 to a U1, what to expect?
- r/snapmaker: Bambu vs Snapmaker U1 for someone who just likes it to work
- Prices and specs: Bambu Lab H2D store page and Snapmaker U1 store page, checked October 2, 2026