
I earn a commission if you buy through links on this page, at no extra cost to you. As an Amazon Associate, I earn from qualifying purchases.
Two boxes showed up on our doorstep for this one: the main X1Pro package with the air assist pump and height risers already inside, and a second box just for the enclosure panels.
That’s a nice surprise: most 20W diode lasers under $600 make you track down the enclosure, the air pump, and the riser kit as separate add-on purchases before you can really get going. Carverall skipped that step and put the whole bundle in our hands on day one.
Carverall sent us this unit to review, and we’re genuinely curious to see what it can do. Below, we cover what showed up, how the build went, and our own cutting and engraving tests, including how deep this thing can actually cut.
Table of Contents
- Carverall X1Pro Specs and Price
- What’s in the Box: Carverall X1Pro Unboxing
- Carverall X1Pro Design and Build Quality
- How to Assemble the Carverall X1Pro (Step-by-Step)
- Carverall X1Pro Software: CutLabX vs LightBurn vs LaserGRBL
- Carverall X1Pro Cutting and Engraving Tests
- Who Should Buy the Carverall X1Pro
- FAQ: Carverall X1Pro Review
- Disclosure
Carverall X1Pro Specs and Price
Carverall is a newer name in the budget laser space, competing against established players like xTool and Creality mostly on price. The company positions itself as an industrial-grade alternative without the premium markup, with a “carving for all” line that runs through its branding, and claims a global base of 500,000+ creators already using its machines.
We like an underdog story. Now let’s see if the hardware backs it up.
The X1Pro is Carverall’s 20W diode laser engraver, built around what the company calls COS technology: four laser diodes combined on a single chip-on-submount module instead of one larger emitter.
The idea is more optical output without the heat and bulk of a single high-power diode.
Carverall actually sells this as two versions: the plain X1Pro, and the X1Pro With Shield, which adds a clear protective cover over the whole machine. Ours is the With Shield version, shipped with an EU-region power adapter.
| Spec | Detail |
|---|---|
| Model | Carverall X1Pro 20W Diode Laser Engraver, With Shield version (Carverall’s model number: JL9) |
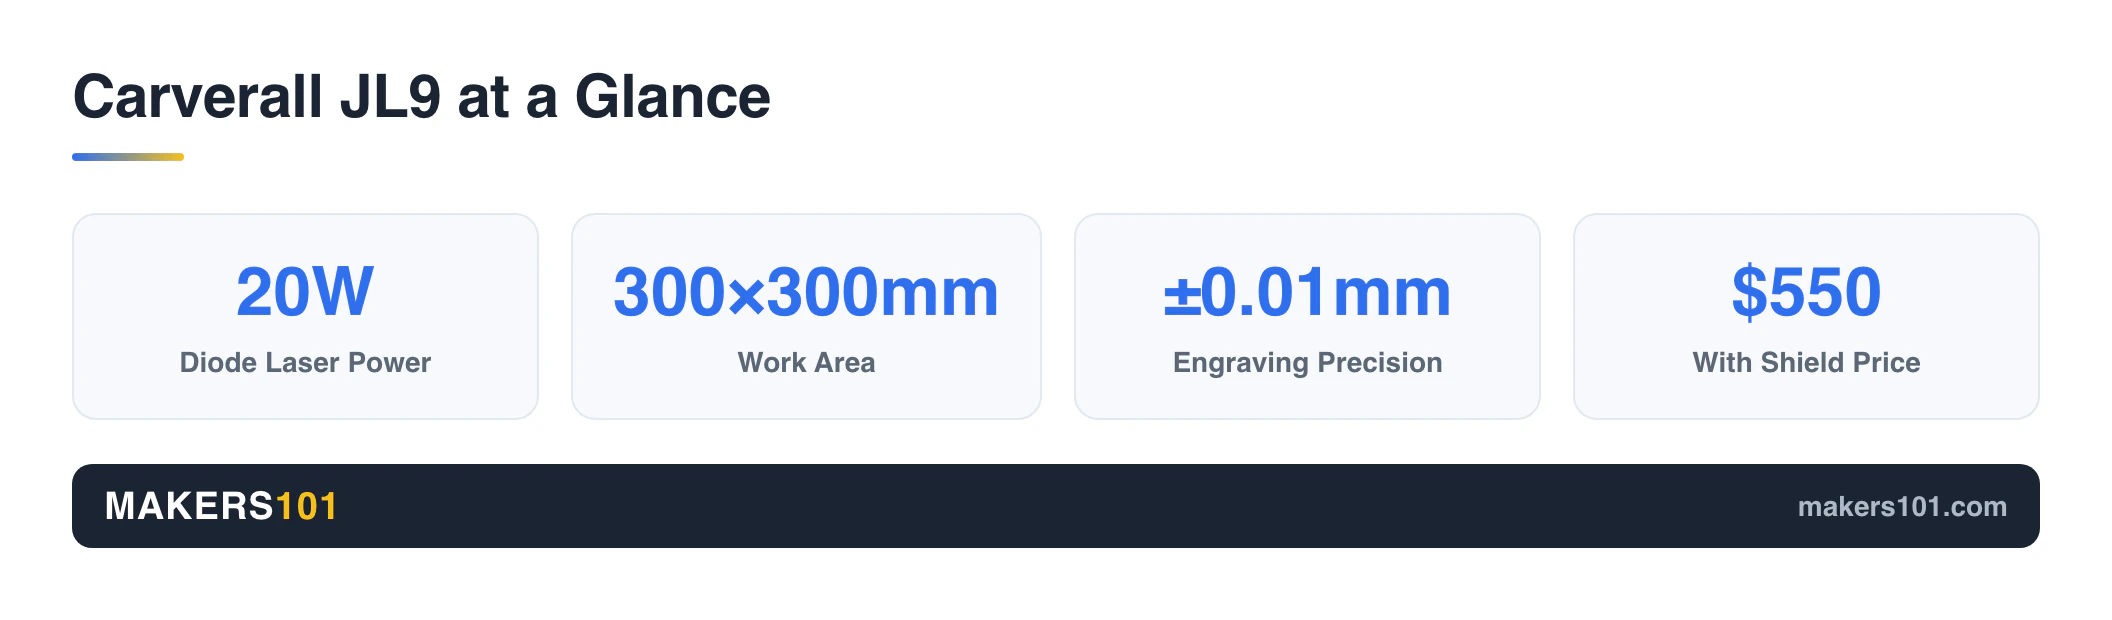
| Laser type | 20W (22W peak), quad-core COS diode, 455nm blue |
| Engraving area | 300 x 300 mm |
| Machine footprint | ~470 x 470 x 160 mm (manufacturer spec) |
| Weight | ~4.7 kg (manufacturer spec) |
| Engraving precision | ±0.01 mm |
| Focus system | 3-position focus knob (3mm / 5mm / 7mm) |
| Motors | Dual Y-axis + single X-axis, belt-free modular frame |
| Laser lifespan | Rated 10,000+ hours (manufacturer, at 27°C) |
| Max travel speed | Rated up to 15,000 mm/min. We measured up to 15,000 mm/min ourselves with no visible step-loss |
| Included accessories | Air assist pump, height risers, safety glasses, TF card + reader |
| Safety features | Key lock, emergency stop, tilt/motion sensors, limit switches |
| Compatible software | CutLabX (proprietary), LightBurn, LaserGRBL |
| Connectivity | USB + WiFi; Windows, macOS, Android, iOS |
| Price | $550, down from $650 (With Shield version). The plain X1Pro without the shield is $428, down from $538 |
We put most of these numbers to the test ourselves once the laser was running, in the cutting and engraving section below. A few of the deeper cuts are still in progress as thicker stock arrives.
Five things stand out about this machine, and they’re not just spec-sheet filler. The modular build goes together in three steps, so you’re not stuck decoding a confusing kit before your first cut. That 0.01mm precision number is what actually lets fine text and photos come out crisp instead of blurry.
The air assist and height risers are already in the box, which means cleaner cuts and room for thicker material without a separate shopping trip. Then there’s the safety setup: a key lock, an emergency stop, tilt and motion sensors, and limit switches. It matters more once there’s an actual laser running in a garage with kids or pets nearby.
Add compatibility with 300+ materials, and there’s a lot of room to experiment before you settle on what you actually want to make.
Most of these held up in our own testing: the modular build and the bundled accessories worked as advertised during unpacking and assembly, and the cutting and engraving results below back up the precision and material-compatibility claims too, at least through the thicknesses we’ve tested so far.
Here’s who we think this is for: makers who’ve already worked through an entry-level machine and are ready for a bigger work area and sturdier hardware, without wanting to spend more than about $550 to get there.
The bundled parts genuinely matter. Price out an add-on air assist pump, height riser kit, and enclosure separately for a bare-frame machine, and you can end up spending close to what the whole X1Pro With Shield package costs on its own. It’s not the machine for anyone needing to cut stock thicker than a 20W diode can realistically handle. Our depth tests below have that ceiling narrowed down through 12mm basswood so far, with the thicker end still being confirmed.
That price and feature list only tell part of the story. Cutting performance isn’t in a spec sheet, which is why we put the machine through its own paces below.

What’s in the Box: Carverall X1Pro Unboxing
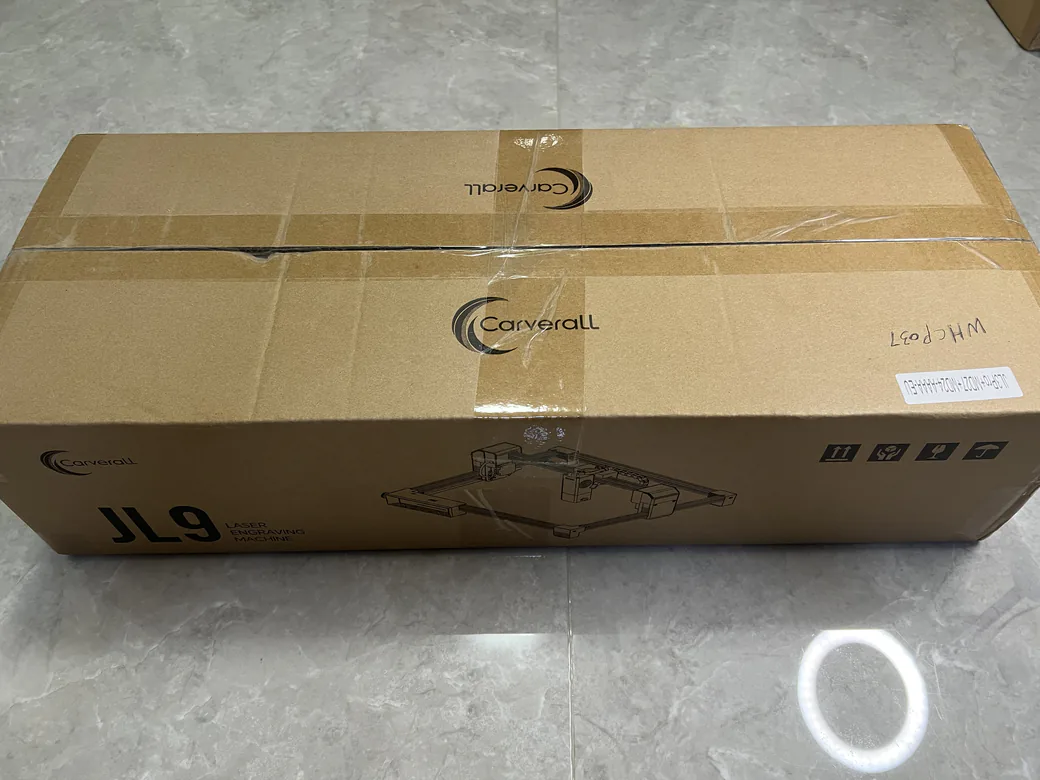
The boxes themselves give away more than you’d expect. The main engraver box arrived with a shipping label that included a “JL3Pro” reference among the codes, plus a handwritten batch number, “WHCP037,” on the side. That JL3Pro mention isn’t a typo — Carverall has since confirmed it’s a legacy/internal model reference. More on that in the FAQ below.
The enclosure showed up in that second box : panels for a shield cover that clips over the whole machine.
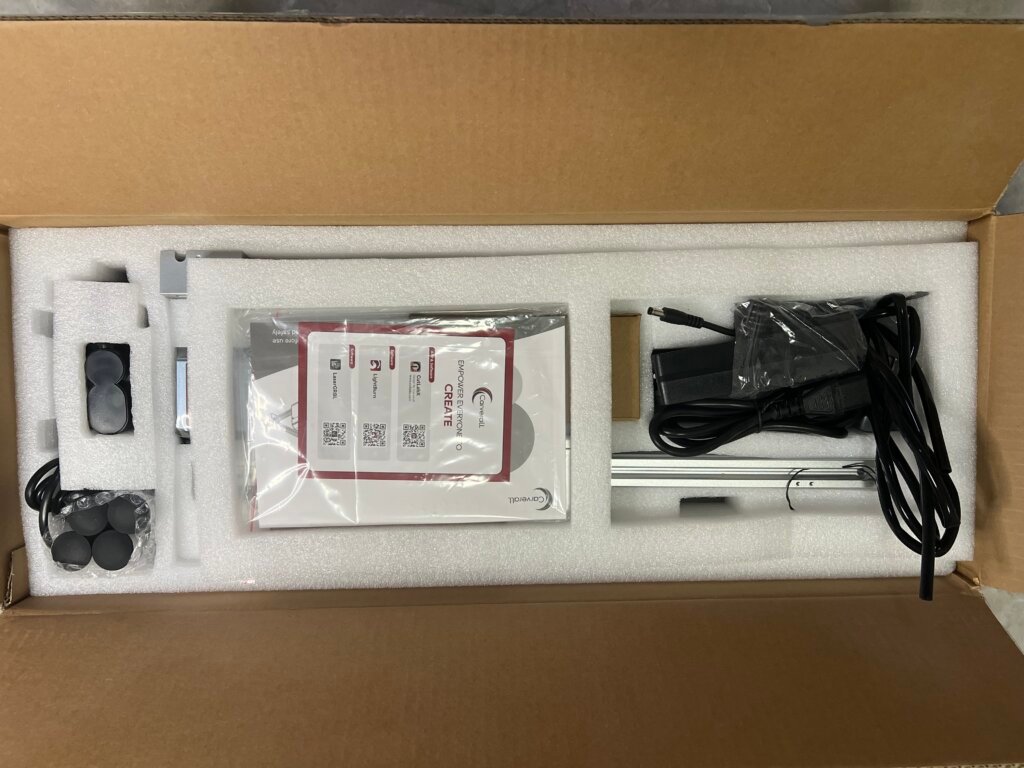
Inside the main box, the foam layout splits the kit into two lanes. One holds the gantry rails, the laser module, and a printed manual sealed in plastic. The other holds the power adapter and cabling, plus a second aluminum rail for the height riser.
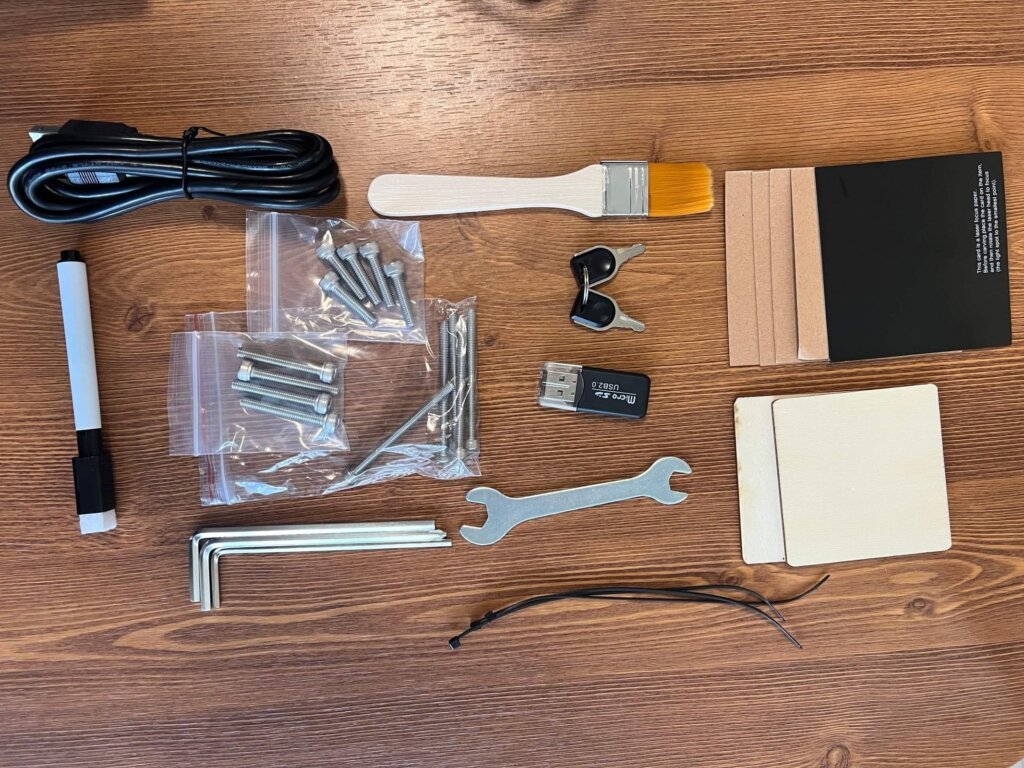
Once everything is laid out, here’s what we counted:
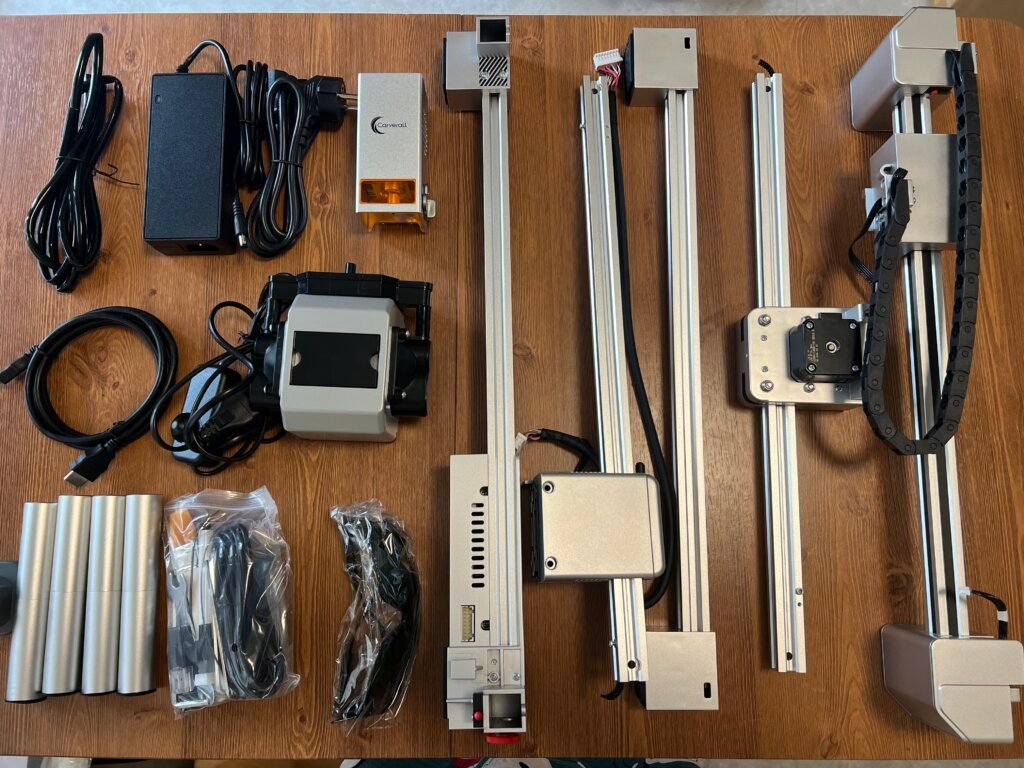
- Laser gantry frame and rails
- 20W laser head module with cooling fan
- Air assist pump and hose, for blowing debris off the cut as it happens and keeping edges clean
- Height riser rail and mounting hardware, which raises the gantry for taller or thicker workpieces
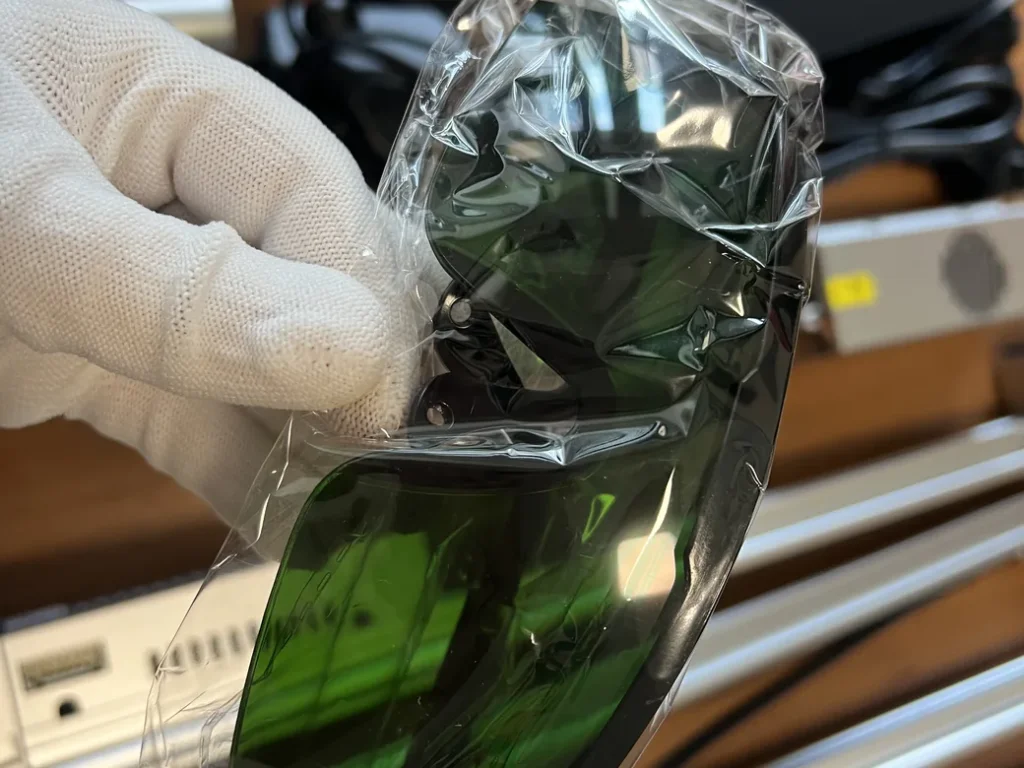
- Safety glasses (tinted, sealed) that block the laser wavelength so you can watch it run safely
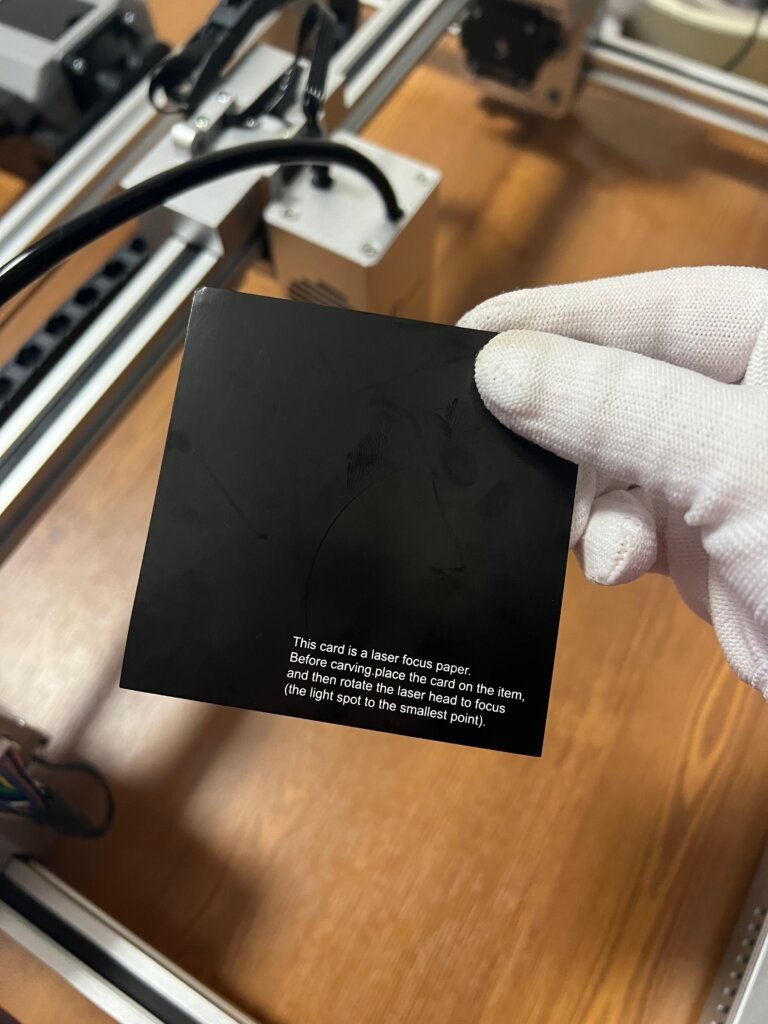
- Focus test card and calibration guide, for dialing in the beam focus before your first real job
- Tool kit: hex wrenches, open wrench, screws in labeled bags, zip ties, brush, marker pen. Everything needed for the build, no extra tools required
- USB card reader loaded with the setup software, for installing CutLabX, LightBurn drivers, and LaserGRBL
- 24V power adapter and cord
- Printed manual (English and Russian, plus a separate safety insert)
Nothing about the packaging felt like an afterthought.
The screws are sorted into separate bags by size, and the manual actually matches the hardware in the box. That’s not something you can take for granted with a first-generation product from a smaller brand.
Carverall X1Pro Design and Build Quality
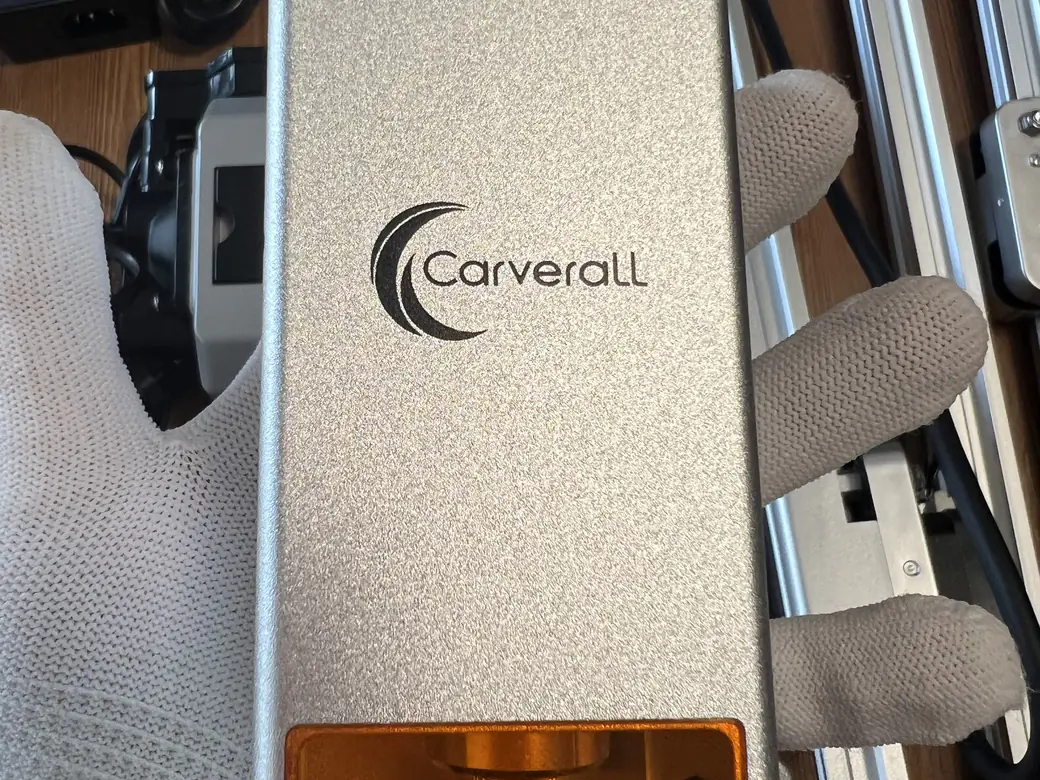

I’ve unboxed a fair number of budget diode lasers at this point, and most of them default to the same black-frame-and-plastic-shroud look. The X1Pro doesn’t.
Both the frame and the laser head module come in a silver-champagne anodized aluminum finish, which gives the whole machine a cleaner, more premium feel sitting on a desk than the category norm.
The frame itself is built from square aluminum extrusion, the same material you’d find on a 3D printer gantry, machined with tight, precise slots at the joints.
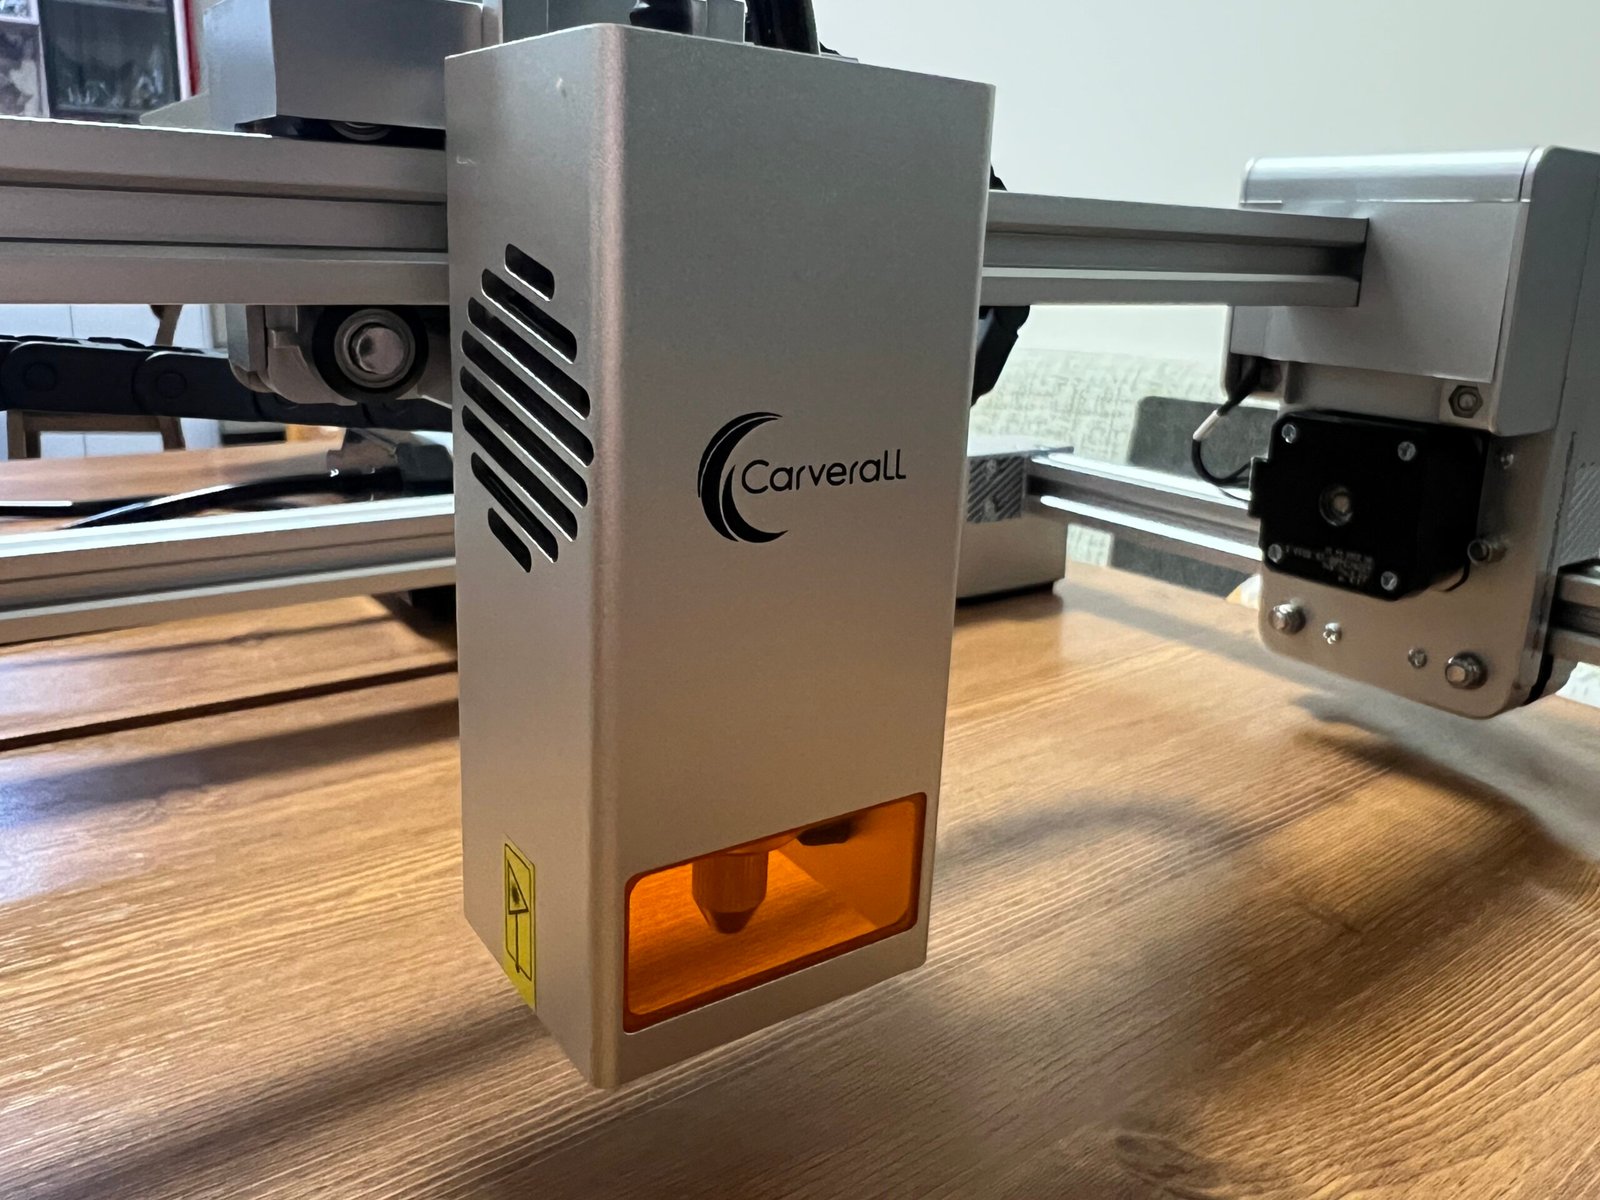
The laser head module is a compact rectangular housing with the Carverall logo etched into the front panel, right above the amber-tinted lens window where the beam exits, flanked by a side-mounted cooling fan.
The power module on the frame continues the same silver finish, with ventilation slots stamped into the housing and an aviation-style connector rather than a simple barrel jack. That barrel-jack DC input is on the separate external power adapter, not this module.
Cable management is handled with a black drag chain that runs the length of the gantry, keeping wiring off the rails instead of leaving it to flop around during a job.
Focusing is manual, via a knob with marked height settings for quick changes between material thicknesses. None of it feels like corners were cut to hit a price point.
Assembled, the footprint stays compact enough for a desk or a shelf. That matters more than it sounds like it should once you’ve tried to find room for a full-size laser enclosure in a spare bedroom.
How to Assemble the Carverall X1Pro (Step-by-Step)
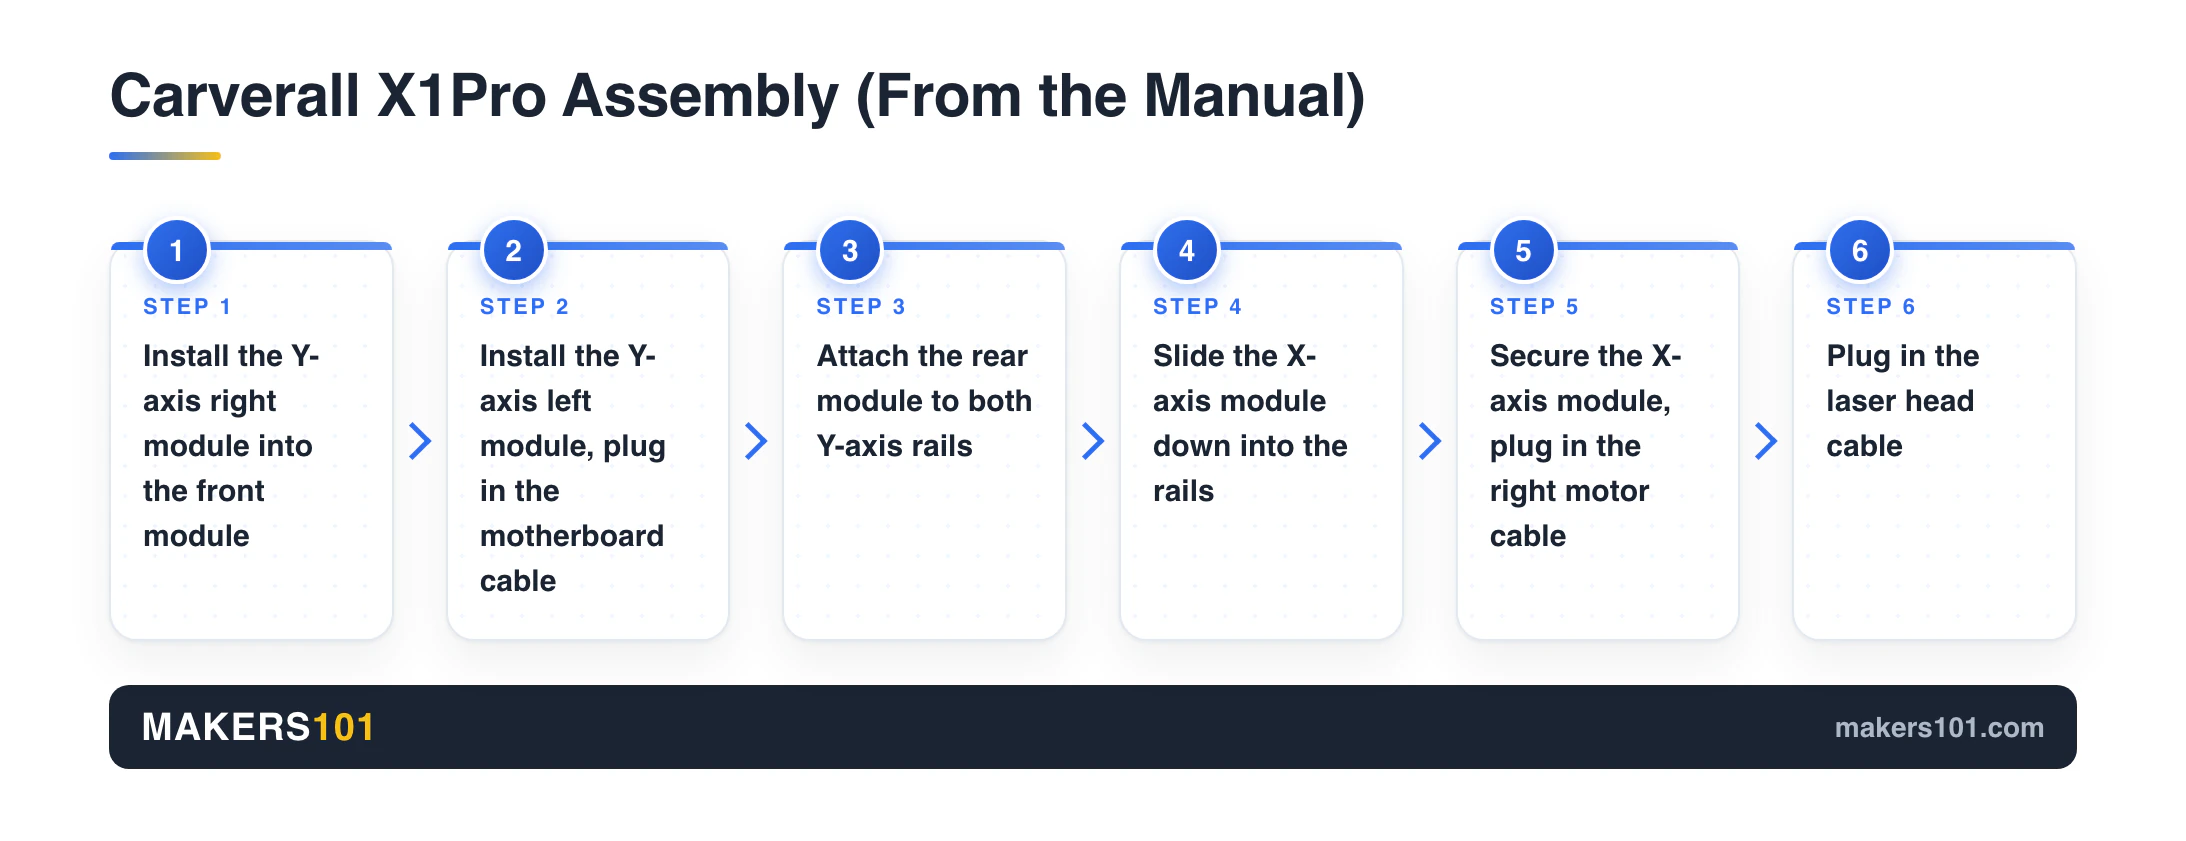
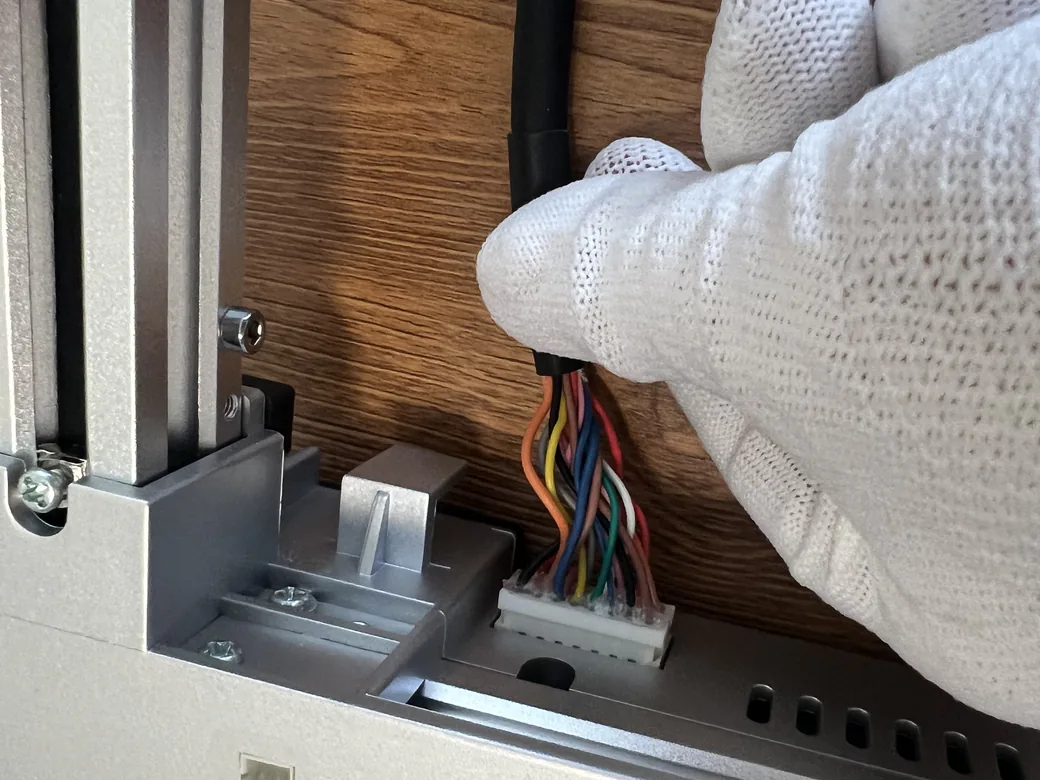
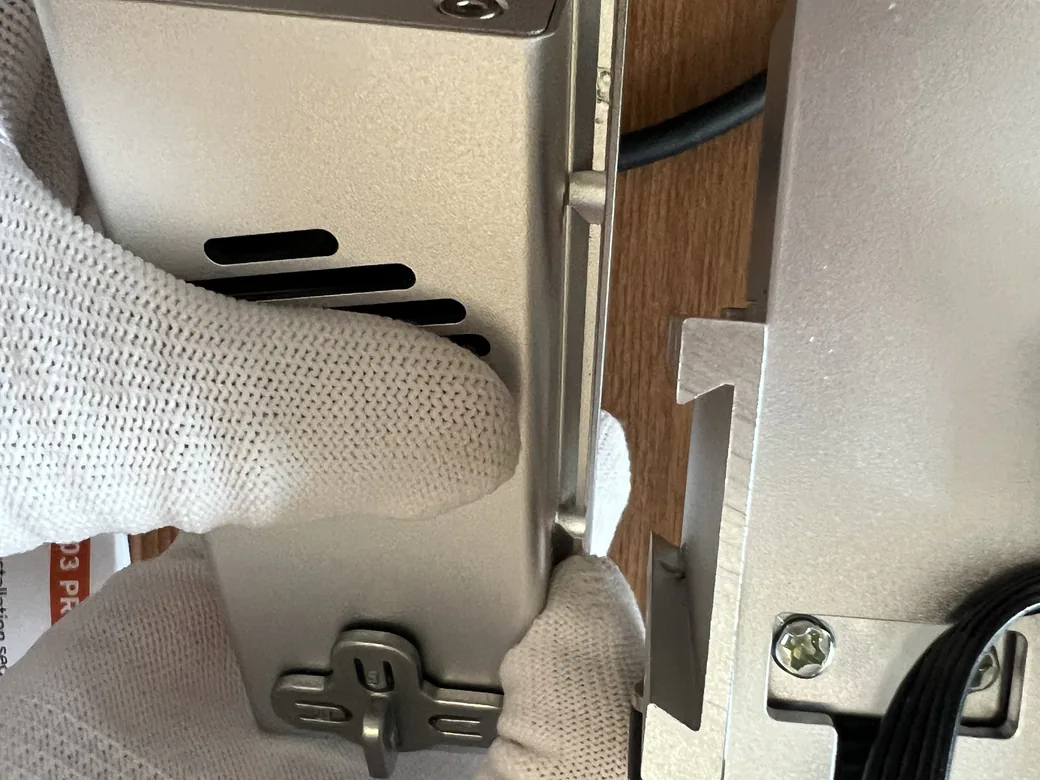
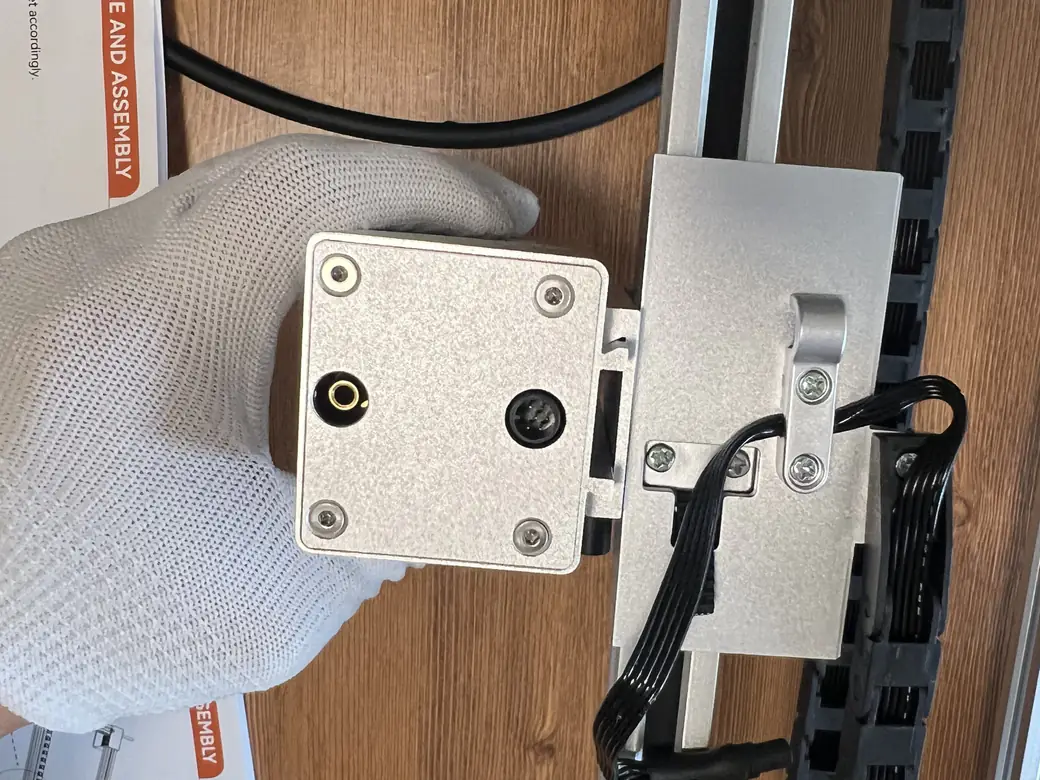
Assembly took us about 15 minutes, start to finish, and it went smoothly the whole way through, as long as you actually follow the manual step by step.
Read it first. It’s more detailed than most manuals in this price range, and it saves you the guesswork. Here’s the order we followed, working through it ourselves piece by piece.
Carverall also has an official assembly video if you’d rather follow along visually.
- Lay out the foam trays and check the parts against the box list first. Do this before you touch a screwdriver. Ours had everything we expected, but confirming that up front saves you a mid-assembly scramble if something’s missing.
- Mount the gantry rails to the base frame. Four screws per side connect the aluminum extrusions. The slots are machined tight, so the frame only goes together one way, which is a good design choice for a beginner-oriented machine.
- Attach the X-axis carriage and route the laser module cable through the drag chain. This is where you’ll find the “Fan Socket” connector, labeled in English and Russian right on the frame, along with an emergency-stop release instruction printed next to it.
- Install the power module and secure it to the frame with the two mounting screws. The power module has ventilation slots, so make sure nothing’s blocking airflow once it’s seated.
- Connect the laser head module to its mounting bracket and check that the cable runs clear of any moving rail before you tighten it down.
- Route and zip-tie the remaining cables, then do a full check before powering on anything.
A few things worth flagging while you’re in there:
- Put the safety glasses on before you power up the laser head for the first time, even just to test movement. It’s an easy step to skip when you’re eager to see the machine move.
- Match your power adapter to your outlet voltage. Our own shipment sat waiting on the right regional adapter before it could go out. Check yours before plugging in.
- Don’t force the gantry screws. The tolerances are tight enough that over-tightening can bind the rail instead of securing it.
- Keep cables clear of the rail’s sliding path. The drag chain handles most of this, but a stray zip tie in the wrong spot will bind the X-axis on its first pass.
- Run the focus card test before your first real job. It’s included specifically so you can confirm the beam is dialed in before you commit a piece of material.
Before you power anything on, it’s worth having a laptop or desktop ready to install the software, plus a well-ventilated spot. A window or a fume extractor helps, since diode lasers put off smoke on most materials.
Set aside a scrap piece of wood or acrylic too, for that first focus test.
One hiccup worth knowing about: the power indicator is supposed to stay solid once you switch the machine on. Ours didn’t light up at first.
Turned out we’d bumped the child safety lock during assembly without noticing. Switching it off fixed it immediately. Worth checking if your indicator light doesn’t come on either.
That’s the mechanical build sorted. From here, we ran the X1Pro through actual cutting and engraving tests, covered below. We’re still working through the deepest cuts and acrylic as thicker stock arrives, and we’ll keep updating this piece as those results come in. Sign up below to get notified. [MAILERLITE: laser-review-updates]
Carverall X1Pro Software: CutLabX vs LightBurn vs LaserGRBL
The X1Pro works with three different programs, and which one you start with depends on how much you already know.
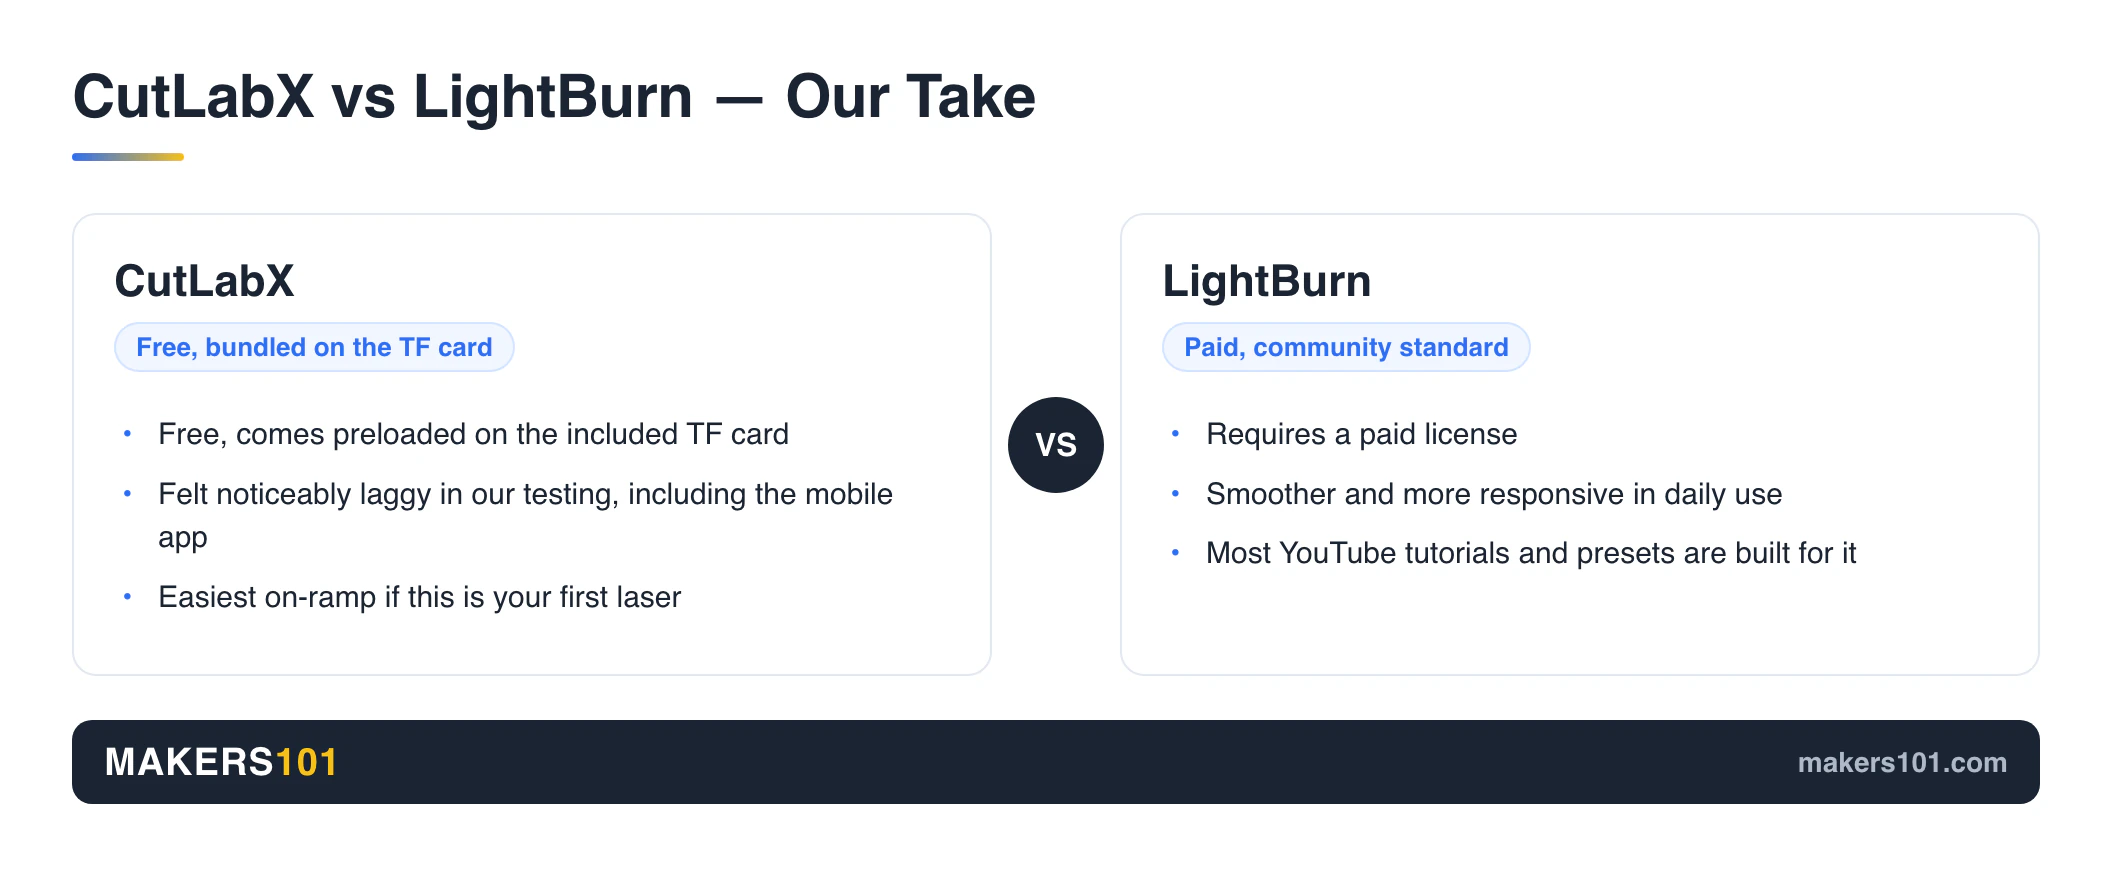
We tested two of the three ourselves: LightBurn and CutLabX. The drivers and the CutLabX installer both ship on the included TF card, so you don’t need to hunt down drivers online to get started.
LightBurn itself is a separate download and purchase from lightburnsoftware.com since it’s third-party paid software. The card includes a device profile for it, not the program itself.
Small hiccup on our end: the bundled card reader wouldn’t read the card properly, so we swapped in our own USB card reader instead. The TF card itself was fine. The files on it were complete and installed without issue once we could actually read them.
CutLabX is Carverall’s own free software. It’s built to feel familiar if you’ve used LightBurn before, with the same basic toolset for drawing, boolean shapes, and material testing. We also tried the mobile app version, and it felt noticeably laggy in daily use.
LightBurn is the software most of the laser engraving community already runs, and it’s the one we personally reached for more. It’s a paid license, but it’s also the tool most YouTube tutorials and community presets are built around, which matters more than any single feature once you’re troubleshooting a bad cut.
If you’re weighing diode lasers against CO2 and fiber machines before you buy anything, LightBurn support across all three is one less thing to worry about switching later.
LaserGRBL is the free, open-source option, and it’s there if you’d rather not pay for software before you’ve decided you’re keeping the machine.
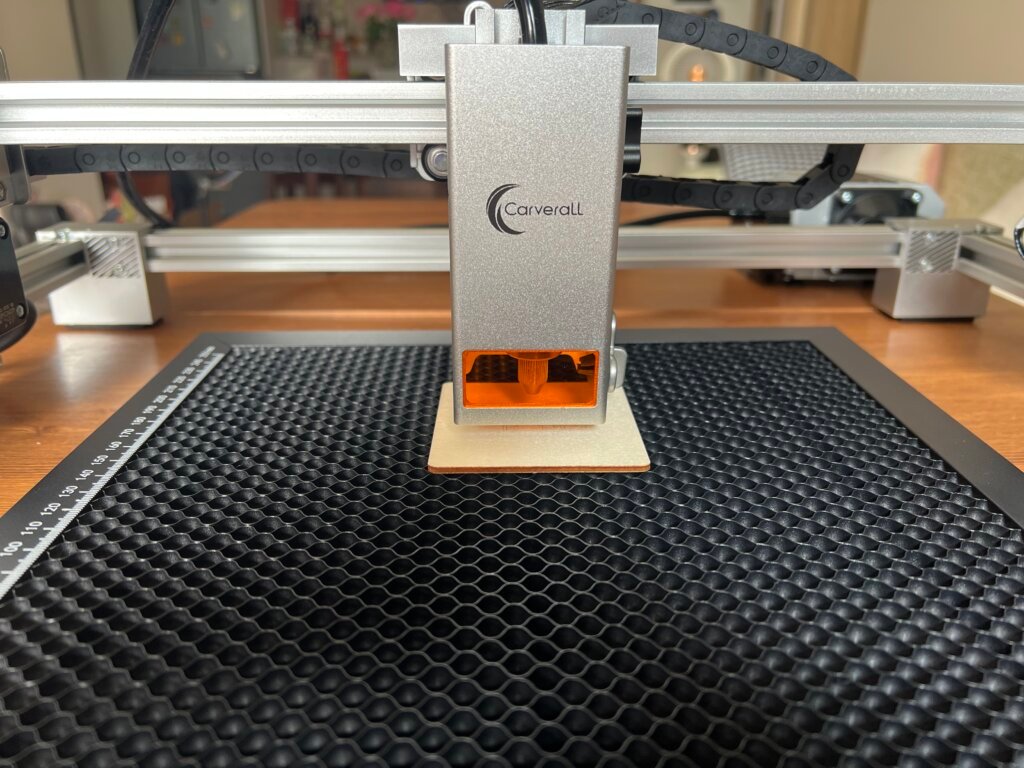
That honeycomb bed under it isn’t part of the X1Pro package. We picked it up separately for cleaner pass-through cuts.
Carverall X1Pro Cutting and Engraving Tests
CutLabX and LightBurn both boil cutting down to four dials: laser power, head speed, focus pin position, and how many passes you run. Get any one wrong and a board that should cut through in one pass comes out half-charred instead. Before touching any of Carverall’s marketing numbers, we ran every material through this same grid ourselves.
Pine/Basswood Cutting Depth Ladder
Carverall rates the X1Pro for pine up to 25mm deep. Eighteen millimeters is also a common thickness for furniture-grade plywood, which is why it gets its own line in the ladder below. Here’s what we measured, board by board, at room temperature (roughly 25-30°C):
| Thickness | Focus pin | Power | Speed | Passes | Cut through? | Surface scorching | Time |
|---|---|---|---|---|---|---|---|
| 3mm basswood | 5 | 100% | 600 mm/min | 1 | Yes | Barely visible | 11s |
| 6mm basswood | 5 | 100% | 400 mm/min | 1 | Yes | Barely visible | 12s |
| 9mm basswood | 5 | 100% | 200 mm/min | 1 | Yes | Barely visible | 22s |
| 12mm basswood | 3 | 100% | 120 mm/min | 1 | Yes | Barely visible | 30s |
| 15mm basswood | Testing in progress, thicker stock on order | ||||||
| 18mm basswood (solid board) | Testing in progress, thicker stock on order | ||||||
| 25mm basswood | Testing in progress, thicker stock on order | ||||||
One consistent pattern through 12mm: the surface right next to the cut line barely darkens at all. On a 20W diode laser we expected a visible scorch halo, but the built-in air pump kept the char confined almost entirely to the kerf itself. Whether that holds at 18mm and 25mm, where the beam has to punch through far more material before it clears the bottom, is what actually tells us whether this machine can do what it’s rated for.
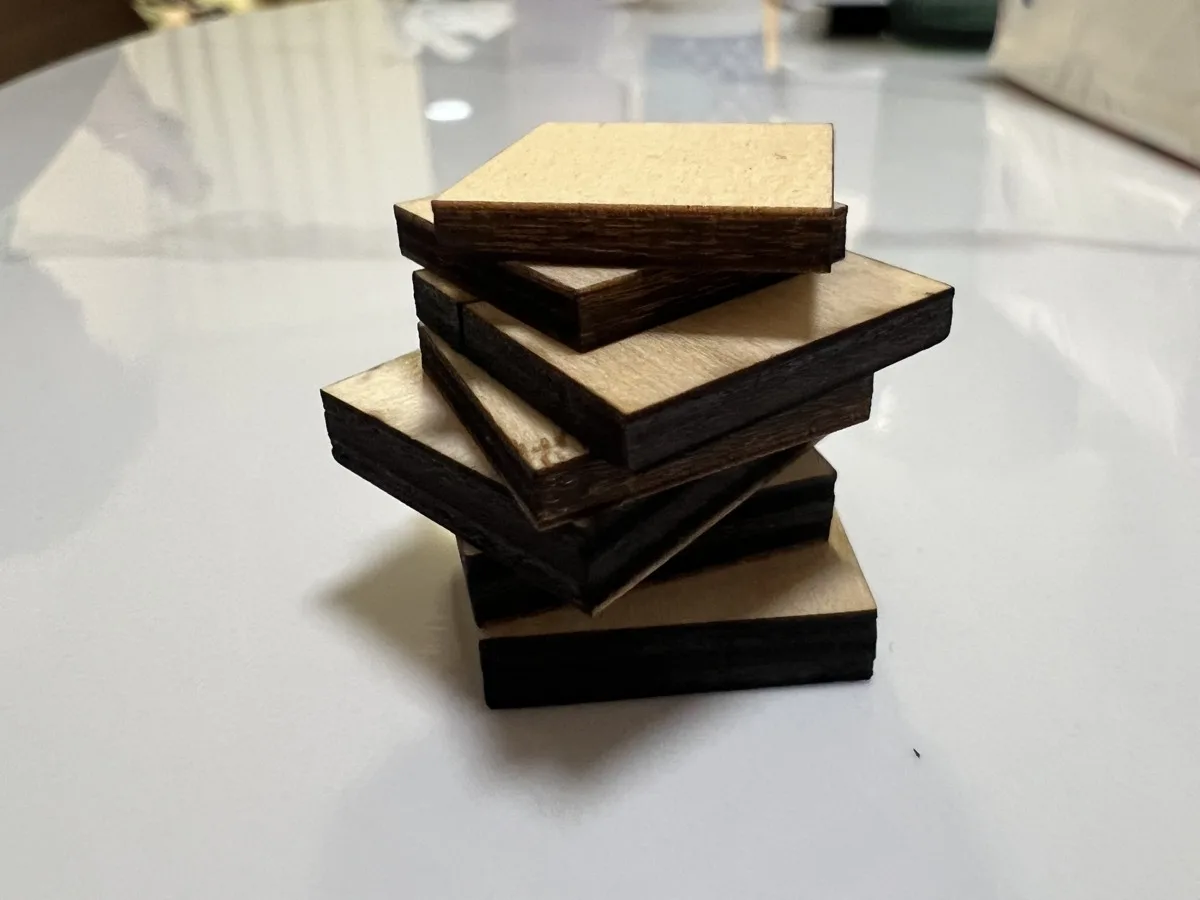
A note on shortcuts, and why we’re not taking one: while waiting on thicker stock to arrive, we tried stacking three 5mm basswood boards plus one 3mm board to approximate 18mm, and cut through the stack in two passes at 100% power, 120mm/min. We’re not reporting that as an 18mm result. Stacked boards have air gaps between layers that a solid board doesn’t, so the laser is cutting through a physically different situation. We’ll update this table with a genuine single-board 18mm and 25mm result as soon as our new stock clears customs.
Acrylic Cutting Depth
Carverall rates the X1Pro for acrylic up to 35mm. We’re waiting on 3mm, 5mm, and 8mm acrylic stock to arrive to test that ourselves, and we’ll fill this section in once that testing is done.
Air Pump On/Off: Does It Actually Matter?
We cut the same 3mm basswood, same settings, 600mm/min, 100% power, one pass, once with the pump off and once with it on, to see whether the pump actually changes anything.
| Pump off | Pump on | |
|---|---|---|
| Cut through | Yes | Yes |
| Surface scorching | Slightly darker | Slightly lighter |
Both boards cut all the way through either way, at least at this thickness. The pump’s job here wasn’t making the cut possible, it was making the edge marginally cleaner. We’re adding a side-by-side photo and a few more data points (sanding needed, time, noise) to this comparison shortly.
Photo Engraving and Fine-Line Detail
We ran a grayscale portrait through CutLabX onto a basswood blank, the kind of test that punishes a cheap diode laser fast, since every gray value has to come from dot density, not actual grayscale power. The result held detail through the hair and denim jacket texture without flattening into mud, which is more than we expected from a $389.99 machine.

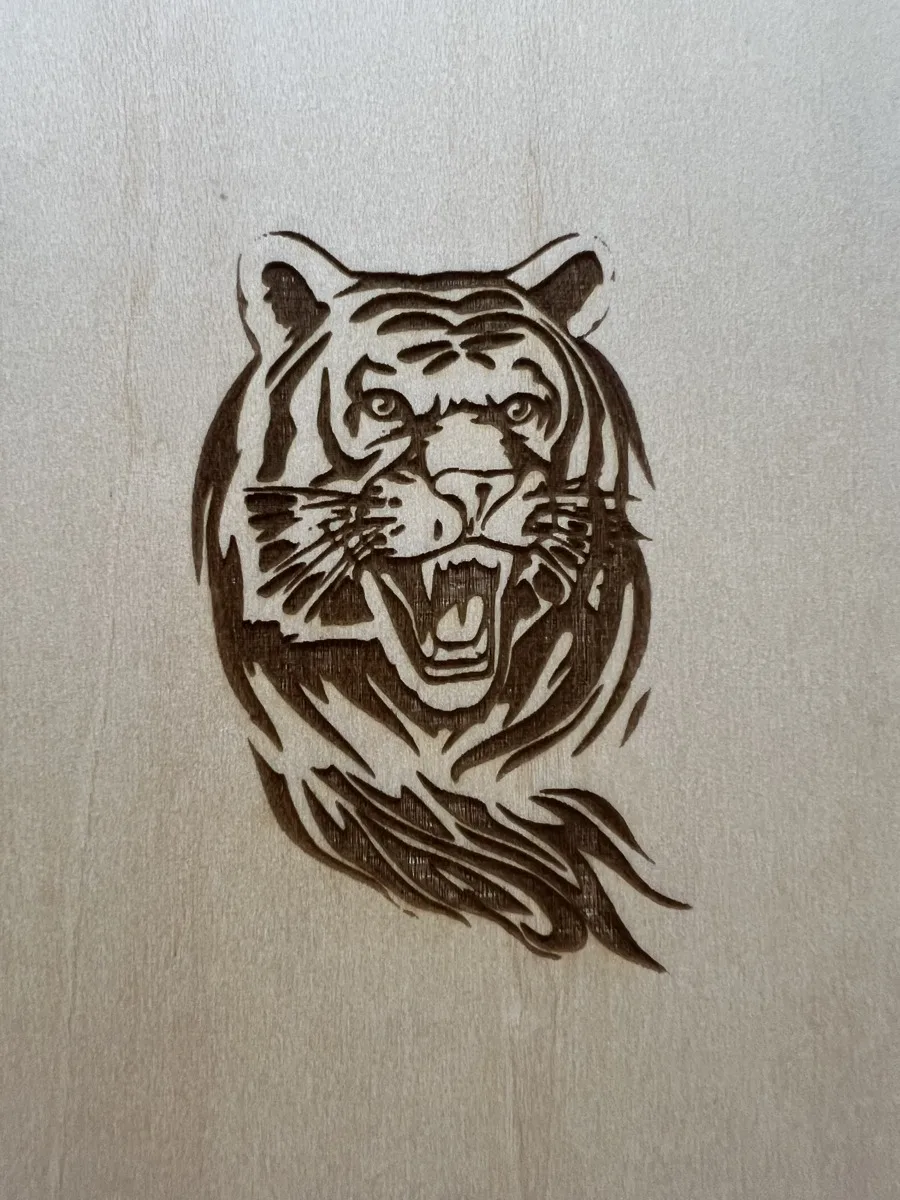
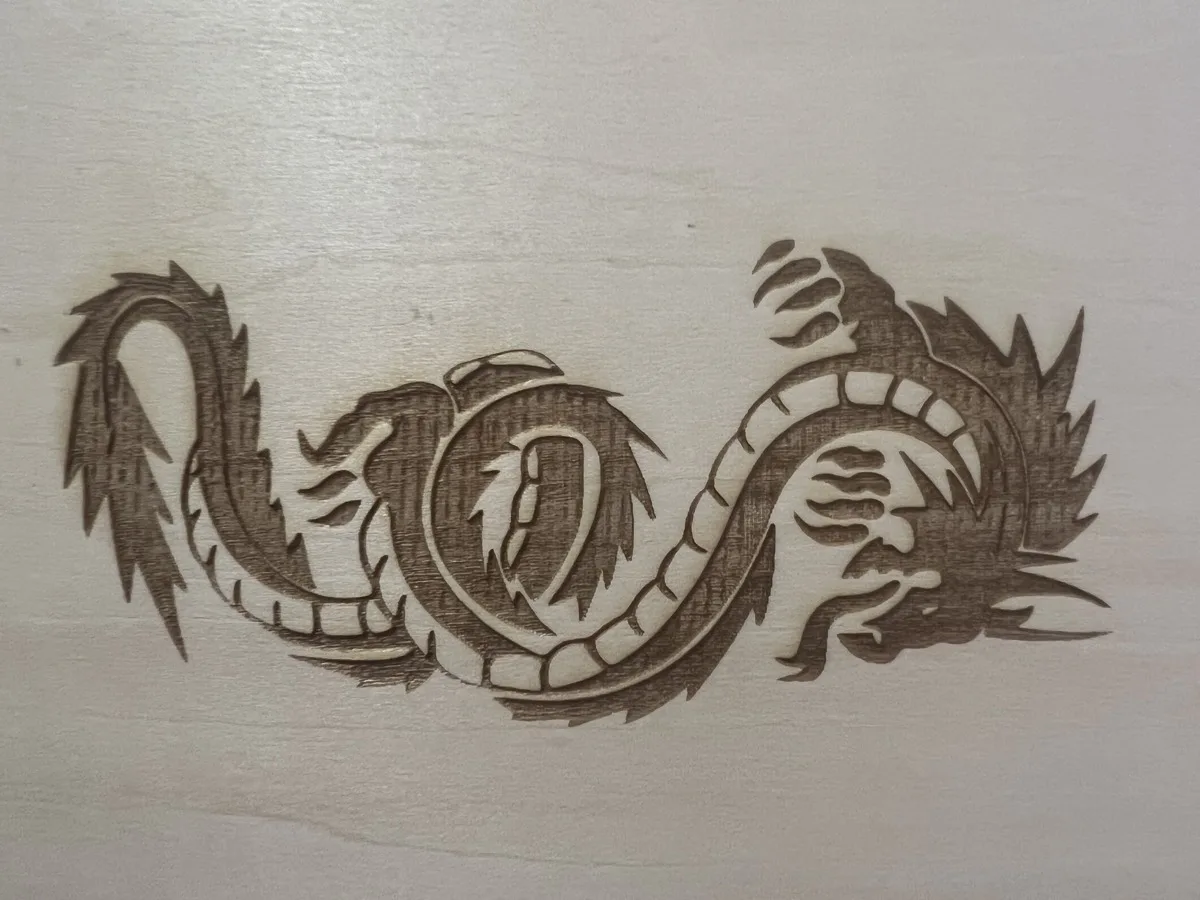
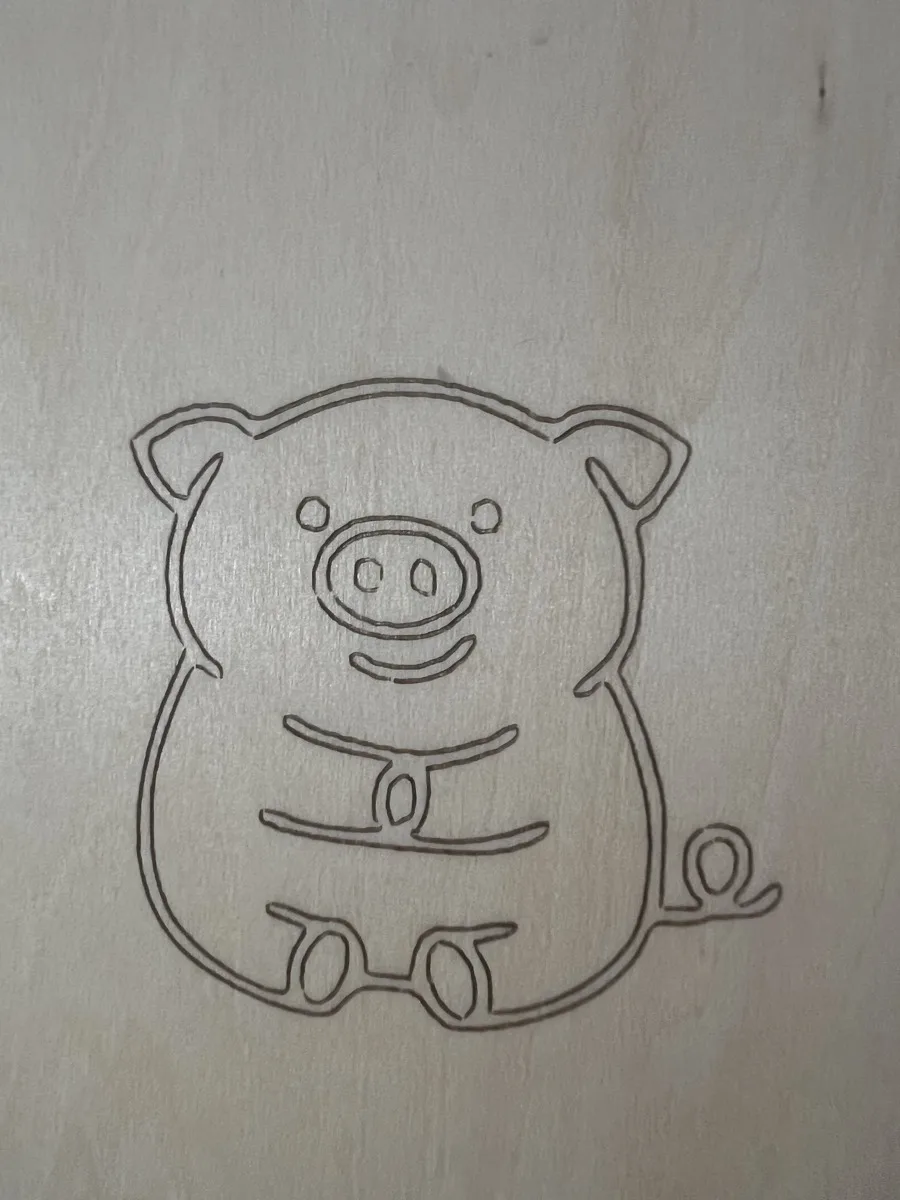
Line-art designs held up just as well. A detailed tiger head engraving came out with clean, legible fur texture and whisker lines instead of the muddy blob a weaker laser or a rushed speed setting tends to produce.
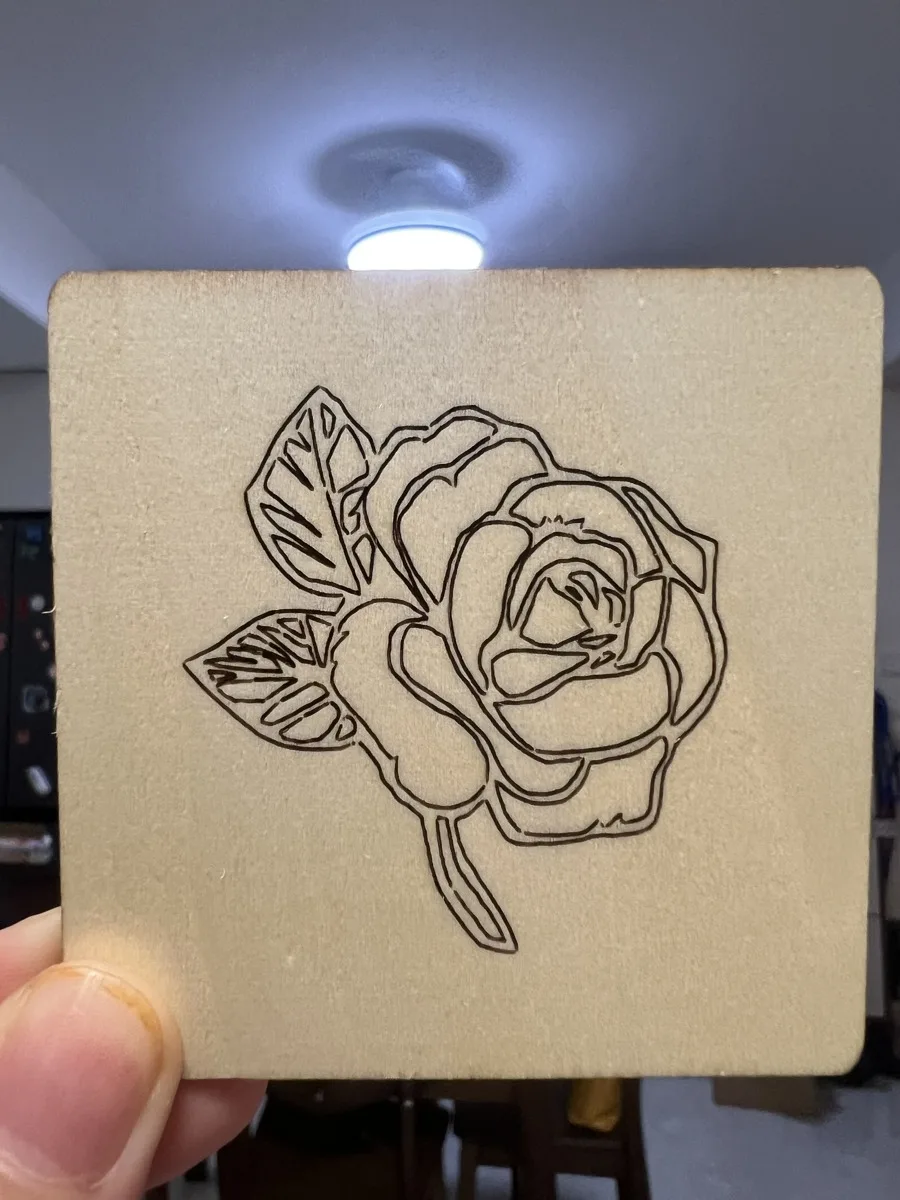
We also engraved a pre-made rose-motif wood-and-leather keychain blank at 60% power, 6,000mm/min, single pass, a different use case from cutting raw stock since it’s decorating a finished blank instead, and it came out clean at that speed. For the finest line test, our measured result landed at 0.08 x 0.1mm.
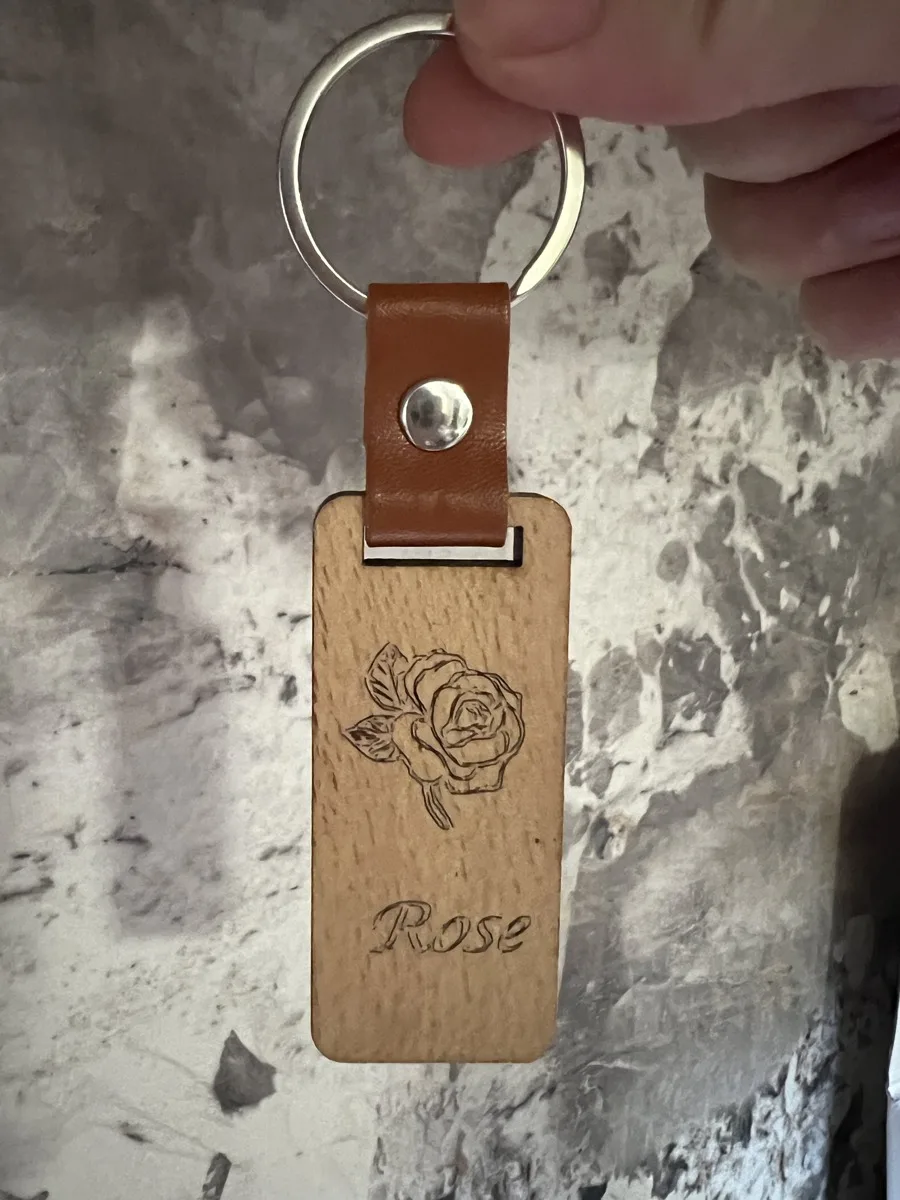
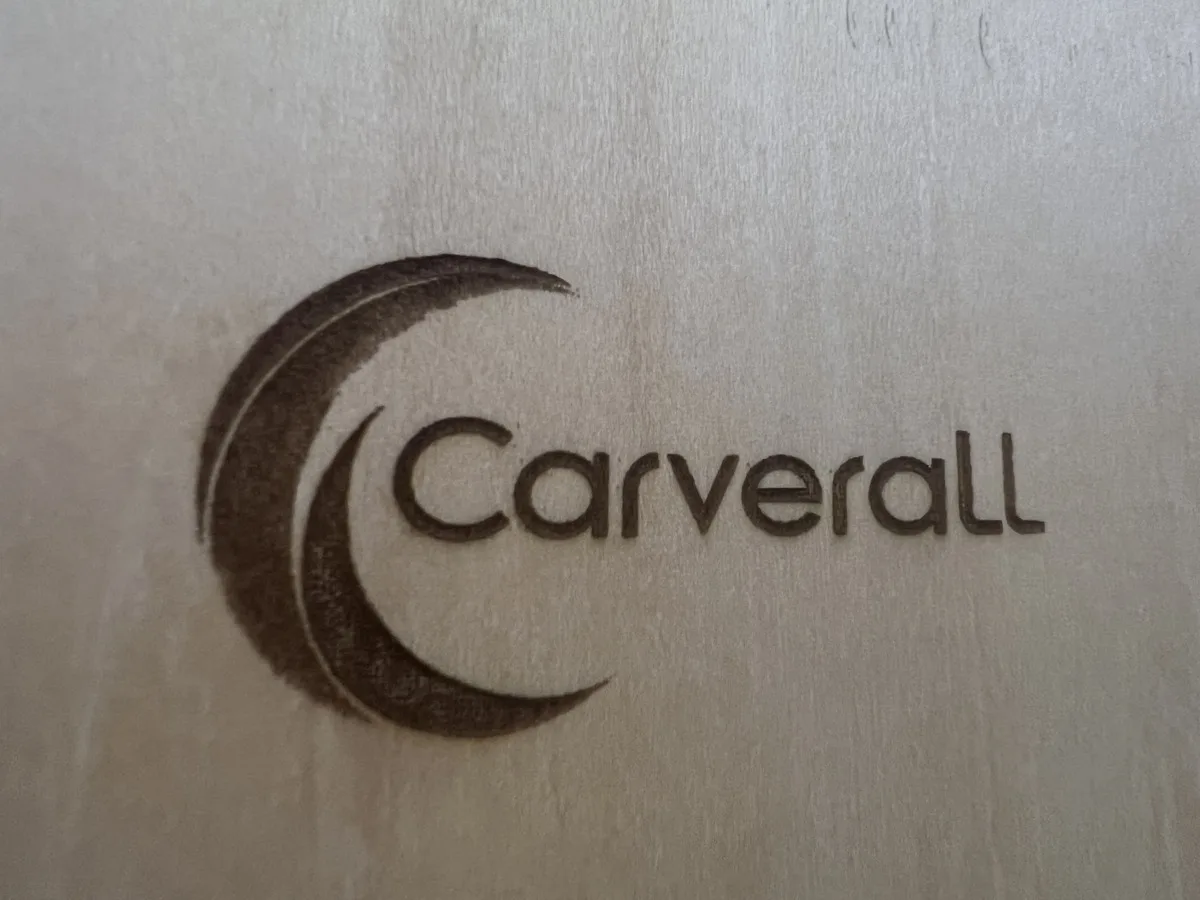
We ran a handful of other designs through the same process, line art, logos, and denser pieces, to get a broader read on engraving quality. Swipe through a few of them:
Material Matrix
| Material | Action | Power | Speed | Passes | Result |
|---|---|---|---|---|---|
| Leather | Engrave | 35% | 8,000 mm/min | 1 | Clean |
| Slate/tile | Engrave | 35% | 8,000 mm/min | 1 | Clean |
| Cardstock | Cut | 5% | 5,000 mm/min | 1 | Slightly fuzzy edge |
| Coated stainless cup (paint removal) | Testing in progress | ||||
| Bare black steel/aluminum | Testing in progress, expected to fail: blue diode lasers generally can’t mark bare black metal without a separate infrared module | ||||
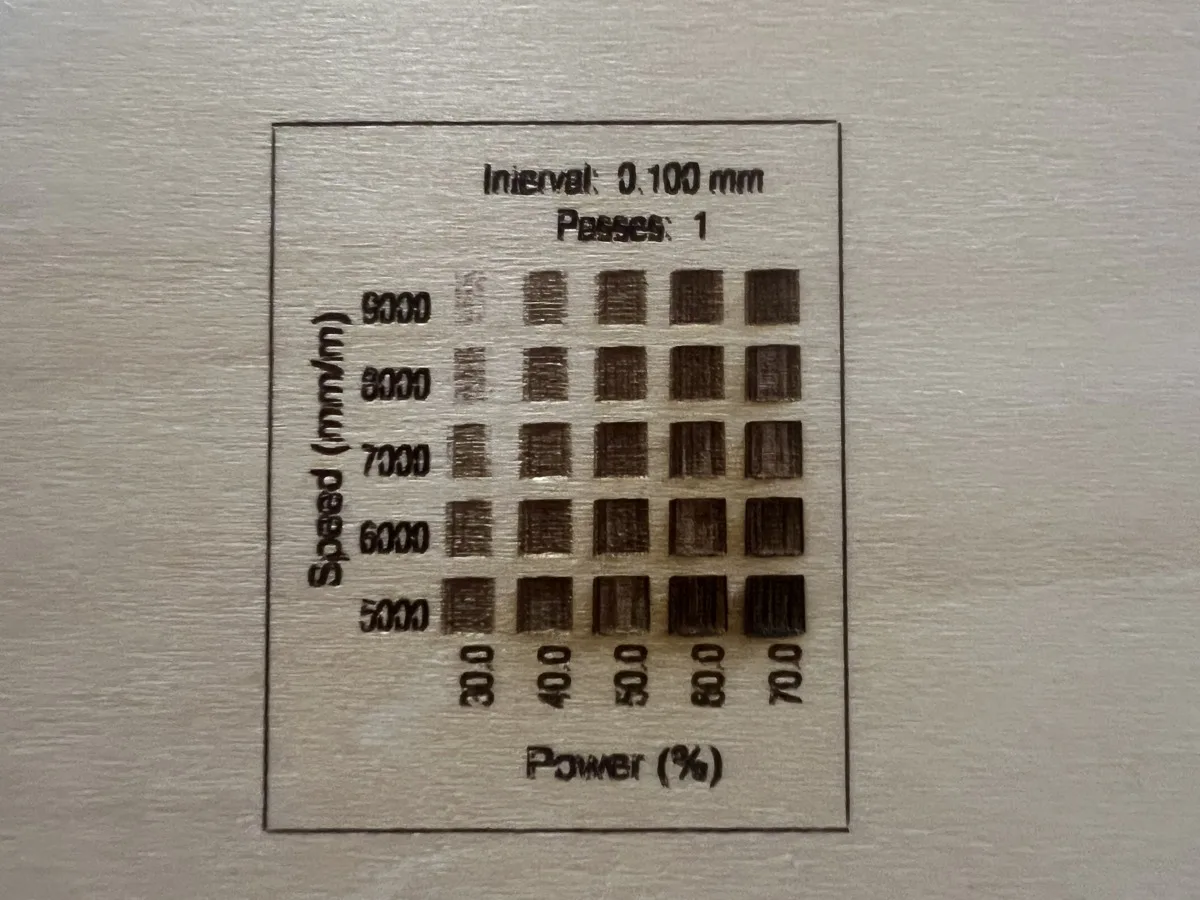
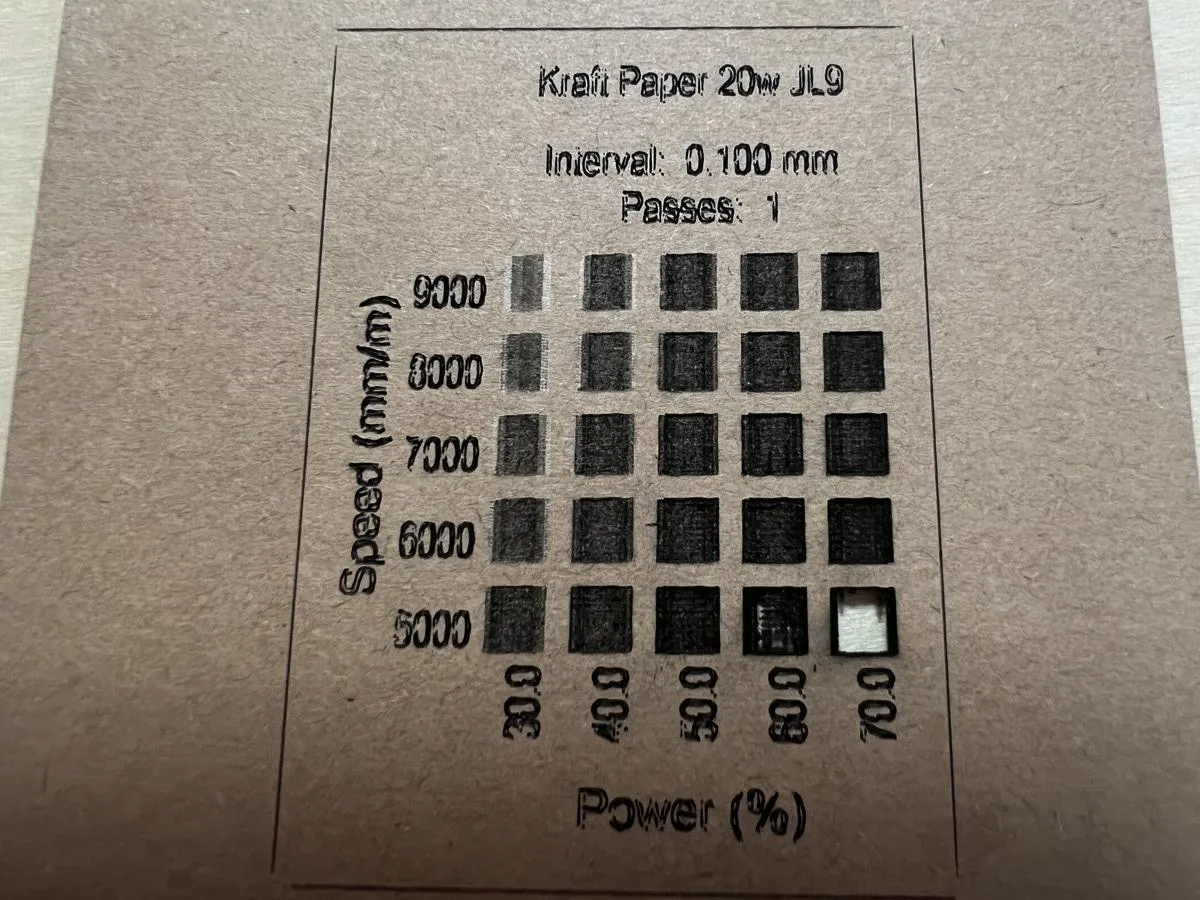
CutLabX and LightBurn both include a built-in material test grid, which burns a small swatch at every combination of power and speed you specify so you can read the results instead of guessing. We ran one on basswood (30-70% power, 5,000-9,000mm/min, 0.1mm interval, single pass) and another on plain kraft paper at the same settings.
On the kraft paper grid, one cell went further than the rest: at 70% power and 5,000mm/min, the laser cut all the way through the paper instead of just marking it, leaving a clean hole rather than a scorched square. Every other combination in the grid only engraved the surface.
We’ll add the stainless cup and bare black metal results here once we’ve run them, including a close-up of the black-metal attempt if it fails the way we expect. A failed test tells you as much about a machine’s limits as a clean one does.
Who Should Buy the Carverall X1Pro
Based on what’s in the box alone, the X1Pro reads like a laser built for someone buying their first machine.
Other diode lasers on the market, including some we’ve covered in our review of the xTool X1, often ship as a bare frame and leave the enclosure, the pump, and the riser as things you track down afterward. The X1Pro folds all three in from the start.
That’s unusual at this price point. It points the machine squarely at beginners assembling a first setup.
Our own testing so far backs that bundle up through 12mm basswood cuts, photo engraving, and a handful of other materials. We’re still confirming where the ceiling actually sits at 18mm and beyond, and we’ll update this section once those results are in. For a wider view of where 20W diode machines like this one sit in the market, our laser engraver buying guide is a good place to start in the meantime.
FAQ: Carverall X1Pro Review
Why Does the Carverall X1Pro’s Box Say “JL3 Pro”?
Carverall confirmed JL3 is a legacy/internal model reference that still shows up on some packaging and shipping labels. The names Carverall uses today — and the ones we use throughout this review — are JL9 and X1 Pro.
What’s included in the With Shield bundle?
Our Carverall X1Pro unit came with the laser gantry and head module, an air assist pump, a height riser kit, safety glasses, a focus test card, a USB card reader with software, a full tool kit, and a 24V power adapter matched to our region.
How much does the Carverall X1Pro cost?
The With Shield version we tested runs $550, down from $650. There’s also a plain X1Pro without the shield for $428, down from $538. Pricing and contents can change, so check the current listing before you buy.
Is the X1Pro good for laser engraving beginners?
Yes, based on what we’ve seen so far: the bundled accessories and the free CutLabX software both point that direction, and the assembly is approachable enough for someone building their first machine.
Our own testing backs that up so far: clean cuts through 12mm basswood, a detailed photo engraving result, and a straightforward assembly all point toward a beginner-friendly machine. Here’s how it lines up against other picks in this price range.
Is the Carverall X1Pro worth it at $550?
Leaning yes, based on testing so far. The bundle looks competitive on paper against machines that make you buy an enclosure and air assist separately, and our own cuts through 12mm basswood and photo engraving results back that up in practice. We’re holding off on a final verdict until we’ve confirmed the deeper cuts Carverall claims (18mm and up) and acrylic performance.
Can the Carverall X1Pro (JL9) cut 18mm pine in one pass?
Not confirmed yet. Carverall rates the machine for pine up to 25mm; 18mm is also one of the most common plywood thicknesses for furniture and cabinet projects. We cut cleanly through solid basswood up to 12mm ourselves. We also tried stacking thinner boards to approximate 18mm while waiting on thicker stock, but we’re not reporting that as an 18mm result, since a stack of thin boards with air gaps between them isn’t the same physical test as a solid board. We’ll update this answer with a genuine single-board result once ours arrives.
Does the Carverall X1Pro’s air pump actually matter for cutting?
At the one thickness we’ve isolated it on so far (3mm basswood, same power and speed both times), the board cut all the way through with the pump on or off. The difference showed up in the edge: slightly more scorching with the pump off, slightly less with it on. So far, it looks like the pump improves the cut rather than enabling it, though we’re expanding this test to more thicknesses.
Disclosure
Carverall provided this X1Pro unit to Makers101 for review. Our testing and conclusions are our own, and any links to Carverall’s site in this piece are marked sponsored.
This piece now includes our own cutting and engraving testing alongside the unboxing and build. A few tests, including the deepest cuts Carverall claims and acrylic performance, are still in progress as thicker stock arrives, and we’ll keep updating this page as those results come in.
As of publishing, Carverall is running 10% off its full laser lineup for new customers. Check the current listing (sponsored) to see if it’s still active.