Heads up — some of the links below are affiliate links. If you buy through them, I earn a small commission (at no extra cost to you), which helps cover the gear I test. Thanks!
- UV light hardens liquid photopolymer one layer at a time, and the object hangs upside down from a metal plate.
- The only moving axis is Z. The machine goes up and down, and nothing else.
- Height sets the clock. A full plate of miniatures takes about as long as one.
- The genuinely hard parts are ventilation, waste disposal, and post-processing time. None of them involve the printer.
- The scariest-sounding chores, like scrubbing the vat after every print, turn out to be optional.
So how does a resin printer work? A screen sits under a tank of liquid resin and displays one slice of your model. UV shines up through that slice, and whatever the light reaches turns solid. The plate then rises by one layer’s worth and the cycle starts again, several thousand times over, with the object hanging upside down the whole way.
If you only want the mechanism, the next section covers it in about sixty seconds. If you’re trying to decide whether to buy one, skip ahead to what’s actually hard about resin printing, because that section is where the real answer lives.
Resin prints look incredible. That’s usually how this starts. You see a miniature with crisp chainmail links or a bust with actual eyelashes, you find out the printer costs less than a decent phone, and then you start reading.
That’s where it falls apart for most people. You hear the word toxic. You see photos of people in respirators. Someone on Reddit mentions hazardous waste disposal and you quietly close the tab. One user in r/resinprinting bought a Photon Mono 6K three years ago, put it in a windowless garage, and has never once turned it on. Meanwhile another user plugged in a Mars 5 Ultra, ran zero exposure tests, skipped calibration entirely, and pulled a clean Gengar off the plate on the first try.
Both of those people are telling the truth. The gap between them is what nobody explains.
So here’s the plan. First, what the machine is actually doing, in plain terms. Then which parts of resin printing are genuinely difficult, and which parts got exaggerated somewhere along the way.
Table of Contents
- How a Resin Printer Works
- What’s Inside a Resin Printer
- The Print Cycle, Step by Step
- Why Resin Printing Is Faster Than It Looks
- SLA vs DLP vs LCD: Three Ways to Cure Resin
- Why Resin Prints Fail
- What Happens After the Print Finishes
- What’s Actually Hard About Resin Printing (And What’s Overblown)
- What Uncured Resin Actually Does to You
- What You’ll Need (And What It Really Costs)
- Is a Resin Printer Right for You?
- Frequently Asked Questions
How a Resin Printer Works
The mechanism is far simpler than the safety warnings around it make it sound. Light hits liquid plastic and the plastic stops being liquid. Do that a few thousand times in the right shapes and you have an object.
The material is photopolymer resin, a liquid that hardens permanently when UV light hits it. Think of gel nail polish. It stays goopy in the bottle and sets solid the moment it goes under the lamp. Resin behaves the same way, which is why it ships in opaque bottles and why sunlight is a problem rather than a convenience.
Here’s the part that surprises people. A resin printer only moves on one axis. An FDM printer drags a nozzle through all three axes, drawing each layer like a pen. A resin printer just goes up and down. The shape comes from an LCD screen underneath the resin tank, which lights up in the outline of one layer and cures everything the light touches, all at once.
The build plate hangs the print above that screen. Not below it. Your model grows downward into the air while the plate climbs.
It’s less like printing and more like repeatedly photographing a solid into existence.
That’s the complete mechanism. Everything below is for people who want to know why prints fail, what the thing actually costs to keep running, and whether it’s worth living with.
What’s Inside a Resin Printer
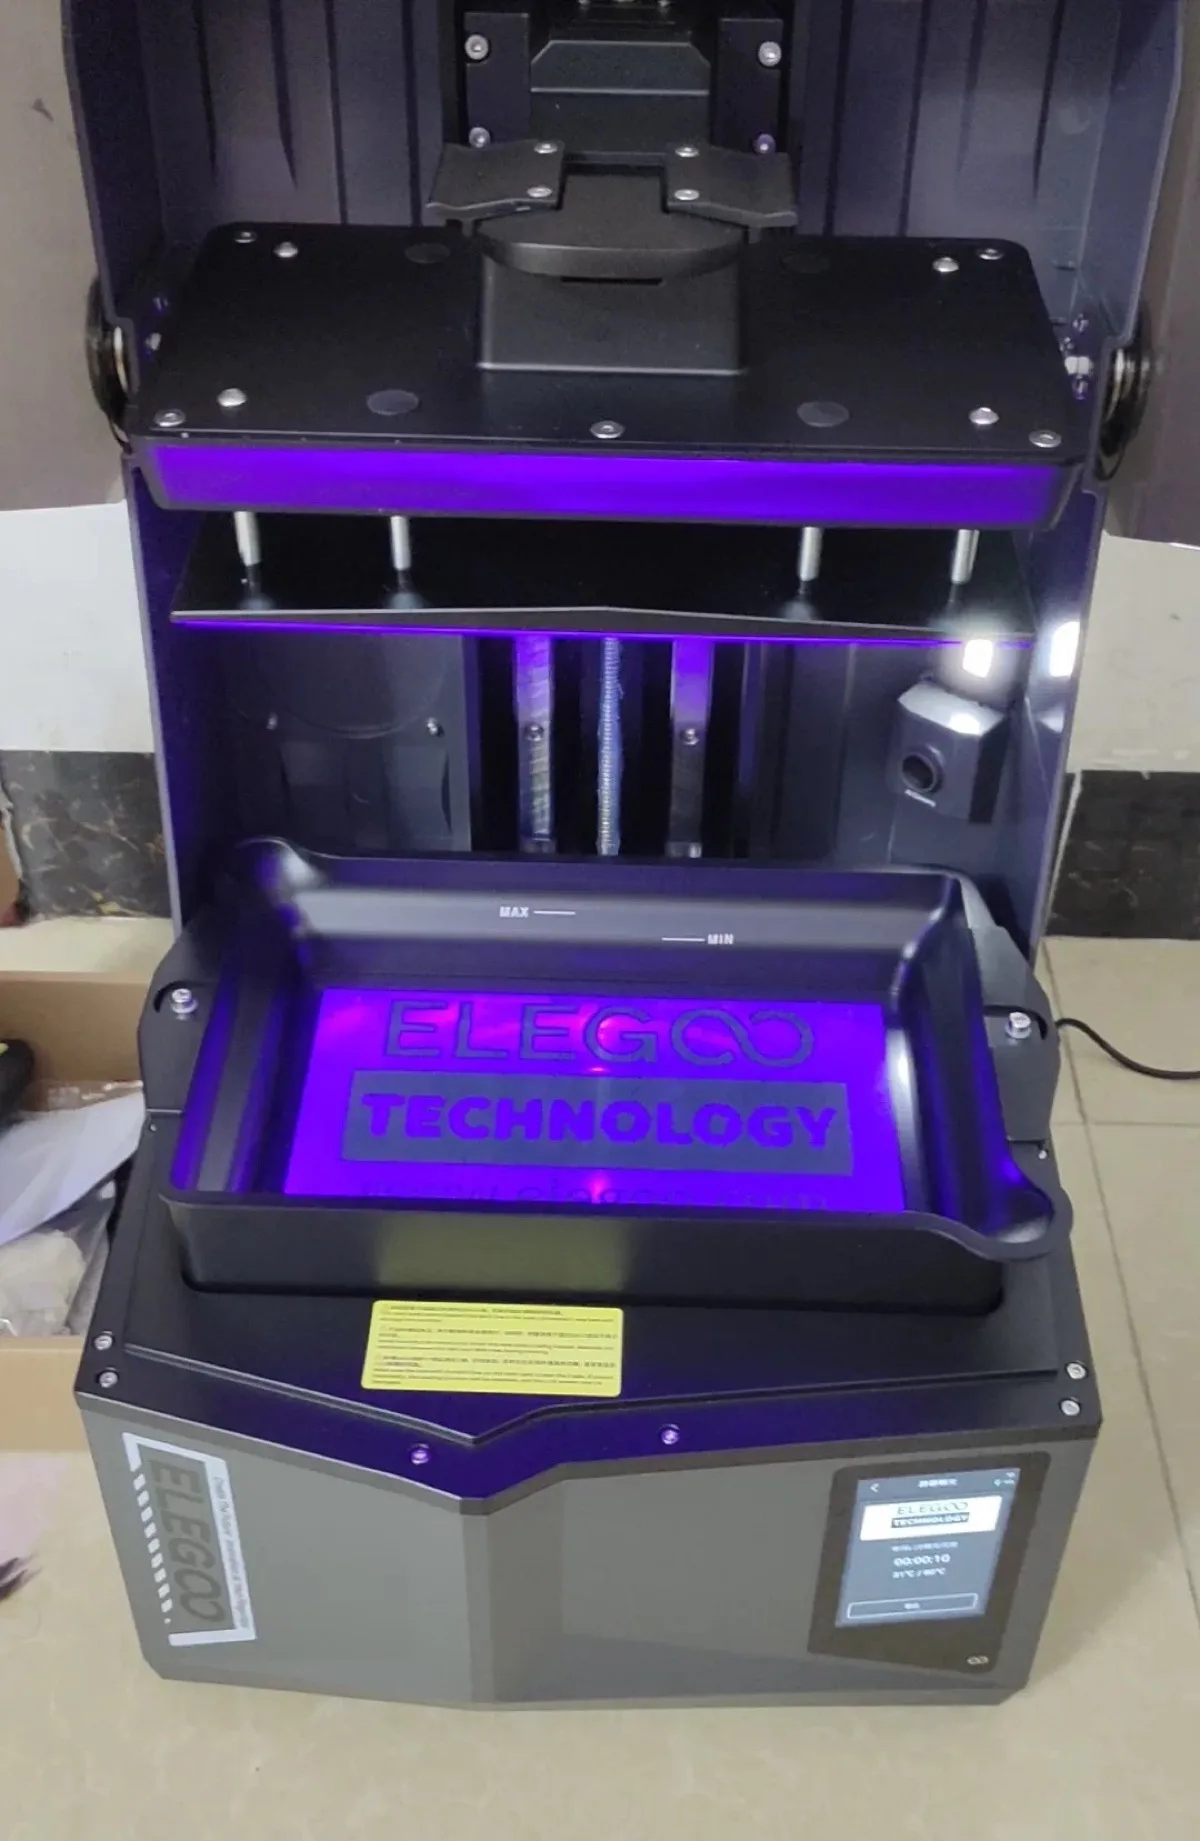
There are five parts that matter, and two of them are consumables. That second fact is the one that catches people out.
| Part | What it does | What happens when it fails |
|---|---|---|
| UV light source | Emits the ultraviolet light that hardens the resin | Output dims unevenly, layers stop bonding, prints delaminate |
| LCD masking screen | Displays each layer’s shape, deciding where light passes through | A consumable. FauxHammer puts replacement at roughly 2,000 hours of exposure time |
| Resin vat and FEP film | Holds the resin. The FEP is the clear film cured layers peel away from | A consumable. Puncture it and resin leaks onto the screen below |
| Build plate | The metal plate your print hangs from, upside down | If it sits unlevel, prints drop off and cure into a blob on the film |
| Z-axis arm | The single moving axis. It raises and lowers the plate | Play or wobble shows up as visible layer shift |
Two of those five wear out on a schedule. That’s the structural difference between owning a resin printer and owning an FDM machine, and it’s the reason the sticker price tells you so little.
The Print Cycle, Step by Step
The way a resin printer works is repetitive by design. One five-step loop, run a few thousand times, and that’s your model.
Step 1: Slice the model and add supports
Slicing software turns your 3D file into a stack of flat images, one per layer, and tells the printer how long to expose each one. ChiTuBox and Lychee are the two most common, and FauxHammer notes the free versions are enough for most people. This is also where supports get added, and where you find out if your model has problems. If you’re still looking for models to print, our comparison of where to download 3D models covers the main libraries.
Step 2: The plate drops to within a hair of the screen
The build plate lowers until the gap between it and the LCD is a fraction of a millimeter. That gap is your layer height. This is why a level plate matters so much: if one corner sits closer than another, your first layers are uneven before anything has cured.
Step 3: The screen flashes one layer
The LCD lights up in the shape of that layer. UV passes through the lit areas, and the resin trapped in that thin gap goes solid. Everything in shadow stays liquid. Layer heights land around 0.05mm on a typical setup, though this varies by printer and resin.
Step 4: The peel
The plate lifts, and the freshly cured layer tears free of the FEP film it just formed against.
This step gets skipped in most explanations, and it should not be. That peel is a physical fight. Suction holds the layer to the film, and something has to win. Hold onto that, because Why Resin Prints Fail comes back to it.
Step 5: Repeat
The plate drops again, a few hundredths of a millimeter higher than last time. Screen flashes. Peel. Repeat. VogMan puts it at hundreds to thousands of layers for a typical print.
Why Resin Printing Is Faster Than It Looks
Print time depends on how tall your object is, not how many objects you put on the plate.
This trips people up, so it’s worth sitting with. Because the screen cures an entire layer in a single flash, it doesn’t matter whether that layer contains one miniature or twenty. Same exposure, same time. Three independent creators land on this point separately. VogMan, ItsMeaDMaDe, Dave Tries This: each describes print duration as a function of height alone.
The practical consequence is that batching is nearly free. Fill the plate. A tray of twenty minis finishes in roughly the time one mini would take, provided they’re all the same height. One process breaks the rule. Full-color inkjet machines sweep a head across the plate instead of flashing a whole layer, so batching on the HeyGears G1X isn’t free. Same story for Flashforge’s new inkjet machine, the full-color CJ270.
One honest caveat. VogMan frames layer time as fully independent of layer area, and that’s a simplification. Large flat cross-sections often need slightly longer exposure to cure properly, so a plate packed edge to edge isn’t always identical to a single small part. The principle holds; the arithmetic is looser than it sounds.
For a sense of the ceiling, Formlabs claims its Form 4 hits 100 mm/hour with Fast Model Resin, with most parts finishing inside two hours. That figure comes from the manufacturer rather than independent testing, and it describes a machine well above hobbyist pricing.
SLA vs DLP vs LCD: Three Ways to Cure Resin
All three technologies cure the same liquid the same way. The only real difference is how the light gets shaped, and if you’re shopping in hobbyist territory, you’re almost certainly buying LCD.
| Technology | How it forms each layer | Where you’ll meet it |
|---|---|---|
| SLA (Stereolithography) | A single laser traces the outline of each layer, point by point | The original process, invented by Charles Hull in the 1980s. Now mostly industrial and professional machines |
| DLP (Digital Light Processing) | A projector throws the whole layer image at once using micromirrors | Professional and some prosumer machines, valued for speed on small parts |
| LCD, also called mSLA | A UV LED array shines through an LCD screen that masks everything except the current layer | Essentially every desktop resin printer sold today |
The practical takeaway is that the SLA versus DLP debate barely touches a hobbyist buying decision. Desktop machines converged on LCD because the panels are cheap and the whole layer cures at once. What you’re really choosing between is screen resolution and build volume.
It also explains the consumable problem from earlier. In an LCD machine, the screen doing the masking sits directly in the UV path and degrades from the exposure. Lasers and projectors don’t wear out that way.
Why Resin Prints Fail
Most resin print failures come down to one uncomfortable fact: the model hangs upside down, and both gravity and suction spend the entire print trying to pull it off the plate. Exposure problems are the exception, and we’ll get to those.
Hold that picture and the rules stop feeling arbitrary. Your print is dangling. Every single layer, the plate lifts and rips the newest layer off a film it just bonded to. If the grip on the plate is weaker than that pull, the print comes off.
That accounts for the first two failure modes below. The third has a different cause entirely.
The plate isn’t level, or supports are too thin. The print detaches mid-job and cures into a solid blob on the FEP. VogMan calls it the most common beginner failure, and it’s the reason leveling gets so much attention.
Islands. These are areas that start mid-air with nothing beneath them, so the first cured slice of that region has nothing to hold onto and simply floats away. Slicers will flag them for you, which makes this the easiest failure on the list to prevent.
Exposure is off. Cure too long and fine detail bloats shut. Cure too little and layers never properly bond. Exposure is the main dial you tune per resin, and it’s why exposure test prints exist.
There’s also a worst case worth naming, because it looks like a disaster and mostly isn’t. Debris left on the film can tear it, and resin then leaks down onto the LCD and cures there. Above WongArt walked through exactly this. The fix is 99% isopropyl alcohol to soften the cured layer, then masking tape pressed on and pulled, which lifts large pieces off in one go. As they put it: “At first I was freaking out, but there’s nothing to freak out about.”
What Happens After the Print Finishes
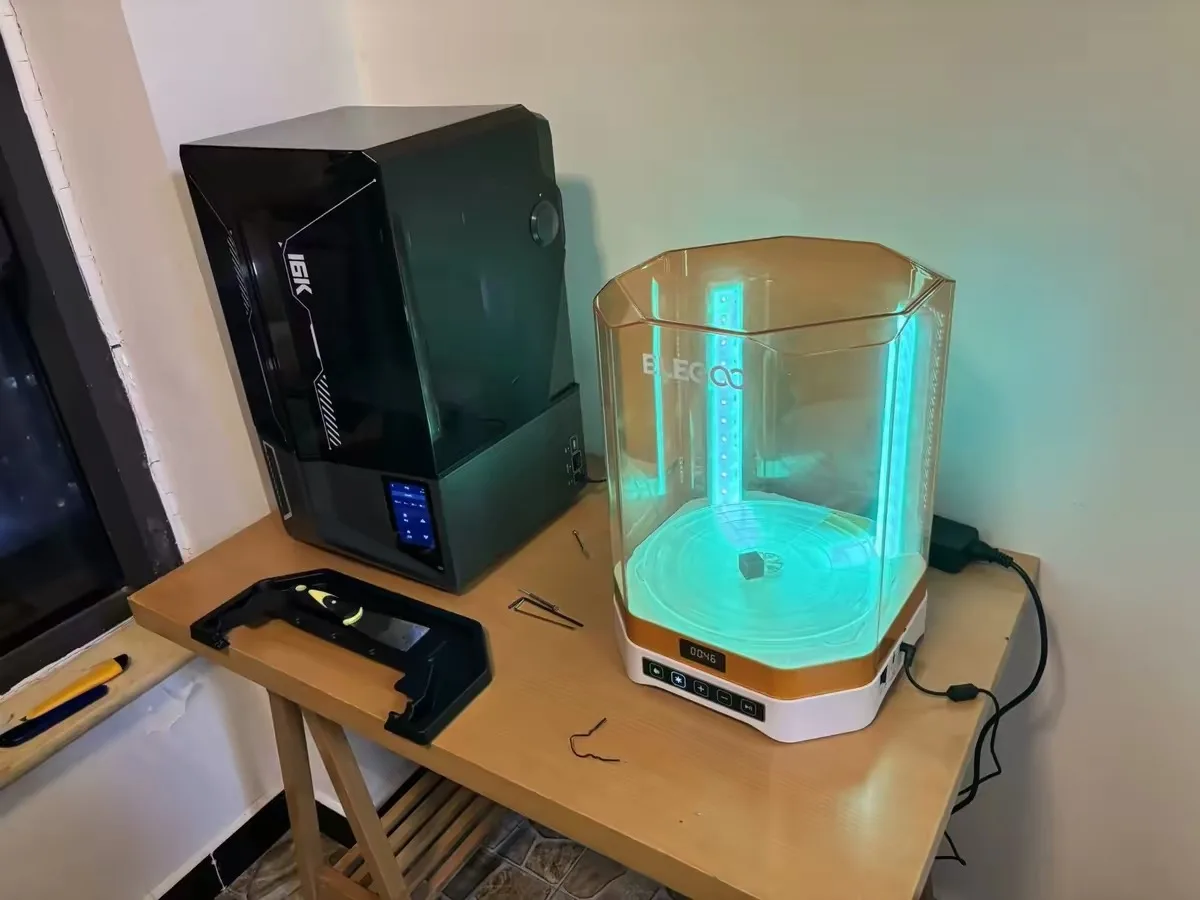
The print finishing isn’t the job finishing. There are three more steps, and together they can take longer than the print did.
Wash first. Uncured resin coats every surface coming off the plate, and it needs to come off in isopropyl alcohol. Dave Tries This specifies 90% concentration or higher, and notes that IPA at that strength is seriously flammable, which shapes where you can do this. We cover the full routine, including what to do with the alcohol once it turns cloudy, in our guide to cleaning resin prints.
Remove supports second. There’s a timing trick here worth knowing: FauxHammer soaks prints in methylated spirits for 20 to 30 minutes before the final cure, which softens supports enough that they come off cleanly instead of taking surface detail with them.
Cure last. The part comes out of the printer solid but not fully polymerized. A final UV cure finishes the chemical reaction and, importantly, makes the surface safe to handle bare-handed.
Skip the cure and you’re holding something that’s still chemically active. That’s the step people are most tempted to rush and the one they should not.
What’s Actually Hard About Resin Printing (And What’s Overblown)
Three things are genuinely hard, and none of them are the printer. The parts people warn you about loudest, meanwhile, are mostly optional.
Genuinely hard: where you’re allowed to put it
Ventilation is the real gatekeeper, and it decides whether you can own one of these at all.
MiniWarGaming, who run a print farm of roughly 30 resin machines, lay out three arrangements that actually work: a separate ventilated room, a tent with an exhaust duct running outside, or a detached garage. Notice what they all have in common. The air goes outside.
People do improvise. ItsMeaDMaDe describes a friend who set their printer up in a bathroom specifically to use the extractor fan. That works because a bathroom fan vents outdoors.
This is exactly where new buyers get stuck. One poster in r/3Dprinting had their eye on a $200 machine, then found out about the masks and gloves and chemical washing, and asked whether they were even allowed to keep it in on-campus housing. That’s the right question to ask before buying, not after.
Genuinely hard: getting rid of the waste
Resin waste is hazardous waste, and that includes things you wouldn’t expect.
Liquid resin, dirty IPA, and contaminated paper towels all qualify. MiniWarGaming are blunt about it: none of it goes down a drain or into household trash, many areas require a hazardous waste facility drop-off, and disposing of it improperly can be illegal depending on where you live.
Then there’s the trap almost nobody writes about. Water-washable resin is not safe to pour down the sink. FauxHammer is emphatic on this point, and the misunderstanding is easy to see: the name says water, so people assume the wastewater is fine. It is not. The resin is still toxic, it’s just suspended in water instead of alcohol.
Genuinely hard: the post-processing tax
Every print bills you twice, once in machine time and once in your own. Washing, support removal, and curing cannot be skipped or batched away, and on a short print they comfortably outlast the printing itself. Budget the evening, not the hour.
Overblown: cleaning the vat after every print
This one costs beginners real money, and it is simply not necessary.
Edward Peak makes the case directly: resin can sit in the vat for months, and he argues even years, provided you stir it and warm it before the next job. Cleaning it out every time wastes resin, wastes IPA, wastes your evening, and puts wear on the FEP for no benefit. The genuine triggers for a clean-out are narrow: a failed print left debris in there, or something dropped in.
His related tip is one to write down. Don’t use IPA to clean the FEP film. It clouds the film over time, which is the opposite of what you want from the one part light has to pass through. A dry microfiber cloth does the job.
Worth flagging that the months-to-years claim is his experience rather than a tested shelf life, and different resin formulations behave differently. The direction is right even if the outer bound is generous.
Overblown: nailing calibration before your first print
You will read that you must run exposure tests before touching a real model. It’s good advice. It’s not a prerequisite.
That Mars 5 Ultra owner from earlier loaded a model into Lychee, hit auto supports, sliced it, printed it, and got a clean result with no calibration whatsoever. That is not a fluke so much as a sign that modern printers ship with sane defaults for common resins.
FauxHammer, who has produced more calibration content than most, arrives somewhere similar: “Stop chasing perfection; start chasing results.” Their argument is that perfect dimensional accuracy on a test print doesn’t predict reliability on a real one. Print something. Adjust from what you see.
The one nobody warns you about: temperature
Cold resin fails, and this is the single most common invisible cause of an overnight print gone wrong.
Resin cures faster when it’s warm and sluggishly when it’s cold, and a room that swings temperature overnight can kill a job that would have succeeded during the day. Edward Peak wraps a fermentation belt around the vat to hold it steady. Some printers now ship with chamber heaters for this reason.
Here’s where it gets murky, and it’s worth being straight about it. FauxHammer gives two different target ranges in two different videos. In one, the guidance is to stay above 20°C, ideally in the mid-20s. In another, the recommendation is 25 to 35°C. Those overlap but they aren’t the same instruction.
We couldn’t resolve this against first-hand testing, so treat it as a range rather than a number: get the resin above 20°C and keep it stable, and understand that the manufacturer’s sheet for your specific resin beats any general figure. Different formulations genuinely want different temperatures, which is the most likely reason the advice diverges in the first place. Stability appears to matter more than hitting an exact target.
What Uncured Resin Actually Does to You
Start with the detail that blindsides people who thought they were being careful: latex gloves do not work. Resin eats through them. You need nitrile, and this comes up independently from both ItsMeaDMaDe and MiniWarGaming.
That single detail tells you what you’re dealing with. Liquid resin is caustic, and skin contact can cause serious irritation and rashes. Worse, sensitization builds. You can handle resin carelessly for months with no reaction and then develop an allergy that makes the hobby impossible for you.
Your eyes are the real emergency. Resin or IPA in an eye can cause serious injury, up to and including blindness. Chemical safety glasses are not optional, and neither is the rule about the UV source itself. Dave Tries This puts it about as plainly as it can be put: never look into a UV light, because it will blind you faster than it cures a print.
Fumes hit faster than people expect. MiniWarGaming report chest pain within 30 seconds of working without a mask. They also do something more useful than fearmongering. When they measured air quality, short exposures didn’t technically require a mask, and they say so, then recommend wearing one anyway. That kind of self-correction is a good signal about the rest of their advice.
Spills are a when, not an if. Resin strips paint and dissolves some materials outright. Cover your work surface before you need to, not after.
Now the part that undermines a popular shortcut. Small carbon filter boxes marketed for resin printers may do nothing useful. FauxHammer tested Elegoo’s Mars Mate and measured VOCs going up in the room, not down. On that evidence, filtering is not ventilation. The only approach in their testing that genuinely worked was ducting the air outside, using something like Anycubic’s AirPure 2.0, an inline fan on a hose that vents out a window.
One more consideration if you’ve young children. ItsMeaDMaDe has actively talked friends with small kids out of buying resin printers, and given that uncured resin is both caustic and attractive-looking, that’s hard to argue with. If a machine has to live in shared family space, an FDM printer running PLA is the saner choice. If you’re shopping for a child specifically, our kids’ 3D printer comparison covers safer options.
What You’ll Need (And What It Really Costs)
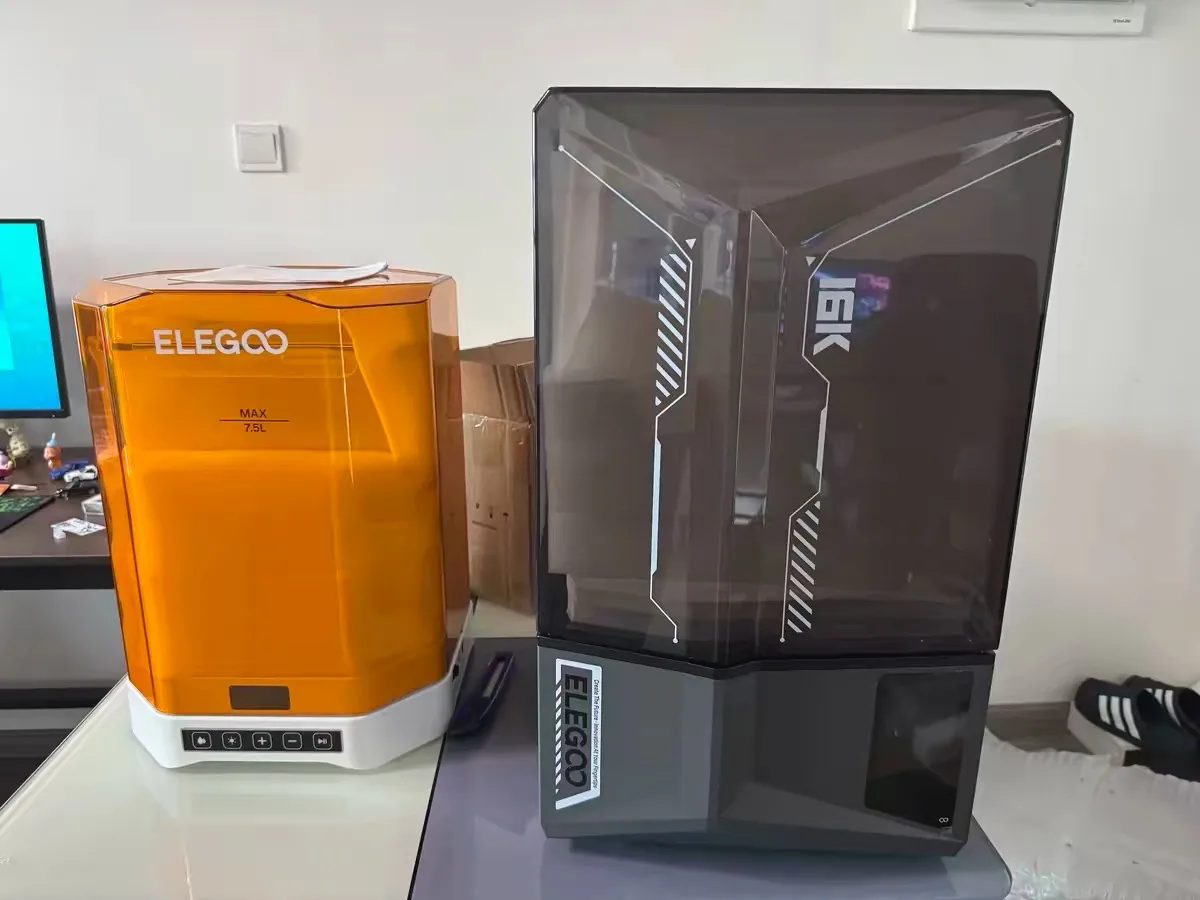
The printer is the entry fee, not the cost. And the surprise is that the resin isn’t it either. What drains money over time is the gear around the resin: gloves, alcohol, a wash station, and a screen that wears out.
Here’s the full kit before you start:
- The printer. Any current LCD machine out-resolves what most beginners need. The Elegoo Saturn 4 Ultra is a representative mid-range example at 16K; MiniWarGaming’s Forge channel runs a Phrozen Sonic Mighty 8K as their workhorse.
- Resin. Standard, ABS-like, or water-washable. All of them toxic before curing. If you’re picking your first bottle, here’s what separates ABS-like from standard.
- Nitrile gloves. Not latex. Buy a big box.
- Chemical safety glasses. Both ItsMeaDMaDe and MiniWarGaming list them as non-negotiable, alongside gloves.
- Isopropyl alcohol, 90% or higher. For washing prints.
- A wash and cure station, or the DIY equivalent in jars.
- Ventilation that moves air outdoors.
- Two scrapers, and they aren’t interchangeable. FauxHammer uses a metal-bladed scraper for prying prints off the build plate, and a silicone one for the vat. Never take metal to the vat: gouging or piercing the film leaks resin onto the screen underneath, which can cost you the printer.
The costs that catch people out are the recurring ones:
| Item | What it runs | The catch |
|---|---|---|
| Resin | About $30 for a 2 kg bottle | Works out near $15 a kilo, which undercuts 3D printer filament at $17 to $20 a spool. The resin was never the expensive part |
| Wash and cure station | Around $100, more for larger tanks | Optional in theory, tedious to skip in practice |
| Nitrile gloves | Cheap per box | A box lasts 2 to 5 prints, per FauxHammer’s usage |
| LCD screen | Varies by model | A wear part. FauxHammer puts replacement near 2,000 exposure hours |
Resin and station prices verified against current Amazon listings on 7 August 2026. The glove usage rate comes from FauxHammer’s 2026 accessories testing, and the screen lifespan from his 2024 explainer. Prices move, so check before you budget.
One genuinely good money-saving trick, since the wash fluid is a recurring cost people underestimate: FauxHammer runs a two-jar pre-wash before the main cleaner, and reports keeping the main station’s fluid usable for over 18 months that way.

- 【16K Magic, Precision Redefined】Designed to capture the finest details for exquisite models, ELEGOO Saturn 4 Ultra 16K Resin 3D Printer boasts…
- 【Smart Tank Heating, Flawless Prints at 30 °C】ELEGOO Saturn 4 Ultra 16K 3D Resin Printer features an intelligent tank heating system that…
- 【New AI Camera with Light for All-Day Monitoring】The AI camera offers real-time monitoring and instant alerts for empty build plates and warped…
- 【Auto-Leveling, Plug-N-Play】Achieve effortless precision with just a click. Saturn 4 Ultra 16K Impresora 3D Resina features automatic leveling…
- 【Tilt Release Innovation, Blazing Fast】ELEGOO Saturn 4 Ultra 16K Resin Printer features advanced tilt release technology, allowing for quick and…
The consumables people most often buy alongside the printer, with the caveat that the wash station is the one item you can improvise:




Is a Resin Printer Right for You?
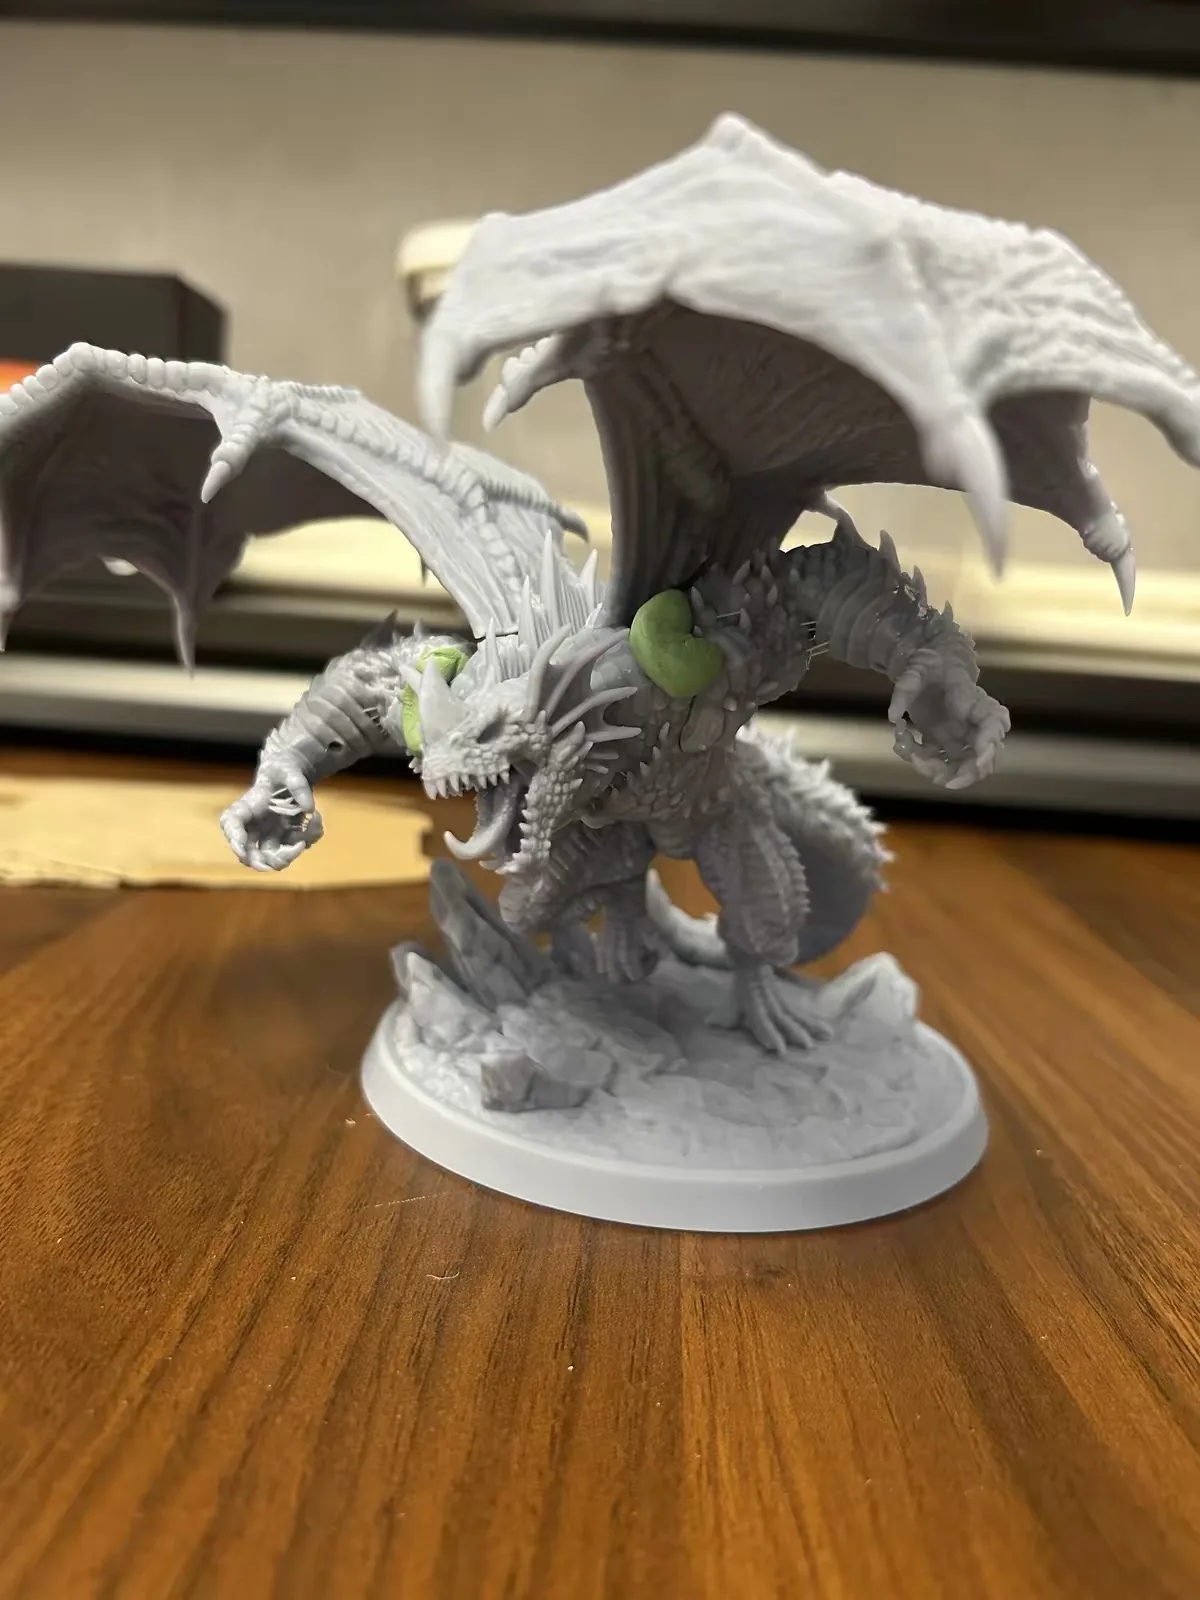
Buy resin for detail. Buy FDM for size. And if you’ve nowhere to vent the air, don’t buy resin yet.
Resin earns its place on small, detailed objects. Miniatures, busts, jewelry, prototypes where surface finish matters. ItsMeaDMaDe prints at 0.03mm layer height on resin against 0.08mm on their FDM machine, and at that scale the layer lines simply stop being visible. Professionally the same properties show up in dental models, custom jewelry casting, and hearing aid earmolds.
FDM wins on everything large. MiniWarGaming’s Forge channel splits it cleanly for tabletop players: terrain on FDM, miniatures on resin. Big pieces on a resin machine are slow, expensive in material, and constrained by a small build volume.
Two things to weigh before deciding. Resin parts are more brittle than FDM parts and can shatter when dropped, which matters for anything handled often. And the ventilation question is a hard gate rather than a preference. If the honest answer is that the printer would live in your bedroom with a closed window, that’s a no for now.
If you need something that survives real abuse without the fragility, an actual injection-molded part is a different class of tough — desktop injection molding machines can shoot one from a printed mold for way less than you’d guess.
If you’re still weighing the two technologies against each other more broadly, our guide on how to choose a 3D printer works through the decision in more depth.
Frequently Asked Questions
Is resin printing good for beginners?
Yes, with one condition. The printing itself is arguably easier to dial in than FDM, because there are fewer variables to tune and modern machines ship with workable defaults. The difficulty isn’t the printing, it’s the handling: gloves, goggles, ventilation, washing, curing, and hazardous waste disposal. If you can solve the ventilation question, resin is a reasonable first printer. If you cannot, start with FDM.
What are the downsides of a resin 3D printer?
The main ones are that uncured resin is toxic and requires protective equipment, that fumes require real ventilation rather than a filter box, that spent resin and dirty alcohol count as hazardous waste needing proper disposal, that post-processing adds washing and curing to every print, that build volumes are smaller than FDM, and that finished parts are more brittle. The LCD screen is also a wear part that eventually needs replacing.
Why can’t you touch resin?
Uncured resin is caustic and can cause rashes and serious skin irritation. The bigger risk is sensitization: repeated exposure can trigger an allergy over time even if early contact caused no reaction. Latex gloves are no protection because resin dissolves them, so nitrile is the requirement. Once a print has been washed and fully UV cured, it’s safe to handle bare-handed.
How long does resin last for 3D printing?
Sealed and stored away from light and heat, an unopened bottle keeps for a long time, though shelf life varies by brand and the bottle’s own label is the figure to trust. Resin left in the vat also keeps far longer than most beginners assume. Edward Peak reports going months between vat changes. He stirs and warms the resin before each new print rather than draining it every time. That figure is his own practice rather than a lab-verified number, and formulations vary, so keep the vat covered and judge by how the resin looks and pours.
Do resin prints need supports?
Almost always, yes. Prints are built hanging upside down, so gravity and the peel force of each layer separating from the film both pull against the model. Supports transfer that load to the build plate. They also solve islands, which are regions that would otherwise begin mid-air with nothing to bond to. Slicers can generate supports automatically and flag islands for you.
Are resin printers faster than FDM printers?
For small detailed parts, usually yes, and for batches, dramatically so. A resin printer cures a whole layer in one flash, so print time scales with the height of the tallest object rather than the number of objects. Twenty miniatures of equal height take roughly as long as one. For large single objects, FDM is generally the faster and cheaper option.